Table of Contents
Advertisement
Quick Links
BALANCE TRAINER
Quick Start Guide
Inflation Instructions
Note: when removing the pump quickly place your finger over
the hole to prevent air from escaping. Then insert the ball plug
underneath your finger into the air hole.
1
Insert the pump
nozzle into the air
hole on the ball.
2
Begin to pump with
even strokes. It should
take a few minutes to
fully inflate.
3
Pump up to your
desired firmness or
desired height. Use
your hand to test the
firmness.
4
Insert the ball plug
completely. I should
be flush with the
exercise ball surface.
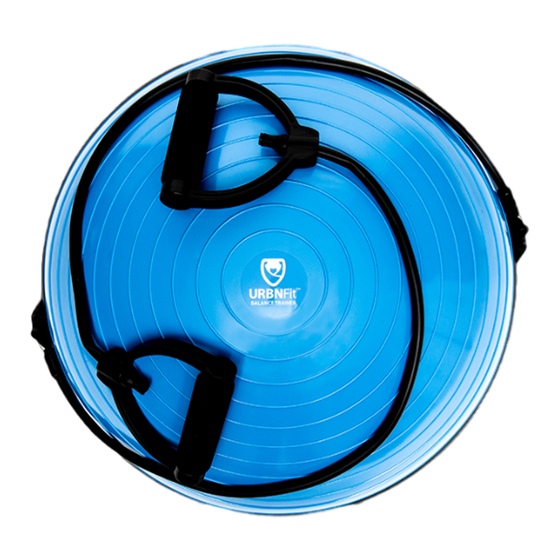
Attaching Resistance Bands
To attach your balance trainer's resistance bands
locate the loops on either side of the half ball
base. Attach the resistance bands by clipping
them to the loop as seen in photo.
Tips For Proper Use
Inflate the ball only as recommend. Improper
inflation may cause damage to the ball. The ball
should never be kicked or used near sharp or hot
objects. Makes sure the air plug is fully inserted to
seal the air hole completely. The ball is intend to
be used indoors only.
Caution
Do Not inflate this product more than 10 inches
high or ball will come out of base.
Maintenance & Care
To clean your exercise ball use a soft cloth and
warm, soapy water. Never use abrasive or chemical
cleaners. Save your pump and replacement plug in
a safe place.
Need Help? We Care!
If you have any questions or issues get in
touch with us at Support@URBNFit.com
10 in
Advertisement
Table of Contents

Subscribe to Our Youtube Channel
Related Manuals for URBNfit BALANCE TRAINER


Summary of Contents for URBNfit BALANCE TRAINER
-
Page 1: Quick Start Guide
Insert the pump nozzle into the air hole on the ball. To attach your balance trainer’s resistance bands locate the loops on either side of the half ball base. Attach the resistance bands by clipping them to the loop as seen in photo.
Need help?
Do you have a question about the BALANCE TRAINER and is the answer not in the manual?
Questions and answers