
Related Manuals for Kanto P101


Summary of Contents for Kanto P101
- Page 1 English User Manual P101/P101W Projector Ceiling Mount TILTING EXTENDABLE PROJECTOR CEILING MOUNT 22 lb 3”-12” 20° (10 kg) (7.5 - 30cm) 360° ™ Supporting your digital lifestyle...
- Page 2 Supplied Parts & Hardware ....3 Other Kanto Products ..... . 7 Setup - Step 1 .
- Page 3 Supplied Parts and Hardware Bolts M2.5 x 15mm (with washers) M3 x 15mm (with washers) M3 x 20mm (with washers) M4 x 15mm N: M8 x 55mm Bolt M4 x 20mm M: Allen Keys (with nut) M4 x 25mm M5 x 15mm M5 x 20mm each M5 x 25mm...
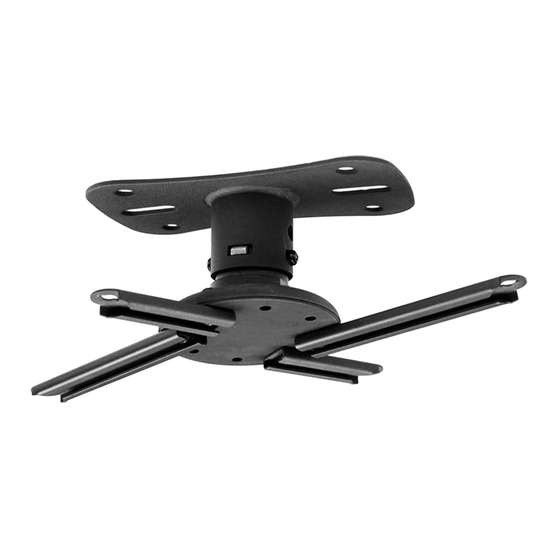
- Page 4 Step 1: Attach Projector to Projector Adapter There are a wide variety of projectors available that use an assortment of bolt sizes. We provide a selection of mounting bolts to fit most projectors. Step 1.1 Determine correct bolt size. use the extension arms (Y) provided (replacing one by one as required).
- Page 5 Step 2: Attach the Ceiling Plate The P101/P101W ceiling plate (U) has 6 holes for mounting options. This plate will mount the projector within 3” of the ceiling. Secure the ceiling plate with appropriate hardware ensuring the ceiling plate assembly can support 4x the total weight of your projector.
- Page 6 Step 4: Attach Projector to Ceiling The P101/P101W has two spring loaded locking tabs that allow easy installation to the ceiling plate assembly. Push the Projector Adapter (V) up into the ceiling plate or extension tube. The 2 spring loaded locking tabs will catch in 2 of the 4 square holes in the ceiling plate or extension tube.
- Page 7 IF NECESSARY Step 7: Adjust the Projector Adapter Tension The Projector Adapter (V) Tensioning Ring comes pre-tensioned from the factory. Should you find your installation requires this ring to be adjusted and re-tensioned, follow this procedure, referring to Diagram I: Step 7.1 Use the included Wrench (Z) to loosen the locking Step 7.3 Tighten the locking nut with Wrench (Z) to ensure nut.
- Page 8 5 years parts and labour If equipment fails because of such defects and Kanto or an authorized dealer is notified within 5 years from the date of shipment with proof of original invoice, Kanto will, at its option, repair or replace the equipment, provided that the equipment has not been subjected to mechanical, electrical, or other abuse or modifications.