
Related Manuals for AGP AC023


Summary of Contents for AGP AC023
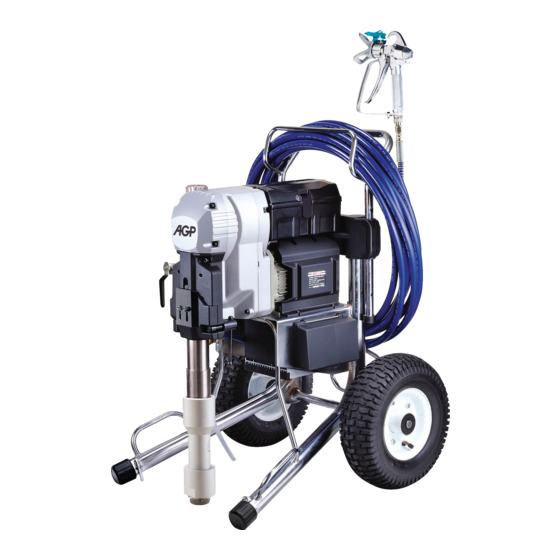
- Page 1 ▇ 1800W Brushless Motor Model ▇ 1500W Brushless Motor Model ▇ 1300W DC Motor Air-Assisted Model Original Safety Instructions Version:20150909...
- Page 2 Brushless Brushless Model 1800W Motor Model 1500W Motor Model Brushless Brushless Motor Type 1800W D.C. Motor 1500W D.C. Motor Power input 1800W 1500W Voltage 110-120V~ 50-60Hz , 220-240V~ 50-60Hz Max Tip Size 0.035 in. 0.031 in. Max Flow 5.3 l/min (1.4 gpm) 4.17 l/min (1.1 gpm) Max Pressure 227 bar (3,300 psi)
- Page 3 1300W DC motor Air-Assisted Model Model Motor type 1300W DC motor Power input 1300W Voltage 110-120V~ 50-60Hz, 220-240V~ 50-60Hz Max. Tip Size 0.023 in.(0.021in) Max. Fluid flow 2.1 l/min (0.55 gpm) Max. Pressure 207 bar (3,000 psi) Atomizing Air output 100 l/min ( 3.5 cfm) Max.
-
Page 4: General Safety Rules
GENERAL SAFETY RULES and refrigerators. There is an increased risk of electric shock if your body is earthed or WARNING! Read and understand all grounded. instructions. Failure to follow all instructions Do not expose power tools to rain or wet conditions. - Page 5 gloves away from moving parts. Loose could result in a hazardous situation. clothes, jewellery or long hair can be caught in moving parts. If devices are provided for the connection SERVICE of dust extraction and collection facilities, ensure these are connected and properly Have your power tool serviced by a qualified used.
- Page 6 SPECIFIC SAFETY RULES FOR AIRLESS which he has access that the plug remains SPRAYERS removed. HANDLE THIS UNIT AS YOU WOULD A LOADED WA R N I N G : H I G H P R E S S U R E. N e ve r l e ave WEAPON! pressurized system unattended.
-
Page 7: Medical Alert
PREVENT STATIC SPARKING FIRE/ operating properly before each use. EXPLOSIONS • Tighten all of the fluid connections before each use. • NEVER alter equipment in any manner. Vapors created when spraying can be ignited by • NEVER smoke while in spraying area. sparks. - Page 8 plugged, follow the pressure relief procedure serious bodily injury. • Only use hoses with a spring guard. The spring guard helps protect the hose from kinks or TIP GUARD other damage which could result in hose rupture and cause an injection injury. Do not •...
- Page 9 benzene, ether, gasoline, naptha. Consult your grounding plug, and a receptacle that will accept the grounding plug on the product. supplier to be sure. Make sure your extension cord is in good condition. When using an extension cord, be ASSEMBLY sure to use one heavy enough to carry the current your product will draw.
-
Page 10: Grounding Instructions
GROUNDING INSTRUCTIONS Connect the hose to the quick-release coupling on the machine. Connect the whip hose between the gun and the bonded fluid and air hose. This product must be grounded. In the event of an electrical short circuit, grounding reduces the risk WARNING: Reversing the hose connections could of electric shock by providing an escape wire for result in serious injury. - Page 11 WARNING: A loose connection could burst loose under pressure causing a hazardous condition. Ensure that all connections are tight. This includes both ends of the hose, the gun filter, the tip guard, the pump filter, and the suction tube gland nut. Brushless motor model WARNING:Always ensure that the gun safety latch is in the locked position.
-
Page 12: How To Flush
HOW TO FLUSH Close the priming valve. 10. Allow the pump to run and watch the fluid (For Air-Assisted Airless models, when discharging from the gun. Allow the fluid to the instructions require you to turn the discharge until completely clean flushing fluid machine “on”... -
Page 13: Spray Tip Assembly
tip handle will point forward). The tip can be discharging from the drain tube. Allow the fluid to discharge until pure material is coming rotated 180 degrees for clearing clogs. out. Turn the tip guard assembly to the desired Point the gun into the waste bucket, unlock orientation and tighten the lock nut firmly by the trigger and hold the trigger open. - Page 14 necessary. Operating the sprayer at a higher than necessary pressure wastes material, causes early tip wear, and shortens sprayer life. Excessive pressure can also result in bounce-back of the material and a rough finish. (Running with the pressure at the absolute maximum setting will also make the pump run on and off in an irregular way.) NOTE: Use proper pressure settings.
-
Page 15: All Models
Work in sections within your reach. When painting Air Pressure Regulator Knob corners, point the gun parallel to the corner. Cut in edges and corners first. Then paint flat areas. Do not allow the material to run out. Remember to follow the PRESSURE RELIEF PROCEDURE before refilling material. - Page 16 a different area (wider or narrower strip). A spray instrument to clean the tip. The tungsten carbide is brittle and can chip.) tip with a narrow fan width makes it easy to spray in tight places. (Thickness of the material coat per stroke is determined by spray tip fan width, rate of SPRAY TIP SELECTION (See chart 1) the spray gun movement, and distance to surface.)
- Page 17 to be discarded and replaced. pattern shaped like a narrow long rounded-corner rectangle. As it wears it will turn into an oval shape. When it is completely worn out it sprays a circle. Relieve pressure in the system according to the Pressure Relief Procedure.
-
Page 18: Long Term Storage
material bucket. Ensure that the pressure knob is in the minimum position and turn the unit on. With the trigger held open, slowly turn the pressure knob clockwise to increase the pressure just enough to let the pump run. 10. Allow the pump to run and watch the material discharging from the gun. -
Page 19: Pump Packings
hopper.) The throat seal oil helps protect the piston, rod and With the priming valve in the open position, packings. Inspect the packing nut daily. If either of the turn the machine on and turn the pressure control knob just enough for the pump to run. following conditions exists the packing nut should Watch the drain tube and as soon as the be tightened:... -
Page 20: Pump Removal
PUMP REMOVAL After resistance from the disc springs is felt, For Air-Assisted Airless model tighten the packing nut a further 3/4 turn. Use the special spline wrench to loosen the gland nut (188) and remove the hopper suction pipe (190) from the bottom of the pump. -
Page 21: Motor Maintenance
MOTOR MAINTENANCE Remove the Packing Set Seat (22), release Intake Disc Seat (8), and remove and discard LUBRICATION – The gear case grease may be all old packings. 10. Remove the Ball Seat Fastener (14), Small Ball changed every 200 hours of operation. This is best Seat (15) and small Check Ball (16). - Page 22 WARNING: All repairs must be entrusted to an authorized service center. Incorrectly performed repairs could lead to injury or death. LCD screen error codes: Error Code Cause Effect Solution How to return to operation Check pressure transducer and check for When pressure signal is normal, Pressure sensing abnormality Motor will stop...
-
Page 23: Troubleshooting
Troubleshooting Problem: Motor will not run Check Solution Electrical supply- must match voltage Use correct outlet on machine nameplate Extension cord-check continuity Replace extension Power supply cable-check continuity Replace cable Carbon brushes Replace brushes Bad switch Replace switch Motor damage Replace or repair motor Problem: Pump loses prime or will not prime Check... - Page 24 WIRING (BRUSHLESS MOTOR MODELS)
- Page 25 WIRING (AIR-ASSISTED AIRLESS MODEL )
- Page 26 1800W BRUSHLESS MOTOR MODEL EXPLODED VIEW...
- Page 27 1800W BRUSHLESS MOTOR MODEL PARTS LIST Parts Name Q'TY Parts Name Q'TY ELBOW UNION FITTING SUCTION TUBE 4 -105L PRESSURE TRANSDUCER HIGH PRESSURE HOSE 75CM 5000PSI 3/8"-19PF SUCTION TUBE 10 -105L FITTING PT 3/8" GLAND NUT FILTER HOUSING O-RING Ø39.3xØ45.1x2.8 BRACKET INTAKE DISC SCREW M5 x 35...
- Page 28 1500W BRUSHLESS MOTOR MODEL EXPLODED VIEW...
- Page 29 1500W BRUSHLESS MOTOR MODEL PARTS LIST Parts Name Q'TY Parts Name Q'TY ELBOW UNION FITTING PRESSURE TRANSDUCER HIGH PRESSURE HOSE 75CM 5000PSI 3/8"-19PF FITTING PT 3/8" SUCTION TUBE 20 -160L FILTER HOUSING GLAND NUT BRACKET O-RING Ø39.3xØ45.1x2.8 SCREW M5 x 35 INTAKE DISC CHECK BALL 7/8"(Ø22.22) PUMP FILTER 30...
- Page 30 1300W DC MOTOR AIR-ASSISTED MODEL EXPLODED VIEW...
- Page 31 1300W DC MOTOR AIR-ASSISTED MODEL EXPLODED VIEW (AIR COMPRESSOR)
- Page 32 1300W DC MOTOR AIR-ASSISTED MODEL PARTS LIST Parts Name Q'TY Parts Name Q'TY NUT M3 O-RING Ø2 x Ø15.9 x Ø19.9 LCD DISPLAY INTAKE DISC WINDOW SCREW M3 x 12 CHECK BALL & PISTON PACKING 67-1 ELECTRONICS UNIT BALL GUIDE 67-2 ELECTRONICS UNIT BOLT M8 x 25...
- Page 33 Parts Name Q'TY Parts Name Q'TY 138-7 GASKET E-CLIP E-7 138-8 VALVE PLATE CROSSPIECE-REAR 138-9 O-RING Ø70 x Ø75 x Ø2.5 CROSSPIECE-FRONT 138-10 AIR FITTING PT1/4 x Ø12 FRAME END CAP 138-11 AIR TUBE Ø9.5 x Ø12.5 x 65 138-12 AIR CLEANER PT1/4 FLAT WASHER Ø20.1 x Ø52 x 2...
Need help?
Do you have a question about the AC023 and is the answer not in the manual?
Questions and answers