
Related Manuals for Rilu Roadie 7D


Summary of Contents for Rilu Roadie 7D
-
Page 1: User Manual
USER MANUAL Roadie 7D Unit 2 - #2 Caulson Close Maribyrnong 3032 Melbourne, Victoria Australia 1800 MY RILU info@rilu-e-bike.com.au Rev.1072019.R7D-UM 1800 MY RILU www.rilu-e-bike.com.au... -
Page 2: Product Description
(Motor Power) Throttle: Thumb Start (6Kmh – Easy Start) Battery-1: 36 V / 14 AH (Lithium Ion) Battery-2: 36 V / 11.6 AH (Lithium Ion) Charger: 36V / 2A (Smart charger) Lights: Front & Rear (Independent powered) 1800 MY RILU www.rilu-e-bike.com.au... - Page 3 Total Battery charge time is 5-6 Hours Both batteries can be charged at the same time on or off the bike, using independent chargers Weight 20 Kg (Bike) net weight 27Kg (2xBattery Installed) ROADIE Rated Load weight is 120Kg 1800 MY RILU www.rilu-e-bike.com.au...
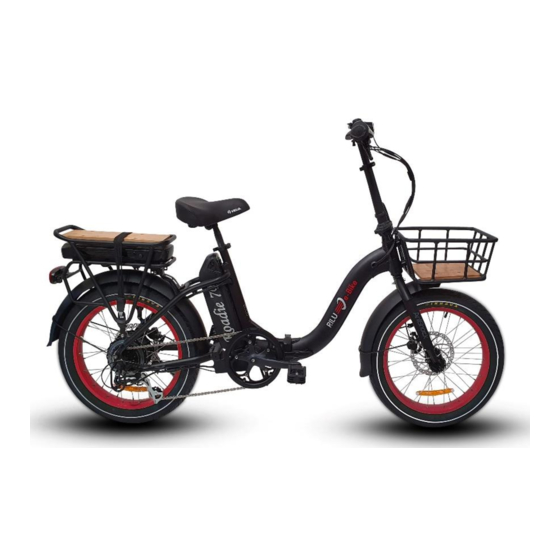
- Page 4 Product Summary Congratulation on your purchase of a RILU ROADIE 7D Folding electric bicycle. Your new electric bicycle has two different ways of activating motor power. Throttle Easy start is designed to get you going on hard starts. For example, when you find yourself stopped at traffic lights in 7 gear you can engage easy start.
- Page 5 General Usage Summary RILU recommends you first ride the bike without using any electrical assistance to familiarize yourself with the mechanical gearing and breaking system of your ROADIE. ONLY BIKE PUMP 1800 MY RILU www.rilu-e-bike.com.au...
- Page 6 Turning ROADIE (ON & OFF) Hold “ M ” Default Motor Assistance Level Reduce Assist to ‘0’ while moving/pushing your Roadie to avoid any sudden unexpected movement. Turn “ON” LCD backlight UPDATED DISPLAY 1800 MY RILU www.rilu-e-bike.com.au...
- Page 7 LCD Summary Function 1800 MY RILU www.rilu-e-bike.com.au...
- Page 8 ROADIE. Press “ + ” 6Km/h – Walk Assist Function Only use ‘Walk Assist’ when you are walking the bike up and incline, do not use while sitting on the bike. Hold “ - ” 1800 MY RILU www.rilu-e-bike.com.au...
- Page 9 When the motor is under heavy load the battery gauge will ‘sag’ showing an underestimated capacity reading. The gauge will correct itself after the heavy load is lifted. 1800 MY RILU www.rilu-e-bike.com.au...
- Page 10 Battery Low – Flashing Warning When battery LED is Flashing Battery charge level is <10%. It is critical that you recharge within 24 hours to avoid any damage to the battery. 1800 MY RILU www.rilu-e-bike.com.au...
- Page 11 MOTOR PHASE CHECK MOTOR CABLE MOTOR HALL CHECK MOTOR CABLE EABS SENSOR ON CHECK BRAKE CABLE BATTERY LOW RECHARGE BATTERY MOTOR STALL CHECK MOTOR / BRRAKES CONTROLLER COMMUNICATION ERROR CHECK CABLES DISPLAY COMMUNICATION ERROR CHECK CABLES 1800 MY RILU www.rilu-e-bike.com.au...
- Page 12 Folding Guide Step 1 - Fold pedals Down Reduces risk of damaged during transport and storage Step 2 - Align the pedals Chain ring – Pointing to the front of the bike. 1800 MY RILU www.rilu-e-bike.com.au...
- Page 13 Step 3 - Unlock ‘Folding Safety Latch’ Step 4 - Pull ‘Folding Lever’ forward 1800 MY RILU www.rilu-e-bike.com.au...
- Page 14 Step 5 - Fold handlebar stem ● TWIST (RIGHT) (Stem lock) ● Fold (DOWN) (Stem latch) Step 6 - Folded ROADIE 1800 MY RILU www.rilu-e-bike.com.au...
- Page 15 Adjusting - Folding Clamp Over time you may need to adjust the folding clamp if you are unable to fully close the clamp before riding or if the folding lock is loose and doesn’t grip the frame. LOOSEN TIGHTEN 1800 MY RILU www.rilu-e-bike.com.au...
- Page 16 Adjusting - Gear Quick Adjustment RILU advises using a bike service stand when performing gearing and breaking adjustments as it will be easier when the bike is raised off the ground. Electric bicycles are heavier than regular bicycles please ensure your...
- Page 17 Gearing Adjustment - Uneven Shifting / Slipping If you experience uneven shifts or slippage in the lower gears, where the chain jumps from gear #2 to gear #3 unintentionally. Try to adjust the derailleur using the following method to improve shifting. 1800 MY RILU www.rilu-e-bike.com.au...
- Page 18 Gearing Adjustment – Gear #7 Pulley Alignment 1800 MY RILU www.rilu-e-bike.com.au...
- Page 19 Gearing Adjustment – Gear #1 Pulley Alignment 1800 MY RILU www.rilu-e-bike.com.au...
- Page 20 Motor - Change Tire Step 1 Step 2 Cut - Cable Tie Unplug - Motor Cable Step 3 Step 4 18mm Spanner Pull back derailleur Step 5 Wheel nut arrangement 1800 MY RILU www.rilu-e-bike.com.au...
- Page 21 Motor – Service Notes 1800 MY RILU www.rilu-e-bike.com.au...
- Page 22 Ensure charging takes place in a well-ventilated area. DO NOT cover the charger, nor the battery during charging. Battery – Charging Error Contact your dealer for support if you experience the above issue if battery not receiving charge. Battery – Storage Guide 1800 MY RILU www.rilu-e-bike.com.au...
- Page 23 (UP) button on the Display to activate 6Km/h walk function Step 4 - If the motor works using 6km/h but does not when pedalling in PAS 1 – 5 you may have a damaged pedal assist sensor. 1800 MY RILU www.rilu-e-bike.com.au...
- Page 24 It will flash RED 12 times when you rotate the pedal 360 clock-wise Step 7 - Check the O-Ring spacers are correctly installed and check that there is NO GAP between the PAS sensor and the crank 1800 MY RILU www.rilu-e-bike.com.au...
- Page 25 Thumb Throttle – Location & Function RILU advises riders to avoid ‘hard starts’ that involve applying full throttle while on an incline. RILU recommends having the bike in motion before engaging the throttle to prolong the life of the motor.
Need help?
Do you have a question about the Roadie 7D and is the answer not in the manual?
Questions and answers