Table of Contents
Advertisement
TM
USER MANUAL
600 // ELECTRIC OVENS
TOT644E | TOC648E
IMPORTANT //
Please ensure that you read through this manual prior to installation and use.
This user manual contains important information to ensure optimal performance and keep you safe.
Please retain your proof of purchase, as this will be needed in the event that you require a warranty
service. Remember to keep this user manual for future reference.
www.tisira.com
Electric Oven User Manual
Advertisement
Table of Contents

Related Manuals for Tisira TOT644E


Summary of Contents for Tisira TOT644E
- Page 1 USER MANUAL 600 // ELECTRIC OVENS TOT644E | TOC648E IMPORTANT // Please ensure that you read through this manual prior to installation and use. This user manual contains important information to ensure optimal performance and keep you safe. Please retain your proof of purchase, as this will be needed in the event that you require a warranty service.
-
Page 2: Table Of Contents
Content Content Warning & Safety Instructions Product Overview Product Specifications Installation 6-13 Control Panel Overview Using the Oven Digital Timer/Clock Instructions 18-21 Replacing the Oven Lamp Cleaning the Oven Glass Cleaning the Oven Door Maintenance & Cleaning Steam Cleaning Accessories (Optional) Trouble Shooting Notes 26-27... -
Page 3: Warning & Safety Instructions
Warning & Safety Instructions IMPORTANT // To ensure best performance, avoid risk of damage or accidents. Please read the operating instructions prior to first time use. To maintain the efficiency and safety of this physical, sensory or mental capabilities, or lack appliance, we recommend that you do the of experience and knowledge, unless they have following:... -
Page 4: Warning & Safety Instructions
Warning & Safety Instructions • Allowing power supply cables of small NOTICE // The manufacturer may not be appliances to come into contact with the held responsible for any damage due to: hot parts of the appliance. Incorrect installation, improper, incorrect and irrational use. -
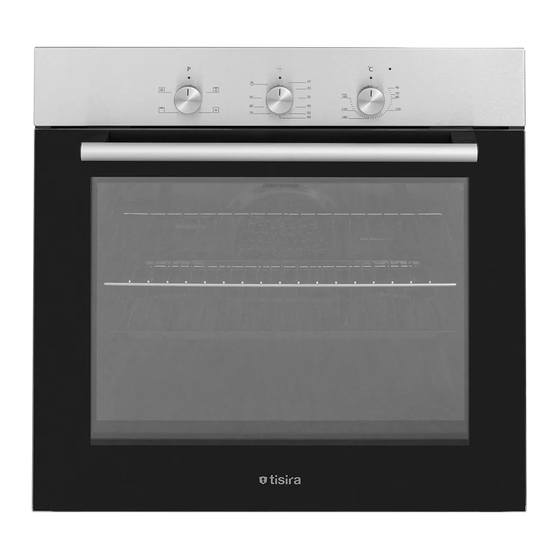
Page 5: Product Overview
Product Overview 1. Control Panel 4. In Tray Wire Grill 2. Deep Tray* 5. Standard Tray 3. Roast Chicken Skewer* 6. Oven door 7. Lamp 8. In Tray Wire Grill 9. Standard Tray Electric Oven User Manual Page 5... -
Page 6: Product Specifications
Product Specifications Specifications TOT644E and TOC648E Lamp Power 15-25W Thermostat 40-240 / Max °C Lower Heater 1200W Upper Heater 1000W Turbo Heater 1800W Grill Heater Small Grill 1000W Big Grill 2000W Supply Voltage 220V-240V 50/60 Hz Technical specifications can be changed without prior notice to improve product quality. -
Page 7: Installation
Installation WARNING: The rules about electrical local standards must be adhered to during product installation. WARNING: Check for any damage on the product before installing it. Do not have product installed if it’s damaged. Damaged products pose danger for your safety. -
Page 8: Installation Requirements
Installation 60 cm Built-In Oven Installation and Mounting Place of use for product must be located before starting installation. Product mustn’t be installed in places which are under the effect of strong air flow. Carry the product with minimum two people. Do not drag the product so that floor isn’t damaged. Remove all transportation materials inside and outside the product. - Page 9 Installation Supply cord mustn’t be under the oven, squeeze in between oven and furniture or bend. Fix the oven to the furniture by using the screws provided with the product. Screws must be mounted as shown in Figure 5 by passing them through plastics attached to frame of the product.
- Page 10 Figure 3 Page 10 Electric Oven User Manual...
- Page 11 Figure 4 Electric Oven User Manual Page 11...
- Page 12 Installation Figure 5 IMPORTANT WARNINGS Electrical Connection This oven must be installed and connected to its place correctly according to manufacturer instructions and by an authorized service. Appliance must be installed in an oven enclosure providing high ventilation. Electrical connections of the appliance must be made only via sockets having earth system furnished in compliance with rules.
-
Page 13: Control Panel Overview
Installation Your oven has been manufactured as 220-240 V 50/60 Hz. AC power supply compliant and requires a 16 Amp fuse. If your power network is different that these indicated values, refer to an electrician or your authorized service. When you need to replace the electrical fuse, please ensure that electrical connection is made as follows: 1. - Page 14 Adjustment can be made only when button is popped for models with pop-up button. Make sure that button is popped by pressing on the button as shown in the figure at left side. You can make necessary adjustments by turning right or left when button is popped enough.
- Page 15 Program Types Heating program types in your appliance and important explanations of them are provided below for you can cook different foods appealing to your taste. Lower and Upper Heating Elements Lower Heating Element and Fan Turbo Heater and Fan Lower-Upper Heating Element Grill and Roast Chicken and Fan...
-
Page 16: Cooking Recommendations
Multi Functional Cooking: Suitable for baking and roasting. Lower and upper heaters operate as well as quick transmission of heat via air flow. Suitable for cooking requiring single tray and intense heat. Cooking Recommendations You can find in the following table the information of food types which we tested and identified their cooking values in our labs. -
Page 17: Using The Oven
Using the Oven Initial Use of Oven Here are the things you must do at first use of your oven after making its necessary connections as per instructions: 1. Remove labels or accessories attached inside the oven. If any, take out the protective folio on front side of the appliance. -
Page 18: Digital Timer/Clock Instructions
Digital Timer/Clock Instructions Screen Symbols Oven Status Indication • On: Cooking or ready for cooking. • Off: No cooking Minute Minder Status Indication • On: Minute minder alarm active. • Flashing: Minute minder adjustment mode , adjustment possible by buttons or current minute minder alarm completed. •... -
Page 19: Setting The Minute Minder
Digital Timer/Clock Instructions It is an electronic timing module enabling your food you have put in the oven to be ready for service at any time you like. The only thing you need to do is to programme the cooking time of the food and also the time when you would like your food to be ready. - Page 20 Digital Timer/Clock Instructions Cancelling the Alarm Buzzer Sound Once the adjusted minute minder duration is elapsed, the buzzer alarm will start to sound , accompanied by the flashing symbol on the screen. Any button press will stop the alarm sound and this indication. If no button is pressed, the alarm sound will end automatically after 5 minutes, but the flashing symbol will go on.
- Page 21 Digital Timer/Clock Instructions Auto Cooking End After the automatic cooking has been completed, symbol will be flashing on the screen and the buzzer alarm will sound. Any button press will stop the alarm sound but the flashing symbol will go on till button is pressed.
-
Page 22: Replacing The Oven Lamp
Replacing the Oven Lamp WARNING: To avoid electric shock, ensure that the appliance circuit is open before changing the lamp. (having circuit open means power is off) First disconnect the power of appliance and ensure that appliance is cold. Remove the glass protection by turning as indicated in the figure on the left side. -
Page 23: Cleaning The Oven Door
Cleaning the Oven Door Figure 16 Figure 17 Figure 16.1 Figure 16.2 Figure 17.1 Figure 17.2 Open the door Set the hinge lock Later, close the For easier removal fully by pulling the to the widest angle opened oven door of oven door, when oven door toward as in Figure 16.2. -
Page 24: Maintenance & Cleaning
Maintenance & Cleaning 1. Remove the power plug from electrical socket. 2. Do not clean inner parts, panel, trays and other parts of the product with hard tools such as bristle brush, wire wool or knife. Do not use abrasive, scratching materials or detergent. 3. -
Page 25: Accessories (Optional)
Accessories (Optional) Tray Used for pastry (cookie, biscuit etc.), frozen foods. Wire Shelf Used for roasting or placing foods to be baked, roasted and frozen into desired rack. Tray Insert Grill* Foods to stick while cooking such as steak are placed on in tray insert grill. -
Page 26: Notes
Notes Page 26 Electric Oven User Manual... - Page 27 Notes Electric Oven User Manual Page 27...
-
Page 28: Contact Details
New Zealand P // 09 306 1020 F // 09 302 0077 sales@aristonappliances.co.nz Tisira is committed to ongoing research and development. Every effort has been made to ensure all information in this service manual is correct at time of going to print. Dimensions should be...
Need help?
Do you have a question about the TOT644E and is the answer not in the manual?
Questions and answers