Samsung NX58K9850S Series User Manual
Gas slide-in range
Hide thumbs
Also See for NX58K9850S Series:
- User manual (180 pages) ,
- Service manual (114 pages) ,
- Installation manual (84 pages)
Table of Contents
Advertisement
Quick Links
Advertisement
Table of Contents

Related Manuals for Samsung NX58K9850S Series


Summary of Contents for Samsung NX58K9850S Series
- Page 1 Gas Slide-in Range User manual NX58K9850S* / NX58K9852S*...
- Page 2 c) If you move the range and then move it back into place, ensure WARNING: If the information in this manual is not followed exactly, the anti-tip device is re-engaged at the right or left rear of the a fire or explosion may result causing property damage, personal range bottom.
- Page 3 Regulatory Notice 1. FCC Notice FCC STATEMENT: This equipment has been tested and found to comply within the CAUTION limits for a Class B digital device, pursuant to part 15 of the FCC FCC CAUTION: Any changes or modifications not expressly approved Rules.
- Page 4 Regulatory Notice FCC RADIATION EXPOSURE STATEMENT: IC RADIATION EXPOSURE STATEMENT: This equipment complies with FCC radiation exposure limits set This equipment complies with IC RSS-102 radiation exposure limits forth for an uncontrolled environment. This equipment should be set forth for an uncontrolled environment. This equipment should be installed and operated so there is at least 8 inches (20 cm) between installed and operated so there is at least 8 inches (20 cm) between the radiator and your body.
-
Page 5: General Safety Instructions
General safety instructions Bigger is better With a capacity of 5.8 cubic feet, this Samsung gas oven range offers more space This unit has been tested and found to comply with the limits for than many other leading brands in the United States and Canadian markets. The a class B digital device, pursuant to Part 18 of the FCC rules. -
Page 6: Table Of Contents
Contents Non-Cooking functions Important safety information Smart control Overview Maintenance Layout Cleaning What’s included Replacing the oven light Control panel Removing and re-installing the oven door Before you start Troubleshooting Display mode Checkpoints Clock Information codes Kitchen timer Warranty Oven vent/cooling vent Open Source Announcement Cooktop Ignition... -
Page 7: Important Safety Information
Important safety information Read all instructions before using this appliance State of California Proposition 65 warning (US only) • All electrical and gas equipment with moving parts can be dangerous. Please WARNING : This product contains chemicals known to the State of California to read the important safety instructions for this appliance in this manual. - Page 8 Important safety information • Do not store any object of interest to children on the cooktop or backguard of the Fire safety range. Children climbing on the range to reach items could be killed or seriously injured. WARNING • Do not operate the range if the range or any part of the range is damaged, To reduce the risk of fire, electric shock, personal injuries, and/or death, observe malfunctioning, or missing parts.
- Page 9 Gas safety Electrical and grounding safety WARNING WARNING To reduce the risk of fire, electric shock, personal injuries, and/or death, observe To reduce the risk of fire, electric shock, personal injuries, and/or death, observe the following precautions. the following precautions. •...
- Page 10 Important safety information Installation safety • Installation of this range must conform with local codes or, in the absence of local codes, with the National Fuel Gas Code, ANSI Z223.1/NFPA.54, latest edition. In Canada, installation must conform with the current Natural Gas Installation Code, WARNING CAN/CGA-B149.1, or the current Propane Installation Code, CAN/CGA-B149.2, and To reduce the risk of fire, electric shock, personal injuries, and/or death, observe...
- Page 11 • Cabinet storage above the surface of the range should be avoided. If cabinet • To flame food, you must have a ventilation hood. When you flame food, the hood storage above the range is necessary, allow a minimum clearance of 40 inches must be on.
- Page 12 Important safety information • Before moving cookware full of fats or oils, make sure it has completely cooled. Oven safety • To prevent delayed eruptive boiling, always allow heated liquids to stand at least 20 seconds after you have turned off the burner so that the temperature in the WARNING liquid can stabilize.
- Page 13 Storage drawer safety Self-cleaning oven safety WARNING WARNING To reduce the risk of fire, electric shock, personal injuries, and/or death, observe To reduce the risk of fire, electric shock, personal injuries, and/or death, observe the following precautions. the following precautions. •...
-
Page 14: Overview
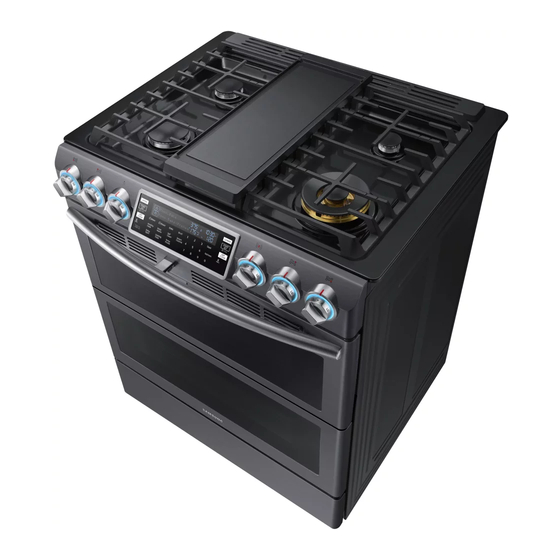
10 Oven light (2 locations) 11 Oven rack system 12 Bake oven burner 13 Convection fan / Upper convection heater NOTE If you need a part marked with an asterisk (*), you can buy it from the Samsung Contact Center (1-800-726-7864). 14 English... -
Page 15: Control Panel
Control panel 13 Touch to Wake-Up: Activate the 19 Temp Probe: Activate the control panel display. temperature probe mode. 14 Healthy Cook: Bring up the 20 Smart Control: Activates the Easy- Healthy Cook recipes that are connection. specially designed for different •... -
Page 16: Before You Start
Before you start Clock You should know about the following features and components before you use your range for the first time. You must set the clock correctly to ensure the automatic features work properly. This product supports two time formats: 12-hour (default) and 24-hour. Display mode To set the clock time 1. -
Page 17: Kitchen Timer
Cooktop Kitchen timer STEP 1 Put all ingredients into a cooking container The kitchen timer gives you an extra timer you can use to time cooking tasks such (pan, pot, etc). as boiling eggs. It does not, however, start or stop any cooking operation. You can set the timer from 1 minute to 9 hours and 59 minutes. -
Page 18: Ignition
Cooktop Gas burners Ignition Each burner has a corresponding knob CAUTION that lets you to set the flame level from LO to HI. In addition, each burner knob has a The knob LED indicates if a burner knob has been turned on. Lite setting. -
Page 19: Cookware
• After turning on a surface burner, make sure that the burner has ignited even if Size limitations the knob LED is on. Adjust the level of the flame by turning the burner knob. CAUTION • Always turn off the surface burner controls before removing cookware. All surface burner controls should be turned OFF when you are not cooking. -
Page 20: Griddle
Cooktop In most cases, you should preheat the griddle before cooking. See the table below. CAUTION • Do not remove the wok grate until the Type of Food Preheating Time Preheat setting Cook setting cooktop grates, surfaces, and wok grate Pancakes 5-10 min. -
Page 21: Dual Door
Dual Door™ How to use the full door This oven has a unique Dual Door™ that is hinged in the middle. If you have inserted the Smart Divider and divided the oven in two (so it is in Twin Mode), 1. -
Page 22: Gas Oven
Gas oven Single mode Twin mode STEP 1 STEP 1 Put all ingredients in a heat-safe container. Put all ingredients in a heat-safe container. STEP 2 STEP 2 Select a cooking mode, and then start Insert the Smart Divider into the 4th rack preheating. - Page 23 STEP 4 NOTES • To use Twin mode operation, insert the Smart Divider. Arrange food containers on the racks. • The cooling fan automatically runs for a certain amount of time after cooking is complete. • When you are not using the Smart Divider, store it at room temperature. •...
-
Page 24: Cooking Mode
Gas oven Cooking mode Baking and Roasting (Twin mode upper) • Make sure to close the door before you start cooking. • If you leave the door open for 20-30 seconds while the oven is in convection baking/ roasting, baking, or broiling modes, the oven burner shuts off. - Page 25 Baking (Twin mode lower) Convection cooking The convection fan at the back of the oven circulates hot air evenly throughout the oven cavities so that food is evenly cooked and browned in less time than with regular heat. 1. Insert the Smart Divider into the cavity. 2.
-
Page 26: Broiling
Gas oven Broiling (Twin mode) Convection roasting • Good for larger, tender cuts of meat, uncovered. • For best performance, place a broiler pan and grid under the meat or poultry. The pan catches grease spills and the grid prevents grease spatters. •... - Page 27 Temperature probe (Single Mode Only) 2. Insert the temperature probe plug into the socket on the top side wall of the The temperature probe lets you cook roasts and poultry to the exact internal oven. temperature you want, taking the guess work out of determining whether a piece 3.
-
Page 28: Recipe Guide
Gas oven Temperature table Recipe guide Type of Food Internal temperature (°F) Broiling guide 140-150 Rare For detailed instructions, see page 26. Beef / Lamb Medium 160-170 NOTES Well done 170-180 • This is for reference only. Pork 170-180 • Preheating for 5 minutes before broiling is recommended. •... -
Page 29: Temperature Setting Guides
CAUTION (O - Available, X - Not available) Make sure to close the door after turning over the food. Upper Oven Lower Oven Available Setting Function and Temp. Temperature setting guides Broil Bake and Roast Mode Set Temp. Twin Mode Temperature setting ranges 480 °F 400 °F 480 °F... -
Page 30: Using The Oven Racks
Gas oven Temperature Limitations by Mode Using the oven racks Single Mode Twin Mode Feature Single Mode - One Oven Cavity Your oven range comes with 3 racks and 7 rack positions. The rack positions are Bake 175 °F (80 °C) 550 °F (285 °C) 175 °F (80 °C) 480 °F (250 °C) - Page 31 Twin Mode - Two Oven Cavities • We recommend cooking pizza and pies using the 2nd rack position in Single mode or the 2nd rack position of the lower oven in Twin mode for crispy bottoms. In Twin mode, the Smart Divider separates the oven into an upper oven and lower oven.
-
Page 32: Cooking Options
Gas oven Rack and Pan placement Cooking options Centering the baking pans in the oven CAUTION as much as possible will produce better results. If baking with more than one pan, Food that can easily spoil, such as milk, eggs, fish, poultry, and meat, should be place the pans so each has at least 1˝... - Page 33 Timed Cook (Lower oven mode) NOTE To change the programmed cooking time, press the Cooking Time pad and enter a different time. Then, press the START/SET pad. Timed Cook (Upper oven mode) 1. Insert the Smart Divider into the cavity. 2.
- Page 34 Gas oven Delay Start (Single mode) Delay Start (Upper mode) The Delay Start function lets you use the kitchen timer to automatically start and stop another cooking program. You can set Delay Start so that it delays the automatic start of a cooking operation you select by up to 12 hours. Mode: Bake / Bake / Roast / Healthy Cook / Self-clean...
-
Page 35: Special Features
Delay Start (Lower mode) Special features Healthy Cook (Single mode only) Healthy Cook provides 6 different specialized cooking options. To use a Healthy Cook option, follow the instructions below. 1. Insert the Smart Divider into the cavity. Place the container with the food on a rack in the lower oven, and then close the door. - Page 36 Gas oven Specialized items • Place the dough in a heat-safe container on rack position 3 or 4 and cover it with a cloth or with plastic wrap. You may need to anchor the plastic wrap underneath 1. Baked potato the container so that the oven does not blow it off the dough.
- Page 37 The Sabbath Option (Single mode only) 4. Press the Bake and Touch to Wake-Up pads simultaneously for 3 seconds to display “SAb”. Once “SAb” appears, the oven control no longer beeps or displays (For use on the Jewish Sabbath and Holidays) any further changes.
-
Page 38: Changing Option Settings
Gas oven Changing option settings Non-Cooking functions Press the Options pad to change various settings of the range to your preference. Demo mode The Options menu is available only when the oven is off. This is used by retailers for display purposes only. In this mode, the heating Setting Description element does not operate. - Page 39 Temp. Unit (°F / °C) Energy saving Change the temperature format of the oven to Fahrenheit or Centigrade. The This will automatically turn off the oven 12 hours after baking starts or 3 hours default is Fahrenheit. after broiling starts. 1.
-
Page 40: Smart Control
Gas oven Oven lock Smart control Lock the control panel and the door to prevent accidental operations and/or product tipping. How to connect the oven 1. Download and open the SmartThings app on your smart device. 2. Follow the app's on-screen instructions to connect your range. 3. -
Page 41: Maintenance
Maintenance Cleaning Oven remote control using the SmartThings app Error Check • Automatically recognize errors. Control panel • Monitor the current temperature and reset the Temp Probe First, lock the control panel and the door to prevent accidental operations and/or probe setting. - Page 42 • If a rack becomes too difficult to slide in or out, lubricate the rack with graphite lubricant. • To purchase the graphite lubricant, contact us at 1-800-SAMSUNG (726-7864). • For online shopping, visit http://www.samsungparts.com/Default.aspx and search Burner controls for part DG81-01629A.
- Page 43 Cooktop surface Burner grates and components The porcelain-enameled cooktop surface needs to be kept clean. We recommend Turn off all surface burners and make sure they have all cooled down. that you remove food spills immediately after they take place. 1.
- Page 44 Maintenance Burner reinstall guide NOTES Dual Burner head • The brass parts of your burner will change 1. Orient the burner head so that the color with use. However, this will not opening for the electrode lines up with affect performance and you can clean the the electrode.
- Page 45 Oval Burner CAUTION Burner Head 1. Orient the burner head so that the Make sure all burner components (heads opening for the electrode lines up with and caps) are reinstalled properly. They the electrode. will be stable and rest flat when correctly installed.
- Page 46 Maintenance Self-cleaning (Single mode only) To perform the self-cleaning cycle Make sure the door lock is released. Remove all racks from the oven cavity. This self-cleaning oven uses high temperatures (well above cooking temperatures) to burn off leftover grease and residue completely or reduce them to a finely powdered ash that you can wipe away with a damp cloth.
-
Page 47: Replacing The Oven Light
• The cooling fan automatically runs for certain amount of time after self-cleaning. NOTE • Self-cleaning does not operate within 2 hours after running the self-cleaning cycle. Make sure all surface burners are off while the oven is performing a self cleaning CAUTION cycle. -
Page 48: Removing And Re-Installing The Oven Door
Maintenance Removing and re-installing the oven door How to re-install the door You can re-install the upper door the same way you re-install the full door. 1. Firmly grasp both sides of the door at the top. How to remove the door 2. -
Page 49: Troubleshooting
Troubleshooting How to remove and re-install the Storage drawer If you encounter a problem with the range, check the tables starting below, and then try the suggested actions. Storage drawer Checkpoints 1. Slide open the drawer until it stops. 2. Locate the roller guide clips on either side. - Page 50 Troubleshooting Surface burner Problem Cause Action Problem Cause Action Very large or The wrong burner orifice Check the burner orifice size. yellow surface is installed. Contact your installer if you All burners do not The power cord is Make sure the electrical plug burner flames.
- Page 51 Problem Cause Action Problem Cause Action The oven will not The oven is not Make sure the electrical plug The oven light The oven door lock is The display will show the Lock turn on. completely plugged into is fully inserted into a live, (lamp) will not turn turned on.
- Page 52 Troubleshooting Problem Cause Action Problem Cause Action Cooking is The fan automatically This is not a product A crackling or This is normal. This is the sound of the metal finished, but the runs for a certain amount malfunction. The fan is popping sound.
- Page 53 Problem Cause Action Problem Cause Action The oven is not A fine dust or ash is This can be wiped clean with a The oven racks are This is normal. Apply a small amount of clean after a self- normal. damp cloth.
- Page 54 Troubleshooting Others Problem Cause Action Problem Cause Action Food does not The wrong cooking mode See page 24. bake or roast is selected. The product is not The appliance has been Make sure the floor is level, properly in the The oven racks have not See page 30.
-
Page 55: Information Codes
Divider switch malfunction. or there is nothing pressing SAMSUNG will repair or replace this product, at our option and at no charge as against the Divider switch, stipulated herein, with new or reconditioned parts or products if found to be press the OFF/CLEAR pad, and defective during the limited warranty period specified above. - Page 56 SPECIAL, INCIDENTAL, OR CONSEQUENTIAL DAMAGES CAUSED BY THE USE, MISUSE, OR INABILITY TO USE THIS PRODUCT, REGARDLESS OF THE LEGAL THEORY ON Please register your product online at www.samsung.com/register. WHICH THE CLAIM IS BASED, AND EVEN IF SAMSUNG HAS BEEN ADVISED OF THE POSSIBILITY OF SUCH DAMAGES. Questions...
-
Page 57: Open Source Announcement
It is also possible to obtain the complete corresponding source code in a physical medium such as a CD-ROM; a minimal charge will be required. The following URL http://opensource.samsung.com/opensource/SMART_AT_051/ seq/0 leads to the download page of the source code made available and open source license information as related to this product. - Page 58 Memo...
- Page 59 Memo...
- Page 60 How-to Videos and Live Shows * Requires reader to be installed on your smartphone Please be advised that the Samsung warranty does NOT cover service calls to explain product operation, correct improper installation, or perform normal cleaning or maintenance. QUESTIONS OR COMMENTS?
Need help?
Do you have a question about the NX58K9850S Series and is the answer not in the manual?
Questions and answers