Advertisement
Do you remember the last time you opened a gift that made you say
"Oh! How did you know? That's exactly what I wanted!" That's the kind
of feeling that the designers at Electrolux seek to evoke in everyone who
chooses or uses one of our products. We devote time, knowledge, and
a great deal of thought to anticipating and creating the kind of appliances
that our customers really need and want.
This kind of thoughtful care means innovating with insight. Not design for design's
sake, but design for the user's sake. For us, thoughtful design means making
appliances easier to use and tasks more enjoyable to perform, freeing our
customers to experience that ultimate 21st century luxury, ease of mind. Our aim
is to make this ease of mind more available to more people in more parts of their
everyday lives, all over the world. So when we say we're thinking
of you, you know we mean just that.
The "Thinking of you" promise from Electrolux goes beyond meeting the needs of
today's consumers. It also means we're committed to making appliances safe for
the environment—now and for future generations.
P/No. 60900400
EMAN_RN_EFC925SAR_926BAR_UM_Nov28_2018 v8
Advertisement

Related Manuals for Electrolux EFC925SAR


Summary of Contents for Electrolux EFC925SAR
- Page 1 Do you remember the last time you opened a gift that made you say “Oh! How did you know? That’s exactly what I wanted!” That’s the kind of feeling that the designers at Electrolux seek to evoke in everyone who chooses or uses one of our products. We devote time, knowledge, and a great deal of thought to anticipating and creating the kind of appliances that our customers really need and want.
-
Page 2: Table Of Contents
Dimensions So whenever you use it, you can be safe in the Rangehood installation knowledge that you’ll get great results every time. Using the rangehood Welcome to Electrolux. Maintenance and cleaning Troubleshooting BEFORE USING YOUR APPLIANCE Customer Care Center read through the whole user manual which provides the description of the rangehood and its functions. -
Page 3: Safety Information
SAFETY INFORMATION Electrical connection This manual explains the proper use of your new Electrolux canopy rangehood. Please read this manual carefully Check that the mains voltage matches with the voltage on before using the product. This manual should be kept in a the data plate inside the canopy rangehood. -
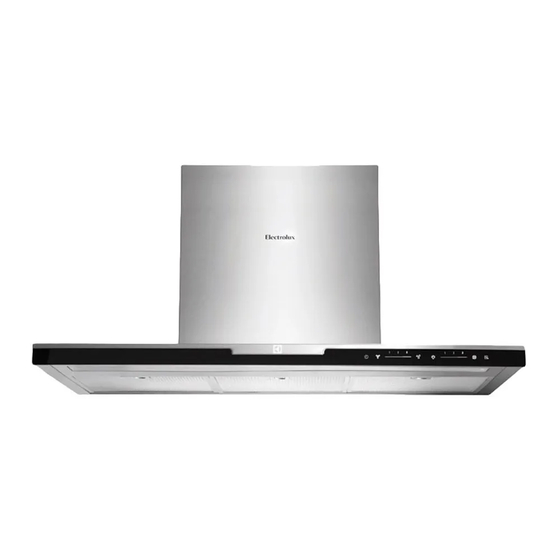
Page 4: Product Description
PRODUCT DESCRIPTION Ceiling mount bracket Telescopic flue cover set Wall bracket Main body and fan housing assembly Grease filters a dditional items required for installation F ngs required to attach rangehood body and anti tilt i x i points. F ngs required to attach ceiling mounting bracket and i x i hood bracket to the wall. -
Page 5: Dimensions
DIMENSIONS 400mm 320mm 1120mm (Maximum) 480mm 38mm 500mm 895mm Fig. 4 NOTE: 1) The fan housing flue transition duct is 184mm in diameter. 2) Flue transition duct 184mm to 150mm is for external venting and Recirculation mode. 150mm 184mm Fig. 5... -
Page 6: Rangehood Installation
RANGEHOOD INSTALLATION WARNING! Using a spirit level mark a vertical centre line on the wall where the hood is to be positioned, and a horizontal line Refer to “Safety information” chapter. at the hood base position (refer diagram below). BEFORE INSTALLATION NOTE: The height of the underside of the hood body must Before the installation of the appliance, record the information be a minimum of 600mm* to a maximum height of 800mm. - Page 7 RANGEHOOD INSTALLATION (CONT) 3. Install flue cover wall mounting brackets with suitable Depending on the preferred installation/ducting mode, fixings. Install suitable screws for cooker hood mounting follow step 5a or 5b below. points (to support a total weight of 30kg) to the wall as 5a.
- Page 8 RANGEHOOD INSTALLATION (CONT) Fig. 11 Electrical connection Check that the installation complies with the standards of local building, gas and electrical authorities. Before connecting to the mains supply ensure that the mains voltage corresponds to the voltage on the rating plate inside the rangehood.
- Page 9 To complete the rangehood installation, insert the three filters to the underside of the hood body. Place back edge of filter into position and push up front edge so that the filter clips into place. Your Electrolux rangehood is now ready to use. Fig. 13 Fig. 14...
-
Page 10: Using The Rangehood
USING THE RANGEHOOD Light Standby mode Filter When connecting the hood to the power supply for the This is the indicator/switch to show when the filter needs first time or after power is returned after power outage, all to be cleaned. Once the filters are cleaned the “Filter” alert symbols on the control panel will light up from left to right can be deactivated with a single touch. -
Page 11: Maintenance And Cleaning
MAINTENANCE AND CLEANING Dishwasher CAUTION! Place grease filters in the dishwasher. Select the most Before maintenance or cleaning is carried out, powerful washing program and highest temperature, at the canopy rangehood should be disconnected least 65°C. Repeat the process. Refit the grease filters from the main power supply. -
Page 12: Troubleshooting
If you have completed all of the above checks and are still experiencing difficulty, please contact your local Electrolux Service Centre. NOTE: This product is fitted with a safety cutout device. - Page 13 Trunkline: +63 2 737- 4756 Website : www.electrolux.com.ph Email : wecare@electrolux.com Singapore Consumer Care Center Tel: (+65) 6727 3699 Electrolux S.E.A. Pte Ltd. 1 Fusionopolis Place, #07-10 Galaxis, West Lobby Singapore 138522. Office Fax : (+65) 6727 3611 Email : customer-care.sin@electrolux.com...
Need help?
Do you have a question about the EFC925SAR and is the answer not in the manual?
Questions and answers