Table of Contents
Advertisement
Advertisement
Table of Contents

Related Manuals for RNA SLL 800


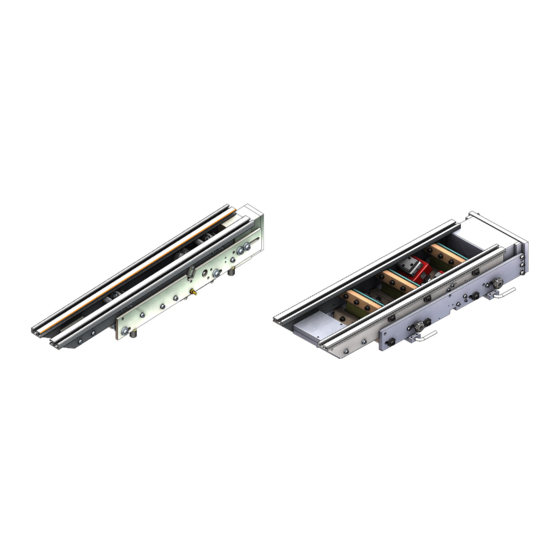
Summary of Contents for RNA SLL 800
- Page 1 Operating Instructions Linear feeder SLL 175 SLL 400 SLL 800 SLL 804 SLF 1000...
-
Page 2: Table Of Contents
Table of Contents Technical data ........................4 Safety directives ........................9 2.1. Applicable directives and standards ..................10 Design and functional description of linear feeder ..............10 Shipment and installation ..................... 11 4.1. Shipment ..........................11 4.2. Installation ..........................11 Commissioning ........................ - Page 3 Declaration of Conformity within the meaning of Low-Voltage Directive 2006/95/EC We hereby declare that the product meets the following requirements: Low-Voltage Directive 2006/95/EC Applied harmonised standards: DIN EN 60204 T1 Remarks: We assume that our product will be incorporated into a stationary machine. Rhein-Nadel Automation GmbH --------------------------------- Managing Director...
-
Page 4: Technical Data
Notice All linear feeders listed in this table shall be operated only in conjunction with an RNA controller and with a mains voltage of 230 V / 50 Hz. For special voltages and frequencies please refer to the separate data sheet. - Page 5 Linear feeder SLL 175 Linear Feeder Type SLL175-175 SLL175-250 Dimensions L x W x H (mm) 200x62x63 275x62x63 Weight Degree of protection IP54 IP54 Connecting cable length (m) 1,800 1,800 Power input (VA) Current 70 mA 70 mA Nominal magnet voltage / frequency (V / Hz) 200/50 200/50...
- Page 6 Linear feeder SLL 800 Linear Feeder Type SLL 800 - 800 SLL 800 - 1000 SLL 800 - 1200 SLL 800 - 1400 Dimensions L x W x H (mm) 850 x 120 x 1,050 x 120 x 1,250 x 120 x...
- Page 7 Linear feeder SLL 804 Linear Feeder Type SLL 804 - 800 SLL 804 - 1000 SLL 804 - 1200 SLL 804 - 1400 Dimensions L x W x H (mm) 850 x 120 x 1,050 x 120 x 1,250 x 120 x 1,450 x 120 x Weight 21.5...
- Page 8 Linear Feeder Type SLL 804 - 2400 SLL 804 - 2800 Dimensions L x W x H (mm) 2,450 x 120 x 172 2,850 x 120 x 172 Weight Degree of protection IP 54 IP 54 Connecting cable length (m) Power input (VA) Current...
-
Page 9: Safety Directives
2. Safety directives We have taken great care in design and manufacture of our linear feeder in order to ensure smooth and safe opera- tion. You, too, can make an important contribution towards safety at work. We therefore ask you to read the brief op- erating instructions completely prior to commissioning the system. -
Page 10: Applicable Directives And Standards
Attention The linear feeder must be installed, put into operation and maintained by professional personnel only. Ob- serve the legally binding provisions for the qualifications of qualified electrical workers and instructed workers as defined by standards IEC 364 and DIN VDE 0105, part 1. Caution: Electromagnetic field Magnetic fields may affect a cardiac pacemaker. -
Page 11: Shipment And Installation
SLL 175-250 SLL 400 - 400 SLL 400 - 600 SLL 400 - 800 SLL 400 - 1000 SLL 800 - 800 SLL 800 - 1000 SLL 800 - 1200 SLL 800 - 1400 SLL 800 - 1600 SLL 800 - 1800... -
Page 12: Commissioning
5. Commissioning Attention Make sure that the machine frame (rack, substructure, etc.) is connected to the protective earth conductor (PE). Protective earthing has to be provided by user as necessary. Attention It is imperative that the vibrating motor be connected to the equipotential bonding system of the overall equipment be- fore commissioning. -
Page 13: Mechanical Tuning Procedure For Use With Compact Controller
When changing springs, take into account that leaves of different thicknesses have different spring forces. As the spring force increases to the square of spring thickness, please note the following examples: * 2.5 mm spring thickness = 6.25 spring force * 3.0 mm spring thickness = 9.0 spring force * 3.5 mm spring thickness = 12.25 spring force One 3.5-mm thick leaf spring produces approximately the same spring force as two 2.5 mm thick leaf springs. -
Page 14: Tuning Procedure For Use With Frequency-Controlled Control System
Notice The feeder speeds that can be obtained by tuning the system in the 'super-critical' region are lower than the speeds possible in the sub-critical region. In addition, the speed differences between loaded and un- loaded feeder are bigger in this case. 'Sub-critical' tuning should be favoured in most cases. Notice As a first step, make a rough adjustment of the feeder speed (by tuning the natural frequency). -
Page 15: Changing The Spring Set On Linear Feeders
5.1.3. Changing the spring set on linear feeders Changing the spring set on SLL 175 type linear feeders Remove the 4 upper lateral spring fastening screws ‘C’ (M4 DIN 912). Now you can lift out the complete vibratory unit, with feed rail attached. Remove the desired spring pack by loosening the lower lateral spring fastening screws ‘D’ (M4 DIN 912). - Page 16 Remember to remove the locating pins before re-starting the unit! Changing the spring set on SLL 800 and SLL 804 type linear feeders Remove the bottom armature fastening screw 'A' (M6 DIN 912). Remove the 4 respectively 6 upper lateral spring fas- tening screws ‘C’...
- Page 17 Changing the spring set on SLF 1000 type linear feeders Remove the 4 upper lateral spring fastening screws ‘C’ (M12 DIN 912). Now you can lift out the complete vibratory unit, with feed rail attached. Remove the desired spring pack by loosening the lower lateral spring fastening screws ‘D’ (M12 DIN 912).
-
Page 18: Adjusting The Desired Feeding Behaviour / Synchronism Of The Linear Feed Rail
5.1.4. Adjusting the desired feeding behaviour / synchronism of the linear feed rail For a linear feed rail to operate smoothly and in synchronism, the spring angle must be set to be identical to the cen- tre-of-gravity angle. The centre-of-gravity angle is determined by the locations of the centres of gravity of the vibrating mass and of the counter mass. - Page 19 SLL 400 (when inserting the wire make sure that it doesn't enter the grooves of the armature); use wire with 3 mm, length 80 mm for SLL 800 and SLL 804; use wire with 2.5 mm, length 250 mm for SLF 1.000). Adjust the air gap (see Section 1, ‘Technical Data’) by pressing down the two armature fastening screws against the direction of...
-
Page 20: Feed Rail Design Rules
6. Feed rail design rules As the use of aluminium profiles makes the vibratory unit strong enough, the feed rails should be of very lightweight design. Only the rail projections beyond the vibratory unit (max. 100 mm at the entry and max. 200 mm at the exit) must be designed to resist torsional stresses involved. -
Page 21: What If
9. What if... (Advice on troubleshooting) Attention Only professional electricians are allowed to open the control unit or connector. Pull the mains plug before opening! If the rail feeding speed or height amplitude is not uniform but rather higher at the exit than at the entry, this indicates that the spring angle is incorrectly set relative to the centre-of-gravity angle (see Section 5.1.3). - Page 22 Fault Potential cause Remedy Linear feeder does Power switch off Close power switch not start on power Mains connector of control unit not plugged-in Plug in the mains connector Connecting cabled between linear feeder and control unit not plugged-in Plug 5-pin connector into control unit Defective fuse in control unit Replace fuse Only slight feeder...
- Page 23 Manufacturing and Sales Rhein-Nadel Automation GmbH Reichsweg 19-23 D-52068 Aachen Phone: +49 (0) 241-5109-0 Further manufacturing sites Fax: +49 (0) 241-5109-219 of the RNA Group E-Mail: vertrieb@RNA.de Manufacturing www.RNA.de Lüdenscheid branch Rhein-Nadel Automation GmbH Further RNA group companies: Nottebohmstraße 57 D-58511 Lüdenscheid...
Need help?
Do you have a question about the SLL 800 and is the answer not in the manual?
Questions and answers