Table of Contents
Advertisement
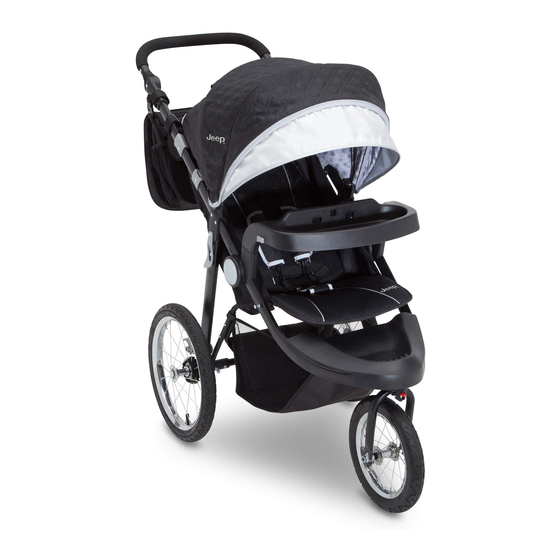
CROSS COUNTRY
SPORT PLUS
JOGGING STROLLER
12988
STYLES AND COLORS MAY VARY
WARNING:
CHOKING HAZARD
Adult assembly required because of
small parts. Keep assembly parts out
of reach of children under 3 years.
Read all instructions BEFORE assembly and USE of product. KEEP INSTRUCTIONS FOR FUTURE USE.
This stroller is not from, sponsored or endorsed by Graco Children's Products Inc.
This stroller is not from, sponsored or endorsed by Evenflo Company, Inc.
This stroller is not from, sponsored or endorsed by Artsana S.p.A.
Copyright
Britax. All rights reserved.
Customer Service: 1-(800)-377-3777
INSTRUCTION MANUAL
Fits Graco® SnugRide® Click Connect™ Infant Car Seat (not included)
Fits Evenflo® Embrace™ Select Infant Car Seat (not included)
Fits Evenflo® Nurture™ Infant Car Seat (not included)
Fits Chicco® Keyfit 30™ Infant Car Seat (not included)
Fits Britax® B-Safe 35™ Infant Car Seat (not included)
www.DeltaChildren.com
DCP-IM-02282018
Advertisement
Table of Contents

Related Manuals for Delta Children J is for JEEP CROSS COUNTRY SPORT PLUS


Summary of Contents for Delta Children J is for JEEP CROSS COUNTRY SPORT PLUS
- Page 1 CROSS COUNTRY SPORT PLUS JOGGING STROLLER INSTRUCTION MANUAL 12988 Fits Graco® SnugRide® Click Connect™ Infant Car Seat (not included) Fits Evenflo® Embrace™ Select Infant Car Seat (not included) Fits Evenflo® Nurture™ Infant Car Seat (not included) Fits Chicco® Keyfit 30™ Infant Car Seat (not included) STYLES AND COLORS MAY VARY Fits Britax®...
-
Page 2: Care And Maintenance
WARNING: Please follow all of these instructions to ensure the safety of your child. Keep these instructions for future reference. WARNING: Failure to follow these instructions could result in serious injury or death. WARNING: Avoid serious injury from falling or sliding out. Always insure that the child is properly positioned by using the safety harness according to these instructions. -
Page 3: Extended Warranty
If you experience any difficulty with assembly, missing parts or use, please DO NOT return this item to the store. Retail stores are unable to properly assist you. Contact our Customer Service Department directly for assistance 1-800-377-3777. www.DeltaChildren.com • CustomerService@DeltaEnterprise.com ©2018 Delta Children’s Products, Inc. New York, NY 10001... - Page 4 Front Wheel Axel Lock Nuts Front Wheel Retainer Plate Part # 50219 Part # 50218 Stroller Parent Fabric Tray Front Wheel Child Tray Part # 50229 Part # 50171 Part # 50174 Carry All Parent Organizer Rear Wheels Part # 50217 Part # 50172 Right Right Side...
-
Page 5: Front Wheel
ASSEMBLY IMPORTANT! To ensure safe operation of your stroller, please follow these instructions carefully. Please keep these instructions for future reference. IMPORTANT! Before assembly and each use, inspect this product for damaged hardware, loose joints, missing parts or sharp edges. NEVER use stroller if any parts are missing or broken. IMPORTANT! Adult assembly is required. - Page 6 ASSEMBLY Front Forks 3. Slide the retainer plate onto the front wheel axle. Be sure that the retainer plate’s bent tab is facing towards the front fork slot. The bent Slot tab on the retainer plate must be lined up with and trapped inside the front fork slot before tightening the wheel (Fig.
-
Page 7: Rear Wheel
ASSEMBLY 5. Lift the front wheel off of the ground and sharply strike the top of the tire. (Fig. 1D) The wheel should not be loose or come off. Fig. 1D REAR WHEEL 6. To attach the rear wheels, lay stroller on its side. -
Page 8: Parent Tray
ASSEMBLY PARENT TRAY WARNING: The maximum weight that can be carried in the parent tray is 3 lbs (1.36 kg). NEVER place hot liquids in the parent tray as can cause serious burns and NEVER place more then 3lbs (1.36kg) in parent tray as may cause an unstable condition. -
Page 9: Sun Visor
ASSEMBLY SUN VISOR SUN VISOR To open the sun visor: grab front edge of sun visor under canopy and pull down and rotate forward until fully extended. (Fig. 6) Fig. 6 PEEK-A-BOO-WINDOW To open, flip backwards to show peek-a-boo window. (Fig. 7) Fig. -
Page 10: Adjustable Handle
ASSEMBLY To access child seat: press left or right release buttons (Fig. 8A) and rotate tray upward (Fig. 8B). Fig. 8A Fig. 8B To remove the child tray: Press the right and left release buttons and pull upward on child tray. - Page 11 SAFETY BRAKES WARNING: Always lock brakes when not in use on a hill or incline as stroller may roll away or slide down the hill. WARNING: Never leave child unattended in stroller. Rear Wheel Brakes: To lock rear wheel brakes, press downward on brake lever located on each rear wheel.
- Page 12 TO SECURE THE CHILD Make sure the brake pedals are pressed down completely. Always set both brake pedals when parking the stroller. Before Placing your Child in Stroller: Close Canopy. Press both brake pedals down until they “click” into the locked position. Waist Belt Waist Belt 5 Point Safety...
- Page 13 ASSEMBLY SEAT BACK RECLINE POSITIONING Squeeze both sides on cord housing and pull away to recline seat, as shown in Fig. 11. To return to an upright position, hold bottom cord loops while squeezing cord housing and move cord housing upwards towards the backseat, as shown in Fig.
- Page 14 ASSEMBLY HOW TO ATTACH GRACO AND EVENFLO ® ® CAR SEATS To use the car seat feature, lock back wheels, close the canopy as described in the canopy Car Seat Safety section (Please see Page 7, Fig. 5A). Recline Grey Latches seat by squeezing both sides of cord housing as described in seat back positioning section (Please see Page 12, Fig.
- Page 15 HOW TO ATTACH CHICCO CAR SEATS ® 21. To use Chicco Keyfit 30 Car seat first, lock the back wheels, close the canopy as described in the canopy section (Please see Page 7, Fig. 5A). Recline seat by squeezing both sides of cord housing as described in seat back positioning section (Please see Page 12, Fig.
- Page 16 23. To attach Chicco car seat, line up foot end of car seat toward stroller (Fig. 13C). Slide car seat into Chicco adapters. Make sure car seat is locked in place by pulling upward on car seat. Car seat is secured when both side lock tabs have "clicked"...
- Page 17 HOW TO ATTACH BRITAX CAR SEATS To use Britax B-Safe 35 Car seat first, lock the back wheels, close the canopy as described in the canopy section (Please see Page 7, Fig. 5A). Recline seat by squeezing both sides of cord housing as described in seat back positioning section (Please see Page 12, Fig.
- Page 18 27. To attach Britax B-Safe 35 car seat, line up foot end of car seat toward stroller (Fig. 14D). Glide car seat into Britax attachments. Make sure car seat is locked in place by pulling upward on car seat. Car seat is secure once both side lock tabs have "clicked"...
-
Page 19: To Fold Stroller
ASSEMBLY JOGGING WITH YOUR STROLLER Push Upward To Lock Front Swivel When you are jogging with your child, use the Wheel following safety features: • LOCK THE FRONT SWIVEL WHEEL BY PUSHING UPWARD ON THE FRONT SWIVEL WHEEL LOCK PUTTING THE Front Swivel FRONT WHEEL INTO A STRAIGHT Wheel Lock... -
Page 20: To Unfold Stroller
ASSEMBLY Release the fold buttons and move handle downward until the stroller is completely folded. The stroller is in a fully locked position when the locking fold latch is locked over the “T” post, located on the right side of the stroller. (Fig. 16A) Fig. - Page 21 OTHER FLAT TIRE The jogging stroller features bicycle air tires which could become flat. If you have a flat tire, use a standard bicycle hand air pump to inflate the tires. Inflate the tires 25 psi. NOTE: The stroller air tires can be taken to a bicycle shop for flat tire repair. Customer Service www.DeltaChildren.com Tel.
- Page 24 www.DeltaChildren.com...
Need help?
Do you have a question about the J is for JEEP CROSS COUNTRY SPORT PLUS and is the answer not in the manual?
Questions and answers