Advertisement
Table of Contents
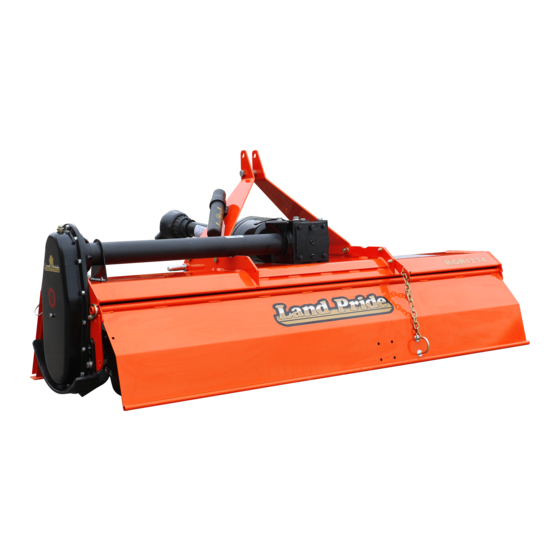
Rotary Tillers
RGR12 & RGA12 Series
RGR1242, RGR1250, RGR1258, RGR1266, RGR1274, & RGR1282
RGA1242, RGA1250, RGA1258, RGA1266, RGA1274, & RGA1282
RGR12 Series Rotary Tillers
70272
Table of Contents
Read the Operator's Manual entirely. When you see this symbol,
!
the subsequent instructions and warnings are serious - follow
without exception. Your life and the lives of others depend on it!
Cover photo may show optional equipment not supplied
with standard unit.
For an Operator's Manual and Decal Kit in French
Language, please see your Land Pride dealer.
RGA12 Series Rotary Tillers
Operator's Manual
70271
311-948M
Printed 1/7/19
Advertisement
Table of Contents

Related Manuals for Land Pride RGR12 Series


Summary of Contents for Land Pride RGR12 Series
- Page 1 Your life and the lives of others depend on it! Cover photo may show optional equipment not supplied with standard unit. For an Operator’s Manual and Decal Kit in French Language, please see your Land Pride dealer. Printed 1/7/19...
- Page 2 Machine Identification Record your machine details in the log below. If you replace this manual, be sure to transfer this information to the new manual. If you, or the dealer, have added Options not originally ordered with the machine, or removed Options that were originally ordered, the weights and measurements are no longer accurate for your machine.
-
Page 3: Table Of Contents
Land Pride assumes no responsibility for errors or omissions. Neither is any liability assumed for damages resulting from the use of the information contained herein. Land Pride reserves the right to revise and improve its products as it sees fit. This publication describes the state of this product at the time of its publication, and may not reflect the product in the future. - Page 4 Parts Manual for this equipment. for Land Pride products. Download the appropriate App on your Refer to Parts Manual QR smart phone, open the App, point your Locator on this page for phone on the QR code and take a picture.
- Page 5 Important Safety Information Important Safety Information Listed below are common practices that may or may not be applicable to the products described in this manual. Safety at All Times Look for the Safety Alert Symbol Careful operation is your best The SAFETY ALERT SYMBOL indicates there is a assurance against an accident.
- Page 6 Lower implement to the ground and Replace parts on this implement implement. follow all shutdown procedures with genuine Land Pride parts only. Attach the chain to the tractor before leaving the operator’s seat to Do not alter this implement in a way drawbar support or other specified perform maintenance.
- Page 7 Use Seat Belt and ROPS signals are recommended Keep Riders Off whenever driving on public roads. Machinery Land Pride recommends the use of a CAB or roll-over-protective- Never carry riders on tractor or structures (ROPS) and seat belt implement.
- Page 8 Spray soapy water onto the cleaned area. all damaged or missing labels. Order new labels from your Peel backing from label and press label firmly onto the nearest Land Pride dealer. To find your nearest dealer, surface. visit our dealer locator at www.landpride.com.
- Page 9 Table of Contents Important Safety Information 858-519C 70273 RGA12 Series Cluster Decal RGA12 Series 70272 818-543C RGR & RGA Series Guard Missing Hazard 1/7/19 RGR12 & RGA12 Series Rotary Tillers 311-948M...
- Page 10 Table of Contents Important Safety Information 70275 818-543C RGR & RGA Series Guard Missing Hazard RGA1258 Shown (Applicable for both RGA & RGR Series) 818-540C RGR & RGA Series Guard Missing Hazard 30370 818-552C RGR & RGA Series 30370 Rotating Driveline Hazard RGR12 &...
- Page 11 The RGR12 and RGA12 Series Rotary Tillers are Pride dealer has trained personnel, repair parts, and designed and built by Land Pride to till soil for seedbed equipment needed to service this implement. and planting preparation with uses and applications in landscaping, gardens, and residential areas.
- Page 12 Table of Contents Section 1: Assembly and Set-up Section 1: Assembly and Set-up Tractor Requirements 3. Lower implement to ground or onto non-concrete support blocks. Tractor horsepower should be within the range noted 4. Put tractor in park or set park brake, turn off engine, below.
- Page 13 Table of Contents Section 1: Assembly and Set-up Upper Hitch Plate Assembly Lower 3-Point Hitch Pin Assembly Refer to Figure 1-1: Refer to Figure 1-1: Attach upper, left-hand hitch plate (#2) to the Applying removable thread lock to the threads of mainframe with 5/8 -11 x 1 1/2 GR5 bolts (#7), lock...
- Page 14 If rubber deflector (#1) has a diamond pattern on one side, install that side up. RGR Front Deflector Assembly Figure 1-2 RGR12 Series Front Deflector Refer to Figure 1-2: NOTE: RGA12 Series tillers discharge out the rear and therefore, do not require a front deflector.
-
Page 15: Chain Assembly Instructions
Table of Contents Section 1: Assembly and Set-up 70282 70281 Rear Deflector Chain Assembly Driveline Assembly Figure 1-4 Figure 1-3 Rear Deflector Chain Driveline Assembly Refer to Figure 1-3: Refer to Figure 1-4: The deflector chain (#1) is shipped from the factory The driveline is coupled to the gearbox input shaft with a assembled to the tail gate. -
Page 16: Hook-Up Rotary Tiller
37298 Hook-Up Rotary Tiller (RGR Series Shown) Figure 1-5 Hook-Up Rotary Tiller NOTE: Land Pride’s Quick Hitch can be attached to the tractor to provide quick and easy 3-point hook- DANGER up and detachment. An additional driveline may be To avoid serious injury or death: required if a Quick Hitch is used. -
Page 17: Driveline Hook-Up
Table of Contents Section 1: Assembly and Set-up 10. With gear selector in park or park brake set, start IMPORTANT: Check driveline collapsible and tractor and raise tiller off the ground several inches. maximum length before completing “Driveline 11. Without lowering the tiller, shut tractor down before Hook-Up”... -
Page 18: Check Driveline Collapsible Length
Table of Contents Section 1: Assembly and Set-up 30563a 30563 Driveline Shortening Driveline Shortening Figure 1-6 Figure 1-7 If dimension “A” is less than 1", shorten driveline as Check Driveline Collapsible Length follows: Refer to Figure 1-6: Refer to Figure 1-7: IMPORTANT: A driveline that is too long can bottom a. -
Page 19: Check Driveline Maximum Length
Table of Contents Section 1: Assembly and Set-up 24513 24872 Maximum Driveline Movement During Operation Figure 1-9 Outer Shielding has been removed for clarity. Check Driveline Interference Driveline Maximum Length Figure 1-8 Refer to Figure 1-9: Check Driveline Maximum Length WARNING Refer to Figure 1-8: To avoid serious injury or death:... -
Page 20: Section 2: Operating
Table of Contents Section 2: Operating Section 2: Operating • Operating Checklist Keep yourself and all others away from rotating tines and drive train. Always disengage power take-off and lockout Hazard control and accident prevention are dependent power source before making adjustments or servicing the upon the awareness, concern, prudence, and proper tiller. -
Page 21: Transport Rotary Tiller
Table of Contents Section 2: Operating • Always shut tractor down using “Tractor Shutdown IMPORTANT: Make sure all safety labels are in their Procedure” provided in this manual before dismounting proper location and in good condition before tractor. operation. Follow all directions on the safety labels. •... -
Page 22: Park Stand Operation
Table of Contents Section 2: Operating Park Stand Operation 70292 Always rotate park stand (#1) up and secure it in the up position before operating or transporting with the tiller attached to the tractor. Always rotate park stand down and secure it in the down position before unhooking the tiller from the tractor. -
Page 23: Unhook Rotary Tiller
Table of Contents Section 2: Operating 24" Maximum Lift Above Ground 37298 70286 Unhook Rotary Tiller (RGR Series Shown) Figure 2-3 Unhook Rotary Tiller 4. Push down on driveline yoke push pin (#8) and hold while pulling driveline yoke from tractor power take- Refer to Figure 2-3: off shaft. -
Page 24: General Operating Notes
With a little practice and a few adjustments, you will soon support tiller with blocks before working around the be achieving the results you want with your Land Pride tiller to remove the objects. Rotary Tiller. See “Section 5: Specifications &... - Page 25 Table of Contents Section 3: Adjustments Section 3: Adjustments Rear Deflector Adjustment Refer to Figure 3-1: Rear deflector (#2) can be adjusted closer to the ground to produce a fine soil texture or raised to produce a coarse soil texture. Adjust rear deflector up or down by repositioning chain (#1) in slot “A”...
- Page 26 Table of Contents Section 3: Adjustments Park Stand Adjustment 70290 Refer to Figure 3-3: WARNING To avoid serious injury or death: An unsupported parked tiller can tip over. Always use park stand and/or support blocks to prevent it from tipping over onto a person.
- Page 27 Figure 4-1 for the RGR12 Series or in Figure 4-2 for the RGA12 Series. IMPORTANT: Remove and install one tine at a time to ensure they are oriented correctly when installed.
- Page 28 Table of Contents Section 4: Maintenance and Lubrication Driveline Protection The clutch should be checked during the first hour of operation and periodically each week. An additional Tiller drive components are protected from shock loads set of scribe marks can be added to check for with a two plate friction clutch.
- Page 29 Table of Contents Section 4: Maintenance and Lubrication Clutch Assembly Refer to Figure 4-4 on page 24: Reassemble each friction disk (#4) next to the metal clutch plate it was separated from. Make certain bushing (#5) is replaced in the same location as when removed.
- Page 30 4. Repaint parts where paint is worn or scratched to prevent rust. Ask your Land Pride dealer for aerosol touch-up paint. They are also available in touch-up bottles with brush, quarts, and gallon sizes by adding TU, QT, or GL to the end of the aerosol part number.
- Page 31 Table of Contents Section 4: Maintenance and Lubrication Lubrication Points Lubrication Multi-purpose Multi-purpose Multi-purpose Intervals in hours at which spray lube grease lube oil lube lubrication is required Legend Hours Driveline U-Joint Type of Lubrication: Grease Quantity = 2-3 pumps 30561 Hours Driveline Shield Bearings...
- Page 32 Table of Contents Section 4: Maintenance and Lubrication 70299 Required Oil Fill And Breather Plug Gear Case Gear Case IMPORTANT: Tiller should be level when checking oil level in the gear case. Type of Lubrication: SAE 80-90W EP Oil Quantity = Gear oil will run out of oil level plug hole when full.
- Page 33 Table of Contents Section 4: Maintenance and Lubrication 30358 Hours Gearbox IMPORTANT: Tiller should be level when checking oil level in the gearbox. Type of Lubrication: SAE 80-90W EP Oil Quantity = Fill until oil begins to flow out of oil level plug hole.
- Page 34 63 1/2" 71 1/2" 79 1/2" 87 1/2" 3-Point hitch type Category I, 3-point plate steel A-frame, Fits Land Pride Quick Hitch Driveline Category 4 with Slip Clutch Optional BX driveline Category 4 with Slip Clutch, Not recommended with Quick Hitch...
- Page 35 63 1/8" 71 1/8" 79 1/8" 87 1/8" 3-Point hitch type Category I, 3-point plate steel A-frame, Fits Land Pride Quick Hitch Driveline Category 4 with Slip Clutch Optional BX driveline Category 4 with Slip Clutch, Not recommended with Quick Hitch...
- Page 36 7" Tilling depth For deep soil penetration. Formed plate steel upper hitch Plate steel is stronger than flat bar type hitch. Fits Land Pride Quick Hitch Allows for quick and easy one person hook-up. Park stand Allows for easy hook-up and storage.
- Page 37 Table of Contents Section 7: Troubleshooting Section 7: Troubleshooting Troubleshooting Chart Problem Cause Solution Tines are loose. Tighten tines. Implement makes Gearbox has tooth damaged. Replace damaged gearbox. intermittent clicking noise Gear drive has tooth damaged. Replace damaged gear. Universal joint is worn. Replace universal joint.
- Page 38 Table of Contents Section 8: Torque Values Chart Section 8: Torque Values Chart Torque Values Chart for Common Bolt Sizes Bolt Head Identification Bolt Head Identification 10.9 Bolt Size Bolt Size (inches) Grade 2 Grade 5 Grade 8 (Metric) Class 5.8 Class 8.8 Class 10.9 in-tpi...
- Page 39 This Warranty is limited to the repair or replacement of any defective part by Land Pride and the installation by the dealer of any such replacement part, and does not cover common wear items such as blades, belts, tines, etc. Land Pride reserves the right to inspect any equipment or parts which are claimed to have been defective in material or workmanship.
- Page 40 Corporate Office: P.O. Box 5060 Salina, Kansas 67402-5060 USA www.landpride.com...
Need help?
Do you have a question about the RGR12 Series and is the answer not in the manual?
Questions and answers