Table of Contents
Advertisement
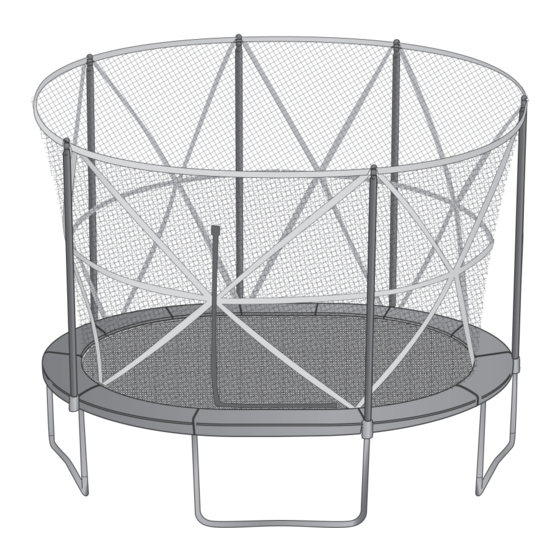
13x10' (4x3m) TRAMPOLINE
AND ENCLOSURE
Assembly, INSTALLATION AND USE MANUAL
IMPORTANT:
Please read and understand this manual
carefully before assembly. Before
beginning assembly of product, make
sure all parts are present. Compare parts
with packaging contents list. If any part
is missing, or if you have any questions,
contact the vendor's customer service
department at 1-866-567-4089
084-6693.indd 1
Model No: 084-6693-4
Trileaf Distribution
Trifeuil Toronto, Canada
Toll-free: : 1-866-567-4089
M4S 2BS
12/5/2014 1:06:29 PM
Advertisement
Table of Contents

Summary of Contents for Outbound 084-6693-4
- Page 1 13x10' (4x3m) TRAMPOLINE AND ENCLOSURE ASSEMBLY, INSTALLATION AND USE MANUAL Model No: 084-6693-4 IMPORTANT: Please read and understand this manual carefully before assembly. Before beginning assembly of product, make Trileaf Distribution sure all parts are present. Compare parts Trifeuil Toronto, Canada with packaging contents list.
-
Page 2: Table Of Contents
124-25 Dear Customer, Thank you for choosing an Outbound trampoline. We hope it will provide many hours of quality exercise to make you feel better, look better and enjoy life to its fullest. It is proven that a regular exercise program can improve physical and mental health. - Page 3 • Climb on and off the trampoline. It is a dangerous practice to jump from the trampoline to the floor or ground when dismounting, or to jump onto the trampoline when mounting. Do not use the trampoline as a springboard to other objects. Model No. 084-6693-4 084-6693.indd 3 12/5/2014 1:06:32 PM...
- Page 4 • This trampoline is for home use only. Do not use for institutional or commercial purposes. Failure to follow this warning could result in minor or moderate injury. • The weight limit on the trampoline is 250 lbs. (113.6 kg). Model No. 084-6693-4 084-6693.indd 4 12/5/2014 1:06:32 PM...
- Page 5 This is especially important if you are over the age of 35, have never exercised before, are pregnant or suffer from any illness. Model No. 084-6693-4 084-6693.indd 5 12/5/2014 1:06:33 PM...
-
Page 6: Key Parts Diagram
KEY PARTS DIAGRAM Model No. 084-6693-4 084-6693.indd 6 12/5/2014 1:06:34 PM... -
Page 7: Parts List
PARTS LIST Model No. 084-6693-4 084-6693.indd 7 12/5/2014 1:06:34 PM... -
Page 8: Assembly
• Secure the trampoline against unauthorized and unsupervised use. • Remove any obstructions from beneath the trampoline. • The owner and supervisors of the trampoline are responsible for making all users aware of practices specified in the user instructions. Model No. 084-6693-4 084-6693.indd 8 12/5/2014 1:06:35 PM... - Page 9 Step 2: Assembling the vertical leg tubes • Connect the Vertical Leg Tube (6) with W-shaped tubes (7). Ensure spring-loaded locking pins are aligned with locking holes and pin locks into the secured position. Model No. 084-6693-4 084-6693.indd 9 12/5/2014 1:06:36 PM...
- Page 10 Vertical Leg Tubes (6) go through the hole on the T-Joints (4 & 5). Note: Make sure all the locking holes and tabs are facing inner toward the jumping mat. Locking Model No. 084-6693-4 084-6693.indd 10 12/5/2014 1:06:38 PM...
- Page 11 Spring hook Note: The hooks at each end of the spring different in the opening. One is wider, and the other is narrower. See the spring as this: Wider opening Narrower opening Model No. 084-6693-4 084-6693.indd 11 12/5/2014 1:06:38 PM...
- Page 12 Please see below illustrations: • Unfold the Trampoline Mat (10). • Have the Springs (11) and Spring Hook Tool (21) ready for assembly. x 72 Model No. 084-6693-4 084-6693.indd 12 12/5/2014 1:06:39 PM...
- Page 13 T-joint (5). There is a red line pre-sewn at the V-ring straps. The T-joint (5) will be placed between these two V-ring straps. When the position confirmed; place 2 springs (11) as shown in below. Zipper Start/End Lines Model No. 084-6693-4 084-6693.indd 13 12/5/2014 1:06:40 PM...
- Page 14 • Make sure that the Springs (11) are always inserted at an angle of approximately 90° to the holes on the Top Rail Frame. • After completing the assembly, the Trampoline Frame and Mat should look like the illustration below. Model No. 084-6693-4 084-6693.indd 14 12/5/2014 1:06:41 PM...
- Page 15 • Slide the assembled poles in until the top end of the Upper Supporting Pole (18) comes out on the opposite side. • Make sure that the Sleeve (16) covers the entire pre-installed foam of the Supporting Poles. Model No. 084-6693-4 084-6693.indd 15 12/5/2014 1:06:42 PM...
- Page 16 • There is a hook-and-loop tapes added at the lower end of the pole foam sleeves to prevent the whole pole foam & sleeves from sliding down to cover up the red spring pole mechanism. Secure it as shown below. Model No. 084-6693-4 084-6693.indd 16 12/5/2014 1:06:42 PM...
- Page 17 Zip around the whole zipper of the mat and net; and end at the Zipper Start/End secure the hook-and-loop tapes to keep zipper pull in position. Please see below figures. Model No. 084-6693-4 084-6693.indd 17 12/5/2014 1:06:43 PM...
- Page 18 • Place both Frame Pads (12) on the trampoline and secure them together with the pre-sewn hook-and-loop tapes at the end of each pad. • Connect the pre-sewn hook-and-loop tapes at the inner side of the frame pad and the net. Model No. 084-6693-4 084-6693.indd 18 12/5/2014 1:06:44 PM...
- Page 19 • Bring the bungee strap with clip around the outside of the frame and under the pad. Pull the bungee strap and clip to the nearest V-ring. • Now the trampoline and enclosure are assembled. Model No. 084-6693-4 084-6693.indd 19 12/5/2014 1:06:45 PM...
- Page 20 • To keep your balance, focus your eyes toward the perimeter of the trampoline while bouncing. • Stop bouncing by bending your knees and at your hips when your feet come into contact with the mat. Model No. 084-6693-4 084-6693.indd 20 12/5/2014 1:06:46 PM...
- Page 21 • Hold your feet shoulder-width apart when landing. • When you want to stop, bend your knees and at your hips when your feet come into contact with the trampoline. Model No. 084-6693-4 084-6693.indd 21 12/5/2014 1:06:47 PM...
- Page 22 • Land on your bottom, with your back straight. • Keep your hands beside your hips. Do not lock your elbows. • Push yourself up to standing position again with your hands. Model No. 084-6693-4 084-6693.indd 22 12/5/2014 1:06:48 PM...
- Page 23 • During the twist, place your hands by your sides and hold your body straight. • After the twist, finish in the seat drop position. Model No. 084-6693-4 084-6693.indd 23 12/5/2014 1:06:50 PM...
-
Page 24: Cleaning And Maintenance
WARRANTY This Outbound product is guaranteed for one year from the date of original retail purchase against defects in materials and workmanship. Subject to the conditions and limitations described below, this product, if... - Page 25 The provisions contained in this warranty are not intended to limit, modify, take away from, disclaim or exclude any statutory warranties set forth in any applicable provincial or federal legislation. Model No. 084-6693-4 084-6693.indd 25 12/5/2014 1:06:50 PM...
Need help?
Do you have a question about the 084-6693-4 and is the answer not in the manual?
Questions and answers
I need to replace my mat for this model but don’t know how or where?
To replace the mat for Outbound model 084-6693-4, follow these steps:
1. Remove the Old Mat:
- Detach all springs connecting the mat to the top rail frame.
- Carefully inspect and remove any remaining parts attached to the old mat.
2. Position the New Mat:
- Align the zipper start/end on the new trampoline mat with the T-joint on the top rail frame.
- Use the red lines pre-sewn at the V-ring straps to guide placement. The T-joint should be between these two straps.
3. Attach Springs:
- Begin attaching the springs at the aligned V-ring straps.
- Make sure to insert springs at a 90° angle to the holes on the top rail frame.
- Continue attaching springs evenly around the mat to ensure even tension.
4. Check Assembly:
- Ensure the mat is not sagging and is evenly tensioned.
- Verify that springs are securely attached and the frame is stable.
If any part is damaged or missing, contact customer service before proceeding.
This answer is automatically generated