Table of Contents
Advertisement
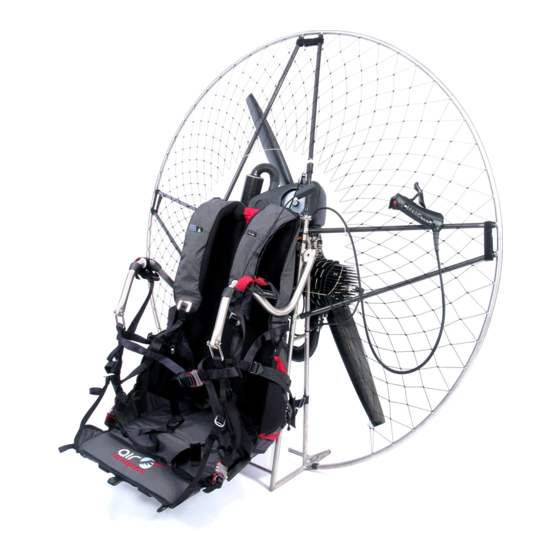
NITRO 200
TORNADO 280
Paramotors
User's Manual
Edition: V2.0
This manual is intended to be for informational purposes only. The manual's content
is based on the best knowledge available at the time of publication. We put every
effort to correct the mistakes we encountered but we cannot guarantee that all
errors have been found. This is why errors found in this manual cannot be treated as
the basis for any legal claims. Information included in the present publication are the
property of the Air Conception company.
Copying, distributing, and content sharing of the whole text or its parts with third
party is not permitted without Air Conception company's written consent. We retain
the right to make changes without notifying the users. Due to the fact that we make
constant changes in order to improve our products some parts of the manual may not
correspond to the version or the equipment of the purchased product. If this is the
case, please contact us.
Advertisement
Table of Contents

Related Manuals for Air Conception NITRO 200

Summary of Contents for Air Conception NITRO 200
- Page 1 Copying, distributing, and content sharing of the whole text or its parts with third party is not permitted without Air Conception company’s written consent. We retain the right to make changes without notifying the users. Due to the fact that we make constant changes in order to improve our products some parts of the manual may not correspond to the version or the equipment of the purchased product.
-
Page 2: Table Of Contents
Content 1. Introduction ......................3 1.1 Limitation of Liability ..................3 1.2 The meaning of symbols used in the manual ............4 2. Preparing the paramotor ..................5 2.1 Package content ....................5 2.2 First time paramotor assembly ................5 2.2.1 Mounting of the propeller .................. -
Page 3: Introduction
1. Introduction Congratulation on joining the Air Conception family! We know that you are a person who embraces adventure, follows your passion and has found the beauty of flying as an important component of life. We are happy that you decided to pursue your passion with our equipment and are here to support you, as you progress through this journey into the sky! We are pleased to welcome you as our customer. -
Page 4: The Meaning Of Symbols Used In The Manual
It is not allowed to make any modifications or adjustments, to use non-original spare parts, and to make repairs without the permission and control of the producer or its authorized representative. Such actions cause the loss of the warranty rights. They could also lead to problems with the working of the equipment, serious equipment damage, and severe body damage including the risks to the pilot’s and the third party’s lives. -
Page 5: Preparing The Paramotor
2. Preparing the paramotor 2.1 Package content The complete standard version of your Air Conception paramotor includes the following items: 1. Frame with engine and harness 1 pc. 2. Propeller cage 1 set 3. Propeller 1 pc. 4. Propeller mounting screws 1 set 5. -
Page 6: Propeller Cage Mounting
2.2.2 Propeller cage mounting Begin mounting the propeller cage by inserting 6 carbon tubes into the frame. Care must be taken as they are 3 different lengths. Please check the following table to know the position of each carbon tube on your frame. Race/Split Delta Delta... -
Page 7: Harness Adjustments
2.2.3 Harness adjustments Proper hang point and harness adjustment is necessary for maximum thrust at take off, flying comfort, and ease of launch. This adjustment is ideally done with the all-up weight of the pilot. 1. SUSPEND THE PARAMOTOR: It has to be suspended from the hang points with the pilot sitting in the harness. -
Page 8: Battery Mounting (E-Start Engine Only)
2.2.4 Battery mounting (e-start engine only) The battery has to be mounted according to this picture: 19/04/2019 V2.0 Page 8 of 24... -
Page 9: Fuel
If you choose a particular oil grade try not to change it. If it is necessary, try to change it as rarely as possible. The Nitro 200 and Tornado 280 engines are not designed to work with marine or mineral oils! Warning: Mixed fuel loses its properties with time. -
Page 10: Priming & Starting The Engine
4. Priming & Starting the engine Every time you want to start up the engine you must secure the gas throttle in such a way that it will not be possible to turn it on by accident. You should also check whether the carburetor throttle is not left ajar. -
Page 11: Turning Off The Engine
A properly regulated and primed engine usually starts after one or two pulls (pull starter version) or two seconds of electric starter use. A well tuned engine works steadily at idle speed, though immediately after the start-up the speed is much higher than 2000 rpms and decreases during the warm-up. -
Page 12: The Run-In And The Engine Use
You should also check whether the engine does not choke and does not have the tendency to cut out. If you observe any alarming symptoms please contact the distributor or Air Conception directly. 5.3 The run-in of the engine in the first hours of flight... - Page 13 Spark plug evaluation in the engine working previously for a long time at idle speed is not reliable. For proper evaluation you should turn the engine off after a few minutes on medium and high speed (horizontal flight) and land on the turned-off engine. Attention: Evaluating the state of the spark plug is the only one way of checking whether the mixture’s composition is correct! Second stage: If the spark plug has dark color or is black after the test flight, we can...
-
Page 14: Spark Plug Diagnosis
The run-in time for the “Nitro 200” or “Tornado 280” engine is about 10 hours of flight. The practical way of estimating the length of run-in stage is using up 1 liter bottle of oil. -
Page 15: Regulating The Carburetor During The Run-In Time
5.5 Regulating the carburetor during the run-in time Before sale every carburetor is set to default, factory settings. You only need to regulate the idle speed because it changes together with the changes in atmospheric pressure (horizontal screw lifting the throttle lever). After the warm-up, we set speed on 2100-2200 rpm or so that the engine could work steadily and would not cut out. -
Page 16: Pre-Flight Inspection And Adjustments
6. Pre-flight inspection and adjustments 6.1 Pre-flight paramotor inspection Checking up the paramotor before taking off includes obligatory inspection of the propeller cage mount and gas throttle performance. The propeller inspection entails checking that it is mounted securely and inspecting for mechanical damages or cracks. The propeller should rotate steadily, and silently. -
Page 17: Basic Engine Adjustments
(L for low speed) and highspeed mixture composition screw (H for high speed). Default mixture composition screws settings for Nitro 200 engine are as follows: The L screw unscrewed for 1 turn from closed position. -
Page 18: Other Maintenance Operations
• Pay special attention to all leakages, scratches and atypical stains. In case of any • doubts, contact an Air Conception representative. Check the frame and the propeller cage. Check the construction’s geometry. Inspect • thoroughly harness settings, condition of tapes, carbines and braking system. - Page 19 Compression of the 6 exhaust springs is very important. Too tight springs will create stress on the exhaust system and may cause exhaust cracking. Springs that are not tight enough with a length of more than 10 mm may also cause exhaust cracking. Not tight enough transmission belt may cause the engine hard or impossible to start and will cause accelerated belt wear.
- Page 20 Every 50 hours or once a year: The same as every 25 hours plus: 1. Replace the starter rope (if any). 2. Check the exhaust silencer condition. 3. Replace the transmission belt (non-clutch engine only). Every 100 hours: The same activities as every 50 hours plus: 1.
-
Page 21: Tightening Torque
8. Tightening torque 23 Nm M8 Cylinder head nuts 10 Nm M5 Crankcase screws 26 Nm Spark-plug 15 Nm M6 and M8 reduction screws 4 Nm M5 reed valve body screws M5 crankcase screws 10 Nm M10 Crankshaft pulley nut 40 Nm M5 Ignition coil screws 10 Nm... -
Page 22: Technical Specifications Of Nitro & Tornado Engine
9. Technical specifications of Nitro & Tornado engine Nitro 200 Tornado 280 Engine Engine type Two-stroke Two-stroke Power 28 Hp @ 7500 rpm 33 Hp @ 7500 rpm Capacity 190 cc 268 cc Cooling Air cooled Air cooled Cylinder bore diameter... -
Page 23: Electric Scheme (E-Start Engine Only)
10. Electric scheme (e-start engine only) 19/04/2019 V2.0 Page 23 of 24... -
Page 24: Warranty And Service
Your invoice is the document confirming your warranty rights. Air Conception grants 24-month warranty on new paramotors from the day of purchase as indicated in the invoice. Air Conception also grants a of 5 years warranty extension option for all American customers.
Need help?
Do you have a question about the NITRO 200 and is the answer not in the manual?
Questions and answers