CeoTronics CT-DECT Multi Operating Instructions Manual
Hide thumbs
Also See for CT-DECT Multi:
- Operating instructions manual (20 pages) ,
- Instructions manual (20 pages) ,
- Operating instructions manual (20 pages)
Table of Contents
Advertisement
Quick Links
Advertisement
Table of Contents

Related Manuals for CeoTronics CT-DECT Multi


Summary of Contents for CeoTronics CT-DECT Multi
- Page 1 CT-DECT Multi Operating Instructions...
-
Page 2: Table Of Contents
Operation ............................10 First commissioning ......................10 3.1.1 Recharging the NiMH rechargeable batteries..............10 3.1.2 On-air subscription of the CT-DECT Multi (PP) to the CT-DECT Case (8) (FP) ....12 Commissioning........................14 3.2.1 Fasten the CT-DECT Multi (PP) on your clothing..............14 3.2.2 Connect the headset to the CT-DECT Multi (PP) ..............14 3.2.3... -
Page 3: Technical Safety Instructions, Environment Protection, Safety At Work
Before using CeoTronics products read completely the appropriate operating instructions. If in doubt, ask our technical staff. If repair work of any kind needs to be done to CeoTronics products, arrange for it to be performed only by the company CeoTronics or by a specialized workshop that is authorized by CeoTronics. In all other cases our warranty and liability for the product shall lapse. - Page 4 The radio equipment may only be used for the specific application envisaged. Should equipment, supplied by CeoTronics, be definitely put out of service you may return it to CeoTronics. We ensure recycling and/or disposal of outdated equipment in compliance with the applicable environment protection law.
- Page 5 Important Notes for operation of the CT-DECT System in the USA Please note that any changes or modifications not expressly approved by the party responsible for compliance will void the user’s authority to operate the equipment. This device complies with part 15 of the FCC Rules. Operation is subject to the following two conditions: (1) This device may not cause harmful interference, and (2) this device must accept any interference received, including interference that may cause undesired operation.
-
Page 6: Description
The "CT-DECT Multi (PP)" is used normally with his associated CT-DECT Case (8) (FP) and must be subscribed to it. The use of a CT-DECT Multi (PP) with another CT-DECT Case (8) (FP) is only possi- ble, if the CT-DECT Multi (PP) subscribed to it. -
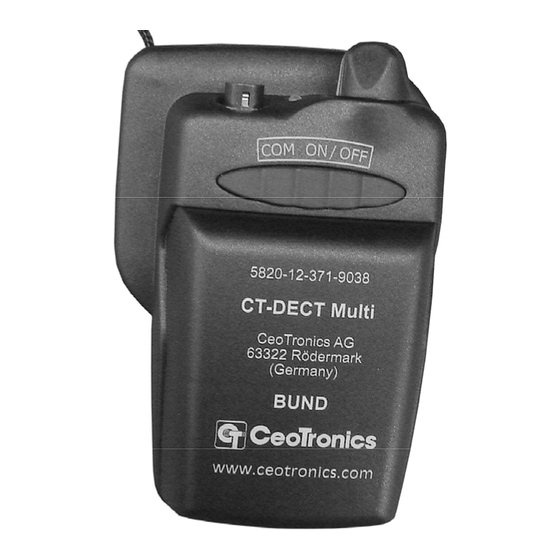
Page 7: Technical Data
Technical data Unit is equipped with - Battery compartment for 3 AA-batteries - Acoustic multilevel warning „Low-Battery“ in the connected headset - Optical warning „Low-Battery“ - Volume switch with ON/OFF-function - 6-pole socket for headsets - Fall protection cord Technical Data Frequency band 1920 –... -
Page 8: Technical Description
CT headset) if previously it was switched-on. Only the user establishing the intercom connection is connected through to the aircraft. - All five pushbuttons can be used for subscription of the CT-DECT Multi (PP) to the base device (FP) for example a CT-DECT Case... - Page 9 2.2.1 Power supply Power for the CT-DECT Multi is supplied either by three rechargeable batteries or by 3 alkaline batter- ies in the battery compartment. 2.2.2 Audio signals used Two different audible tones are used for signaling the operating status via the communication set con- nected to the device.
-
Page 10: Operation
Charge rechargeable batteries only within a building or similar environment that does not contain dangerous concentrations of volatile vapors. The three NiMH batteries are in the battery compartment of the CT-DECT Multi. For charging they have to be removed from the battery compartment. - Page 11 c. Take the three NiMH batteries out the battery compartment. Charge the rechargeable batteries with the charger. d. After charging: When inserting recharged NiMH batteries, attend to the polarity. Fit the two hooks of the battery compartment cover into the two openings at the compartment’s bottom (Fig. 8) and press the cover against the compartment until it is engaged.
-
Page 12: On-Air Subscription Of The Ct-Dect Multi (Pp) To The Ct-Dect Case (8) (Fp)
The on-air subscription is not part of the normal commissioning and operating procedure for the system. It must be performed again only in the case a CT-DECT Multi (PP) that isn't subscribed to the CT-DECT Case (8) has to be used in conjunction with the CT-DECT Case (8). - Page 13 »d« in order to avoid a »timeout«. d. Press on the CT-DECT Multi (PP) at least one of the five buttons of the push-button bank and keep it depressed. Switch the CT-DECT Multi (PP) on while depressing the button and keep it depressed for at least another 5 seconds since switch-on until you hear a descending 5-tone sequence in your headset.
-
Page 14: Commissioning
3.2.1 Fasten the CT-DECT Multi (PP) on your clothing Fasten the CT-DECT Multi at a suitable place on your clothing. Take care that your mobility is not im- paired and the CT-DECT Multi (PP) can be operated without any problem. -
Page 15: Controls
Controls Duplex communication between »mobile« users After switch-on of the CT-DECT Case (8) and the CT-DECT devices (PP) and successfully completed automatic establishment of connection (see chapter 3.2.3) the units are ready for duplex communica- tion within the working range between CT-DECT devices (PP) and CT-DECT Case (8). Microphones and headsets are permanently switched on. -
Page 16: Faults, Causes, Corrective Actions
Replacing components 5.1.1 Remarks regarding maintenance work/repairs on the CT-DECT Multi After repairing the portable radio in factory, the repaired CT-DECT Multi must be subscribed once again to the CT-DECT Case (8). For details, refer to chapter 2.2.2. 5.1.2 Replacing rechargeable batteries Switch the CT-DECT Multi (PP) off. - Page 17 Mounting the cover: insert the two hooks of the battery compartment cover into the openings at the compartment’s bottom (figure 8). Fold the cover upwards and press it against the battery compart- ment until it is engaged. 5.1.4 Replacing the potentiometer knob Rotate the potentiometer knob anticlockwise into OFF position (figure 10).
- Page 18 Notes...
- Page 19 Notes...
- Page 20 Fax +33 1 60286060 E-Mail ventas@ceotronics.es E-Mail ventes@ceotronics.fr Germany and Switzerland Poland International Sales CeoTronics AG CeoTronics Sp. z o.o. CT-Video GmbH Grundstr. 16 ul. Słonecza 15 Gewerbegebiet Rothenschirmbach 9 6343 Rotkreuz 91-491 Łódź (Polska) 06295 Lutherstadt Eisleben Tel. +41 41 7905838 Tel.
Need help?
Do you have a question about the CT-DECT Multi and is the answer not in the manual?
Questions and answers