Table of Contents
Advertisement
Advertisement
Table of Contents

Related Manuals for GTAKE GK500-2T0.4B

Summary of Contents for GTAKE GK500-2T0.4B
-
Page 2: Preface
Preface Thank you for choosing GTAKE GK500 Series Mini AC Motor Drives. This user manual presents a detailed description of GK500 series with respect to product features, structural characteristics, functions, installation, parameter setting, troubleshooting, commissioning and daily maintenance, etc. Be sure to carefully read through the safety precautions before use, and use this product on the premise that personnel and equipment safety is ensured. - Page 3 Summary of Changes The information below summaries changes made in May 2016 for GK500 Series Mini AC Motor Drives User Manual, version A01-EN. Besides there are some changes on the manner of writing, error correction, and designation replacement like control panel instead of keypad, following is the material new or updated information in this user manual.
-
Page 4: Table Of Contents
Table of Contents Preface ......................- 1 - Table of Contents ..................- 3 - Chapter 1 Safety Precautions ..............- 1 - Safety Considerations ..............- 1 - Other Considerations ..............- 5 - Chapter 2 Product Information ..............- 7 - Model Explanation ............... -
Page 5: Table Of Contents
Control Terminal Wiring ............. - 19 - Control Terminal Specification ........... - 21 - Control Terminal Usage ............. - 22 - 3.10 Instruction of Signal Switches ........... - 26 - 3.11 EMI Solutions ................- 26 - Chapter 4 Operation and Run Instructions ..........- 30 - Operation of Control Panel ............ -
Page 6: Chapter 1 Safety Precautions
Users are requested to read this chapter carefully when installing, commissioning and repairing this product and perform the operation according to safety precautions as set forth in this chapter without breach. GTAKE will bear no responsibility for any injury and loss as a result of any inappropriate operation. - Page 7 Chapter 1 Safety Precautions GK500 User Manual This equipment must be mounted on metal or other flame retardant objects. Failure to comply may result in fire. This equipment must be mounted in an area which is away from combustibles and heat sources.
- Page 8 RA, RB and RC. Failure to comply will result in equipment damage. ATTENTION Since all adjustable frequency AC drives from GTAKE have been subjected to hi-pot test before delivery, users are prohibited from implementing such a test on this equipment. Failure to comply may result in equipment damage.
- Page 9 ATTENTION Make sure the number of phases of power supply and rated voltage are consistent with product nameplate. If not, contact the seller or GTAKE. Check there are no short circuits in peripheral circuits connected with the drive, and make sure the connection is tight.
-
Page 10: Other Considerations
GK500 User Manual Chapter 1 Safety Precautions All pluggable components can be inserted or pulled out only when power has been cut off. 1.2 Other Considerations 1.2.1 Input Power Supply This series of drives are not applicable to applications out the range of operating voltage as set forth in this manual. - Page 11 Chapter 1 Safety Precautions GK500 User Manual drive since this may result in drive damage as a result of over-temperature. 1.2.5 Insulation of the motor In view of the fact that the drive output is PWM high frequency chopping voltage accompanied by higher harmonics, the noise, temperature rise and vibration of the motor is higher compared with sinusoidal voltage.
-
Page 12: Chapter 2 Product Information
GK500 User Manual Chapter 2 Product Information Chapter 2 Product Information 2.1 Model Explanation Model shown on product nameplate indicates the series name, applicable type of power supply, power class and the version of software and hardware, etc. via the combination of numbers, symbols and letters. -
Page 13: Information Of Product Model
Triphase Single-phase Applicable Brake Model rating current input current input current motor Voltage unit (kW) (A) (A) (A) (kW) GK500-2T0.4B GK500-2T0.75B 0.75 0.75 200V* GK500-2T1.5B 14.5 GK500-2T2.2B inbuilt GK500-4T0.75B 0.75 0.75 GK500-4T1.5B 400V GK500-4T2.2B GK500-4T3.7B 14.9 * 200V drives are applicable for triphase 200V and single-phase 200V. - Page 14 GK500 User Manual Chapter 2 Product Information Output frequency 0.00~ 600.00Hz; unit: 0.01Hz (Hz) Power output Overload 150% - 1min; 180% - 10s; 200% - 0.5s capacity V/f control V/f patterns Sensor-less vector control 1 Speed regulation 1:100 ( V/f , sensor-less vector control 1) range Speed ±0.5% (V/f control)
- Page 15 Chapter 2 Product Information GK500 User Manual DC brake start frequency: 0.00~600.00Hz DC brake DC brake current: 0.0~100.0% capacity DC brake time: 0.0~30.00s Input 4 digital inputs terminals 1 analog, current/voltage programmable 1 digital output Basic 1 relay output Output functions 1 analog output, voltage/current programmable;...
-
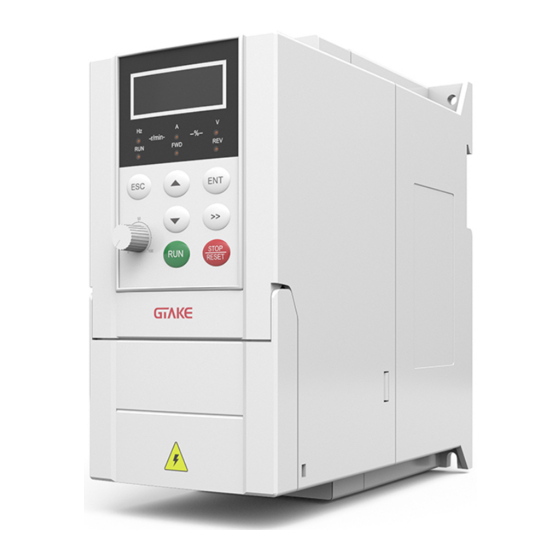
Page 16: Parts Drawing
GK500 User Manual Chapter 2 Product Information 2.5 Parts Drawing Mounting holes DIN-rail groove Nameplate Control panel Lower casing Cover Middle casing Fig. 2-3 Parts drawing 2.6 Configuration, Mounting Dimensions and Weight Fig. 2-4 External dimensions - 11 -... -
Page 17: External Dimensions Of Control Panel
Chapter 2 Product Information GK500 User Manual Table 2-3 Dimensions and weight Dimensions(mm) Weight Model (kg) Mounting holes (dia) GK500-2T0.4B GK500-2T0.75B 1.25 GK500-4T0.75B GK500-4T1.5B GK500-2T1.5B GK500-2T2.2B GK500-4T2.2B GK500-4T3.7B 2.7 External Dimensions of Control Panel Control panel model of GK500 series mini AC motor drive is KBU-BX2 whose configuration and external dimensions are shown in Fig. - Page 18 GK500 User Manual Chapter 2 Product Information Fig. 2-6 Cabinet hole dimensions when control panel remote mounting required - 13 -...
-
Page 19: Chapter 3 Installation And Wiring
Chapter 3 Installation and Wiring GK500 User Manual Chapter 3 Installation and Wiring 3.1 Installation Environment 1) Ambient temperature should be in the range of -10℃~ 50℃. 2) Drive should be installed on surface of flame retardant object, with adequate surrounding space for heat dissipation. -
Page 20: Remove & Mount The Control Panel And Cover
GK500 User Manual Chapter 3 Installation and Wiring ATTENTION: If several drives are mounted in one cabinet, parallel side-by-side mounting is recommended. 3.3 Remove & Mount the Control Panel and Cover 3.3.1 Remove and Mount the Control Panel Remove control panel Press the buckle of control panel as indicated by number "1"... -
Page 21: Selection Of Peripheral Devices
Fig. 3-3 Open and close the cover 3.4 Selection of Peripheral Devices Table 3-1 Selection of peripheral devices Brake unit Breaker Contactor Model (A) (A) Power(W) Resistor(Ω) ≥200 GK500-2T0.4B ≥200 GK500-2T0.75B ≥100 GK500-2T1.5B ≥75 GK500-2T2.2B ≥150 GK500-4T0.75B ≥100 GK500-4T1.5B ≥75 GK500-4T2.2B... -
Page 22: Terminal Configuration
GK500 User Manual Chapter 3 Installation and Wiring 3.5 Terminal Configuration Ground terminal Main circuit terminal Control circuit terminal Main circuit terminal Ground terminal Fig. 3-4 Terminal configuration 3.6 Main Circuit Terminals and Wiring WARNING Only qualified personnel familiar with AC motor drives are allowed to implement wiring. - Page 23 Table 3-2 Terminal screw and wiring requirement Power terminal Ground terminal Model Cable Torque Cable Torque Scew Screw (kgf . cm) (kgf . cm) (mm ) (mm ) GK500-2T0.4B M3.5 15±0.5 M3.5 15±0.5 GK500-2T0.75B M3.5 15±0.5 M3.5 15±0.5 - 18 -...
-
Page 24: Control Terminal Wiring
GK500 User Manual Chapter 3 Installation and Wiring Power terminal Ground terminal Model Cable Torque Cable Torque Scew Screw (kgf . cm) (kgf . cm) (mm ) (mm ) GK500-2T1.5B M3.5 15±0.5 M3.5 15±0.5 GK500-2T2.2B M3.5 15±0.5 M3.5 15±0.5 GK500-4T0.75B M3.5 15±0.5 M3.5... - Page 25 Chapter 3 Installation and Wiring GK500 User Manual Brake Resistor Contactor Braker + /B1 L1/L U/T1 V/T2 Power GK500 W/T3 L3/N Supply Motor Power Grounding supply grounding +24V Keypad 485+ Digital In 1 MODBUS 485- Digital In 2 COMM Digital In 3 Digital In 4 Relay Out 1 250V AC/3A...
-
Page 26: Control Terminal Specification
GK500 User Manual Chapter 3 Installation and Wiring Control Terminal Specification Table 3-3 Control terminal specification Category Terminal Terminal Specification designation 10.3V ±3% Analog input Maximum output current 25mA +10V reference The resistance of external potentiometer voltage should be larger than 400Ω Analog ground Connect with COM interiorly Analog... -
Page 27: Control Terminal Usage
Control panel when connected to Control panel panel interface interface Use GTAKE dedicated cable 3.9 Control Terminal Usage 3.9.1 Lay-out of Control Terminals Fig. 3-6 Lay-out of control terminals 3.9.2 Control Terminal Screw and Wiring Requirement Table 3-6 Terminal screw and wiring specification... - Page 28 GK500 User Manual Chapter 3 Installation and Wiring 3.9.4 Instructions of Digital Input/Output Terminals Digital input & output signals cables should be as short as possible, shielded, and their shielded layers should be properly grounded close to the side of drive. The cables should not exceed 20m.
- Page 29 Chapter 3 Installation and Wiring GK500 User Manual +24V Shorter- Drive External circuiter Controller +24V Shielded Cable Near-end Grounded Fig. 3-8 Dry contact wiring (activated at X-terminal high level) Open collector +24V Shorter- External Drive circuiter Controller Shielded Cable Near-end Grounded Fig.
- Page 30 GK500 User Manual Chapter 3 Installation and Wiring External +24V Controller Shorter- Drive circuiter +24V Shielded Cable Near-end Grounded Fig. 3-10 Open collector PNP wiring Instructions of digital output terminal Instructions of Y output terminal +24V +24V ≤30V Pull-up Pull-up resistor...
-
Page 31: Instruction Of Signal Switches
Chapter 3 Installation and Wiring GK500 User Manual ATTENTION: When relay coil voltage is lower than 24V, a resistor as voltage divider selected based on coil impedance should be mounted between relay and output terminal,. Wiring instruction of relay output terminal RA/RB/RC are relay contacts. - Page 32 GK500 User Manual Chapter 3 Installation and Wiring 3.11.1 Noise Abatement When peripheral equipment and drive share the power supply of one system, noise from drive may be transmitted to other equipment in this system via power lines and result in misoperation and/or faults.
- Page 33 Chapter 3 Installation and Wiring GK500 User Manual Use to the fullest extent the maximum standard size of grounding cables to reduce the impedance of grounding system; Grounding wires should be as short as possible; Grounding point shall be as close to the drive as possible; ...
- Page 34 GK500 User Manual Chapter 3 Installation and Wiring instructions during the use: Enclosure of the filter needs to be reliably grounded; Input lines of the filter shall be kept as far away from output lines as possible so as to avoid mutual coupling;...
-
Page 35: Chapter 4 Operation And Run Instructions
Chapter 4 Operation and Run Instructions GK500 User Manual Chapter 4 Operation and Run Instructions 4.1 Operation of Control Panel As a human-machine interface, control panel is the main part for the drive to receive command and display parameters. Fig. 4-1 Control panel 4.2 Key Functions On control panel there are 7 keys and 1 knob whose functions are as shown in Table 4-1. -
Page 36: Control Panel Indicators
GK500 User Manual Chapter 4 Operation and Run Instructions Symbol Key name Meaning 1) Selection of parameter code serial digital 2) Selection of parameter value edited digital Shift key >> 3) Selection of stop/run-status displayed parameters 4) Fault status switched to parameter displayed status Run key Stop/reset 1) Stop... -
Page 37: Potentiometer Setting
Chapter 4 Operation and Run Instructions GK500 User Manual 4.4 Potentiometer Setting Potentiometer could be frequency setting source or process PID setting programmed by related parameters. When b0-01 is set to 3, potentiometer is source of master frequency setting. When b0-03 is set to 4, potentiometer is source of auxiliary frequency setting. When ones place, tens place, or hundreds place of b1-01 is set to 4, potentiometer would be working as frequency setting source of corresponding run command source. -
Page 38: Parameter Setting
GK500 User Manual Chapter 4 Operation and Run Instructions 4.6 Parameter Setting 4.6.1 Parameter System GK500 series drive parameter group: A0, b0~b2, C0~C4, d0~d2, E0~E1, F0~F1, H0, L0~L1, U0~U1. Each parameter group contains a number of parameters. Parameter codes are identified by the combination "parameter group character + parameter subgroup number + parameter number". -
Page 39: Chapter 5 List Of Parameters
Chapter 5 List of Parameters GK500 User Manual Chapter 5 List of Parameters GK500 parameter groups are listed below: Category Parameter group Related pages Group A: system parameters A0: system parameters b0: frequency setting Group b: run parameter b1: start/stop control setting b2: Accel/Decel parameters C0: digital input... - Page 40 GK500 User Manual Chapter 5 List of Parameters Factory Param Designation Range Attr default Group A: System Parameter Group A0: System Parameter △ A0-00 Setting of user password 0~FFFF 0000 0: All parameter programming allowed A0-02 Parameter protection × 1: Only A0-00 and this parameter programming allowed 0: No operation 1: Clear fault history...
- Page 41 Chapter 5 List of Parameters GK500 User Manual Factory Param Designation Range Attr default △ b0-02 Master Freq digital setting Lower limit Freq ~ upper limit Freq 50.00Hz 0: No setting 1: Digital setting (b0-04) + ∧/∨ adjustment on control panel 2: Digital setting (b0-04) + terminal UP/DOWN adjustment b0-03 Auxiliary frequency set...
- Page 42 GK500 User Manual Chapter 5 List of Parameters Factory Param Designation Range Attr default Upper limit of skip 0.00Hz~upper limit frequency b0-18 0.00Hz × frequency band 3 △ b0-19 Jog frequency 0.00Hz~upper limit frequency 5.00Hz Group b1 Start/Stop Control 0: Control panel control b1-00 Run command 1: Terminal control ×...
- Page 43 Chapter 5 List of Parameters GK500 User Manual Factory Param Designation Range Attr default b1-10 Flying start current 0.0~200.0% 100.0% × b1-11 Flying start decel time 0.1s~20.0s 2.0s × 0: Ramp to stop b1-13 Stop method 1: Coast to stop ×...
- Page 44 GK500 User Manual Chapter 5 List of Parameters Factory Param Designation Range Attr default Accel time switching △ b2-13 frequency of broken-line 0.00Hz~upper limit frequency 0.00Hz Accel/Decel Decel time switching △ b2-14 frequency of broken-line 0.00Hz~upper limit frequency 0.00Hz Accel/Decel Time of Accel S-curve first △...
- Page 45 Chapter 5 List of Parameters GK500 User Manual Factory Param Designation Range Attr default 21: Accel/Decel disabled(ramp stop not inclusive) 22: External fault input 23: Fault reset (RESET) 27: Run command switched to control panel control 28: Run command switched to terminal control 29: Run command switched to communication control...
- Page 46 GK500 User Manual Chapter 5 List of Parameters Factory Param Designation Range Attr default Ones place: at stop 0: Cleared 1: Maintained Tens place: on power loss 0: Cleared 1: Maintained Terminal UP/DOWN FREQ △ C0-17 Hundreds place: integral function 0100 adjustment action 0: No integral function...
- Page 47 Chapter 5 List of Parameters GK500 User Manual Factory Param Designation Range Attr default 11: Frequency detection FDT2 13: Torque limited 14: Fault output 15: Alarm output 16: Drive (motor) overloaded alarm 17: Drive overheat alarm 18: Zero current detection 19: X1 20: X2 25: Consecutive run time attained...
- Page 48 GK500 User Manual Chapter 5 List of Parameters Factory Param Designation Range Attr default Tens place: Control panel potentiometer input curve (same as Ones place) C2-01 Curve 1 maximum input Curve 1 minimum input ~ 110.0% 100.0% △ Corresponding set value of C2-02 -100.0%~100.0% 100.0%...
- Page 49 Chapter 5 List of Parameters GK500 User Manual Factory Param Designation Range Attr default Control panel △ C2-22 potentiometer input filtering 0.000s~10.000s 0.01s time Group C3 Analog Output 0: No output 1: Set frequency 2: Output frequency 3: Output current (related to drive rated current) 4: Output torque 5: Output voltage...
- Page 50 GK500 User Manual Chapter 5 List of Parameters Factory Param Designation Range Attr default Input value of AI calibration C4-04 9.00V × Range: 0.00V~10.00V point 2 Sampling value of ◎ C4-05 1.00V calibration point 1 of control Range: 0.00V~10.00V panel potentiometer Input value of calibration C4-06 1.00V...
- Page 51 Chapter 5 List of Parameters GK500 User Manual Factory Param Designation Range Attr default Motor flux weakening coeff Model d0-12 0.0000~1.0000 × dependent Motor flux weakening coeff Model d0-13 0.0000~1.0000 × dependent Motor flux weakening coeff Model d0-14 0.0000~1.0000 × dependent 0: No autotuning Motor parameter...
- Page 52 GK500 User Manual Chapter 5 List of Parameters Factory Param Designation Range Attr default △ d1-15 Energy saving percentage 0%~40.0% 0.0% V/f oscillation suppression △ d1-16 0~3000 gain 1 V/f oscillation suppression △ d1-17 0~3000 gain 2 Group d2 Motor Vector Control Parameters ASR high-speed △...
- Page 53 Chapter 5 List of Parameters GK500 User Manual Factory Param Designation Range Attr default Group E Enhanced Function and Protection Parameters Group E0 Enhanced Function △ E0-00 Switching frequency 0.7kHz~12.0kHz 8.0kHz Ones place: switching frequency relation with temperature 0: Self-adaption 1: No adaption Tens place: PWM modulation mode...
- Page 54 GK500 User Manual Chapter 5 List of Parameters Factory Param Designation Range Attr default 0: Disabled E1-02 Undervoltage stall × 1: Enabled Ones place: detection option: 0: Always detect 1: Detect at constant speed only Tens place: compared with: E1-03 Overload alarm 0: Motor rated current ×...
- Page 55 Chapter 5 List of Parameters GK500 User Manual Factory Param Designation Range Attr default fault occurs 0: No action 1: Action enabled Tens place: when fault locked 0: No action 1: Action enabled Hundreds place: at interval of auto- reset 0: No action 1: Action enabled Drive overheat alarm...
- Page 56 GK500 User Manual Chapter 5 List of Parameters Factory Param Designation Range Attr default △ F0-10 Differential time Td1 0.0s~100.0s 0.0s △ F0-11 Proportional gain Kp2 0.0~100.0 50.0 △ F0-12 Integration time Ti2 0.001s~50.000s 0.500s △ F0-13 Differential time Td2 0.0s~100.0s 0.0s 0: No switch, determined by...
- Page 57 Chapter 5 List of Parameters GK500 User Manual Factory Param Designation Range Attr default panel ∧/∨ adjustment 2: Digital setting b0-04 + terminal UP/DOWN 3: AI 4: Control panel potentiometer 7: Process PID output 8: Communication Lower limit frequency ~ upper limit △...
- Page 58 GK500 User Manual Chapter 5 List of Parameters Factory Param Designation Range Attr default Group H Communication Parameters Group H0 MODBUS Communication Parameters Ones place: baud rate 0: 4800bps 1: 9600bps 2: 19200bps 3: 38400bps 4: 57600bps Tens place: data format 0: 1-8-2-N format, RTU 1: 1-8-1-E format, RTU RS-485 port...
- Page 59 Chapter 5 List of Parameters GK500 User Manual Factory Param Designation Range Attr default Group L Keys and Display of Control Panel Group L0 Keys of Control Panel 0: Not locked 1: All locked 2: Keys locked except RUN, △ L0-01 Keys locked selection STOP/RESET 3: Keys locked except...
- Page 60 GK500 User Manual Chapter 5 List of Parameters Factory Param Designation Range Attr default BIT1: Output power (kW) BIT2: Output voltage (V) BIT3: Motor speed (r/min) Hundreds place: BIT0: AI (V) BIT1: Control panel potentiometer BIT2: Input terminal status BIT3: Output terminal status Thousands place: BIT0: PID setting (%) BIT1: PID feedback (%)
- Page 61 Chapter 5 List of Parameters GK500 User Manual Factory Param Designation Range Attr default Group U Monitoring Group U0 Status Monitoring ◎ U0-00 Run frequency 0.00Hz~600.00Hz 0.00Hz ◎ U0-01 Set frequency 0.00Hz~600.00Hz 0.00Hz ◎ U0-02 Bus voltage 0V~65535V ◎ U0-03 Output voltage 0V~65535V ◎...
- Page 62 GK500 User Manual Chapter 5 List of Parameters Factory Param Designation Range Attr default 0: No fault source Current detection fault 1: IU ◎ U0-39 source 2: IV 3: IW Higher-bit digital of control ◎ U0-42 panel ∧/∨ stored value Lower-bit digitals of control panel ∧/∨...
- Page 63 Chapter 5 List of Parameters GK500 User Manual Factory Param Designation Range Attr default 37: Reference protection 38: 5V power supply out-of-limit 40: AI input out-of-limit 41: Undervoltage protection 45: PID feedback loss 46: Interior communication abnormal ◎ U1-01 Fault 1 run frequency 0.00Hz~600.00Hz 0.00Hz ◎...
- Page 64 GK500 User Manual Chapter 5 List of Parameters Remark: FWD/REV terminal control C0-19 Range: 0~3 Factory default: 0 mode There are four different types when run command is determined by FED/REV terminal. This terminal control mode takes no effect on JOG. 0: Two-wire mode 1 FWD terminal inputs forward run command, while REV terminal inputs reverse run command.
- Page 65 Chapter 5 List of Parameters GK500 User Manual +24V Three-wire 三线式运 行端子Xi terminal 变 频 器 Drive Fig. 5-3 Three-wire mode 1 SB1 is a stop button, by pressing which the drive will stop; SB2 is a FORWARD button, by pressing which forward run will be activated; SB3 is a REVERSE button, by pressing which reverse run will be activated.
- Page 66 GK500 User Manual Chapter 5 List of Parameters Factory default: C1-11 FDT1 lower bound Range: 0.00Hz~ maximum freq 49.00Hz These parameters should be used with frequency detection signal FDT1 and FDT2. Take FDT1 for example, when the drive output frequency exceeds upper bound of FDT1, it will output ON signal, and it will output OFF signal when the output frequency is lower than lower bound of FDT1.
- Page 67 Chapter 5 List of Parameters GK500 User Manual When it is 0~20mA: 0mA corresponds to 0%, 20mA corresponds to 100%. Potentiometer only supports 0~10V voltage input. Corresponding set values of C2-02, C2-04: When corresponding set value is frequency: 100% is maximal frequency, -100% is negative maximal frequency;...
- Page 68 GK500 User Manual Chapter 5 List of Parameters Specification of curve 2 input value is as below. Voltage input: 1) AI: 0% corresponds to 0V or 0mA, 100% corresponds to 10V or 20mA. 2) Potentiometer: 0% corresponds to 0V, 100% corresponds 10V. Curve 2 is defined by C2-05~C2-12.
- Page 69 Chapter 5 List of Parameters GK500 User Manual Additional examples are shown as below: AO1 output after adjustment AO1调整后输出 (C3-04) = 200% (C3-04) = 100% AO standard output AO1标准输出 Fig. 5-12 Diagram of influence of AO gain on output AO output after adjustment AO1调整后输出...
- Page 70 GK500 User Manual Chapter 5 List of Parameters ATTENTION: Set the theoretical value or actual value of analog voltage in C4-06 and C4-08. This value can be either the set value of analog output of peripheral equipment, or the actual voltage value of analog input measured by a multimeter or other instruments.
-
Page 71: Fault Causes And Troubleshooting
Chapter 6 Troubleshooting GK500 User Manual Chapter 6 Troubleshooting 6.1 Fault Causes and Troubleshooting Once drive fault occurs, please identify the causes of fault carefully and make a detailed record of fault symptom. To seek services, please contact the dealer. Parameters U1-00, U1-09 and U1-18 are used to view the fault history of fault 1 (fault 1 = the most recent fault), fault 2 (fault 2 = the second most recent fault), and fault 3 (fault 3 = the third most recent fault). - Page 72 GK500 User Manual Chapter 6 Troubleshooting Fault Fault Fault Causes Solutions code Display description Output short circuit Check motor (phase-to-phase connection and short circuit or output output ground ground short circuit) impedance Overload is too Constant Reduce the load heavy speed overcurrent Power rating of the...
- Page 73 Chapter 6 Troubleshooting GK500 User Manual Fault Fault Fault Causes Solutions code Display description Improper parameter Properly set regulator setting of regulator parameters under SVC control Load inertia is too big Use dynamic braking Abnormal input Check power grid voltage voltage Output short circuit Check motor...
- Page 74 GK500 User Manual Chapter 6 Troubleshooting Fault Fault Fault Causes Solutions code Display description Bad motor Check motor connection connection Identification in Identification during Autotune stationary status of rotation of the motor failed the motor Bias between motor Set the parameters parameters and their correctly according to setting is too big...
- Page 75 Chapter 6 Troubleshooting GK500 User Manual Fault Fault Fault Causes Solutions code Display description Improper setting of Properly set the motor overloaded motor overloaded protection time protection time Identify the causes of Motor stalled or motor stalling or sharp variation of check the load load condition...
- Page 76 GK500 User Manual Chapter 6 Troubleshooting Fault Fault Fault Causes Solutions code Display description Module Module detection Seek services temperature circuit damaged detection Thermistor damaged Seek services disconnected Ambient temperature Raise ambient is too low temperature External fault Check the status of External terminal is enabled external fault terminal...
- Page 77 Chapter 6 Troubleshooting GK500 User Manual Fault Fault Fault Causes Solutions code Display description PID feedback Check feedback channel abnormal channel PID detection out-of-limit PID parameters not Set properly properly set Internal communication chip Seek services failed Interior COMM. alarm Check surrounding Severe surrounding equipment and seek...
-
Page 78: Chapter 7 Maintenance
GK500 User Manual Chapter 7 Maintenance Chapter 7 Maintenance Ambient temperature, humidity, salt mist, dust, vibration, aging and wear of internal components may result in drive faults. Routine maintenance shall be performed during the use and storage. ATTENTION: Please make sure the power supply of the drive has been cut off, and DC bus voltage has discharged to 0V before the maintenance. -
Page 79: Regular Maintenance
Chapter 7 Maintenance GK500 User Manual Inspection Inspection Inspection aspects Criteria items methods No abnormal heating and Thermal status Smell scorching smell Motor Noise Listen No abnormal noise Observe, No abnormal vibration and Vibration listen sound Power supply input Ammeter In the range of requirement current Power supply input... -
Page 80: Replacement Of Vulnerable Parts
GK500 User Manual Chapter 7 Maintenance Inspection items Measures Check if control terminal screws are loose Tighten Check if main circuit terminal screws are loose Tighten Check if ground terminal screws are loose Tighten Check if drive mounting screws are loose Tighten Check if there are damage on power cables and Replace the damaged cables... -
Page 81: Storage
Chapter 7 Maintenance GK500 User Manual parts and components; routine inspection and maintenance also contributes to effective improvement of parts' service life. To prolong the service life of entire drive, the cooling fan, electrolytic capacitor, relay or contactor and other vulnerable parts should be subjected to routine inspection according to the table below. - Page 82 GK500 User Manual Chapter 7 Maintenance ATTENTION: Since long-term storage may lead to the deterioration of electrolytic capacitor, the inverter must be powered on once in case storage period exceeds 2 years. During the power-on, input voltage must be boosted to rated value gradually using a voltage regulator, and be sure to have the inverter operate at no load for more than 5 hours.
Need help?
Do you have a question about the GK500-2T0.4B and is the answer not in the manual?
Questions and answers