Table of Contents
Advertisement
Advertisement
Table of Contents

Related Manuals for GTAKE GK600E-4T5.5B

Summary of Contents for GTAKE GK600E-4T5.5B
- Page 2 Preface Thank you for choosing GTAKE GK600E Series Elevator Dedicated Drives. This user manual presents a detailed description of GK600E series with respect to product features, structural characteri s tics, functions, installation, parameter setting, troubleshooting, commissioning and daily maintenance, etc. Be sure to carefully read through the safety precautions before use, and use this product on the premise that personnel and equipment safety is ensured.
-
Page 3: Table Of Contents
Table of Contents Chapter 1 Safety Precautions ....................- 1 - Safety Considerations ..................- 1 - Other Considerations ..................- 5 - Chapter 2 Product Inform ation ..................- 7 - Model Explanation ....................- 7 - Nameplate Information ..................- 7 - Information of Product Model ................- 8 - Technical Features of GK600E................- 8 - Parts Draw ing....................- 11 - Appearance, Mounting Dimensions and Weight..........- 12 -... -
Page 4: Table Of Contents
Control Terminal Specification ................- 30 - Control Terminal Usage ..................- 31 - 3.10 Instruction of Signal Sw itches................- 37 - 3.11 EMI Solutions ....................- 37 - Chapter 4 Operation and Run Instructions ..............- 40 - Operation of Control Panel ................- 40 - Chapter 5 Elevator Dedicated Parameters ..............- 55 - Standard Wiring ....................- 55 - Elevator Sequence ...................- 56 -... -
Page 6: Chapter 1 Safety Precautions
Users are requested to read this chapter carefully when installing, commissioning and repairing this product and perform the operation according to safety precautions as set forth in this chapter without violation. GTAKE bears no responsibility for any injury and loss as a result of any violation. - Page 7 Chapter 1 Safety Precautions GK600E User Manual This equipment must be mounted on metal or other fl a me retardant obj e cts. Failure to comply may result in fire. This equipment must be mounted in an area whi c h i s away from combustibles and heat sources.
- Page 8 RA, RB and RC. Failure to comply may result in equipment damage. ATTENTION Since all adjustable frequency AC drives from GTAKE have been subjected to hi-pot test before delivery, users are prohibited from implementing such a test on this equipment. Failure to comply may result in equipment damage.
- Page 9 Make sure the number of phases of power suppl y and rated voltage are consistent w ith product nameplate. If not, contact the seller or GTAKE. Check there are no short circuits in peripheral circuits connected w ith the drive, and make sure the connection is tight.
-
Page 10: Other Considerations
GK600E User Manual Chapter 1 Safety Precautions ATTENTION Do not touch the electric components with bare hands during maintenance, and troubleshooting. Failure to comply may result in component damage due to ESD. All pluggable components can be inserted or pulled out only when power has been turned off. - Page 11 Chapter 1 Safety Precautions GK600E User Manual 1.2.5 Insulation of the Motor In view of the fact that the dri v e output is PWM high frequency chopping voltage accompanied by higher harmonics, the noi s e, temperature rise and vibration of the motor is higher compared with sinusoidal voltage.
-
Page 12: Chapter 2 Product Inform Ation
GK600E User Manual Chapter 2 Product Information Chapter 2 Product Information 2.1 Model Explanation Model show n on product nameplate indicates the series name, applicable type of power supply, pow er class and the version of software and hardware, etc. via the combination of numbers, symbols and letters. -
Page 13: Information Of Product Model
Pow er output input Applicable Brake Drive model rating current current motor (kW) chopper (kW) GK600E-4T3.7B 10.5 GK600E-4T5.5B 14.6 GK600E-4T7.5B 20.5 GK600E-4T11B Inbuilt GK600E-4T15B GK600E-4T18.5B 18.5 18.5 GK600E-4T22B GK600E-4T30B 2.4 Technical Features of GK600E Table 2-2 Technical Features of GK600E... - Page 14 Ramp stop + DC brake Dynamic Brake chopper w orking voltage: 650V-750V braking Service time: 0-100.0s; brake chopper is inbuilt as default capacity for GK600E lift dedicated drives at GTAKE Basic DC brake start frequency: 0.00~600.00Hz functions DC brake DC brake current: 0.0~100.0% capacity DC brake time: 0.0~30.00s...
- Page 15 Chapter 2 Product Information GK600E User Manual 7 digital inputs, one of which can be used for high-speed pulse input, and compatible w ith active open collectors Input NPN, PNP and dry contact input. terminals 2 analog inputs, one of which is voltage/current programmable, and the other supports voltage only.
-
Page 16: Parts Draw Ing
GK600E User Manual Chapter 2 Product Information 2.5 Parts Drawing Fans 风扇 Mounting 安装孔 holes Base plate 底板 风扇罩 Fan cov er Control 机箱 Mounting 安装孔 Enclosure 托板 panel holes Dust cover 防尘盖板 bracket Lower 下壳体 Control 操作面板 casing Nameplate panel 铭牌... -
Page 17: Appearance, Mounting Dimensions And Weight
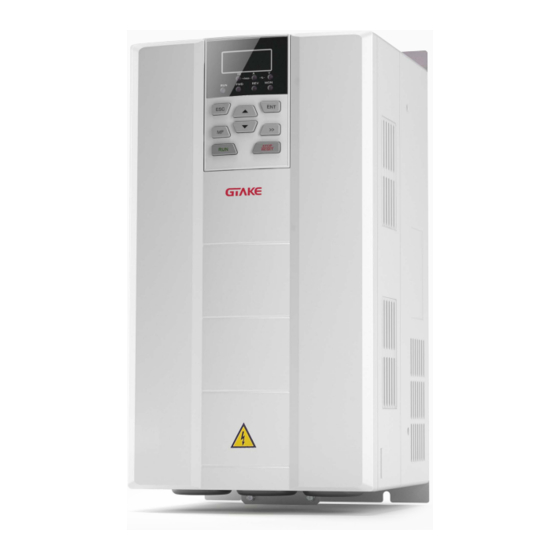
Chapter 2 Product Information GK600E User Manual 2.6 Appearance, Mounting Dimensions and Weight a) GK600E-4T3.7B ~ GK600E-4T15B b) GK600E-4T18.5B ~ GK600E-4T30B Fig. 2-4 External dimensions - 12 -... -
Page 18: External Dimensions Of Control Panel
Chapter 2 Product Information Table 2-3 Appearance, mounting dimensions and weight External and installation dimensions (mm) Weight Model Mounting (kg) hole dia. GK600E-4T3.7B GK600E-4T5.5B GK600E-4T7.5B GK600E-4T11B GK600E-4T15B GK600E-4T18.5B GK600E-4T22B 15.5 GK600E-4T30B 2.7 External Dimensions of Control Panel Control panel model of GK600E series Elevator Dedicated Drives is KBU-BX1 whose appearance and external dimensions are show n in Fig. - Page 19 Chapter 2 Product Information GK600E User Manual dimensions in the cabinet. Panel TH Hole WTH 1.2mm 73.2mm 1.5mm 74.4mm 75.5mm a) External dimensions of KBU-DZ1 b) Hole dimensions in the cabinet Fig. 2-6 External dimensions of KBU-DZ1 and cabinet hole dimensions - 14 -...
-
Page 20: Chapter 3 Installation And Wiring
GK600E User Manual Chapter 3 Installation and Wiring Chapter 3 Installation and Wiring 3.1 Installation Environment ℃ ℃ 1) Ambient temperature is in the range of -10 ~ 40 2) Drive should be installed on surface of flame retardant object, with adequate surrounding space for heat dissipation. -
Page 21: Remove & Mount Control Panel And Cover
Chapter 3 Installation and Wiring GK600E User Manual 空气流通位置 Vent clearance Vent clearance 空气流通位置 Fig. 3-2 Minimum mounting clearances of GK600E-4T18.5B and above ATTENTION: When mounting a drive GK600E-4T18.5B or above, the minimum mounting clearances as set forth in Table 3-1 should be assured. Table 3-1 Requirement of minimum mounting clearances Mounting clearances (mm) Drive model... - Page 22 GK600E User Manual Chapter 3 Installation and Wiring Fig. 3-3 Remove the control panel Fig. 3-4 Mount the control panel 3.3.2 Open & Mount the Covers of GK600E-4T3.7B ~ GK600E-4T15B Rem ove the control panel Use the remove method as stated in Section 3.3.1. ...
- Page 23 Chapter 3 Installation and Wiring GK600E User Manual Mount the cover On the completion of w i r ing, insert the buckle at higher part of the cover into the grooves at middle housing as indicated by number "1" in Fig. 3-6, then push in the lower part of the cover as indicated by "2".
- Page 24 GK600E User Manual Chapter 3 Installation and Wiring Fig. 3-7 Open & mount the covers Mount the upper cover Insert the upper part of the cover into mounting groove as shown in Fig. 3-8 (left), close the upper cover, use cross screwdriver to tighten the four capti v e screws, as indicated by number “1”...
- Page 25 Chapter 3 Installation and Wiring GK600E User Manual ATTENTION: Be sure to remove the control panel before opening the cover and mount the cover before mounting the control panel. - 20 -...
-
Page 26: Configuration Of Peripheral Devices
GK600E User Manual Chapter 3 Installation and Wiring 3.4 Configuration of Peripheral Devices 3.4.1 Standard Configuration of Peripheral Devices Pow er Supply Circuit Breaker or RCD Contactor Input AC Reactor Input Filter DC Choke AC Motor Drive Output Filter Braking Resistor Output AC Reactor Motor Fig. - Page 27 Reduce conducted and radiated interference of the dri v e to peripheral devices Brake unit Purpose: consume motor feedback energy to attain quick brake Type selection: Contact GTAKE technical personnel for type selection of braking brake unit. Refer to type selection of braking resistor in Table 3-3 Type resistor Selection of Peripheral Devices.
- Page 28 Table 3-3 Selection of peripheral devices ■GK600E-4TB, Three phase 400V input Circuit Brake resistor /Brake chopper* Drive model breaker Contactor(A) Pow er (W) Resistance (Ω) ≥75 GK600E-4T3.7B ≥75 GK600E-4T5.5B ≥75 GK600E-4T7.5B ≥30 GK600E-4T11B ≥16 GK600E-4T18.5B 1300 ≥16 GK600E-4T22B 1500 ≥16...
-
Page 29: Terminal Configuration
Chapter 3 Installation and Wiring GK600E User Manual 3.5 Terminal Configuration Control circuit terminals Main circuit terminals Grounding terminals Fig. 3-10 Terminal configuration 3.6 Main Circuit Terminals and Wiring WARNING Only qualified personnel familiar w ith AC motor drives and passenger lift are allowed to implement w iring. - Page 30 GK600E User Manual Chapter 3 Installation and Wiring other terminals since this w ill result in short circuit and equipment damage. Wiring screws and bolts for main circuit terminals must be screwed tightly. Failure to comply may result in faults and/or equipment damage. ATTENTION ...
-
Page 31: Control Terminal Wiring
Cable Cable Drive model Torque Torque requirement Screw requirement Screw (kgf.cm) (kgf.cm) GK600E-4T3.7B 14± 0.5 14± 0.5 GK600E-4T5.5B 14± 0.5 14± 0.5 GK600E-4T7.5B 14± 0.5 14± 0.5 GK600E-4T11B 28± 0.5 14± 0.5 GK600E-4T15B 28± 0.5 14± 0.5 GK600E-4T18.5B 48± 0.5 48±... - Page 32 GK600E User Manual Chapter 3 Installation and Wiring damage, fire, and/or personnel injury exists. Screw s or bolts for terminal w iring must be screwed tightly. AC 220V signal is prohibited from connecting to terminals other than control terminals RA, RB and RC.
- Page 33 Chapter 3 Installation and Wiring GK600E User Manual 3.7.1 Control Board Diagram Option board interface (engaged 操作面板 485 接口 扩展卡接口 by EPC-TM1 as default) Control panel 485 interface 主信号接口 Main signal interf ace 端 模 模 S1: Terminal resistor selection for terminal communication 子...
- Page 34 GK600E User Manual Chapter 3 Installation and Wiring 3.7.2 Wiring Diagram Braking DC Reactor Resistor 1-phase 220VAC 2/B1 Jumper R/L1 U/T1 Three-phase S/L2 V/T2 Power Supply 380V-460V T/L3 W/T3 GK600E 50/60Hz Power Motor Supply Ground Ground +24V Jumper Enable Safety Contacts Run Fwd Control Panel Run Rev...
-
Page 35: Control Terminal Specification
Chapter 3 Installation and Wiring GK600E User Manual 3.8 Control Terminal Specification Table 3-5 Control terminal specification Category Terminal Terminal Specification designation 10.3V ± 3% Analog input Maximum output current 25mA +10V reference The resistance of external potentiometer voltage should be larger than 400Ω Analog ground Isolated from COM interiorly 0~20mA: input impedance - 500Ω, maximum... -
Page 36: Control Terminal Usage
GK600E User Manual Chapter 3 Installation and Wiring Category Terminal Terminal Specification designation RA-RB: NC; RA-RC: NO Control board RA/RB/RC relay output Relay Contact capacity: 250VAC/3A, 30VDC/3A output Option board relay RA/RB/RC Same as control board relay output output 485 differential Rate: 485+ signal +... - Page 37 Chapter 3 Installation and Wiring GK600E User Manual Control cables shall be kept no less than 20cm away from main circuit and strong current lines (e.g. power lines, motor lines, relay lines and contactor lines) and should not be arranged in parallel w ith strong current lines.
- Page 38 GK600E User Manual Chapter 3 Installation and Wiring +24V Drive External +3.3V 20~30V Controller +3.3V X6/DI Shielded Cable Near-end Ground Fig. 3-15 External power supply dry contact ATTENTION: When external power suppl y is used, the jumper between +24V and PLC must be removed. Otherw ise, it may result in equipment damage.
- Page 39 Chapter 3 Installation and Wiring GK600E User Manual Open collector NPN connection +24V Drive External +3.3V Jumper Controller +3.3V X6/DI Shielded Cable Near-end Ground Fig. 3-16 Internal power supply open collector NPN connection +24V Drive External +3.3V 20~30V Controller +3.3V X6/DI Shielded...
- Page 40 GK600E User Manual Chapter 3 Installation and Wiring Open collector PNP connection External Controller +24V Drive +3.3V Jumper +3.3V X6/DI Shielded Cable Near-end Ground Fig. 3-18 Internal power supply open collector PNP connection ATTENTION: When PNP connection is adopted, it is necessary to remove the jumper betw een +24V and PLC, and connect the jumper to PLC and COM.
- Page 41 Chapter 3 Installation and Wiring GK600E User Manual Instructions of digital output terminal Instructions of Y1 and Y2/DO output terminals a) Internal power supply b) External power supply Fig. 3-20 Wiring when Y1 and Y2/DO output with pull-up resistor ...
-
Page 42: Instruction Of Signal Sw Itches
GK600E User Manual Chapter 3 Installation and Wiring 3.10 Instruction of Signal Switches Fig. 3-22 Jumper diagram of signal switching Default Designation Function setting Selection of 485 termination resi s tor; ON :100Ω termination resistor provided; OFF: no termination resistor Type Selection of AI1 analog signal: V: 0~10V I: current input (0~20mA);... - Page 43 Chapter 3 Installation and Wiring GK600E User Manual Signal lines should be provided w ith shielded layer and reliably grounded. Alternatively, signal cable could be put into metallic conduits between which the distance shall be no less than 20cm, and shall be kept as far away from the drive, its peripheral devices, and cables as possible.
- Page 44 GK600E User Manual Chapter 3 Installation and Wiring 3.11.3 Leakage Current Suppression Leakage current passes through the line-to-line and ground distributed capacitors at input & output sides of drive, and its si z e is associated with the capacitance of distributed capacitor and the switching frequency.
-
Page 45: Chapter 4 Operation And Run Instructions
Chapter 4 Operation and Run Instructions GK600E User Manual Chapter 4 Operation and Run Instructions 4.1 Operation of Control Panel As a human-machine interface, control panel is the main part for the drive to recei v e command and display parameters. Fig. - Page 46 GK600E User Manual Chapter 4 Operation and Run Instructions 1) Stop Stop/reset key 2) Fault reset Multi-function See Table 4-2 " MF key function definition" Table 4-2 MF key function definition L0-00 set Function of MF key Meaning value Disabled MF key disabled Forw ard JOG Forw ard JOG function...
- Page 47 Chapter 4 Operation and Run Instructions GK600E User Manual Indicator Designation Meaning OFF: Stop Flash: Stopping ON: If the drive in stop status, forward command enabled. If the drive in run status, the drive is Forw ard indicator running forward Flash: Forw ard is being transferred to reverse ON: If the drive in stop status, reverse command enabled.
- Page 48 GK600E User Manual Chapter 4 Operation and Run Instructions to get into parameter edit status (get into password authentication status i f parameter under password protection). Directly get into frequency modification status when recei v e UP/DOWN command from terminal, or pressing on control panel.
- Page 49 Chapter 4 Operation and Run Instructions GK600E User Manual Fig. 4-4 Fault or alarm display status (CCL: Contactor act fault) In such a status, the drive gets into stop status upon receipt of pressing , and would get into parameter edit status when receiving pressing command again (if parameter is under password protection, the dri v e would get into password authentication status).
- Page 50 GK600E User Manual Chapter 4 Operation and Run Instructions 4.1.3.5 Parameter Value Setting Status Enter parameter value setting status upon receipt of pressing w hen in parameter value edit status. When pressing command is received in such a state, escape parameter edit status.
- Page 51 Chapter 4 Operation and Run Instructions GK600E User Manual Fig. 4-7 Direct frequency modification status 4.1.3.8 Prompt Message Status Prompt message status shall be displayed upon the completion of some operations. For instance, the "bASIC" prompt message would be displayed upon the completion of parameter initialization.
- Page 52 GK600E User Manual Chapter 4 Operation and Run Instructions Parameter dow nload from USEr When A0-01 is set to 2 dnLd1 control panel (motor parameter excluded) Parameter dow nload from ndFLt When A0-01 is set to 3 dnLd2 control panel (motor parameter included) LoC-1 Control panel locked 1 (full locked)
- Page 53 Chapter 4 Operation and Run Instructions GK600E User Manual Displayed Character Displayed Character Displayed Character Displayed Character character Meaning character Meaning character Meaning character Meaning 8. . 4.1.4 Setting Method of Parameters 4.1.4.1 Parameter System GK600E series drive parameter groups: A0, A1, b0, b2, C0, C4, d0, d2, E0, E1, F1, F6, H0, L0, L1, U0, U1.
- Page 54 GK600E User Manual Chapter 4 Operation and Run Instructions Fig. 4-9 First-tier display of parameter Second-tier display show n in Fig. 4-10: Fig. 4-10 Second-tier display of parameter ("3" is the value of b0-00) 4.1.4.3 Example of Setting of Parameter Parameter values are di v ided into decimal (DEC) and hexadecimal (HEX) values.
- Page 55 Chapter 4 Operation and Run Instructions GK600E User Manual 2) Press to display parameter value 0000 that belongs to A0-00; 3) Press for six times to change the rightmost digit "0" to "6"; 4) Press to move the flashing digit to the leftmost bit; 5) Press once to change "0"...
- Page 56 GK600E User Manual Chapter 4 Operation and Run Instructions Exam ple of parameter setting Exam ple 1: modify upper limit frequency from 600Hz to 50Hz (change b0-09 from 600.00 to 50.00) 1) In non-parameter edit status, press to display current parameter A0-00; 2) Press to move flashing digit to modification bit (A flashes);...
- Page 57 Chapter 4 Operation and Run Instructions GK600E User Manual Flow chart is shown below: 2 or 3 Fig. 4-13 Flow chart of user parameter initialization Exam ple 3: setting method of hexadecimal parameter Take L1-02 (LED STOP display parameter) for example, if LED control panel is required to display: setting frequency, bus voltage, AI1, running linear speed, and setting linear speed.
- Page 58 GK600E User Manual Chapter 4 Operation and Run Instructions BIT0 and BIT1 in ones place of L1-02. If BIT0=1, setting frequency w ill be displayed. The bits that correspond to the parameters which are not requi r ed to di s play shall be set to 0. Therefore, the value in ones place should be 0011, corresponding to 3 in a hexadecimal number.
- Page 59 Chapter 4 Operation and Run Instructions GK600E User Manual Method 2: do not operate CONTROL P ANEL w ithin five minutes after L0-01 is set to non-zero. Method 3: cut the power off and then appl y power on after L0-01 parameter i s set to non-zero.
-
Page 60: Chapter 5 Elevator Dedicated Parameters
GK600E User Manual Chapter 5 Elev ator Dedicated Parameters Chapter 5 Elevator Dedicated Parameters GK600E series are dedicated for open-loop elevator application. The electrical installation, commissioning and the maintenance of the device should therefore only be carried out by qualified personnel. 5.1 Standard Wiring For open loop control, standard w iring of elevator dedicated drives is as shown as below Braking... -
Page 61: Elevator Sequence
Chapter 5 Elevator Dedicated Parameters GK600E User Manual 5.2 Elevator Sequence Timing diagrams of the elevator sequence are show n as Fig. 5-2 Enable Run Fwd Run Rev Freq Sel 1...4 b2.16 b2.17 b2.01 b2.02 b2.18 F6.15 Actual Speed (motor speed) b2.03 F6.17/F6.18 b2.15... -
Page 62: Startup Manual
GK600E User Manual Chapter 5 Elev ator Dedicated Parameters 5.3 Startup Manual In order to make drive installation and commissioning easier, all the parameters needed for standard setup are gathered in the STARTUP menu. The list of parameters in startup menu of the lift version follow s: Group A0: System Parameters Factory default:... - Page 63 Chapter 5 Elevator Dedicated Parameters GK600E User Manual Factory default: A0-03 Parameter restoration Range: 0~4 0: No operation 1: Clear fault record When this parameter is set to 1, all fault record of Group U1 w ill be cleared. 2: Restore all parameters to factory default (excluding motor parameters) 3: Restore all parameters to factory default (including motor parameters) 4: Restore all parameters to backup parameters Group b1 Start/Stop Control...
- Page 64 GK600E User Manual Chapter 5 Elev ator Dedicated Parameters 0: No binding 1: Digital setting (b0-02) + ∧/∨ adjustment on control panel 2: Digital setting (b0-02) + terminal UP/DOWN adjustment 3: Analog input AI1 4:Aanalog input AI2 5: Analog input EAI (on IO option board) 6: X6/DI pulse input 7: Process PID output 8: Simple PLC...
- Page 65 Chapter 5 Elevator Dedicated Parameters GK600E User Manual Holding time of start Factory default: b1-07 Range: 0.0s ~ 3600.0s frequency 0.0s Start frequency is initial output frequency of dri v e start from stop status. Start frequency holding time is the continuous run time w ith start frequency. After this holding time, the drive w ill Accelerate to set frequency.
- Page 66 GK600E User Manual Chapter 5 Elev ator Dedicated Parameters frequency attains the set value of b1-14. b1-15 defines brake level, in amps, applied to the motor. 100% corresponds to rated current of drive. b1-16 sets the duration that DC brake current w orks when b1-13 is set to 2.
- Page 67 Chapter 5 Elevator Dedicated Parameters GK600E User Manual b2-12 Accel/Decel curve Range: 0~5 Factory default: 5 0: Linear Accel/Decel 1: Broken-line Accel/Decel 2: S-curve Accel/Decel A 3: S-curve Accel/Decel B 4: S-curve Accel/Decel C 5: Elevator dedicated S-curve S-curve acc start time b2-15 Range: 0.00s~60.00s Factory default: 1.00s...
- Page 68 GK600E User Manual Chapter 5 Elev ator Dedicated Parameters Group C1 Digital Output In elevator application, a relay output i s often used to control run contactor, another relay output controls the brake, w hile a digital output reports the fault. As default configuration and setting, GK600E has a relay output at its control board to control the brake, and a relay output at its option board EPC-TM1 to control the run contactor.
- Page 69 Chapter 5 Elevator Dedicated Parameters GK600E User Manual d0-05 Motor pole Range: 1~80 Factory default: 4 Factory default: d0-06 Motor rated speed Range: 0~65535 r/min model dependent Above-noted motor parameters must be correctl y set according to motor nameplate. Please select the motor that suits the power class of the drive, otherwi s e the control performance of the drive w ill drop dramatically, or cause elevator safety problems w hen the drive power rating is smaller than the motor pow er ratings.
- Page 70 ATTENTION: To consider the comfort of lift, GTAKE adopts multi-step V/f control technology rather than vector control, and therefore motor atuto-tune is not required usually. How ever, if users still would like to have motor auto-tune, please onl y perform stati c tune and first b1-00 should be set to 0 (keypad control).
- Page 71 Chapter 5 Elevator Dedicated Parameters GK600E User Manual Applies to general constant-torque load. When dri v e output frequency is 0, output voltage w ill be 0, while when output frequency is rated frequency of motor, the output voltage would be rated voltage of motor.
- Page 72 GK600E User Manual Chapter 5 Elev ator Dedicated Parameters Factory default: d1-03 V/f frequency value f2 Range: d1-05~d1-01 15.00Hz Factory default: d1-04 V/f voltage value V2 Range: 0.0%~100.0% 35.0% Factory default: d1-05 V/f frequency value f1 Range: d1-07~d1-03 3.00Hz Factory default: d1-06 V/f voltage value V1 Range: 0.0%~100.0%...
- Page 73 Chapter 5 Elevator Dedicated Parameters GK600E User Manual Output v oltage (V) 输出电压(V) Rated v oltage of motor 电机额定电压 Boost v alue 提升量 Output f requency (Hz) 输出频率(Hz) Rated f requency of motor 电机额定频率 Fig. 5-4 Group E0 Enhanced Function E0-00 Sw itching FREQ Range: 0.7~16.0kHz...
- Page 74 GK600E User Manual Chapter 5 Elev ator Dedicated Parameters 7) Motor noise is relatively big, increase switching frequency. Group E1 Protection Parameters E1-00 Overvoltage stall Range: 0~1 Factory default: 0 0: Prohibited 1: Allow ed When the motor is decelerating with a high-inertia load or short-term regenerati v e braking occurs during the run, the energy feedback to the drive may raise DC bus voltage, and thus resulting in overvoltage protection.
- Page 75 Chapter 5 Elevator Dedicated Parameters GK600E User Manual When drive output current exceeds the level set by E1-04 and the lasting time attains parameter value of E1-05, the drive w ill display overload fault and coast to stop. Factory default: E1-04 Overload alarm threshold Range: 20.0%~200.0%...
- Page 76 GK600E User Manual Chapter 5 Elev ator Dedicated Parameters Low er limit frequency ~ upper Factory default: F1-07 Multi-step frequency 5 limit frequency 0.00 Hz Low er limit frequency ~ upper Factory default: F1-08 Multi-step frequency 6 limit frequency 0.00 Hz Low er limit frequency ~ upper Factory default: F1-09...
- Page 77 This is a must to program the respecti v e parameters for lift up or lift dow n correspondingly. Thousands place are for GTAKE engineers only w hen it is required at some peculiar cases, users are not suggested to change thousands place to non-zero before sufficient communication w ith GTAKE engineers.
- Page 78 GK600E User Manual Chapter 5 Elev ator Dedicated Parameters Factory default: F6-09 Brake close frequency Range: 0.00Hz~10.00Hz 0.2Hz Factory default: F6-11 Brake w aiting time Range: 0.00s-10.00s 0.4s Duration of the stopping phase, after the speed has fallen below the zero threshold (F6-09) or DC brake stop/start frequency (b1-14).
- Page 79 Chapter 5 Elevator Dedicated Parameters GK600E User Manual Factory default: F6-22 Leveling frequency Range: 0.00Hz-400.00Hz 5.00Hz Note: this parameter value must be set to the same as the leveling frequency as defined by multi-speed sel 1 to 3 - 74 -...
-
Page 80: Chapter 6 List Of Parameters
GK600E User Manual Chapter 6 List of Parameters Chapter 6 List of Parameters GK600E parameter groups are listed below : Category Parameter group Reference page Group A: system A0: system parameters parameters and parameter A1: user-defined display management parameters b0: frequency setting Group b: Run parameter b1: start/stop control setting... - Page 81 Chapter 6 List of Parameters GK600E User Manual Factory Parameter Designation Scope Attr default Group A: System Parameters and Parameter Management Group A0: System Parameters △ A0-00 Setting of user password 0~FFFF 0000 0: Display all parameters 1: Only display A0-00 and A0-01 2: Only display A0-00, A0-01 and △...
- Page 82 GK600E User Manual Chapter 6 List of Parameters Factory Parameter Designation Scope Attr default Group A1: User-defined Display Parameters User-defined display A1-00 A0-00 × parameter 1 User-defined display A1-01 A0-00 × parameter 2 User-defined display A1-02 A0-00 × parameter 3 User-defined display A1-03 A0-00...
- Page 83 Chapter 6 List of Parameters GK600E User Manual Factory Parameter Designation Scope Attr default Parameter group A1-20 0~FFFF FFFF × display/hide setting 1 Parameter group A1-21 0~FFFF FFFF × display/hide setting 2 Group b Run Parameter Setting Group b0 Frequency Setting 0: Master FREQ set 1: Master &...
- Page 84 GK600E User Manual Chapter 6 List of Parameters Factory Parameter Designation Scope Attr default 9: Multi-step speed 10: Communication Auxiliary FREQ digital △ b0-04 Low er limit FREQ ~ upper limit FREQ 0.00Hz setting 0: Relative to maximum FREQ b0-05 Auxiliary FREQ range ×...
- Page 85 Chapter 6 List of Parameters GK600E User Manual Factory Parameter Designation Scope Attr default Ones place: frequency set bundled under control panel control: 0: No binding 1: Digital setting (b0-02) + ∧/∨ adjustment on control panel 2: Digital setting (b0-02) + terminal UP/DOWN adjustment 3: Analog input AI1 4: Analog input AI2...
- Page 86 GK600E User Manual Chapter 6 List of Parameters Factory Parameter Designation Scope Attr default 2: Ramp to stop + DC brake Start FREQ of DC brake b1-14 0.00Hz~upper limit FREQ 0.20Hz × stop △ b1-15 DC brake current 0.0%~200.0% 80.0% △...
- Page 87 Chapter 6 List of Parameters GK600E User Manual Factory Parameter Designation Scope Attr default Decel time sw itching FREQ △ b2-14 0.00Hz~upper limit FREQ 0.00Hz of broken-line Accel/Decel △ b2-15 S-curve acc start time 0.00s~60.00s (S-curve A) 1.00s △ b2-16 S-curve acc end time 0.00s~60.00s (S-curve A) 1.00s...
- Page 88 GK600E User Manual Chapter 6 List of Parameters Factory Parameter Designation Scope Attr default option board) not inclusive) 22: External fault input 23: Fault reset (RESET) 24: Pulse input (valid only for X6/DI) 25: Motor 1/2 sw itchover 26: Reserved 27: Run command sw itched to control panel control 28: Run command sw itched to...
- Page 89 Chapter 6 List of Parameters GK600E User Manual Factory Parameter Designation Scope Attr default 1: Negative logic Tens place: X2 (same as ones place) Hundreds place: X3 (same as ones place) Thousands place: X4 (same as ones place) Ones place: X5 0: Positive logic 1: Negative logic Digital input terminal...
- Page 90 GK600E User Manual Chapter 6 List of Parameters Factory Parameter Designation Scope Attr default 1: Virtual terminal in effect Ones place: BIT0~BIT3: X1~X4 Tens place: BIT4~BIT6: X5~X6, EX Hundreds place: BIT8~BIT10: AI1~AI2, EAI (EX and EAI located at IO option board) 0: Trigger edge detected + ON Enabled condition of run command terminal after...
- Page 91 Chapter 6 List of Parameters GK600E User Manual Factory Parameter Designation Scope Attr default 30: PLC step completed 31: PLC cycle completed 32: Wobble frequency attains to upper or low er limit frequency 33: Upper/low er limit of set FREQ attained 34: Target FREQ attained (set by C2-29)
- Page 92 GK600E User Manual Chapter 6 List of Parameters Factory Parameter Designation Scope Attr default Ones place: AI1 input curve 0: Curve 1 (2 points) 1: Curve 2 (4 points) 2: Curve 3 (4 points) 3: Curve 2 and curve 3 sw itchover C2-00 Analog input curve 0000...
- Page 93 Chapter 6 List of Parameters GK600E User Manual Factory Parameter Designation Scope Attr default Input of curve 3 inflection Range: input of curve 3 inflection △ C2-15 0.0% point A point B ~ curve 3 maximum input Set val u e correspondi n g to △...
- Page 94 GK600E User Manual Chapter 6 List of Parameters Factory Parameter Designation Scope Attr default 11:AI1 12:AI2 13:EAI 14: Reserved 15:DI 16:Communication input percentage 17: Output FREQ before compensation 18:Output current (relative to motor rated current) 19:Output torque (direction hinted) 20:Set torque (direction hinted) 21~99: Reserved C3-03 AO1 offset...
- Page 95 Chapter 6 List of Parameters GK600E User Manual Factory Parameter Designation Scope Attr default calibration point 2 Input value of AI1 C4-04 9.00V × Range: 0.00V~10.00V calibration point 2 Sampling value of AI2 ◎ C4-05 1.00V Range: -10.00V~10.00V calibration point 1 Input value of AI2 C4-06 1.00V...
- Page 96 GK600E User Manual Chapter 6 List of Parameters Factory Parameter Designation Scope Attr default dependent Model d0-11 Motor no-load current 0.0A~6553.5A × dependent Motor flux w eakening coeff Model d0-12 0.0000~1.0000 × dependent Motor flux w eakening coeff Model d0-13 0.0000~1.0000 ×...
- Page 97 Chapter 6 List of Parameters GK600E User Manual Factory Parameter Designation Scope Attr default d1-01 V/f FREQ value f3 0.00Hz~motor rated FREQ 50.00Hz × d1-02 V/f voltage value V3 0.0%~100.0% 100.0% × d1-03 V/f FREQ value f2 d1-05~d1-01 15.00Hz × d1-04 V/f voltage value V2 0.0%~100.0%...
- Page 98 GK600E User Manual Chapter 6 List of Parameters Factory Parameter Designation Scope Attr default time Ti1 ASR low -speed △ d2-03 0.0~20.0 proportional gain Kp2 ASR low -speed integration △ d2-04 0.000s~8.000s 0.200 time Ti2 △ d2-05 ASR sw itching FREQ 1 0.00Hz~d2-06 5.00Hz △...
- Page 99 Chapter 6 List of Parameters GK600E User Manual Factory Parameter Designation Scope Attr default 0.7kHz~10.0kHz, factory default: 4.0 kHz 55kW~75kW: 0.7kHz~16.0kHz, factory default: 3.0 kHz ≥90kW: 0.7kHz~3.0kHz, factory default: 2.0 kHz Ones place: sw itching FREQ relation w ith temperature 0: Self-adaption 1: No adaption Tens place: PWM modulation mode...
- Page 100 GK600E User Manual Chapter 6 List of Parameters Factory Parameter Designation Scope Attr default coefficient Kp V/F current integral E0-06 0~60000 × coefficient Ki 0: Disabled E0-07 V/F torque r × 1: Enabled E0-08 Torque sampling time 0.00s~6.00s 0.20s × E0-09 Reserved Reserved...
- Page 101 Chapter 6 List of Parameters GK600E User Manual Factory Parameter Designation Scope Attr default Ones place: abnormal pow er supply w hen running (SUE): 0: Coast to stop 1: Alarm but run continued Tens place: current detection circuit failed (CtC) 0: Coast to stop 1: Alarm but run continued Hundreds place: abnormal contactor...
- Page 102 GK600E User Manual Chapter 6 List of Parameters Factory Parameter Designation Scope Attr default Drive overheat alarm △ E1-13 0.0℃~100.0℃ 80.0℃ threshold Group F Application Group F1 Multi-step frequency 0: Digital setting F1-02 1: Digital setting b0-02 + control panel ∧/∨...
- Page 103 Chapter 6 List of Parameters GK600E User Manual Factory Parameter Designation Scope Attr default △ F1-17 Emergency speed Low er limit FREQ ~ upper limit FREQ 5.00 Hz Group F6 Lift dedicated parameters Ones place: Brake control 0: Disabled 1: Enabled Tens place: Logic of lift and motor run direction 0: Positive logic...
- Page 104 GK600E User Manual Chapter 6 List of Parameters Factory Parameter Designation Scope Attr default 0: Local 485 port H0-00 SCI port selection × 1: Optional 232 port Ones place: baud rate 0: 4800bps 1: 9600bps 2: 19200bps 3: 38400bps 4: 57600bps 5: 115200bps Tens place: data format 0: 1-8-2-N format, RTU...
- Page 105 Chapter 6 List of Parameters GK600E User Manual Factory Parameter Designation Scope Attr default 2: Reverse jog 3: Forw ard/reverse switchover 4: Emergency stop 1 (set Decel time by b2-09) 5: Emergency stop 2 (coast to stop) 6: Run command sources shifted 0: Not locked 1: All locked 2: Keys locked except RUN,...
- Page 106 GK600E User Manual Chapter 6 List of Parameters Factory Parameter Designation Scope Attr default BIT1: Output pow er (kW) BIT2: Output voltage (V) BIT3: Motor speed (r/min) Hundreds place: BIT0: AI1 (V) BIT1: AI2 (V) BIT2: EAI (V) BIT3: Output sync FREQ (Hz) Thousands place: BIT0: DI BIT1: External count value...
- Page 107 Chapter 6 List of Parameters GK600E User Manual Factory Parameter Designation Scope Attr default BIT2: EAI (V) BIT3: Reserved Hundreds place: BIT0: PID setting (%) BIT1: PID feedback (%) BIT2: Set length (m) BIT3: Actual length (m) Thousands place: BIT0: Run linear speed (m/s) BIT1: Set linear speed (m/s) BIT2: External count value BIT3: DI...
- Page 108 GK600E User Manual Chapter 6 List of Parameters Factory Parameter Designation Scope Attr default 3: Analog input AI1 4: Analog input AI2 5: Analog input EAI 6: X6/DI pulse input 7: Process PID output 8: PLC 9: Multi-step FREQ 10: Communication ◎...
- Page 109 Chapter 6 List of Parameters GK600E User Manual Factory Parameter Designation Scope Attr default ◎ U0-33 Heat sink temperature 2 -40.0℃~100.0℃ 0.0℃ 0: No fault 1: IGBT overcurrent 2: Reserved ◎ U0-34 FAL fault source 3: Output grounding fault 4: Output overcurrent 5: DC bus overvoltage 6: Other sources ◎...
- Page 110 GK600E User Manual Chapter 6 List of Parameters Factory Parameter Designation Scope Attr default FREQ Reserved ◎ Reserved Reserved U0-53 ◎ Empty car w eight (lift-up) -300.0%~300.0% U0-54 ◎ Empty car weight (li f t-down) -300.0%~300.0% U0-55 Leveling torque display -300.0%~300.0% U0-56 Group U1 History Fault...
- Page 111 Chapter 6 List of Parameters GK600E User Manual Factory Parameter Designation Scope Attr default (SUE) 29: EEPROM read/w rite fault (EPr) 30: Contactor close fault (CCL) 31: Port communication abnormal (TrC) 32: Control panel communication abnormal (PdC) 33: Parameter copy fault (CPy) 34: Reserved 35: Software version compatibility fault (SFt)
- Page 112 GK600E User Manual Chapter 6 List of Parameters Factory Parameter Designation Scope Attr default Temperature 2 of heat ◎ U1-14 -40.0℃~100.0℃ 0.0℃ sink at fault 2 Input terminal status at fault ◎ U1-15 0~FFFF 0000 Output terminal status at ◎ U1-16 0~FFFF 0000...
-
Page 113: Chapter 7 Troubleshooting
Chapter 7 Troubleshooting GK600E User Manual Chapter 7 Troubleshooting 7.1 Fault Causes and Troubleshooting Once drive fault occurs, please identi f y the causes of fault carefully and make a detailed record of fault symptom. To seek services, please contact the dealer. Parameters U1-00, U1-09 and U1-18 are used to view the records of fault 1, fault 2 and fault 3. - Page 114 GK600E User Manual Chapter 7 Troubleshooting Fault Fault Fault description Causes Solutions code display Output short circuit Check motor connection (phase-to-phase short and output ground circuit or output ground impedance Decel short circuit) overcurrent Load inertia is too big Use dynamic brake Decel time is too short Prolong the Decel time Input voltage is too low...
- Page 115 Chapter 7 Troubleshooting GK600E User Manual Fault Fault Fault description Causes Solutions code display protection overcurrent overvoltage or overcurrent Output short circuit Check motor connection (phase-to-phase short and output ground circuit or output ground impedance short circuit) Loose connection of Pull out and reinsert the control board cables of control board...
- Page 116 GK600E User Manual Chapter 7 Troubleshooting Fault Fault Fault description Causes Solutions code display Torque boost is too big Reduce torque boost under V/f control value Inappropriate V/f curve Set V/f curve correctly under V/f control Set the parameters Motor parameters are correctly according to improperly set motor nameplate...
- Page 117 Chapter 7 Troubleshooting GK600E User Manual Fault Fault Fault description Causes Solutions code display supply imbalance among abnormal pow er supply phases Abnormal input w iring Check pow er supply input of pow er supply w iring Abnormal bus Seek services capacitance Motor cable Check motor connection...
- Page 118 GK600E User Manual Chapter 7 Troubleshooting Fault Fault Fault description Causes Solutions code display Temperature sensor not w ell connected Pull out and re-insert w ith socket Module Ambient temperature Raise ambient temperature is too low temperature detection disconnected Module detection Seek services circuit failed Thermistor failed...
- Page 119 Chapter 7 Troubleshooting GK600E User Manual Fault Fault Fault description Causes Solutions code display Parameter read/w rite EEPROM abnormal at control Seek services read/w rite fault board Pow er supply voltage Check grid pow er supply abnormal voltage Abnormal contactor feedback circuit at Seek services Contactor close...
- Page 120 GK600E User Manual Chapter 7 Troubleshooting Fault Fault Fault description Causes Solutions code display Overcurrent SMPS failed Seek services benchmark Control board failed Seek services error SMPS failed Seek services 5V supply out-of-limit Control board failed Seek services SMPS failed Seek services 10V supply out-of-limit...
- Page 121 Chapter 7 Troubleshooting GK600E User Manual in the table. If the fault fails to be solved, do not apply pow er to the drive again. Contact the supplier for service in time. - 116 -...
-
Page 122: Chapter 8 Maintenance
GK600E User Manual Chapter 8 Maintenance Chapter 8 Maintenance Ambient temperature, humidity, salt mist, dust, vibration, aging and wear of internal components may result in drive faults. Routine maintenance shall be performed during the use and storage. ATTENTION: Please make sure the power supply of the drive has been cut off, and DC bus voltage has discharged to 0V before the maintenance. -
Page 123: Regular Maintenance
Chapter 8 Maintenance GK600E User Manual Inspection Inspection Inspection aspects Criteria items methods No abnormal heating and Thermal status Smell scorching smell Motor Noise Listen No abnormal noise Observe, Vibration No abnormal vibration and sound listen Pow er supply input Ammeter In the range of requirement current... -
Page 124: Replacement Of Vulnerable Parts
GK600E User Manual Chapter 8 Maintenance Inspection items Measures Check if there are defect on pow er cables and control Replace the cables cables Check if there is dust on circuit board Clear it up Check if air duct is blocked Clear it up Test the ground terminal w ith 500V megameter after all input... -
Page 125: Storage
Chapter 8 Maintenance GK600E User Manual Vulnerable Service life Cause of damage Criteria parts Check if fan blades have Wear of bearing and cracks 30,000~40,000h aging of blade Check if there is abnormal vibration and noise on w orking Excessively high Check if there is liquid leakage ambient temperature Check if safety valve projects... - Page 126 GK600E User Manual Chapter 8 Maintenance ATTENTION: Since long-term storage may lead to the deterioration of electrol y tic capacitor, the inverter must be powered up once in case storage period exceeds 2 years. After applying the power, input voltage must be boosted to rated value gradually using a voltage r egulator, and be sure to have the inverter operated at no load for more than 5 hours.
Need help?
Do you have a question about the GK600E-4T5.5B and is the answer not in the manual?
Questions and answers