Table of Contents
Advertisement
Quick Links
Advertisement
Table of Contents

Related Manuals for Nokia Cricket Wireless 3.1 C


Summary of Contents for Nokia Cricket Wireless 3.1 C
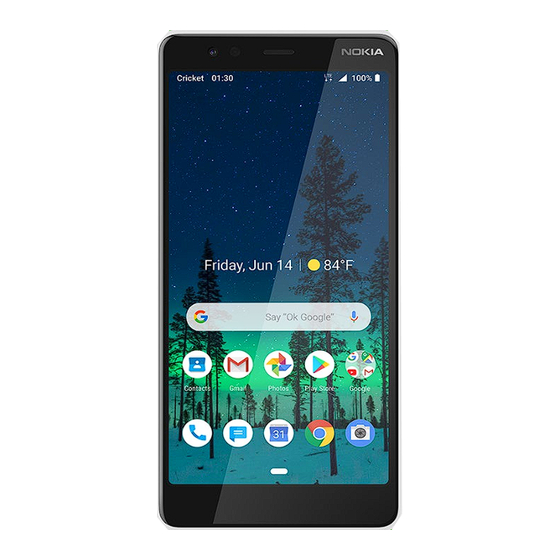
- Page 1 Nokia 3.1 C User Guide...
-
Page 2: Get Started
Get started 1. Flash Keep your phone up to date 2. Camera Keep your phone up to date and accept available software 3. Headset connector updates to get new and enhanced features for your phone. 4. Microphone Updating the software may also improve your phone’s 5. -
Page 3: Insert Sim And Memory Card
Do not connect to products that create an output signal, as this Insert SIM and memory card may damage the device. Do not connect any voltage source to the audio connector. If you connect an external device or headset, other than those approved for use with this device, to the audio connector, pay special attention to volume levels. -
Page 4: Charge Your Phone
1. With the phone facing down, put your fingernail in the Do not remove the memory card when an app is using it. Doing small slot on the back cover, bend the back cover open, so may damage the memory card and the device and corrupt and remove it. -
Page 5: Transfer Data From Your Previous Phone
2. When the phone is switched on, choose your language 2. Switch Backup to Google Drive on. and region. Lock your phone 3. Follow the instructions shown on your phone. If you want to avoid accidentally making a call when your TRANSFER DATA FROM YOUR PREVIOUS PHONE phone is in your pocket or bag, you can lock your keys and You can transfer data from an old phone to your new phone... -
Page 6: Tap And Hold To Drag An Item
TAP AND HOLD TO DRAG AN ITEM SWIPE Place your finger on the item for a couple of seconds, and slide Place your finger on the screen, and slide your finger in the your finger across the screen. direction you want. -
Page 7: Scroll Through A Long List Or Menu
SCROLL THROUGH A LONG LIST OR MENU ZOOM IN OR OUT Place 2 fingers on an item, such as a map, photo, or web page, and slide your fingers apart or together. Slide your finger quickly in a flicking motion up or down the screen, and lift your finger. - Page 8 USE THE NAVIGATION KEYS CHANGE YOUR WALLPAPER Tap Settings > Display > Wallpaper. • To see all your apps, swipe up the home key then swipe it up again. CHANGE YOUR PHONE RINGTONE • To go to the home screen, tap the home key. The app 1.
-
Page 9: Use The Quick Setting Icons
settings. Tap Notifications. You can turn off or on the notifications USE THE QUICK SETTING ICONS for each app individually. Tip: To see notification dots, tap Settings > Apps & notifications > Notifications and switch Allow notification dots on. A small dot will appear on the app icon, if you’ve got a notification, but haven’t attended to it yet. -
Page 10: Change The Volume For Media
If you want to be able to reject an incoming call by turning over the phone, tap Settings > System > Gestures > Turn over to reject Do not connect to products that create an output signal, as this call, and switch on. may damage the device. -
Page 11: Switch Between Upper And Lower Case Characters
• Mute unnecessary sounds, such as touch sounds. Tap your phone scanning for available wireless networks. Tap Settings > Network & internet > Wi-Fi, and disable Use Wi- Settings > Sound > Advanced, and under Other sounds Fi. If you're listening to music or otherwise using your and vibrations, select which sounds to keep. -
Page 12: Add An Accent To A Character
TYPE IN A NUMBER OR SPECIAL CHARACTER MOVE THE CURSOR Tap the numbers and symbols key. Some special character keys To edit a word you just wrote, tap the word, and drag the cursor bring up more symbols. To see more symbols, tap and hold a to the place you want. -
Page 13: Correct A Word
CORRECT A WORD 3. Switch Automatic time zone on. If you notice that you have misspelled a word, tap it to see Alarm clock suggestions for correcting the word. SET AN ALARM SWITCH SPELL CHECKER OFF You can use your phone as an alarm clock. Tap Settings >... -
Page 14: Adjust The Font Size
Accessibility Note that when TalkBack is on, the phone screen behaves differently: ADJUST THE FONT SIZE Do you want to have larger fonts on your phone? • To activate an item, first tap it to select it, and then double-tap it. 1. -
Page 15: Make A Call
SWITCH REAL-TIME TEXT ON when you pick the phone up: tap Settings > System > Gestures > If you want to use real-time text when making calls, tap Mute on pickup, and switch on. > > Settings > Accessibility, and switch Real-time text (RTT) If you want to be able to reject an incoming call by turning over the phone, tap Settings >... -
Page 16: Send And Receive Messages
3. Tap SAVE. READ A MESSAGE 1. Tap Messaging. IMPORT OR EXPORT CONTACTS 2. Tap the message you want to read. You can also read a Tap Contacts > > Settings > Import or Export. message from the notification panel. Slide down from the top of the screen and tap the message. -
Page 17: Get Social
2. You can select the address connected with your Google 3. To delete multiple messages, tap the circle with the account or tap Add an email address. recipient's initial to select messages and tap 3. After adding all the accounts, tap TAKE ME TO GMAIL. Get social SEND MAIL To keep in touch with your friends and family, sign in to your... -
Page 18: Record A Video
TAKE A SELFIE To switch Motion off, tap Need that perfect selfie? Use the phone's front camera to take one. TAKE PHOTOS WITH A TIMER Want to have time to get in the shot too? Try out the timer. 1. Tap Camera. 1. -
Page 19: Change The Location Of Saved Photos And Videos
Save your photos and videos to a memory PLAY A VIDEO Tap Photos and tap the video you want to play. card If there is a memory card in your phone, and your phone Tip: To pause playback, tap . To resume, tap memory is filling up, save the photos you take and videos you FAST FORWARD OR REWIND A VIDEO record to the memory card. -
Page 20: Use A Mobile Data Connection
1. In Photos, tap the photo or video you want to share and Important: Use encryption to increase the security of your Wi-Fi connection. Using encryption reduces the risk of others accessing your data. 2. Select how you want to share the photo or video. Use a mobile data connection Internet and connections TURN ON THE MOBILE DATA CONNECTION... -
Page 21: Browse The Web
2. Switch on Airplane mode. The other device uses data from your data plan, which may result in data traffic costs. For info on availability and costs, Airplane mode closes connections to the mobile network and contact your network service provider. switches your device’s wireless features off. -
Page 22: Connect To A Bluetooth Accessory
Bluetooth® 5. You may need to type in a passcode. For details, see the user guide for the other device. You can connect wirelessly to other compatible devices, such as phones, computers, headsets, and car kits. You can also send Since devices with Bluetooth wireless technology communicate your photos to compatible phones or to your computer. -
Page 23: Connect To Your Friend's Phone With Bluetooth
1. Tap Settings > Connected devices > Previously SEND YOUR CONTENT USING BLUETOOTH connected devices. When you want to share your content or send photos you've taken to a friend, use Bluetooth to send them to compatible 2. Tap next to a device name. devices. -
Page 24: Add An Event
The location of the received files depends on the other device. DELETE A VPN PROFILE For details, see the user guide for the other device. 1. Tap next to a profile name. 2. Tap FORGET. You may need a virtual private network (VPN) connection to Organize your day access your company resources, such as intranet or corporate mail, or you may use a VPN service for personal purposes. -
Page 25: Delete An Appointment
3. To make an event repeat on certain days, tap More 3. Select an item from the list of proposed matches as you options > Does not repeat, and select how often the write, or tap to search. event should repeat. The location is shown on the map. -
Page 26: Download And Update Maps
HMD Global Tip: You can also set your phone to update the maps Privacy Policy, available at automatically. Tap Maps > > Offline maps > and switch http://www.nokia.com/phones/privacy. Automatically update offline maps and Automatically download offline maps to On. -
Page 27: Software Updates And Backups
Some satellite positioning systems may require transferring small 2. Type in your Google account credentials and tap Next, amounts of data over the mobile network. If you want to avoid or, to create a new account, tap Create account. data costs, for example when traveling, you can switch the 3. -
Page 28: Back Up Your Data
Warning: If you install a software update, you cannot use the otherwise want to dispose of or recycle your phone, here’s how device, even to make emergency calls, until the installation is you can remove your personal info and content. Note that it is complete and the device is restarted. -
Page 29: Remove Downloaded Apps
REMOVE DOWNLOADED APPS LOCK CODE Also known as security code or password. Tap Play Store > > My apps & games, choose an app you want to remove, and tap UNINSTALL. The lock code helps you protect your phone against unauthorized use. -
Page 30: Locate Or Lock Your Phone
has a removable back cover, you can find the IMEI code under 1. Open android.com/find on a computer, tablet or phone the cover. connected to the internet and sign in to your Google Account. The IMEI is also visible on the original sales box. 2. - Page 31 HMD Global does not make any representations, provide a HMD Global Oy is the exclusive licensee of the Nokia brand for warranty, or take any responsibility for the functionality, content, phones & tablets. Nokia is a registered trademark of Nokia or end-user support of third-party apps provided with your Corporation.
- Page 32 Android, Google and other related marks and logos are download, and/or purchase goods, applications, and services trademarks of Google LLC. from Cricket or elsewhere from third parties. Cricket provides tools for you to control access to the Internet and certain The Bluetooth word mark and logos are owned by the Bluetooth Internet content.
Need help?
Do you have a question about the Cricket Wireless 3.1 C and is the answer not in the manual?
Questions and answers