
Subscribe to Our Youtube Channel
Summary of Contents for Kendon Stand-Up
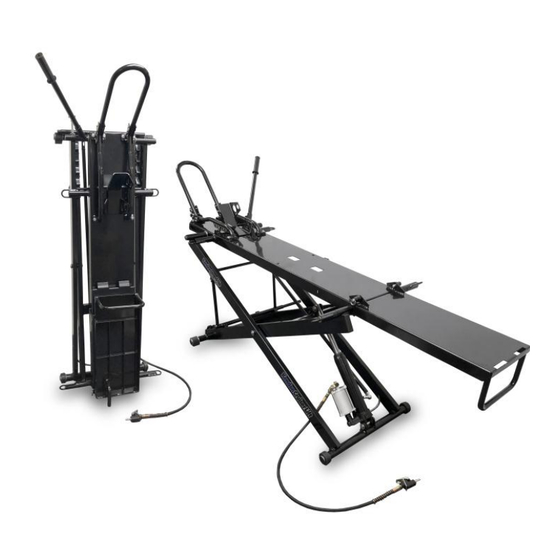
- Page 1 ™ KENDON STAND-UP MOTORCYCLE LIFT OWNER’S MANUAL KENDON INDUSTRIES, LLC 1672 Sierra Madre Circle Placentia, CA 92870 USA Tel 714-630-7144 • Fax 714-630-7132 www.KendonUSA.com Rev. 032619...
- Page 3 714-630-7144 www.KendonUSA.com WARNING: Serious injury, death and/or property damage could result through improper use of this product, including crushing or severing type injuries. WARNING: Thoroughly read and understand all instructions and owner’s manual(s) before using the lift. WARNING: For Adult Use Only. Keep children away from lift at all times.
- Page 4 Lift owner is responsible for complying with all the recommended procedures in this instruction manual. Use at your own risk. Kendon is not responsible for injury, liability, property damage and/or any consequential damage(s) caused by the misuse of this product.
- Page 5 714-630-7144 www.KendonUSA.com LOADING Properly attach the loading ramp as per this manual’s instructions. Ensure motorcycle fender, fairing or other parts clear lift frame and wheel chock when loading and unloading. Ensure the wheel chock on the lift rail is in the open position (pg. 16). Please contact us directly at 714-630-7144 or info@KendonUSA.com if you have any questions about ramp use or attachment.
- Page 6 Safety is our number one concern. Before using this product, please take the time to completely read this motorcycle lift Owner’s Manual and familiarize yourself thoroughly with the parts on your new Kendon Lift. In addition to this manual, be sure to read and follow the separate usage instructions for your specific model Stand-Up™...
- Page 7 Most incidents occur from first time users with no experience in loading and unloading a motorcycle. Practicing the process with a spotter is highly recommended. Kendon does not recommend riding your motorcycle onto the motorcycle lift.
- Page 8 714-630-7144 www.KendonUSA.com Expanded Drawing & Numbered Parts List Lift Release Knob Front Wheel Loop Brackets (2) Front Wheel Loop Front Wheel Loop Detent Ring Pins 5/16” (6) Front Wheel Left Guide Rail Lift Front Foot (2) Height Positioner Height and Safety Lock Bar Inside Scissor Outside Scissor Air Hose with Air Attachment...
- Page 9 2. Pry open the top cover of crate using a pry bar or hammer. Be sure to use caution when lifting the top cover off as nails will be exposed. Kendon recommends removing the nails prior to lifting off the top lid. 3. Remove all packaged small loose parts from the crate.
- Page 10 714-630-7144 www.KendonUSA.com 9. Roll the lift on its casters to a flat surface area to complete the installation. Front Loop Installation: 1. Attach the two front wheel loop brackets to the front most part of the lift front rail using the supplied hex bolts and washers and a 9/16” wrench. 2.
- Page 11 714-630-7144 www.KendonUSA.com 3. Attach the back of each left and right guide rail using the supplied hex bolts and washers using a 9/16” wrench. - 9 -...
- Page 12 Congratulations! The lift assembly is now complete and ready for use. About your Lift’s Air-Over-Hydraulic System Kendon Stand-Up™ Motorcycle Lifts are equipped with an Air-Over-Hydraulic bottle jack. This means that the lift can be actuated using an air compressor or manually using the supplied hand pump. To use your lift with an air...
- Page 13 Due to the lift’s 1000 lbs. lifting capacity, there are certain restrictions on the size of compressor that can be used to actuate the lift. Kendon’s minimum recommended air compressor size is 150 PSI with a 6-gallon tank or larger. For optimal use, we recommend 150 PSI to 175 PSI compressor with an 8-gallon or larger tank.
- Page 14 714-630-7144 www.KendonUSA.com 1. Lay your Kendon Stand Up™ Lift lying horizontally on the ground. Ensure that it is fully retracted (e.g., ensure that the piston on the jack itself is fully retracted – as with any air-over-hydraulic jack, it can appear to be fully retracted, but can have a small amount of travel remaining).
- Page 15 You must check to ensure that the wheel chock will not contact fender, fairing or other parts of your motorcycle BEFORE loading. The wheel chock is designed to accommodate a variety of motorcycles, but Kendon is not responsible to ensure that the wheel chock will fit any particular motorcycle.
- Page 16 Correct Tie-Down Procedure In order to safely use the Kendon Motorcycle Lift, locking type ratchet tie downs must be used on the front and rear of the motorcycle. This will ensure that the bike is safely secured to the lift.
- Page 17 714-630-7144 www.KendonUSA.com 3. Hydraulic Operation - With pump handle securely inserted into the pump handle assembly, actuate the internal hydraulic cylinder by pumping the pump handle back and forth. For Air-Over-Hydraulic operation, simply connect your compressor to the lift and turn on the air. If the lift does not rise, repeat step 2 above, by tightly closing the release valve.
- Page 18 6. The lift is now locked in place and secure so that you can work on your motorcycle. Maximum Height – It is possible to raise your Kendon Stand Up™ Bike Lift above the maximum operating height. This is required so that the locking safety bar/height adjuster can be freed from the height lock allowing the lift to be lowered back down to the ground.
- Page 19 714-630-7144 www.KendonUSA.com 2. Raise the lift slightly (using the hand pump or air compressor) to release the safety bar from its locked position. 3. Using the outer part of the supplied Safety Lock Bar Extender rotate the safety bar/height lock bar away from the height positioners. - 17 -...
- Page 20 This release valve should be turned only in small increments. You can control the lowering speed of your Kendon lift by slightly opening and closing the release valve. If you open it up too much, especially with a heavy motorcycle secured to the lift, the lift will descend quickly.
- Page 21 5. Now you can roll the motorcycle off of the lift. Standing your Kendon Stand Up™ Lift for Storage 1. Fully lower the lift as described in the Lowering the Lift section. 2. Remove the ramp and store it separately. The ramp can also be stored on the lift by placing the ramp between the front rail and rear folding rail then securing with the rubber latch.
- Page 22 Putting the Kendon Lift Back Down for Use When it’s time to use your Kendon Stand Up™ bike lift again, it’s important to be careful lowering it from the standing position. 1. The Lift weighs over 150 pounds. If you cannot comfortably lift 100 to 150 pounds, do NOT attempt to raise or lower the lift to or from the storage position without assistance.
- Page 23 714-630-7144 www.KendonUSA.com 3. Follow the Loading and Raising instructions described earlier in this manual. Maintenance Use only good grade hydraulic jack oil. Avoid mixing different types of fluid and NEVER use brake fluid, transmission fluid or motor oil. Improper fluid can cause premature failure of the jack and the potential for sudden and immediate loss of load.
-
Page 24: Troubleshooting
Ensure release valve tightly maintain pressure closed closed Overload condition Remedy overload condition Hydraulic unit malfunction Contact Kendon for Service Jack will not lower after Reservoir overfilled Drain fluid to proper level unloading Linkages binding Clean and lubricate moving parts... - Page 25 Krylon, Fusion, Rust-Oleum, Scotch-Brite, Teflon, Lucas Oil, Red N’ Tacky, Mobil and WD-40 are the registered names and/or trademarks of their respective trademark holders. Kendon Industries, LLC is not in any way associated with or endorsed by these brands. Product names, logos, brands, and their trademarks featured or referred to within this Owner’s Manual are the property of their respective trademark holders.
- Page 26 Goods Authorization) number and copy of the original purchase receipt. Should the lift need to be returned to Kendon for repair, the Customer is responsible for all shipping costs to and from Kendon Industries LLC, 1672 Sierra Madre Circle, Placentia, California 92870.
- Page 27 714-630-7144 www.KendonUSA.com Kendon Industries, LLC 1672 Sierra Madre Circle Placentia, CA 92870 714-630-7144 Telephone 714-630-7132 Facsimile info@KendonUSA.com www.KendonUSA.com facebook.com/kendonusa instagram.com/kendonindustries - 25 -...
- Page 28 714-630-7144 www.KendonUSA.com NOTES - 26 -...
- Page 29 714-630-7144 www.KendonUSA.com NOTES - 27 -...
- Page 30 714-630-7144 www.KendonUSA.com WARNING: Serious injury, death and/or property damage could result through improper use of this product, including crushing or severing type injuries. WARNING: Thoroughly read and understand all instructions and owner’s manual(s) before using the lift. WARNING: For Adult Use Only. Keep children away from lift at all times.
- Page 31 Lift owner is responsible for complying with all the recommended procedures in this instruction manual. Use at your own risk. Kendon is not responsible for injury, liability, property damage and/or any consequential damage(s) caused by the misuse of this product.
- Page 32 714-630-7144 www.KendonUSA.com This page intentionally left blank - 30 -...
- Page 33 Visit us at www.KendonUSA.com for product updates, new products, and support. NO PART OF THESE INSTRUCTIONS MAY BE COPIED AND/OR REPRODUCED WITHOUT THE WRITTEN PERMISSION OF KENDON INDUSTRIES, LLC ALL PART NUMBERS, DIMENSIONS AND SPECIFICATIONS IN THESE INSTRUCTIONS ARE SUBJECT TO CHANGE WITHOUT PRIOR NOTICE.
Need help?
Do you have a question about the Stand-Up and is the answer not in the manual?
Questions and answers