Table of Contents
Advertisement
Quick Links
See also:
Manual
Aeon Labs Z-Stick
powered Z-W
network
(independent from external power and
host microprocessor). By being able
to remotely include/remove Z-Wave
network installation. When connected
to a host controller (via USB), it enables
the host controller to take part in the
Z-Wave Network.
The Z-Stick
firmware upgradeable by the end
consumer. This enables the product
to always have the latest Z-Wave
protocol, capabilities and commands.
By taking advantage of the Z-Wave
m e s h n e t w o r k , c o m m a n d s c a n
View the expanded manual:
be routed to their destination via
http://aeotec.com/support
intermediary "listening" Z-Wave
products. Products that are Z-Wave
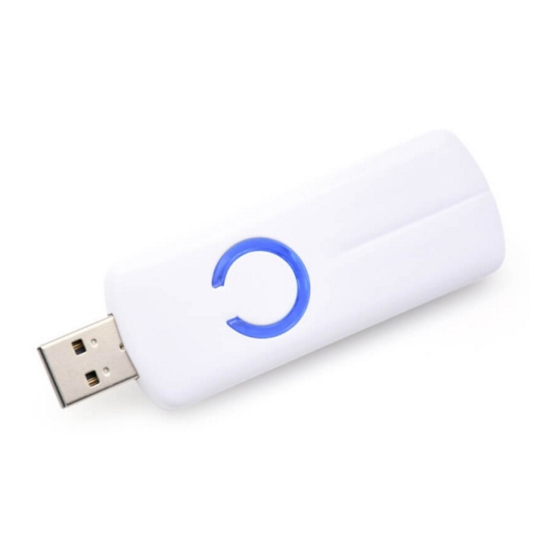
Action Button
Aeotec by Aeon Labs Z-Stick .
Gen5 is a self-
The Z-Stick
®
SerialAPI-Mode. Both Inclusion-Mode
ave USB adapter with
creation
capabilities
and Removal-Mode require that the
Z-Stick to be plugged into the USB
connector of the host. Software drivers
for the "ZW050x_USB_VCP_PC_
Driver" may need to be installed for
the Z-Stick to be recognized on some
computers(drivers can be found at
http://www.aeotec.com/support).
Gen5 is also device
To initiate SerialAPI-Mode, plug the
Z-Stick into the USB connector of the
host.
Note:
1). While in SerialAPI-mode, the
Z-Stick is always listening (it is awake
and always in RX receive mode) for
instructions and acts as a Z-Wave
adapter and responds to commands
Familiarize yourself with
sent through USB by the host processor
your Z-Stick .
software.
2). Pressing the Action Button will not
have any effect while in SerialAPI-
Mode. But short pressing the Reset
Button will reset the USB port.
Reset Button
Quick start.
Gen5 operates in
SerialAPI-Mode: Allowing a Host
Processor To Take Control of the
Z-Stick and Take Part in the Z-Wave
Network
Installation and Maintenance
Application (IMA) feature.
The IMA feature only can be used
in Serial API-Mode for Z-Stick Gen5,
it can measure the network health
for each device in the network. The
different colour of LED indicates the
communication quality between the
Z-Stick Controller and devices in the
network.
the IMA tool can be downloaded from
here: http://www.aeotec.com/support).
Select the node device and then click
the IMA test button to start the IMA test
between the Central Controller and the
node devices. Your IMA tool client will
receive the test result via the different
colour of LED icon to indicate the
network health level and its colour will
be changed follow with the change of
network health level. If the color of LED
is changed to green
, which means
the current network quality is good. If
the color of LED is changed to orange
, which means the current network
quality is acceptable but latency can
occur. If the color of LED is changed
to red
, which means the current
tool return a , which means the current
network is critical because a node is
not responding.
Upgrading the Z-Stick with
the Latest Software.
1. Download the Aeon Labs Z-Stick
Gen5 firmware upgrade software
that contains the firmware update
and UART to USB driver at http://
www.aeotec.com/support and run the
downloaded program.
2. Follow the on screen instructions to
complete installation.
Power Supply: USB DC 4.75V to 5.25V.
Max Operating Current: 100mA.
Operating Temperature: 0 to 50 .
C
C
Storage Temperature: -20 to 70 .
C
C
Operating Distance: Up to1310 feet/400
metres outdoors.
Warranty.
Aeon Labs warrants to the original
purchaser of Products that for the
Warranty Period (as defined below),
the Products will be free from material
defects in materials and workmanship.
The foregoing warranty is subject
to the proper installation, operation
and maintenance of the Products in
accordance with installation instructions
and the operating manual supplied to
Customer. Warranty claims must be
made by Customer in writing within
Advertisement
Table of Contents

Subscribe to Our Youtube Channel
Related Manuals for Aeon Labs Aeotec Z-Stick Gen5


Summary of Contents for Aeon Labs Aeotec Z-Stick Gen5
- Page 1 Aeotec by Aeon Labs Z-Stick . Quick start. Installation and Maintenance Upgrading the Z-Stick with Application (IMA) feature. the Latest Software. Aeon Labs Z-Stick Gen5 is a self- The Z-Stick Gen5 operates in 1. Download the Aeon Labs Z-Stick ®...
- Page 2 (30) days of the manifestation of IN NO EVENT SHALL AEON LABS BE transportation charges for returned MODIFICATIONS TO THIS EQUIPMENT. Reorient or relocate the receiving LIABLE FOR ANY INDIRECT, INCIDENTAL, a problem. Aeon Labs' sole obligation SUCH MODIFICATIONS COULD VOID THE Products, and insure the shipment or antenna.
- Page 3 (V1.00) Aeon Labs Z-Stick Gen5 is a Z-Wave USB adapter. When it connects to a host controller (via USB), it enables the host controller to take part in the Z-Wave Network. You can use the PC Controller application to control your Z-Wave devices via its Serial API function, this greatly simplifies Z-Wave network installation.
- Page 4 2. Reset Z-Stick to factory default Settings will: 1, exclude the Z-Stick from the Z-Wave network; 2, remove all Node ids that the Z-Stick included. 3, restore the configuration settings to the default. 3.2 Function of Reset Button Button action Description Click one time Reset the USB port.
- Page 5 SUPPORT_NVM_GET_ID SUPPORT_NVM_EXT_READ_LONG_BUFFER SUPPORT_NVM_EXT_READ_LONG_BYTE SUPPORT_NVM_EXT_WRITE_LONG_BUFFER SUPPORT_NVM_EXT_WRITE_LONG_BYTE SUPPORT_PWR_CLK_PD SUPPORT_PWR_CLK_PUP SUPPORT_PWR_SELECT_CLK SUPPORT_PWR_SETSTOPMODE SUPPORT_STORE_HOMEID SUPPORT_STORE_NODEINFO SUPPORT_ZW_ADD_NODE_TO_NETWORK SUPPORT_ZW_AES_ECB SUPPORT_ZW_ARE_NODES_NEIGHBOURS SUPPORT_ZW_ASSIGN_RETURN_ROUTE SUPPORT_ZW_ASSIGN_SUC_RETURN_ROUTE SUPPORT_ZW_CONTROLLER_CHANGE SUPPORT_ZW_CREATE_NEW_PRIMARY SUPPORT_ZW_DELETE_RETURN_ROUTE SUPPORT_ZW_DELETE_SUC_RETURN_ROUTE SUPPORT_ZW_ENABLE_SUC SUPPORT_ZW_EXPLORE_REQUEST_INCLUSION SUPPORT_ZW_GET_CONTROLLER_CAPABILITIES SUPPORT_ZW_GET_LAST_WORKING_ROUTE SUPPORT_ZW_SET_LAST_WORKING_ROUTE SUPPORT_ZW_GET_NEIGHBOR_COUNT SUPPORT_ZW_GET_NODE_PROTOCOL_INFO SUPPORT_ZW_GET_PROTOCOL_STATUS SUPPORT_ZW_GET_PROTOCOL_VERSION SUPPORT_ZW_GET_RANDOM...
- Page 6 SUPPORT_ZW_GET_ROUTING_MAX SUPPORT_ZW_GET_SUC_NODE_ID SUPPORT_ZW_GET_VERSION SUPPORT_ZW_GET_VIRTUAL_NODES SUPPORT_ZW_IS_FAILED_NODE_ID SUPPORT_ZW_IS_NODE_WITHIN_DIRECT_RANGE SUPPORT_ZW_IS_PRIMARY_CTRL SUPPORT_ZW_IS_VIRTUAL_NODE SUPPORT_ZW_IS_WUT_KICKED SUPPORT_ZW_NEW_CONTROLLER SUPPORT_ZW_RANDOM SUPPORT_ZW_REDISCOVERY_NEEDED SUPPORT_ZW_REMOVE_FAILED_NODE_ID SUPPORT_ZW_REMOVE_NODE_FROM_NETWORK SUPPORT_ZW_REPLACE_FAILED_NODE SUPPORT_ZW_REPLICATION_COMMAND_COMPLETE SUPPORT_ZW_REPLICATION_SEND_DATA SUPPORT_ZW_REQUEST_NETWORK_UPDATE SUPPORT_ZW_REQUEST_NEW_ROUTE_DESTINATIONS SUPPORT_ZW_REQUEST_NODE_INFO SUPPORT_ZW_REQUEST_NODE_NEIGHBOR_UPDATE SUPPORT_ZW_RF_POWER_LEVEL_GET SUPPORT_ZW_RF_POWER_LEVEL_REDISCOVERY_SET SUPPORT_ZW_RF_POWER_LEVEL_SET SUPPORT_ZW_SEND_DATA SUPPORT_ZW_SEND_DATA_ABORT SUPPORT_ZW_SEND_DATA_BRIDGE SUPPORT_ZW_SEND_DATA_META SUPPORT_ZW_SEND_DATA_META_BRIDGE SUPPORT_ZW_SEND_DATA_META_MR...
- Page 7 SUPPORT_ZW_SEND_DATA_MR SUPPORT_ZW_SEND_DATA_MULTI SUPPORT_ZW_SEND_DATA_MULTI_BRIDGE SUPPORT_ZW_SEND_NODE_INFORMATION SUPPORT_ZW_SEND_SLAVE_DATA SUPPORT_ZW_SEND_SUC_ID SUPPORT_ZW_SEND_TEST_FRAME SUPPORT_ZW_SET_DEFAULT SUPPORT_ZW_SET_EXT_INT_LEVEL SUPPORT_ZW_SET_LEARN_MODE SUPPORT_ZW_SET_LEARN_NODE_STATE SUPPORT_ZW_SET_PROMISCUOUS_MODE SUPPORT_ZW_SET_RF_RECEIVE_MODE SUPPORT_ZW_SET_ROUTING_INFO SUPPORT_ZW_SET_ROUTING_MAX SUPPORT_ZW_SET_SLAVE_LEARN_MODE SUPPORT_ZW_SET_SLEEP_MODE SUPPORT_ZW_SET_SUC_NODE_ID SUPPORT_ZW_SET_WUT_TIMEOUT SUPPORT_ZW_SUPPORT9600_ONLY SUPPORT_ZW_TYPE_LIBRARY SUPPORT_ZW_WATCHDOG_DISABLE SUPPORT_ZW_WATCHDOG_ENABLE SUPPORT_ZW_WATCHDOG_KICK SUPPORT_ZW_WATCHDOG_START SUPPORT_ZW_WATCHDOG_STOP SUPPORT_ZW_NVR_GET_VALUE SUPPORT_FUNC_ID_CLEAR_TX_TIMERS SUPPORT_FUNC_ID_GET_TX_TIMERS...
- Page 8 4.4 Installation and Maintenance Application (IMA) feature When the Z-Stick is in Serial API-Mode and acts a primary controller, it can measure the network health for each device in the network. The different colour of LED indicates the communication quality between the Z-Stick Controller and devices in the network.
- Page 9 The parameter number field specifies which configuration parameter is being set. The parameter numbers refer to the form at the end of the document. Default (1 bit) If the default bit is set to 1 the device is set to default factory setting and the configuration values is ignored. If the default bit is set to 0 then the configuration values is used.
- Page 10 Parameter Number Definitions (8 bit): Parameter Number Description Default Value Size (Hex / Decimal) 0x51 (81) When the USB power supply, the LED indicator light configuration (0 =disable, 1 = enable, other= ignore) Security network enabled 0xF2 (242) (0 =disable, 1 = enable, other= ignore) Configuration of the RF power level 0xDC (220) 1~10, other= ignore.
Need help?
Do you have a question about the Aeotec Z-Stick Gen5 and is the answer not in the manual?
Questions and answers