Table of Contents
Advertisement
Quick Links
Advertisement
Table of Contents

Related Manuals for SOMFY Connected Lock


Summary of Contents for SOMFY Connected Lock
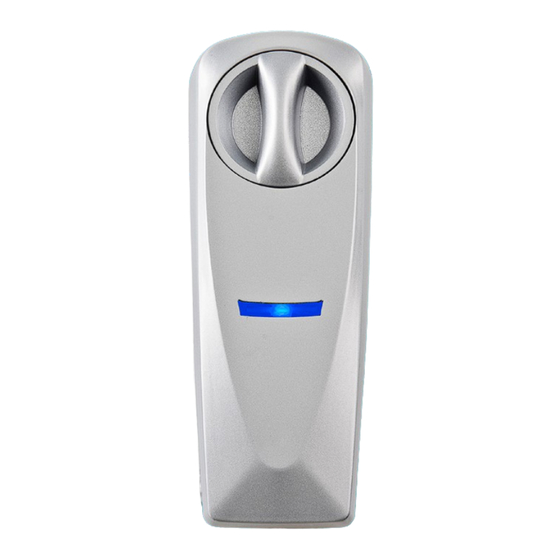
- Page 1 Connected lock I N S T A L L A T I O N A N D U S E R G U I D E www.somfy.com...
- Page 2 Open me! CONNECTED LOCK Installation and user guide © 2017 Somfy SAS. All rights reserved - Images for illustration purposes only.
- Page 3 … You will soon be able to enjoy your connected lock! CONNECTED LOCK Installation and user guide © 2017 Somfy SAS. All rights reserved - Images for illustration purposes only.
- Page 4 Lock and unlock your door with your smartphone. ▶ Complete safety Smartphone login/AES 256 encrypted lock. Anti-breakage, anti-pull, anti-drill cylinder. Supplied with secure metal keys. CONNECTED LOCK Installation and user guide © 2017 Somfy SAS. All rights reserved - Images for illustration purposes only.
- Page 5 > Introduction: Compatibility of the lock with your doors > Installation: Overview > Use: Quick control > Use: Overview of the interface > Use: Managing users and their access CONNECTED LOCK Installation and user guide © 2017 Somfy SAS. All rights reserved - Images for illustration purposes only.
-
Page 6: Table Of Contents
C. Mobile app 3. MANAGE THE CONNECTED LOCK A. Manage users and accesses B. Manage products Recap Replacing batteries Troubleshooting Reset Technical data CONNECTED LOCK Installation and user guide © 2017 Somfy SAS. All rights reserved - Images for illustration purposes only. -
Page 7: Pack Contents
Fixing screw for the cover ×1 Allen key ×1 AAA batteries ×4 Reversible screwdriver ×1 Torx T-10 screwdriver ×1 CONNECTED LOCK Installation and user guide © 2017 Somfy SAS. All rights reserved - Images for illustration purposes only. [ Back Contents ]... -
Page 8: Introduction
(also called “security” locks) • Doors without handle outside … AND AN ESSENTIAL ITEM: THE EUROPEAN CYLINDER Your door is compatible with the connected lock if it has a European cylinder. IN DETAIL: The connected lock can be installed on:... -
Page 9: Connected Lock = Secure
SMS. This protection is enabled by default. (To disable it, you can go later to My account and untick the relevant box.) CONNECTED LOCK Installation and user guide © 2017 Somfy SAS. All rights reserved - Images for illustration purposes only. [ Back Contents ]... -
Page 10: Access To The Connected Lock
You can also operate the lock manually! From inside From outside By turning the knob. With one of the keys provided. CONNECTED LOCK Installation and user guide © 2017 Somfy SAS. All rights reserved - Images for illustration purposes only. [ Back Contents ]... -
Page 11: Installation
Installation CONNECTED LOCK Installation © 2017 Somfy SAS. All rights reserved - Images for illustration purposes only. [ Back Contents ]... -
Page 12: Installation Steps
INSTALLATION STEPS 1. Create your account Somfy-connect.com Somfy-connect.com 2. Install the connected lock Somfy-connect.com 3. Configure the connected lock CONNECTED LOCK Installation © 2017 Somfy SAS. All rights reserved - Images for illustration purposes only. [ Back Contents ]... -
Page 13: Create Your Account
And follow the instructions on the screen. received. You then have access to this guide for download: YOU CAN NOW INSTALL YOUR CONNECTED LOCK! CONNECTED LOCK Installation © 2017 Somfy SAS. All rights reserved - Images for illustration purposes only. [ Back Contents ]... -
Page 14: Install The Connected Lock
This step requires work on your door. Be sure you have enough time. Leave your screen for the moment, you can get back to it later. CONNECTED LOCK Installation © 2017 Somfy SAS. All rights reserved - Images for illustration purposes only. [ Back Contents ]... - Page 15 • With your door closed, check that you can lock and unlock it from inside and outside. If not, you need to adjust your current lock or your door before installing your connected lock. CONNECTED LOCK Installation © 2017 Somfy SAS. All rights reserved - Images for illustration purposes only. [ Back Contents ]...
- Page 16 Part of the cylinder actuated by the key, which by turning will drive the bolt, and thus lock or unlock the door. CONNECTED LOCK Installation © 2017 Somfy SAS. All rights reserved - Images for illustration purposes only. [ Back Contents ]...
-
Page 17: Replace The Cylinder
P2 P1 P3 Fork to be inserted into the connected lock. Existing cylinder New cylinder Also releases the removable parts. CONNECTED LOCK Installation © 2017 Somfy SAS. All rights reserved - Images for illustration purposes only. [ Back Contents ]... - Page 18 55 mm D = xx mm CASE 1 CASE 2 CASE 3 CASE 1 CASE 2 CASE 3 CASE 1 CASE 2 CASE 3 © 2016 Somfy SAS. All rights reserved - Images for illustration purposes only. [ Back Contents ]...
- Page 19 P2 P1 P3 Distance: Distance: 30mm (standard cylinder) 40mm (standard cylinder) 45mm (long cylinder) 55mm (long cylinder) See next page → CONNECTED LOCK Installation © 2017 Somfy SAS. All rights reserved - Images for illustration purposes only. [ Back Contents ]...
- Page 20 Now pull the golden metal fork (2) to release the black casement bolt P1. Do not remove the fork completely; simply slide it. CONNECTED LOCK Installation © 2017 Somfy SAS. All rights reserved - Images for illustration purposes only. [ Back Contents ]...
- Page 21 P2 P3 Then use the notches of parts Distance: P2 and P3 to position them. 40mm (standard cylinder) 55mm (long cylinder) CONNECTED LOCK Installation © 2017 Somfy SAS. All rights reserved - Images for illustration purposes only. [ Back Contents ]...
- Page 22 P2 or P3 depending on the required configuration. YOUR NEW CYLINDER IS NOW READY! CONNECTED LOCK Installation © 2017 Somfy SAS. All rights reserved - Images for illustration purposes only. [ Back Contents ]...
- Page 23 • Once the cylinder in place, check that its operation is still smooth. If not, you can loosen the screw slightly. YOU CAN NOW FIX YOUR CONNECTED LOCK! CONNECTED LOCK Installation © 2017 Somfy SAS. All rights reserved - Images for illustration purposes only. [ Back Contents ]...
-
Page 24: Fix The Connected Lock
B3. Add the batteries. B1. Put the backing plate in place The backing plate allows you to install the connected lock on the door. It should be fixed on the inside of the door (inside the house). 1. Position the backing plate 2. - Page 25 - Tighten the screw into the slot provided for this purpose (B) - Tighten the screw into the holes provided for this purpose (D) CONNECTED LOCK Installation © 2017 Somfy SAS. All rights reserved - Images for illustration purposes only. [ Back Contents ]...
- Page 26 • Finally, with the opening knob of the lock, lock and unlock your door to check that the assembly operates smoothly. If not, loosen the screws slightly. inside CONNECTED LOCK Installation © 2017 Somfy SAS. All rights reserved - Images for illustration purposes only. [ Back Contents ]...
- Page 27 • Alkaline AAA batteries provide the best performance for your lock. • We do not recommend using rechargeable batteries. YOU CAN START THE AUTO-ACQUISITION OF YOUR CONNECTED LOCK! CONNECTED LOCK Installation © 2017 Somfy SAS. All rights reserved - Images for illustration purposes only. [ Back Contents ]...
-
Page 28: Start Auto-Acquisition
2. INSTALL THE CONNECTED LOCK / C. Start auto-acquisition C. Start auto-acquisition Before using your connected lock, you must initialise it so that it fits your door. • (1) Using the grey metal knob, close your door and lock inside it until the knob can no longer turn. - Page 29 (see p. 26). You will need it when you register your product online. • (1) Position the cover of your choice over the connected lock. • (2) To secure the cover, insert the screw supplied into the hole in the underside of the cover and tighten it.
-
Page 30: Configure The Connected Lock
- log into the web portal with your credentials You have downloaded (and read) the guide You have installed the connected lock You can now configure the connected lock! CONNECTED LOCK Installation © 2016 Somfy SAS. All rights reserved - Images for illustration purposes only. [ Back Contents ]... - Page 31 Doorlock remotely (refer to the guide of the Internet Gateway for more information). The installation of the Internet Gateway is done with the help of the mobile application “My Connected Doorlock”. CONNECTED LOCK Installation © 2017 Somfy SAS. All rights reserved - Images for illustration purposes only. [ Back Contents ]...
-
Page 32: Register The Connected Lock
For example: “Main House” Name the lock. For example: “Front Door” Feel free to choose icons to personalise your lock! CONNECTED LOCK Installation © 2017 Somfy SAS. All rights reserved - Images for illustration purposes only. [ Back Contents ]... - Page 33 Then, you can assign them to other users after adding them. If not, finish the configuration. Refer to the guide for the Card reader for more information. CONNECTED LOCK Installation © 2017 Somfy SAS. All rights reserved - Images for illustration purposes only. [ Back Contents ]...
-
Page 34: Synchronise The Connected Lock
• Scan these QR codes • Click it • Find My Connected Doorlock It will help later you to control the lock every day! CONNECTED LOCK Installation © 2017 Somfy SAS. All rights reserved - Images for illustration purposes only. [ Back Contents ]... - Page 35 This 4-digit security code is required every time you open the app. For more details, and complete explanations about the app: read from page 49. CONNECTED LOCK Installation © 2017 Somfy SAS. All rights reserved - Images for illustration purposes only. [ Back Contents ]...
- Page 36 YOUR LOCK IS NOW INSTALLED AND INITIALISED. It is ready for use! CONNECTED LOCK Installation © 2017 Somfy SAS. All rights reserved - Images for illustration purposes only. [ Back Contents ]...
-
Page 37: Use
CONNECTED LOCK © 2017 Somfy SAS. All rights reserved - Images for illustration purposes only. [ Back Contents ]... -
Page 38: Use Case
Start using your connected lock in 3 steps! 1. Control the connected lock 2. Explore the controller of the connected lock 3. Manage the connected lock CONNECTED LOCK © 2017 Somfy SAS. All rights reserved - Images for illustration purposes only. [ Back Contents ]... -
Page 39: Control The Connected Lock
1. CONTROL THE CONNECTED LOCK YOU CAN NOW CONTROL YOUR CONNECTED LOCK! Just follow the few instructions below. CONNECTED LOCK © 2017 Somfy SAS. All rights reserved - Images for illustration purposes only. [ Back Contents ] [ Back Contents ]... - Page 40 (to synchronise it). MY CONNECTED DOORLOCK • Scan these QR codes • Click it • Find My Connected Doorlock CONNECTED LOCK © 2017 Somfy SAS. All rights reserved - Images for illustration purposes only. [ Back Contents ]...
- Page 41 By default, the app opens on the control screen. Your connected lock: To control it, swipe its icon: And the lock is actuated: To unlock To lock CONNECTED LOCK © 2017 Somfy SAS. All rights reserved - Images for illustration purposes only. [ Back Contents ]...
- Page 42 The app shows whether your action is successful. OPENING OK CLOSING OK STATUS UNKNOWN For example, if the lock was actuated manually afterwards. CONNECTED LOCK © 2017 Somfy SAS. All rights reserved - Images for illustration purposes only. [ Back Contents ]...
- Page 43 FROM OUTSIDE: By turning the knob With one of the keys provided AND THAT’S ALL FOR CONTROL! EXPLORE THE REST OF THE INTERFACE… CONNECTED LOCK © 2017 Somfy SAS. All rights reserved - Images for illustration purposes only. [ Back Contents ]...
-
Page 44: Explore The Connected Lock Controller
OF THE CONNECTED LOCK You can access the controller of your lock in several ways: A. Overview B. Web portal C. Mobile app CONNECTED LOCK © 2017 Somfy SAS. All rights reserved - Images for illustration purposes only. [ Back Contents ]... -
Page 45: Overview
When using for the first time, it is recommended to go to the web portal. You can then better understand all the options available for your connected lock! CONNECTED LOCK © 2017 Somfy SAS. All rights reserved - Images for illustration purposes only. [ Back Contents ]... -
Page 46: Web Portal
Default screen The Doorlock control function is also available on the web portal, when the Internet Gateway is installed. CONNECTED LOCK © 2017 Somfy SAS. All rights reserved - Images for illustration purposes only. [ Back Contents ]... - Page 47 The Doorlock control function is also available on the web portal, when the Internet Gateway is installed. CONNECTED LOCK © 2017 Somfy SAS. All rights reserved - Images for illustration purposes only. [ Back Contents ]...
- Page 48 Manage your users Explanations in the section below. • Access the online help at any time, if necessary GUIDES VIDEO TUTORIALS HOTLINE … CONNECTED LOCK © 2017 Somfy SAS. All rights reserved - Images for illustration purposes only. [ Back Contents ]...
-
Page 49: Mobile App
User management My doors Lock control App settings Default screen On a daily basis, you can primarily use the mobile app. CONNECTED LOCK © 2017 Somfy SAS. All rights reserved - Images for illustration purposes only. [ Back Contents ]... - Page 50 Detailed explanations given on page 41. • And an access to the main functions Explanations in the section below. Manage your locks Manage your users CONNECTED LOCK © 2017 Somfy SAS. All rights reserved - Images for illustration purposes only. [ Back Contents ]...
- Page 51 NOW THAT THE INTERFACE HAS BEEN INTRODUCED, LEARN TO MANAGE YOUR CONNECTED LOCK! CONNECTED LOCK © 2017 Somfy SAS. All rights reserved - Images for illustration purposes only. [ Back Contents ]...
-
Page 52: Manage The Connected Lock
THE CONNECTED LOCK Make the use of your connected lock even more personalised! A. Manage users and accesses B. Manage products CONNECTED LOCK © 2017 Somfy SAS. All rights reserved - Images for illustration purposes only. [ Back Contents ]... - Page 53 Your connected lock allows you to easily manage all accesses: You have … it’s that Other users with access rights that you determine the control… simple! CONNECTED LOCK Installation © 2016 Somfy SAS. All rights reserved - Images for illustration purposes only. [ Back Contents ]...
- Page 54 Your users & their access rights For each user, And define access rights assign an access key or delete them. or revoke it. CONNECTED LOCK © 2017 Somfy SAS. All rights reserved - Images for illustration purposes only. [ Back Contents ]...
- Page 55 The user can open the door: The user is always allowed - for a given period to open the door. - in periodic time slots CONNECTED LOCK © 2017 Somfy SAS. All rights reserved - Images for illustration purposes only. [ Back Contents ]...
- Page 56 If he already has a connected lock. He also sees He also sees his users here, and can add others his lock here, and can control and manage it. and manage them. CONNECTED LOCK © 2017 Somfy SAS. All rights reserved - Images for illustration purposes only. [ Back Contents ]...
- Page 57 - Go to the icon of the user you want to delete - Slide it to the middle: a bin appears. You can also go to the “Manage my users” menu. CONNECTED LOCK © 2017 Somfy SAS. All rights reserved - Images for illustration purposes only. [ Back Contents ]...
- Page 58 - Click the name of the user you want to edit - Follow the instructions on the screen. You can also go to the “Manage my users” menu. CONNECTED LOCK © 2017 Somfy SAS. All rights reserved - Images for illustration purposes only. [ Back Contents ]...
- Page 59 - Click the “Add a user” button And follow the instructions on the screen. You are going to send an electronic key to his smartphone. Have his email address handy. CONNECTED LOCK © 2017 Somfy SAS. All rights reserved - Images for illustration purposes only. [ Back Contents ]...
- Page 60 Delete a user Again, from the “My users” menu: - Open the user you want to delete - Click Delete user. CONNECTED LOCK © 2017 Somfy SAS. All rights reserved - Images for illustration purposes only. [ Back Contents ]...
- Page 61 - Go to the icon of the key you want to revoke from the user - Slide it to the middle: a bin appears. CONNECTED LOCK © 2017 Somfy SAS. All rights reserved - Images for illustration purposes only. [ Back Contents ]...
- Page 62 - Go to the icon of the user in the initially authorised lock. - Slide it to the middle: a bin appears. CONNECTED LOCK © 2017 Somfy SAS. All rights reserved - Images for illustration purposes only. [ Back Contents ]...
- Page 63 When you delete a user from the mobile app, the electronic key is automatically revoked from him. CONNECTED LOCK © 2017 Somfy SAS. All rights reserved - Images for illustration purposes only. [ Back Contents ]...
- Page 64 Again, from the “My users” menu: - Open the user you want to delete. - And click Manage accesses. - Slide the cursor to Not authorised. CONNECTED LOCK © 2017 Somfy SAS. All rights reserved - Images for illustration purposes only. [ Back Contents ]...
- Page 65 On the web portal, the screen displays: Go close Synchronise to your lock Log in the lock Refer to page 35 for more explanations. CONNECTED LOCK © 2017 Somfy SAS. All rights reserved - Images for illustration purposes only. [ Back Contents ]...
- Page 66 - Date & time of lock movements. - Users who controlled your lock. From the “My doors” menu: - Select the desired lock. - Click History. CONNECTED LOCK © 2017 Somfy SAS. All rights reserved - Images for illustration purposes only. [ Back Contents ]...
-
Page 67: Manage Products
B1. Edit the lock settings From the “Manage my accesses” menu: - Click the relevant lock. - Follow the instructions on the screen. CONNECTED LOCK © 2017 Somfy SAS. All rights reserved - Images for illustration purposes only. [ Back Contents ]... - Page 68 The added locks are also visible and can be controlled in the same way as the initial lock: Web portal Mobile app CONNECTED LOCK Installation © 2016 Somfy SAS. All rights reserved - Images for illustration purposes only. [ Back Contents ]...
- Page 69 - Manage my Products > Manage my devices The list of devices is displayed on the screen. You can edit or delete them. CONNECTED LOCK © 2017 Somfy SAS. All rights reserved - Images for illustration purposes only. [ Back Contents ]...
- Page 70 On the web portal, the screen displays: Go close Synchronise to your lock Log in the lock Refer to page 35 for more explanations. CONNECTED LOCK © 2017 Somfy SAS. All rights reserved - Images for illustration purposes only. [ Back Contents ]...
- Page 71 Add a card reader and cards Manage all your devices together and edit them MANAGING THE ACCOUNT CONNECTED LOCK Installation and user guide © 2017 Somfy SAS. All rights reserved - Images for illustration purposes only. [ Back Contents ]...
-
Page 72: Replacing Batteries
28. CONNECTED LOCK Installation and user guide © 2017 Somfy SAS. All rights reserved - Images for illustration purposes only. [ Back Contents ]... -
Page 73: Reset
If you have a card reader associated with the lock: reset it to factory settings. More information in the guide for the card reader. CONNECTED LOCK Installation and user guide © 2017 Somfy SAS. All rights reserved - Images for illustration purposes only. [ Back Contents ]... -
Page 74: Technical Data
In case the equipment is not covered by the warranty, it will be returned to the customer. The images in this guide are for illustration purposes only. CONNECTED LOCK Installation and user guide © 2017 Somfy SAS. All rights reserved - Images for illustration purposes only. [ Back Contents ]... - Page 75 AND VOILA! You can now enjoy your connected lock! CONNECTED LOCK Installation and user guide © 2017 Somfy SAS. All rights reserved - Images for illustration purposes only. [ Back Contents ]...
- Page 76 50 avenue du Nouveau Monde F-74300 CLUSES www.somfy.com © 2017 Somfy SAS. All rights reserved. SOMFY is a registered trademark. Apple and the Apple logo are trademarks of Apple Inc., registered in the US and other countries. App Store is a trademark of Apple Inc.
Need help?
Do you have a question about the Connected Lock and is the answer not in the manual?
Questions and answers