
Related Manuals for Bresser National Geographic EXPLORER 3


Summary of Contents for Bresser National Geographic EXPLORER 3
- Page 1 E X P LO R E R 3 ULTRA HD | WIFI Bedienungsanleitung Operating instructions Instrucciones de uso Manual de instruções Instrukcja użytkownika Art.No. 8683400...
- Page 2 Besuchen Sie unsere Website über den folgenden QR Code oder Weblink um weitere Informatio- nen zu diesem Produkt oder die verfügbaren Übersetzungen dieser Anleitung zu finden. Visit our website via the following QR Code or web link to find further information on this product or the available translations of these instructions.
- Page 3 FULL MANUAL & VIDEO DOWNLOAD: www.bresser.de/download/8683400 APP DOWNLOAD „XDV“: SERVICE AND WARRANTY: www.bresser.de/warranty_terms Bedienungsanleitung ......... 4 Operating instructions ........20 Instrucciones de uso ........36 Manual de instruções ........52 Instrukcja użytkownika ........68 Apple and the Apple logo are trademarks of Apple Inc., registered in the U.S. and other countries. App Store is a service mark...
-
Page 4: Allgemeine Informationen
Allgemeine Informationen Lesen Sie vor der Benutzung des Geräts aufmerksam die Sicherheitshinweise und die Bedienungsanleitung. Bewahren Sie diese Bedienungsanleitung für die erneute Verwendung zu einem späteren Zeitpunkt auf. Bei Verkauf oder Weitergabe des Gerätes ist die Bedienungsanleitung an jeden nachfolgenden Besitzer/Benutzer des Produkts weiterzugeben. -
Page 5: Hinweise Zur Reinigung
• Reinigen Sie die Schutzhülle nach jedem Gebrauch mit klarem, sauberem Wasser und trock- nen Sie es gründlich. EG-Konformitätserklärung Eine „Konformitätserklärung“ in Übereinstimmung mit den anwendbaren Richtlinien und entsprechenden Normen ist von der Bresser GmbH erstellt worden. Diese kann auf Anfrage jederzeit eingesehen werden. -
Page 6: Garantie & Service
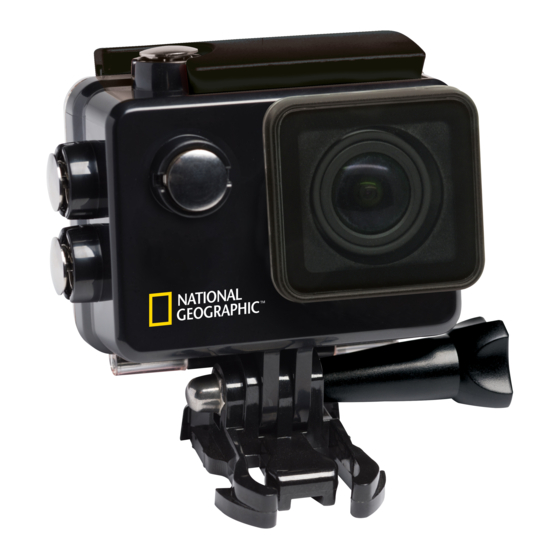
Die reguläre Garantiezeit beträgt 2 Jahre und beginnt am Tag des Kaufs. Um von einer verlän- gerten, freiwilligen Garantiezeit wie auf dem Geschenkkarton angegeben zu profitieren, ist eine Registrierung auf unserer Website erforderlich. Die vollständigen Garantiebedingungen sowie Informationen zu Garantiezeitverlängerung und Serviceleistungen können Sie unter www.bresser.de/garantiebedingungen einsehen. - Page 7 Lieferumfang Kamera USB Kabel Wasserdichtes Gehäuse Gurte, Sicherungsdraht Fahrradhalterung und Putztuch Akku und Ersatzakku Flügelschrauben Basis-Verbindungsstück Multifunktions-Verbindungsstück Basis-Halterungen für flache oder gebogene Oberflächen + Klebepads...
-
Page 8: Erste Schritte
Erste Schritte Wasserdichtes Gehäuse öffnen/schließen: Gehäuse öffnen: Gehäuse schließen: Drücken Sie die Klemme nach oben Drücken Sie die Klappe an das Gehäuse (1), und um das Gehäuse zu öffnen (1). lassen sie die Klemme am Gelenk einrasten (2). Nun die Klemme nach unten drücken (3) um zu schließen. - Page 9 Akku einsetzen oder entfernen A. Die Sperre lösen und die Batteriefachabdeckung öffnen. B. Akku in korrekter Richtung einsetzen. C. Akku entfernen: Batteriefachabdeckung öffnen und den Akku entfernen. Batteriefachabdeckung Akku aufladen A. Der Akku kann mit dem beiliegenden Netzteil oder über das USB Kabel am Computer aufgeladen werden.
- Page 10 Funktionen Ultra HD Ultra HD EXPLORER 3 EXPLORER 3 WIFI...
- Page 11 Ultra HD EXPLORER 3 Ultra HD 1. Ein/Ausschalter 9. Betriebsanzeige & Menü & Mode-Taste 10. Lautsprecher EXPLORER 3 2. Linse 11. HOCH + Wi-Fi Taste WIFI 3. Mikrofon 12. RUNTER Taste 4. Micro SD Steckplatz 13. OK / Aufnahme Taste 5.
- Page 12 Verwendung der Halterungen Befestigung an flachen oder gebogenen Oberflächen: Wählen Sie, je nach Oberfläche, die flache oder gebogene Basis-Halterung aus. Befestigung an Basis-Halterung (z.B. Helm-Montierung):...
- Page 13 Montierungen - Beispiele: Basis-Montierung / Helm-Montierung: Helm-Montierung (Seitliche Befestigung): Fahrradhalterung: Gürtelhalterung: *optional...
-
Page 14: Betrieb
Betrieb Moduswechsel Drücken Sie die [EIN/AUS / Modus] Taste [ ] wiederholt, um durch die verschiedenen Kamera- Modi zu schalten. Kamera-Modi Beschreibung Video-Aufnahmemodus Videoaufnahme Foto-Aufnahmemodus Aufnahme eines einzelnen Fotos Zeitlupen Aufnahme Aufnahme eines Zeitlupe Videos Wiedergabe der Videos und Fotos über den Wiedergabemodus Bildschirm oder am TV über HDMI Kabel. - Page 15 Fotos aufnehmen Wechseln Sie in den Foto-Aufnahmemodus, indem Sie [ ] drücken. In der linken oberen Ecke wird das Symbol [ ] angezeigt. Drücken Sie “OK” [ ], um Fotos aufzunehmen. Bei gedrückt gehaltener HOCH- oder RUNTER-Taste können Sie rein- oder rauszoomen.
- Page 16 Einstellungen Um zu den Einstellungen zu gelangen drücken Sie [ ] so oft, bis das Symbol für die Einstellun- gen [ ] erscheint. Drücken sie jetzt “OK” [ ] um das Menü zu öffnen. Mit der Taste [ wechseln Sie zwischen den verschiedenen Untermenüs. Video-, Foto-, Bild- und Systemeinstel- lungen.
-
Page 17: Sonstige Einstellungen
Sonstige Einstellungen Belichtung -3/ -2/ -1/ 0/ 1/ 2/ 3 Weißabgleich Auto/ Sonnig/ Wolkig/ künstliches Licht/ Neonlicht Wlan An/ Aus Bildschirm drehen An/ Aus Kfz-Modus An/ Aus (Automatische Videoschleife nach Einschaltung) Netzfrequenz Auto/ 50Hz/ 60Hz Status LED An/ Aus Bildschirmschoner 10s/ 20s/ 30s/ Aus Energiesparmodus 1min/ 3min/ 5min/ Aus... -
Page 18: Technische Daten
Technische Daten 2 Zoll (5.08 cm) Bildschirm TFT Bildschirm 0,94 Zoll (2,4 cm) OLED Bildschirm vorne 170° Weitwinkel Linse Wasserdichtes Gehäuse Wasserdicht bis 30 Meter Sprachen DE, EN, ES, FR, IT, PT, PL 12 MP (4032x3024), 10 MP (3648x2736), Bild-Auflösung 8 MP (3264x2448), 5 MP (2592x1944), 3 MP (2048x1536), 2 MP 4K (30fps);... - Page 19 Einzelbild / Aufnahme-Schleife / Zeitraffer Aufnahme-Modi / Serienaufnahme / Selbstauslöser / Automatische Bildaufnahme Frequenz 50Hz/60Hz Schnittstellen Micro-USB, Micro-HDMI, Micro SD Kartenslot Stromquelle 3.7 V 1050 mAh Akku-Kapazität 1050 mAh @ 3.7 V Energieableitung ca. 50 Minuten (bei 4k) Aufnahmezeit ca. 3 Stunden Ladezeit Maße 60x30x41 mm...
-
Page 20: Intended Use
About this Instruction Manual Please read the safety instructions and the operating instructions carefully before use. Keep these instructions for renewed use at a later date. When the device is sold or given to someone else, the instruction manual must be provided to the new owner/user of the product. -
Page 21: Notes On Cleaning
• Clean the protective case after each use with clear, clean water and dry it thoroughly. EC Declaration of Conformity Bresser GmbH has issued a Declaration of Conformity‘ in accordance with applicable guidelines and corresponding standards. This can be viewed any time upon request. -
Page 22: Warranty And Service
You can consult the full guarantee terms as well as information on extending the guarantee period and details of our services at www.bresser.de/warranty_terms. -
Page 23: Scope Of Delivery
Scope of delivery Camera USB cable Waterproof case Straps, Wire rope Bicycle mount and cleaning cloth Battery pack and spare battery pack Thumb knobs Retaining clip for Base mount Multifunction mount Base for flat and curved surface + sticker... -
Page 24: First Steps
First Steps How to open and close the waterproof case: How to open: How to close: Press the clamp upward, to open Press the case door all the way down (1) and then the housing (1). snap the clamp to the hinge (2). Now, simply press the clamp down (3) to close. - Page 25 Installing or removing the battery A. Press on the battery cover to open it B. Correctly install the battery into the camera. C. Remove Battery: Simply open battery cover to take the battery out. Battery cover Charging A. Charging can be done with the power adapter or by connecting the action camera to a compu- ter via the usb cable.
- Page 26 Functions Ultra HD Ultra HD EXPLORER 3 EXPLORER 3 WIFI...
- Page 27 Ultra HD EXPLORER 3 Ultra HD 1. Power button (on/off) 9. Working indicator light & Menu & Mode button 10. Loudspeaker EXPLORER 3 2. Lens 11. UP + Wi-Fi button WIFI 3. Microphone 12. DOWN button 4. Micro SD port 13.
- Page 28 How to use the Base mount Flat surface or curved surface mount: Choose the flat or curved base depending on the surface. Base mount (e.g. for helmet mount):...
- Page 29 Mount examples: Base mount / Helmet mount: Helmet mount (Vertical mount): Bicycle mount: Belt mount: *optional...
- Page 30 Operating Mode Switching Press the [Power ON/OFF / Mode] button [ ] repeatedly to cycle through the camera modes. Camera mode Description Video recording mode Video recording Photo shooting mode Take a single photo Slow motion recording Take a slow motion video Playback videos directly on the TFT screen or via Playback Mode HDMI cable on your TV.
- Page 31 Photo shooting Switch to photo shooting mode by pressing [ ]. There will be an [ ] icon in the upper left corner. Press ”OK” [ ] to take a single photo. Press and hold the „UP“ or „DOWN“ button to zoom in or out. You can make various option changes under Settings [ Take slow motion videos Press the [...
-
Page 32: Video Menu
Settings To access the settings, press [ ] several times until you see the icon [ ] for the settings. Now press “OK” [ ] to open the menu. Use the [ ] button to switch between the various submenus. Video, photo, image and system settings. Video menu Video resolution 4K(3840*2160 ) @ 30fps;... -
Page 33: Other Settings
Photo menu Picture resolution 2M/ 5M/ 8M/ 12M/ 16M* Self timer Off/ 3s/ 5s/ 10s/ 20s Automatic shooting Off/ 3s/ 10s/ 15s/ 20s/ 30s Continuous shooting (burst) Off/ 3x/ 5x/ 10x Other settings Exposure -3/ -2/ -1/ 0/ 1/ 2/ 3 White balance Auto/ Sunny/ Cloudy/ Artificial light/Neon light Wlan... -
Page 34: System Settings
System settings Language Deutsch, English, Español, Français, Italiano, Português, Polski Date / Time YYYY/MM/DD HH:MM:SS Format All data on the sd card will be deleted Reset (default settings) Reset system to default settings Version View current firmware version Technical Data 2 Zoll (5.08 cm) display TFT Display 0.94 Zoll (2.4 cm) OLED front display... - Page 35 4K( 30fps); 2.7K (30fps); Resolution of videos 1920*1080 (60fps); 1920*1080 (30fps); 1280*20 (120fps) 1280*720 (60fps) Video format Video codec H.264 Micro SD card up to 64 GB (not included) Storage (SDHC Class 10 or higher required) Single photo / Loop recording / Time Lapse / Shooting mode Burst mode / Self timer / Automatic shooting Frequency...
-
Page 36: Informaciones De Carácter General
Informaciones de carácter general Lea atentamente las indicaciones de seguridad recogidas en este manual. Emplee este producto exclusivamente de la forma descrita en el manual, con el fin de evitar daños en el aparato o lesiones. Conserve el manual de instrucciones para poder volver a informarse en todo momento sobre las funciones de manejo. - Page 37 • Limpie la carcasa protectora después de cada uso con agua clara y limpia y séquela a fondo. Declaración de conformidad de la Unión Europea (CE) Bresser GmbH ha emitido una „Declaración de conformidad“ de acuerdo con las di- rectrices y normas correspondientes. Dicha declaración se puede consultar en cual- quier momento, previa petición.
-
Page 38: Garantía Y Servicio
Las condiciones de garantía completas así como informaciones relativas a la ampliación de la garantía y los servicios pueden encontrarse en www.bresser.de/warranty_terms. -
Page 39: Volumen De Suministro
Volumen de suministro Cámara Cable USB Carcasa sumergible Correas, Alambre y paño de limpieza Batería y Batería de repuesto Soporte de bicicleta Tornillos para la fijación del soporte Base de la montura Montura multifunción Base para superficies planas y curvadas + Pegatinas... -
Page 40: Primeros Pasos
Primeros Pasos Como abrir y cerrar la carcasa sumergible: Como abrirla: Como cerrarla: Presione la pinza hacia arriba, para Presione la puerta trasera hacia abajo (1) y luego abrir la carcasa (1). encaje la abrazadera en la bisagra (2). Ahora, simplemente presione la abrazadera hacia abajo (3) para cerrar. - Page 41 Instalar o quitar la batería A. Presione la tapa de la batería para abrirla. B. Instale correctamente la batería en la cámara. C. Quitar la batería: simplemente abra la tapa de la batería para sacar la batería. Tapa batería Carga A.
- Page 42 Funcionamiento Ultra HD Ultra HD EXPLORER 3 EXPLORER 3 WIFI...
-
Page 43: Luz Indicadora
Ultra HD EXPLORER 3 Ultra HD 1. Tecla encendido/apagado 9. Luz indicador funcionamiento & menú & modo 10. Altavoz EXPLORER 3 2. Lente 11. Tecla UP (arriba) WIFI 3. Micrófono + Tecla Wi-Fi 4. Puerto Micro SD 12. Tecla DOWN (abajo) 5. - Page 44 Como usar la base del soporte Montaje en una superficie plana o curva: Elija la base plana o curva dependiendo de la superficie. Instalación en una base (p.e. para el soporte del casco):...
- Page 45 Montaje - Ejemplos: Montaje de la base/Montaje de la carcasa: Montaje de la carcasa (montaje lateral): Soporte para bicicleta: Soporte de correa: *opcional...
- Page 46 Funcionamiento Cambio de modo Presiones el botón [Power On-Off / mode] [ ] varias veces para recorrer los modos de la cámara. Modo de Cámara Descripción Modo de grabación de Grabacción vídeo video Modo de fotografía Permite hacer una sola foto Grabación a cámara lenta Grabación de un vídeo a cámara lenta Reproducir las fotos en la pantalla o en la...
- Page 47 Fotografías & Ajustes Cambie el modo de fotografía o grabación pulsando el botón [ ]. El botón se en- cuentra en la esquina superior [ ] izquierda. Pulse el botón “OK” [ ] para realizar fotos individuales. Mantenga pulsadas las teclas ARRIBA y ABAJO para alejar o acercar el zoom.
-
Page 48: Modo De Configuración
Modo de configuración Para acceder a la configuración, presionar varias veces [ ] hasta que puedas ver el icono ] para los ajustes. Ahora presiona “OK” [ ] para abrir el menu. Con el botón [ ] puede cambiar entre los diferentes submenús. Ajustes de vídeo, foto, imagen y sistema. Menú... -
Page 49: Otros Ajustes
Disparo continuo Apagado/3x/5x/10x Otros ajustes Exposición -3/-2/-1/0/1/2/3 Balance de blancos Auto/Soleado/Nublado/Luz artificial/Luz fluorescente Wi-Fi Encendido/Apagado Girar la pantalla Encendido/Apagado Modo coche Encendido/Apagado (Bucle de vídeo automático tras conexión) Frecuencia de red Auto/50Hz/60Hz Estado LED Encendido/Apagado Salvapantallas 10s/20s/30s/Apagado Modo ahorro de energía 1 min/3 min/5 min/Apagado Indicador de fecha y hora Apagado/Encendido... -
Page 50: Datos Técnicos
Firmware Versión del firmware actual Datos técnicos Pantalla TFT Pantalla de 2 pulgadas (5.08 cm) Lente 170° gran angular Carcasa sumergible Sumergible hasta 30 m Idioma Deutsch, English, Español, Français, Italiano, Português, Polski Resolución de las fotos 12 MP (4032x3024), 10 MP (3648x2736), 8 MP (3264x2448), 5 MP (2592x1944), 3 MP (2048x1536), 2 MP Resolución de los videos... - Page 51 Frecuencia 50Hz/60Hz Puertos Micro-USB, Micro-HDMI, ranura Micro SD Fuente de energía 3.7 V Capacidad de la batería 1050 mAh Disipación de energía 1050 mAh @ 3.7 V Tiempo de grabación Aproximadamente 50 minutos (en 4k) Tiempo de carga Aproximadamente 3 horas Dimensiones 60x30x41 mm Peso...
-
Page 52: Informações Gerais
Informações gerais Este manual de instruções deve ser considerado como parte do aparelho. Antes de utilizar o aparelho, leia com atenção as advertências de segurança e o manual de instruções. Guarde este manual de instruções de forma a poder consultá-lo mais tarde. -
Page 53: Declaração De Conformidade Ce
• Limpe a cobertura de protecção após cada utilização , utilizando água e secando bem de seguida. Declaração de conformidade CE Foi criada pela Bresser GmbH uma „Declaração de conformidade“ de acordo com as directivas e respectivas normas aplicáveis. A sua visualização pode ser solicitada a qualquer momento. -
Page 54: Garantia E Serviço
é neces- sário registar-se no nosso Website. Todas as condições de garantia bem como informações sobre o prolongamento da garantia e prestações de serviço podem ser consultadas em www.bresser.de/warranty_terms. -
Page 55: Conteúdo Da Embalagem
Conteúdo da embalagem Câmara Cabo USB Caixa impermeável Correias, arame de segurança e pano de limpeza Suporte para a bicicleta Bateria e Bateria de reposição Parafuso de orelhas Base de adaptador de fixação (adaptadore de fixação para o suporte de capacete) Adaptador multifunções Base de fixação para áreas planas ou superfí- cies curvas + autocolante... - Page 56 Primeiro Passo Como abrir e fechar a caixa estanque: Como abrir: Como fechar: Pressione o dispositivo de fixação Pressione a porta da caixa ao máximo (1) e depois para cima para abrir a caixa (1). encaixe o dispositivo de fixação na dobradiça (2). Agora, basta pressionar o dispositivo de fixação para baixo (3) para fechar a caixa estanque.
- Page 57 Instalar ou retirar a bateria A. Pressione a tampa da bateria para abri-la. B. Instale a bateria corretamente na câmara. C. Para retirar a bateria, basta abrir a tampa da bateria. Tampa da bateria Carregar A. O carregamento pode ser feito com o transformador de corrente ou ligando a câmara de ação a um computador através do cabo USB.
- Page 58 Funcionamento Ultra HD Ultra HD EXPLORER 3 EXPLORER 3 WIFI...
- Page 59 Ultra HD EXPLORER 3 Ultra HD 1. Botão On / Off 9. Indicador de potência & Menu & Botão Modo 10. Altifalante EXPLORER 3 2. Lente 11. Botão para cima WIFI 3. Microfone + Botão Wi-Fi 4. Entrada Micro SD 12.
- Page 60 Utilização do suporte de capacete Suporte de superfície plana ou de superfície curva: Escolha a base plana ou curva, dependendo da superfície. Suporte na base (por exemplo, para a montagem no capacete):...
- Page 61 Montagem - Exemplo: Montagem da Base / Montagem do Capacete: Montagem do Capacete (Montagem lateral): Suporte para a bicicleta: Correias de suporte: *opcional...
- Page 62 Funcionamento Alterar o modo Prima o botão de [corrente / modo] [ ] repetidamente para percorrer os modos da câmara. Modo da câmara Descrição Modo de gravação de Gravação de vídeos vídeos Modo de fotografia Tirar uma única fotografia Gravar em Slow Motion Gravar um vídeo Slow Motion Reprodução de vídeos e fotos num ecrã...
- Page 63 Disparo de fotografias e definições Altere para modo de fotografia enquanto pressiona o botão [ ]. No canto superior esquerdo irá aparecer este símbolo [ ]. Pressione em “OK” [ ] para tirar fotos individuais. Se manter o dedo pressionando as teclas CIMA ou BAIXO poderá fazer zoom.
-
Page 64: Modo De Configuração
Modo de configuração Para aceder às definições, prima [ ] várias vezes até ver o ícone [ ] para as definições. Agora, prima “OK” [ ] para abrir o menu. Com a tecla [ ] pode navegar através dos diferentes menus existentes. -
Page 65: Outras Configurações
Captura de imagem Desligado/ 3s/ 10s/ 15s/ 20s/ 30s automática Disparo contínuo Desligado/ 3x/ 5x/ 10x Outras configurações Exposição -3/ -2/ -1/ 0/ 1/ 2/ 3 Equilíbrio de branco Automático/ Solarengo/ Nublado/ Luz artificial / Luz de néon Wi-Fi Ligado/ Desligado Girar monitor Ligado/ Desligado Modo-kfz (Loop automático... -
Page 66: Dados Técnicos
Formatar Confirmar/Cancelar Repor definições de origem Confirmar/Cancelar Versão Versão atual Firmware Dados técnicos Pantalla TFT Pantalla de 2 pulgadas (5.08 cm) Objetiva Grande angular 170° Caixa estanque À prova de água até 30 m de profundidade Opções de idioma DE, EN, ES, FR, IT, PT, PL Resolução das 12 MP (4032x3024), 10 MP (3648x2736), fotografias... - Page 67 Modos de Gravação Disparo Único / Vídeo-Loop / Time-lapse / Função de disparo contínuo / Temporizador / Captura de imagem automática Frequência da fonte ótica 50Hz/60Hz Interfaces Micro-USB, Micro-HDMI, Entrada para micro SD Fonte de alimentação 3.7 V Capacidade de Bateria 1050 mAh Derivação de Energia 1050 mAh @ 3.7 V...
-
Page 68: Ogólne Informacje
Ogólne informacje Przed rozpoczęciem korzystania z urządzenia należy uważnie przeczytać wskazówki dotyczące bezpieczeństwa i instrukcję obsługi. Niniejsza instrukcja powinna zostać zachowana do ponownego wykorzystania w późniejszym czasie. W przypadku sprzedaży lub udostępnienia urządzenia instrukcję obsługi należy przekazać jego każdemu kolejnemu właścicielowi/użytkownikowi. Przeznaczenie Ten produkt przeznaczony jest wyłącznie do użycia w zakresie prywatnym. -
Page 69: Wskazówki Dotyczące Czyszczenia
• Myć pokrowiec ochronny po każdym użyciu w klarownej, czystej wodzie i wycierać do sucha. Deklaracja zgodności WE „Deklaracja zgodności” zgodna ze stosowanymi dyrektywami i odpowiednimi norma- mi została sporządzona przez Bresser GmbH. Na życzenie jest ona w każdej chwili do wglądu. UTYLIZACJA Materiały, z których wykonano opakowanie, należy utylizować posortowane według rodzaju. -
Page 70: Gwarancja I Serwis
Wszelkie informacje dotyczące gwarancji jak również informacje na temat przedłużenia czasu gwa- rancji i świadczeń serwisowych można znaleźć na stronie: www.bresser.de/warranty_terms. Service Hotline ... -
Page 71: Zakres Dostawy
Zakres dostawy Kamera Kabel USB Wodoodporna obudowa Paski, przewód zabezpieczający, Mocowanie do roweru ściereczka do czyszczenia Akumulator i zapasowy akumulator Śrubki motylkowe Podstawa- część łącząca Adapter Wielofunkcyjne Podstawa mocowania na płaskich i wypukłych powierzchniach + Naklejka... -
Page 72: Pierwsze Kroki
Pierwsze kroki Otwieranie/zamykanie wodoodpornej obudowy Otwieranie obudowy: Zamykanie obudowy: Nacisnąć zacisk w górę, aby Przycisnąć klapkę do obudowy (1) i pozwolić, aby otworzyć obudowę (1). zacisk zaskoczył (2). Przycisnąć zacisk w dół (3), aby zamknąć. Wkładanie karty pamięci Micro SD* •... - Page 73 Wkładanie lub wyciąganie akumulatora A. Odblokować blokadę i otworzyć klapkę na baterie. B. Włożyć akumulator we właściwym kierunku. C. Wyciąganie akumulatora: Otworzyć klapkę na baterie i wyciągnąć akumulator. Klapka na baterie Ładowanie akumulatora A. Akumulatorek można naładować bezpośrednio z sieci za pomocą załączonego adaptera sieciowego lub podłączając kablem USB do komputera.
- Page 74 Funkcje Ultra HD Ultra HD EXPLORER 3 EXPLORER 3 WIFI...
- Page 75 Ultra HD EXPLORER 3 Ultra HD 1. Włącznik/wyłącznik 9. Wskaźnik operacyjny & przycisk menu i trybu 10. Głośnik EXPLORER 3 2. Soczewka 11. Przycisk GÓRA WIFI 3. Mikrofon + Przycisk Wi-Fi 4. Szczelina czytnika Micro SD 12. Przycisk DÓŁ 5. Port micro USB 13.
- Page 76 Korzystanie z mocowań Montaż na płaskich lub wypukłych powierzchniach: W zależności od powierzchni należy wybrać płaską lub wypukłą podstawę mocowania. Montaż na podstawie mocowania (np. montaż na kasku):...
- Page 77 Mocowanie - Przykłady: Mocowanie podstawowe / Mocowanie do kasku: Mocowanie do kasku (Mocowanie boczne): Uchwyt rowerowy: Uchwyt paska: *opcjonalny...
- Page 78 Obsługa Zmiana trybu Przyciskać przycisk [Wł./Wył./ Tryb] [ ], aby przełączać pomiędzy poszczególnymi trybami kamery. Tryby kamery Opis Tryb nagrywania filmów Nagrywanie filmów Tryb robienia zdjęć Robienie pojedynczych zdjęć Nagrywanie w zwolnionym Nagrywanie filmów w zwolnionym tempie tempie Odtwarzanie filmów i zdjęć na ekranie lub telewiz- Tryb odtwarzania orze za pomocą...
- Page 79 Robienie zdjęć Przełącz aparat na tryb robienia zdjęć naciskając [ ]. W lewym górnym rogu pojawi się symbol [ ]. Naciśnij “OK” [ ], aby wybrać wykonywanie pojedynczych zdjęć. Odpowiednio przyciskając przycisk GÓRA lub DÓŁ można przybliżyć lub oddalić. W ustawieniach [ ] można dokonać...
- Page 80 Ustawienia Aby przejść do ustawień należy naciskać [ ] aż pojawi się symbol ustawień [ ]. Nacisnąć „OK” [ ], aby otworzyć menu. Za pomocą przycisku [ ] można przełączać pomiędzy różnymi submenu. Ustawienia filmów, zdjęć i systemowe. Menu filmów Rozdzielczość...
-
Page 81: Ustawienia Systemu
Tryb zdjęć seryjnych Wył./3x/5x/10x Pozostałe ustawienia Oświetlenie -3/-2/-1/0/1/2/3 Balans bieli Auto/słońce/zachmurzenie/sztuczne światło/ światło neonowe Wlan Wł./Wył. Obracanie ekranu Wł./Wył. Moduł samochodowy Wł./Wył. (nagrywanie w pętli po włączeniu) Częstotliwość sieci Auto/50 Hz/60 Hz Status LED Wł./Wył. Wygaszacz ekranu 10 s/20 s/30 s/Wył. Tryb oszczędzania energii 1 min/3 min/5 min/Wył. -
Page 82: Dane Techniczne
Ustawienia fabryczne Potwierdź/Anuluj Oprogramowanie Aktualna wersja oprogramowania Dane techniczne Ekran TFT Ekran 2-calowy (5.08 cm) Soczewka Kąt 170° Wodoodporna obudowa Sumergible hasta 30 m Języki Deutsch, English, Español, Français, Italiano, Português, Polski Rozdzielczość zdjęć 12 MP (4032x3024), 10 MP (3648x2736), 8 MP (3264x2448), 5 MP (2592x1944), 3 MP (2048x1536), 2 MP Rozdzielczość... - Page 83 Pamięć Karta pamięci Micro SD (do 64 GB) (nie objęta dostawą) (wymagana karta klasy 10 SDHC lub wyższej) Tryb działania Zdjęcie pojedyncze / Nagrywanie w pętli / Filmy poklatkowe / Funkcja zdjęć seryjnych / Samowyzwalacz / Auto Zapis obrazu Częstotliwość 50 Hz / 60 Hz Interfejsy Micro-USB, micro-HDMI,...
- Page 84 © 2018 National Geographic Partners LLC. All rights reserved. NATIONAL GEOGRAPHIC and Yellow Border Design are trademarks of the National Geographic Society, used under license. Bresser GmbH Gutenbergstr. 2 DE-46414 Rhede Irrtümer und technische Änderungen vorbehalten. www.bresser.de · info@bresser.de Errors and technical changes reserved. Manual_8683400_ActionCam-Explorer-3_de-en-es-pt-pl_NATGEO_v022018a...
Need help?
Do you have a question about the National Geographic EXPLORER 3 and is the answer not in the manual?
Questions and answers