
Related Manuals for Kyocera au Gratina


Summary of Contents for Kyocera au Gratina
- Page 1 Basic Manual Contents Safety Precautions Basic Operations Character Input Phone Phone Book Mail LINE Internet Camera Useful Functions Settings Appendix...
-
Page 2: Preface
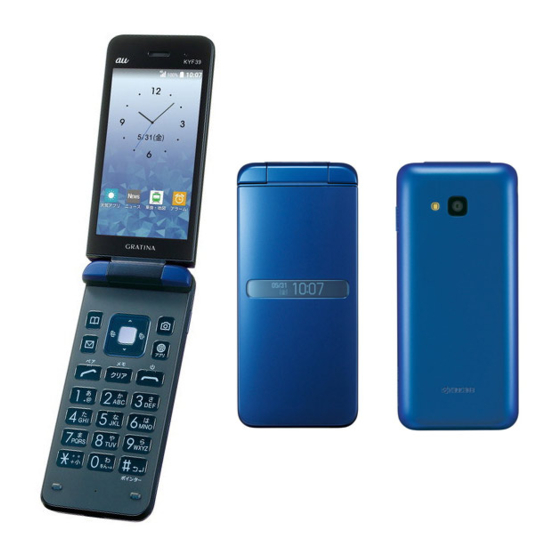
Preface List of Packaged Items Thank you for buying the "GRATINA" (simply Before you start using the product, make sure called the "product" or "main unit" from here on). that you have all the following packaged items Before using the product, be sure to read the with the product. -
Page 3: Operating Instructions
Handles only basic operations for main • Earphone features. • USB Type-C™ cable ■ "取扱説明書 詳細版 (Full Instruction • KYOCERA 3.5ΦType-C conversion cable Manual)" (0401QNA) For detailed descriptions of various functions, refer to the "取扱説明書 詳細版 (Full Instruction Manual)" (Japanese) available on the au ◎... -
Page 4: Illustrations And Descriptions In This Manual
■ GRATINA Guide Illustrations and In the following step, you can find detailed Descriptions in This Manual usage of the product via images. From the standby screen, press l → ■ Note on Key Illustrations [GRATINA guide] In this manual, the key illustrations are simplified as shown below. - Page 5 ■ Description of Operations for Selecting Item/Icon/Button, etc. ◎ For details on key operations, refer to "Learn Basic In this manual, step descriptions for selecting a Key Operations" (▶P. 87). menu item/icon/on-screen button, etc. with w or d and then pressing k (OK/Check/Set/ ■...
- Page 6 ◎ In this manual, keys, screenshots and icons are described based on default settings (color: pale water color) of the product. However, actual keys, screenshots and icons may differ or be partially omitted. ◎ Contents at the bottom of the screen that can be operated by pressing k/u/o/j/l are indicated in parentheses, such as u (Menu).
-
Page 7: Table Of Contents
Notes on Applications............47 Contents Cell Phone Etiquette ............48 Basic Operations ........50 Preface ..................ii List of Packaged Items ............ii Basic Operations ............. 50 Operating Instructions ............1 Names and Functions of Parts ........50 Illustrations and Descriptions in This Manual .....2 Charging/Notification Indicator ........ - Page 8 Switching to English Display ........... 71 Learn How to Enter Characters........89 Using the Standby Screen ..........71 Enter a Character Quickly in the Standby Using Widgets and Indicators ......... 72 Screen ..................93 Editing Widgets in the Standby Screen ....... 72 Phone ............95 Monitoring the Product's Status ........
- Page 9 Registering the Frequently Used Address to Pair Internet ..........121 Function ................107 Using the Pair Function..........108 Internet Access ............121 Accessing the Internet ..........121 Mail ............109 Using Data Communication .......... 121 Browser................122 E-mail ................. 109 Displaying the Browser Menu ........
- Page 10 Displaying the Settings Menu ........132 Wireless LAN (Wi-Fi ® ) Function ......133 Wireless LAN (Wi-Fi ® ) Function ........133 Using the Wireless LAN (Wi-Fi ® ) Function....134 Enabling the Wireless LAN (Wi-Fi ® ) Function ..134 Connecting to a Wi-Fi Network ........
-
Page 11: Safety Precautions
connecting with emergency call receiving Safety Precautions agencies within Japan. You cannot connect using 3G (circuit-switched network). • The product is compatible with au World When Using the Product Service. Each network service described in this manual varies depending on the area and •... - Page 12 • The Company is not liable for any incidental assumes no responsibility for any damages or damages (change/disappearance of saved lost profits resulting from altered or lost content, loss of business income, disruption contents. of business, etc.) arising from use of or •...
- Page 13 Sold by: KDDI CORPORATION, OKINAWA CELLULAR TELEPHONE COMPANY Manufactured by: KYOCERA Corporation ◎ Reproduction of the content of this manual in part or in whole is prohibited. ◎ The content of this manual is subject to change ...
-
Page 14: Safety Precautions (Observe Strictly)
*1 Serious injury: This refers to loss of sight, injury, Safety Precautions (Observe burns (high- and low-temperature), Strictly) electric shock, broken bones, injuries with residual aftereffects from poisoning, etc., and injuries requiring ■Before using the product, thoroughly read hospital admission for treatment or this "Safety Precautions"... - Page 15 ■ Precautions Common to the Main Indicates that Unit, Battery Pack, Back Cover, use in a place where the Indicates that Charger, au IC Card, Peripheral product is the power Devices likely to get plug must be wet or disconnected DANGER allowing the from the...
- Page 16 Do not put sand, dirt, or mud on the Do not subject the product to strong product or put it on them directly. Do pressure or break the product. not touch the product with hands to Especially when bringing the product which sand or others adhere.
- Page 17 WARNING Do not let the product get wet with water (drinking water, perspiration, seawater, urine of pet animals, etc.). Do not drop, trample, or throw the Doing so may cause fire, burns, injuries, product or give a strong force or or electric shock.
- Page 18 Make sure to turn off or stop charging Perform the following operations while the product before you get close to using, charging, or keeping the product places where a flammable gas or dust if there are odors, noise, smoke, can be generated. overheating, discoloring, deformation, Using the product in places where a or other abnormalities.
- Page 19 Do not use or store the product in Be careful when using the product humid or dusty places, or places that continuously for a long time or charging get hot. as it gets hot. Be careful of contacting Doing so may cause fire, burns, or with the product continuously by electric shock.
- Page 20 Do not apply excessive force such as Do not lighten or flash the light to point sticking a sharp-edged tool (nail, etc.) at the eyes of someone driving a car, into the product, hitting it with a hard etc. tool (hammer, etc.), or stepping on it. Doing so may interfere with driving and Doing so may cause fire, burns, or cause an accident.
- Page 21 Turn off the product or set it to Airplane When using the handsfree call, loud mode before going aboard an airplane. ringtone is ringing, or in the standby Since using the product on airplanes is mode, be sure to keep the product off restricted, follow the instructions given of the ears.
- Page 22 To use electronic medical equipment, When the display or camera lens is check with electronic medical accidentally broken, be careful of equipment manufacturer or vendor to broken glass or exposed internal parts determine how devices are affected by of the product. radio waves before using.
- Page 23 CAUTION Do not use the product without the back cover. Doing so may cause burns, injuries, or Do not swing the product around by electric shock. holding strap, etc. To use the product in car, check with Doing so may cause an accident. automobile manufacturer or dealer to If the display breaks and the fluid, etc.
- Page 24 Make sure that there is no adhered Do not forcibly install the battery pack metal pieces (cutter blade, staples, when attaching the battery pack. Do etc.) as the speaker (including the not forcibly remove the battery pack outer case side) or camera key part of when removing the battery pack.
- Page 25 WARNING Check the orientation of the battery pack when installing the battery pack into the product. Do not use the product if there are Not doing so may cause fire, burns, or odors, noise, smoke, overheating, injuries due to battery pack ignition, discoloring, deformation, or other rupture, overheat, or leak.
- Page 26 CAUTION Do not use or charge the product with the battery pack is wet. Doing so may cause fire, burns, or If fluid, etc. leaks out from the battery injuries. pack, do not let the fluid contact with the skin on your face or hands or ■...
- Page 27 Do not place heavy objects on the cord Do not touch the cord, charging of the specified charger (sold terminal or power plug of the specified separately), or do not pull the cord with charger (sold separately) with wet excessive force. hands.
- Page 28 When you disconnect the power plug When the charger is not to be used for from an outlet, do not pull the cord of a long time, disconnect the power plug the specified charger (sold separately) from the outlet. with excessive force. Instead, grasp Leaving it plugged in may cause fires, the adapter to disconnect.
- Page 29 ■ au IC Card When using electronic medical devices as home medical treatment other than CAUTION an implanted pacemaker and an implanted cardioverter-defibrillator outside medical facilities, check Be careful of the cut surface when individually with the manufacturer of handling the au IC card as it may the electronic medical equipment damage a part of your body such as regarding the influence of radio waves.
-
Page 30: Material List
Part Material Surface When using the product in medical Treatment facilities, be sure to observe the Phone book key, - regulations of the facility. camera key, hardening Radio waves may affect the browser key, mail resin performance of electronic medical key, cursor key, equipment. -
Page 31: Handling Precautions
■Battery pack (KYF36UAA) Handling Precautions Part Material Surface These precautions are provided to prevent Treatment product faults and to ensure that performance Exterior PC resin - can be fully demonstrated. Seal PET (base - Thoroughly read these precautions to ensure material) + correct use. - Page 32 ●To ensure the waterproof property (equivalent ●Do not use the product in extremely hot, cold to IPX5 and IPX7) of the product, use the or humid places. product with the back cover attached. (Use within an ambient temperature range of Note that the waterproof property is not 5℃...
- Page 33 ●The product may become warm while ●To prevent short-circuiting of the connection charging, depending on the situation, but this terminal, do not allow your fingers or any is not abnormal. other part of your body or conductive ●Remove the battery pack after turning off the materials (metal, pencil lead, etc.) to come in product.
- Page 34 ●Do not store the product in places subject to ●Never use the modified product. Use of a direct sunlight (e.g. in a car), places that get modified device violates the Radio Law and hot, places that get extremely cold, and in Telecommunications Business Law.
- Page 35 ●Take care not to place magnetized items ●While writing/reading data to/from a microSD such as magnetic cards, speakers and TV memory card, do not subject the product to sets near the product, as it might cause vibration or impact, removing the battery malfunction.
- Page 36 ●The battery pack is a consumable item. If the ■Battery pack performance of a battery pack does not (The battery pack of the recover (e.g. the usable time after each product is a lithium-ion charge has become extremely short), the battery.) battery is at the end of service life, so stop The battery pack is not fully...
- Page 37 ■Charger ●Do not damage the card (use in a hot place, throw into fire, contact the metal part with ●Do not wrap power cords of the specified foreign object, give an impact, bend, apply a charger (sold separately) around the charger. load, moisten, etc.).
- Page 38 ●Be careful about the copyright and portrait right when posting photos you shot, etc. on Internet homepages. ■Back up content on the product ●Please back up important content recorded or downloaded to the product to an outside source. Content recorded to memory on the product sometimes disappears or is altered by unexpected factors, such as static electricity or a fault, or by repair, mishandling,...
-
Page 39: Notes On Waterproof/Dustproof/Shockproof Properties
*2 IPX8 equivalent means that the product will Notes on Waterproof/ maintain its operability as a phone with no water Dustproof/Shockproof getting inside the main unit even if it is gently submerged in a tank of still tap water at room Properties temperature to a depth of 1.5 meter for about 30 minutes. -
Page 40: Important Items To Remember Before Use
Important Items to Remember this will not affect use, you should not leave the product next to items you do not want to before Use get wet. The product may wet clothing, inside ● Make sure the back cover is completely of carry bag, etc. - Page 41 ●Do not wear gloves while removing/attaching ■If any liquid other than water gets on the the back cover. Any minute particles product becoming lodged between contact surfaces ●If anything other than water (seawater, (a single hair, etc.), no matter how small, can washing detergent, alcohol, etc.) gets on the cause seepage.
- Page 42 ●Be careful not to pinch the rubber seal when ■Shock closing the back cover. Trying to close the ●The product shock resistance assumes cover with a seal pinched can scratch the usage in daily situations; subjecting the seal and affect water resistance. Any minute product to excessive shock such as by particles becoming lodged between contact throwing or causing/letting the product fall...
-
Page 43: Precautions On Charging
Precautions on Charging Draining the Product ●Accessories and optional accessories are not If you use the product after it gets wet, be sure to water/dust resistant. Note the following drain water from the earpiece/speaker, before and after charging. mouthpiece (microphone), and external connection ●Never charge the battery if the product is terminal. - Page 44 Shake the product Press the product gently against a clean dry lint-free cloth, and wipe ① Hold the product firmly and shake it in the direction of arrows until water does not off water remained in the gaps such come out. as in the earpiece/speaker, * When shaking the product, stay alert to your mouthpiece (microphone), hinges,...
-
Page 45: Notes On Using Bluetooth ® /Wireless Lan (Wi-Fi ® ) Function
noise when used near a microwave oven.) Notes on Using Bluetooth ® • Using this product near a TV, radio or similar Wireless LAN (Wi-Fi ® appliance might cause reception interference Function and disrupt TV images. • Searching might not be successful if there are •... - Page 46 (collectively called "other wireless stations" from here on) are operated in addition to home electrical appliances such as microwave ◎ The connections between this product and all other Bluetooth ® and wireless LAN (Wi-Fi ® ) devices have ovens, devices for industrial, scientific and not been confirmed.
-
Page 47: Security Code/Pin Code
• Available channels vary depending on ◎ Since Bluetooth ® and wireless LAN (Wi-Fi ® countries. functions use the same frequency band, using the both functions at the same may cause radio wave • For use in an airplane, check with the airline interference resulting in decreased communication company in advance. -
Page 48: Notes On Pin Code
Notes on PIN Code ■Security code Example ① To do remote operation of voice ■ PIN Code mail and call forwarding services To prevent unauthorized use of the au IC card usage from a fixed-line phone by a third party, you can set the product to ②... -
Page 49: Notes On Data Communication Charges
■ PUK Code Notes on Data In case PIN code is locked, you can unlock it by Communication Charges entering PUK code. • PUK code is an 8-digit number given at the • Since constant Internet connection is possible time of purchase, which is printed on the back with the product, data communication may be side of the plastic card on which your au IC performed automatically by some applications,... -
Page 50: Cell Phone Etiquette
• Be sure to check the security of the Cell Phone Etiquette application, then install it at your own risk. Some applications might cause virus infection, ■ Use of Cell Phones is Not Allowed damage various data, and send out your in the Following Places! location information, usage history or personal •... - Page 51 where you might hinder other pedestrians. • Viewing a cell phone screen while walking is a serious hazard. Do not suddenly stop to talk on/operate the cell phone or do so while walking. • Move to areas where you will not inconvenience others on bullet trains, in hotel lobbies, etc.
-
Page 52: Basic Operations
⑮ ⑰ ③ ⑪ Basic Operations ⑯ ㉔ ④ ⑫ ⑳ ⑤ ⑬ ⑥ Names and Functions of Parts ㉑ ⑦ ⑭ ⑱ ㉒ ⑧ ① ⑩ ㉕ ㉖ ⑲ ⑨ ㉓ ㉗ ② ㉘ ㉙ ⑮ microSD au Nano IC ㉔... - Page 53 ⑥ , Clear/Memo key ① Earpiece/Speaker Hear the other party's voice on call, playing While using the product, return to the sound of the auto answering, ringtone, alarm previous screen. sound, etc. From the standby screen, press the key to display the answer memo list screen.
- Page 54 ⑫ o Camera key ⑩ Air vent Since the product is water/dust resistant, In the standby screen, press to activate the the sealing performance is high. Therefore, an camera function. Holding down for at least 1 air vent (hole to ventilate) is equipped. second in the standby screen displays the •...
- Page 55 ⑰ Strap eyelet *1 The antenna is built into the product. Covering the antenna with your hand might affect communication ⑱ Charging/Notification indicator quality. Lights red during charging. Flashes according *2 For details on inserting/removing the au IC card and to settings for new call or new mail.
-
Page 56: Charging/Notification Indicator
Charging/Notification Attaching a Strap Indicator Remove the back cover of the Lighting/Blinking the charging/notification product indicator notifies you the timing for charging, For details on removing the back cover, refer to charging status, missed calls, or new mail, etc. "Installing the Battery Pack" (▶P. 55). Thread a strap through the strap LED Color Notification Contents... -
Page 57: Installing/Removing The Battery Pack
◎ Confirm the strap is properly hooked on the strap pin. If a strap is placed between the product and back cover, you cannot attach the back cover completely. This may affect water/dust resistance. If a strap is off the eyelet, it might cause damage or injury. - Page 58 Attach the back cover Press firmly to make sure there are no gaps around the back cover Note the orientation of the back cover and place it on the main unit with the main unit Trace the circumference of the back cover in closed, and attach the back cover.
-
Page 59: Removing The Battery Pack
Removing the Battery Pack au IC Card Remove the back cover of the The au IC card contains phone number and product other information. The product is compatible with au Nano IC Card (▶P. 55 "Installing the Battery Pack") 04 LE. Removing the battery pack Lift the battery pack by the notch of the au Nano IC Card 04 LE... -
Page 60: When Au Ic Card Is Not Inserted
When au IC Card is Not Inserting/Removing the au Inserted IC Card When au IC Card is not inserted, the following Attach/Remove the au IC card after turning off operations are not available. " " appears on the the product and removing the battery pack. status bar. - Page 61 Pull the tab and raise the stopper in Slide the au IC card in the direction the direction shown below shown below with the terminal (metal) part downwards until it Be careful not to raise the stopper forcefully. May cause damage. clicks Check the correct direction of the notch.
-
Page 62: Removing The Au Ic Card
Removing the au IC Card Lower the stopper until it clicks locked Turn the power off and remove the If the stopper is difficult to close, raise the battery pack stopper again and make sure the au IC card is installed all the way. - Page 63 Pull the tab and raise the stopper in Push the au IC card until it clicks the direction shown below (①), slide the card to remove (②) Be careful not to raise the stopper forcefully. May cause damage. Stopper ① ②...
-
Page 64: Inserting/Removing The Microsd Memory Card
Lower the stopper until it clicks Inserting/Removing the locked microSD Memory Card Inserting the microSD Memory Card Attach the microSD memory card after turning off the product and removing the battery pack. Turn the power off and remove the Stopper battery pack (▶P. -
Page 65: Removing The Microsd Memory Card
◎ Make sure that the top/bottom and front/rear of the microSD memory card are facing correctly. Trying to force a wrongly oriented card into the slot could make it impossible to remove the card or result in damage. ◎ Do not touch the terminal part of a microSD memory card. -
Page 66: Charging
Charging The battery pack is not fully charged at the time of purchase. Charge the battery sufficiently before use. • While charging, the charging indicator illuminates in red. When charging is finished, the charging indicator goes out. ◎ The product may become warm while charging, depending on the situation, but this is not abnormal. -
Page 67: Charging With The Ac Adapter
Charging with the AC Adapter ◎ Right after " " is displayed while charging, the charging indicator may not turn off, but the How to charge the product using Type-C indicator will turn off soon and the charging will be Common AC Adapter 01 (sold separately) is completed. -
Page 68: Charging With The Desktop Holder And The Specified Ac Adapter
Insert the USB Type-C plug of Unplug the power plug of Type-C Type-C Common AC Adapter 01 Common AC Adapter 01 (sold (sold separately) straight into the separately) from the outlet external connection terminal The USB Type-C plug is reversible and can be inserted to the terminal which side is up. - Page 69 Mount the closed product in the desktop holder (KYF39PUA) Put the product in the direction shown below. Note the orientation of the product and desktop holder (KYF39PUA) (sold separately), and insert the product straight into the external connection terminal. Make sure the charging light of the product blinks in red.
-
Page 70: Turning The Power On/Off
Turning the Power Off When the charging is complete, pull the product out from the desktop Press and hold . for at least 1 holder (KYF39PUA) (sold seconds. separately) [Yes] Unplug the power plug of Type-C Common AC Adapter 01 (sold Forcing the Product to Shut separately) from the outlet Down and Restart... -
Page 71: Using The Pointer
Pointer Operation Using the Pointer Move the pointer on the screen up/down/left/ The product uses e/c/s/f to operate the right to operate the browser, etc. pointer. Activate a Pointer-capable function/ application and turn the Pointer ON to use the ■ Turn ON the Pointer on-screen pointer. - Page 72 ■ Select ■ Scroll With the pointer at buttons With the pointer at the up/ or items to select, the down/left/right edge of the buttons or items are screen, move toward off the confirmed (action) by screen using e/c/s/f. pressing k. •...
-
Page 73: Switching To English Display
Switching to English Display Using the Standby Screen You can switch the display from Japanese to Check the status of the product in the standby English. screen. From the standby screen, press k ■ Viewing the Standby Screen The main menu is displayed. ①... -
Page 74: Using Widgets And Indicators
Editing Widgets in the Standby ③ Indicators Notifications for missed calls, new Screen e-mail/+Message (SMS), etc. are displayed. Edit widgets displayed in the standby screen. You can hide indicators by pressing ./,. • Select a notification → Press k or activate From the standby screen, press w an application and confirm the contents to →... -
Page 75: Monitoring The Product's Status
■ Main Status Icons Monitoring the Product's Status Icon Description Time Viewing Icons Battery level : 100% : Empty : Charging Notification icons for missed calls, new mail, : Battery care mode is set and running operations are displayed on the left Airplane mode is set of the status bar, and status icons for product Signal strength (Receiving electric... -
Page 76: Notification/Settings Panel
■ Viewing the Notification/Settings Icon Description Panel Bluetooth in use ® : Standby : Connected Press s/f to toggle between the notification Auto answering set panel and settings panel. : Set : Full Notification/Settings Panel In the notification panel, you can check ②... -
Page 77: Setting Manner Mode
■ Using the Notification Panel Setting Manner Mode Select notification you want to use Select the manner mode so as not to disturb in the notification panel → k others around you in public places. You can activate the application corresponding From the standby screen, press k to a notification. -
Page 78: Setting Airplane Mode
Setting Airplane Mode Original mode Edit the manner mode according to your When airplane mode is set, all the wireless preference such as setting functions (telephone, data communication, the ringtone volume for wireless LAN (Wi-Fi ® ) function, and Bluetooth ®... -
Page 79: Checking Your Phone Number
Checking Your Phone ◎ From the profile screen, you can reset your profile by pressing u (Menu) → [Reset] → [Yes] → [OK]. Number Using the Sub-display Checking Your Profile From the standby screen, press k The sub-display displays a date and time, device status such as the manner mode and →... - Page 80 ■ Main Icons Icon Description New +Message/New SMS Icon Description Wi-Fi ® connected/Wi-Fi ® Signal strength (Receiving connected (Open) electric field) : Strong : Fair : Weak : Weak : Out of service area : Airplane mode is set • An icon for the network is displayed.
-
Page 81: Using The Main Menu
■ Main Menu Application List Using the Main Menu Menu Description From the standby screen, press k au Smart Pass This is a portal application to maximize "au Smart The main menu is displayed. Pass" as well as daily tools Select menu →... - Page 82 Menu Description Menu Description Security/Safety Security/Safety My au You can check your daily Data Storage You can back up various usage, points and monthly data in your smartphone to billing of au services with cloud storage or microSD this application. You can memory card.
- Page 83 Menu Description Menu Description Security/Safety au WALLET "au WALLET App" is useful for the user of au. When mamorino Connecting (pairing) with you use it, you can do the Watchナビ mamorino Watch via following things. (mamorino Bluetooth ® allows you to ○...
- Page 84 Menu Description Menu Description Data Folder View captured photos/ App Service movies, downloaded files, au助手席ナビ Joshuseki-Navi (Passenger etc. seat navigation) is a car Browser View webpages in the Passenger navigation service to be same way as with a PC. seat used by those sitting in the The browser is a Pointer- navigation)
- Page 85 Menu Description Menu Description App Service Tool Weather Check weather information Alarm Use the alarm. (▶P. 128). for the current location and Calendar Use the calendar. area that you set. Countdown Use the countdown timer. ココセコム申込 This is an application to Timer 用アプリ...
- Page 86 Menu Description Menu Description LINE LINE is a communication Phone/Mail application which allows Speed dial Display the speed dial list you to make free voice calls (▶P. 99). and send free messages E-mail Use an E-mail (@au.com/@ anytime and anywhere (▶ ezweb.ne.jp) address to P.
-
Page 87: Using Applications/Services
■ Getting Applications From the standby screen, press k ◎ Some functions used by activating applications → [App Service] → x may incur communication charges. • Display the Free tab. ◎ After application version upgrades, etc., the appearance of applications and icons on the o (Get app) product may differ from as shown in this manual. -
Page 88: Using The Custom Menu
Rearranging Applications Using the Custom Menu In the custom menu, select the Register preferred applications to the custom application you want to rearrange menu for quick access. → u (Menu) Registering Applications to the [Sort] → Select the location where Custom Menu you want to rearrange the application →... -
Page 89: Learn Common Operations
• When an image is displayed and functions are Learn Common Operations not displayed at the bottom of the screen, Learn Basic Key Operations press u, j, l, etc. to display them. ■ Selecting Items ■ Using Functions that Appear at the Bottom of the Screen To select a displayed item, select the item using w or d and press k. -
Page 90: Using Checkboxes
■ Moving to Previous or Next Data Disabling Manner/Shutter While displaying mail, etc., you can press l to Key Operation when the move to the next data or j to move to the Product is Folded (Key Lock) previous data. ■... -
Page 91: Character Input
Character Numbers Character Input Hiragana/Kanji 2-byte alphabet type (2-byte/1-byte) さ しすせそ d e f D E F 3 Katakana Learn How to Enter 1-byte alphabet Dial entry (2-byte/1-byte) Characters サシスセソ defDEF3 ■ Key Assignments for Character Character Numbers Hiragana/Kanji 2-byte alphabet Entry type (2-byte/1-byte) - Page 92 Character Numbers Character Numbers Hiragana/Kanji 2-byte alphabet Hiragana/Kanji 2-byte alphabet type (2-byte/1-byte) type (2-byte/1-byte) まみむめ も p q r s P Q R S 7 わをん ゎ、 。 - ・ ~ ! ? 0 space! ? ・ , ’ ” ....
- Page 93 Katakana Alphabet Numbers Katakana Alphabet Numbers Character Hi r agana/ Dial Character Hi r agana/ Dial (2-byte/1- (2-byte/1- (2-byte/1- (2-byte/1- (2-byte/1- (2-byte/1- type Kanj i entry type Kanj i entry byte) byte) byte) byte) byte) byte) When entering text, # Short When entering text, display list of display one character...
- Page 94 Katakana Alphabet Numbers Katakana Alphabet Numbers Character Hi r agana/ Dial Character Hi r agana/ Dial (2-byte/1- (2-byte/1- (2-byte/1- (2-byte/1- (2-byte/1- (2-byte/1- type Kanj i entry type Kanj i entry byte) byte) byte) byte) byte) byte) Move cursor left Move cursor down a line Select conversion candidate Select conversion candidate -...
-
Page 95: Enter A Character Quickly In The Standby Screen
■ Changing the Character Type to Enter a Character Quickly in Enter the Standby Screen Pressing j (Char.) on the character entry screen changes the character type. Press m Set the "Write now" setting to ON and you can to toggle 2-byte/1-byte. enter characters quickly from the standby : Hiragana/Kanji screen (up to 1,000 2-byte/2,000 1-byte... - Page 96 Internet Connect to the Internet and Register new contacts with search with entered phonebook the entered characters as characters. name. ▶P. 104 "Registering to the Search Map Activate a map application Phone Book" set with entered characters. By entering a shop name/ Activate the Calendar address/station etc., you schedule...
-
Page 97: Phone
o (Setting): Heard effect adjustment Phone Adjust how the other party sounds. j (Mic OFF/Mic ON): Mute ON/OFF l (Profile): Display profile w: Adjust call volume (volume of other party's Making a Call voice) m: Place call on hold Entering a Phone Number and ,: Record a voice memo Making a Call •... - Page 98 ■ Using Voice Memo/Record Later ■Playing back a voice memo From the standby screen, press k ■Using a voice memo function → [Phone Mail] → [Voice memo] → Record a conversation between the other party [Voice Memo List] and you during a call. The voice memo list screen is displayed.
- Page 99 ■ Emergency Call Location ◎ When GPS cannot be used to notify of your Notification location, base station signal is used instead. ◎ When making an emergency call to Police, Fire and The product supports "Emergency call location Ambulance or Regional Coast Guard Headquarters, notification"...
-
Page 100: Using Call Histories And Making A Call
■ Using ; (Pause) / , (Auto Pause) Dialing and Making a Call ◎ When you use, (Auto Pause) dialing and make a Enter the push signals to send beforehand and call, enter the phone number → u (Menu) → send the push signals during the call. -
Page 101: Using Speed Dial
■ Dialing with Speed Dial Select contact to call from history → m From the standby screen, enter the Place a call to the selected person. speed dial number (0 to 99) • Select an entry in the incoming history/outgoing history screen →... -
Page 102: Calling Overseas From Au Phones (Au International Call Service)
Calling Overseas from au Phones (au International Call ◎ You can also press k (Call) → [Add Special No.] → Service) [Intl Call] to enter the country code when entering a phone number. You can make international calls without any ◎... -
Page 103: Receiving A Call
Receiving a Call If you did not answer a call ◎ " " is displayed in the status bar. In the notification panel, the time and number of an Answering an Incoming Call incoming call or registered name in phone book is displayed. -
Page 104: Settings For Step-Up Ring Volume
Settings for Step-Up Ring Using Auto Answering Volume Settings for Auto Answering Set to notify by step-up ring when receiving an incoming call from the same number within 10 From the standby screen, press k minutes after receiving a missed call →... -
Page 105: Playing Back Auto Answering
Playing Back Auto Answering From the standby screen, press k → [Phone Mail] → [Auto answering] [Recorded messages] • In the standby screen, press , to display the recorded messages screen. Select the recorded messages to play → k The selected message is played. •... -
Page 106: Phone Book
Phone Book ◎ If the number is a fixed-line phone, enter the area code first. Registering to the Phone ◎ If the name includes 1-byte alphabet and numbers, it may be displayed in the order of given name, Book family name. ◎... -
Page 107: Using The Phone Book List
① Search by dial keys Using the Phone Book List You can search for contacts by pressing the Displaying the Phone Book number keys in the contacts list and entering characters to search. Pressing , deletes List characters to search and ends search. ②... -
Page 108: Using Time-Reduction Search (Phone Book Search)
Using Time-reduction Search Using Information in Phone (Phone Book Search) Book Holding down a dial key for at least 1 second in From the standby screen, press u the standby screen displays a search result of → Select the contact → k contacts having the character corresponding to the pressed key. -
Page 109: Registering The Frequently Used Address To Pair Function
Select the contact → k → [OK] ③ Image ④ Normally used phone number/Normally used When a partner with an e-mail address is registered in the phone book, the activity e-mail address information notice confirmation screen is displayed. In the confirmation screen, select [Yes]/[No] and follow the on-screen ◎... -
Page 110: Using The Pair Function
Using the Pair Function You can make calls and send e-mails to the registered contacts. From the standby screen, press m → x to select the partner Call Make a call. Send E-mail Display the e-mail create screen setting the e-mail address as a recipient. -
Page 111: Mail
E-mail ◎ Once the capacity of the "Inbox" is exceeded, oldest read e-mail is automatically deleted. E-mail that is unread, protected, or for which the text body Checking E-mail is unreceived is not deleted. ◎ New e-mail cannot be received if the "Inbox" is full Received e-mail is saved in the "Inbox". - Page 112 ■ Viewing the Folder List ■ Viewing the E-mail List In the folder list, the "Inbox", "Outbox", folders, etc. are displayed. Folders created by selecting ① "Create new folder" are displayed. ② ② ③ ③ ① ⑦ ② ④ ③ ④...
- Page 113 ■ Viewing an E-mail Message ① : Unread e-mail : E-mail with unreceived text body ① ① ② Subject ⑥ ⑥ ③ Recipient's/sender's name or e-mail address ② ② ⑦ ⑦ The registered image/name is displayed if the ③ e-mail address is registered in the contacts. ④...
-
Page 114: Sending E-Mail
⑥ Icons Address Enter all e-mail addresses : Replied-to e-mail group registered to a contacts : E-mail that has been forwarded group as the recipients. : Replied-to e-mail/e-mail that has been If the number of e-mail forwarded addresses in the group : Multiple recipients exceeds the limit available : E-mail received with BCC recipients... -
Page 115: Adding/Deleting Recipients
Adding/Deleting Recipients ■Adding a recipient ◎ You can press l (Save) in the e-mail create screen to save e-mail that is being created to the "Unsent" E-mail create screen → Select the box. empty address entry field → k ◎ デコレーションアニメ (decoration anime) is not A menu for selecting a recipient entry method supported. -
Page 116: Receiving E-Mail
Receiving E-mail ◎ E-mail is received in the background even while Receiving E-mail using e-mail or other functions. " " is displayed in Once an e-mail is received, you are notified of the status bar and a ringtone sounds. However, the new e-mail in the following ways. -
Page 117: Inquiring For And Receiving New Mail
Inquiring for and Receiving Using +Message New Mail When you activate this application for the first time, the confirmation screen such as terms You can inquire for and receive new mail if and conditions, etc. appears. Confirm the "Auto-receive" is set to OFF or there is an e-mail contents and follow the on-screen instructions. -
Page 118: The Usages Of +Message
The Usages of +Message How to Use +Message You can send stickers, photos and videos to From the standby screen, hold down the other party when the other party uses j for at least 1 second +Message. If the other party does not use +Message, you The message list screen is displayed. -
Page 119: Registering Recipients
Registering a New Recipient Registering Recipients From the standby screen, hold down Registering Recipients via QR j for at least 1 second Code Alternatively, to access the screen from the When you and the other party use +Message standby screen, j → j (+Message). (SMS), by using the QR code for +Message Select the message of the (SMS), you can register the other party as a... -
Page 120: Pc Mail
Select a recipient from the selection PC Mail screen → k • If quoting the name of the recipient from the You can send and receive a PC mail used on phone book, select the entry field "Search by name, number..." and enter the name. the network of a household PC or smartphone, •... -
Page 121: Sending Pc Mail
Sending PC Mail Replying/Forwarding PC Mail From the standby screen, press k → [Phone Mail] → [PC Mail] The inbox screen → Select a mail → u (Menu) → [Add] Select address entry field → k → u (Menu) → [Reply]/[Reply all]/ [Forward] →... -
Page 122: Line
LINE LINE is a new communication application which allows you to make free voice calls and send free messages anytime and anywhere. • Updating the application and registration of an account is required for using LINE. For details on using LINE, visit the LINE website, or from the LINE screen →... -
Page 123: Internet
in the standby screen, press k → [Settings] → Internet Access [Wireless/Network] → [Cellular networks] → [Access Point Names] → [LTE NET for DATA]. Accessing the Internet ◎ Subscription to LTEフラッ ト (LTE flat) or other data You can access the Internet by data communication flat-rate/discount service allows communication or the wireless LAN (Wi-Fi ®... -
Page 124: Browser
■ How to Confirm Your Data My au Display the My au Communication Charges homepage. GRATINA You can find detailed You can confirm your data communication guide usage of the product via charges at the following URL. images. https://www.au.com/support/ (in Japanese only) History Display the browsing history. -
Page 125: Camera
• Focusing may not be possible for the following Camera types of subjects. - Low-contrast subjects such as plain walls - Subjects with strong backlighting • Fingerprints and smudges on the lens may - Shiny subjects that reflect light brightly cause images to appear unclear. -
Page 126: Viewfinder Layout
Viewfinder Layout • You should refrain from any activity which may infringe copyrights when duplicating, editing, From the standby screen, press o etc. images taken or recorded with the product, as well as any activity which may • From the standby screen, you can also press infringe portrait rights such as use or k →... -
Page 127: Capturing Still Pictures/Video
① Capture mode icons ⑧ Battery level A mode icon is displayed when the capture Displayed when battery is low. mode is "Continuous", "Scene", "Effect", or ⑨ Zoom "Time-lapse". Press w to display a zoom bar and adjust • Depending on the set effect, an the zoom. - Page 128 ■Recording a movie o (Record) Recording starts. During recording, press k (Shoot) or v to capture a photo. o (Stop) Recording stops. Recorded data is automatically saved. ◎ Folding the product during recording stops recording. ◎ Although the product features continuous AF for maintaining continuous autofocus, it may take time for the camera to focus depending on the subject.
-
Page 129: Useful Functions
テレビde写真 (Photos on TV) ◎ You can use this function by a device that supports Miracast. You can display photos, etc. saved to the * It may not be available depending on your receiver. product wirelessly on TV by connecting "テレビ ◎... -
Page 130: Alarm
o (Set) → [OK] Alarm A specified time is notified by alarm or vibration. ◎ Pressing k on the alarm list screen switches to From the standby screen, press k ON/OFF. ◎ Even if "Auto power on" (▶P. 129) set to ON with →... -
Page 131: Using The Menu In The Alarm List
Using the Menu in the Alarm Using the Weather Forecast List Alarm When the alarm sounds, the current weather From the alarm list screen, press u condition and weather forecast for the entire (Menu) day are read out. And when the chance of rain ▶P. -
Page 132: Flashlight
Flashlight ◎ The alarm and "Read out the weather forecast" sound at the same time. In this period, the alarm From the standby screen, press k volume goes down. → [Tool] → [Flashlight] ◎ When "Read out the weather forecast" is set to ON, stop the ringing alarm to activate the weather The flashlight turns on. -
Page 133: Kanji Check
Kanji Check ◎ Screenshot may not be available depending on applications or functions such as the TV screen. You can enlarge a Kanji character with a lot of stroke counts to display and check it. You can check 100 characters at once. Battery Care Mode From the standby screen, press k →... -
Page 134: Settings
Item Description Settings Eco/Battery Set Eco Mode and check, battery usage, and the battery Displaying the Settings care mode setting. More Set the fake incoming call, Menu settings pointer, security, storage, applications, location Set and manage various functions from the information, accounts, setting menu language and input, date and... -
Page 135: Wireless Lan
Wireless LAN (Wi-Fi ) Function ® ◎ For use at home, make sure you have an Internet connection and a wireless LAN (Wi-Fi ® ) base set Wireless LAN (Wi-Fi ® (Wi-Fi ® network). Function ◎ Before using out on the go, first check the Wi-Fi ®... -
Page 136: Using The Wireless Lan (Wi-Fi ® ) Function
Enter the password → o (Connect) Using the Wireless LAN (Wi- You can set "Show password" to ON to display ® ) Function a password as you enter it. Enabling the Wireless LAN (Wi-Fi ® ) Function ◎ Some access points do not require a password. ◎... -
Page 137: Appendix
• Any operations are not available during Appendix software update. Calling 110 (Police), 119 (Fire/Ambulance), 118 (Maritime rescue) and 157 (Customer Service Center) is not Updating Software available. Alarm does not work, either. • Charge the battery sufficiently before starting You can update the product to the most recent update. -
Page 138: Troubleshooting
Troubleshooting Trouble Detail Page Cannot make Is the power turned on? P. 68 Before you assume that the product is calls Is the correct au IC card P. 57 malfunctioning, check the following: inserted? Or, check for possible remedies in " ト ラブル診断 •... - Page 139 Trouble Detail Page Trouble Detail Page Cannot Is the signal strong P. 73 " " (out of Is the product within the P. 73 receive calls enough? service area) service area or where appears signal is good enough? Is the product within the P.
- Page 140 Trouble Detail Page Trouble Detail Page Cannot If a pop-up window P. 69 The battery Is it adequately P. 64 operate a appears, operate with pack can charged? pop-up the Pointer. only be used • Charge until the red window using a short time charging indicator the browser...
-
Page 141: 位置検索サポート (Find Missing Device Service)
■ Calling the Customer Service Trouble Detail Page Center and Searching Location or Camera does Is the battery low? P. 64 not operate Is the product or the P. 29 Remotely Locking/Unlocking the battery at a normal Product temperature? The From a fixed-line phone, 0077-7-113 (toll product may stop... -
Page 142: After-Sales Service
◎ For details, refer to "取扱説明書 詳細版 (Full ◎ Before handing the product for repair, make a Instruction Manual)" (Japanese). "取扱説明書 詳細版 backup of the contents of memory since they may (Full Instruction Manual)" (Japanese) is available disappear during repair. Note that the Company on the au homepage. - Page 143 ■ Performance Parts for Repair ③ When the product is repaired by repair offices other than the company specified. The Company retains performance parts for ④ When the product is malfunctioning or repair of the KYF39 main unit and its damaged due to a handling fault or peripherals for 4 years after discontinuation of accident.
- Page 144 ■ Repair and Delivery Support ◎ When you get a new au portable terminal by changing the model, purchasing an extra portable An after-sales service membership program on terminal, etc., the "Repair and Delivery Support" a monthly basis called "Repair and Delivery membership for the old au portable terminal is Support"...
-
Page 145: Sim Unlock
■Desktop holder (KYF39PUA) (sold used. The Company does not guarantee separately) operation whatsoever. ■KYOCERA 3.5φType-C conversion cable • To make settings after SIM-unlocking the (0401QNA) (sold separately) product, from the standby screen, press k → ■au Carrying Case F Black (0105FCA) (sold [Settings] →... -
Page 146: Using An Earphone
■MicroB to Type-C Conversion Adapter (0601PHA) (sold separately) separately) in the product ■テレビde写真 (Photos on TV) Receiver Insert the plug of KYOCERA 3.5φType-C (0603RKA) (sold separately) conversion cable (0401QNA) (sold separately) straight into the external connection terminal. * Requires a MicroB to Type-C Conversion Adapter (sold separately). -
Page 147: Main Specifications
Overseas Approx. 370 minutes (GSM) ◎ Depending on an earphone (sold separately), you Continuous In Japan Approx. 530 hours may not be able to connect the KYOCERA 3.5φ standby Overseas Approx. 570 hours Type-C conversion cable (0401QNA) (sold time (GSM) separately). - Page 148 Maximum 10 devices Bluetooth ® Compatible Bluetooth ® number of function version standards Ver.4.1 Wi-Fi ® compatible tethering Output Class1 connection Communication 10 m devices range Charging Type-C Approx. 120 minutes Supported GATT (Generic times Common Bluetooth Attribute Profile) (estimate) AC Adapter profile SPP (Serial Port...
- Page 149 devices are compliant with Bluetooth ® standards Bluetooth ® Supported HSP (Headset designated by Bluetooth SIG, and they are function Bluetooth Profile) authenticated. However, procedures may differ or profile HFP (Hands-Free data transfer may not be possible depending on the Profile) device's characteristics or specifications.
-
Page 150: Specific Absorption Rate (Sar) Of Cell Phones
for this cell phone when tested for use at the Specific Absorption Rate ear is 0.562W/kg (*2). The highest SAR value (SAR) of Cell Phones for this cell phone when tested for use on the body is 0.522W/kg (*2). There may be slight This model KYF39 mobile phone complies with differences in SAR levels among individual Japanese technical regulations and... -
Page 151: Fcc Notice
date, no adverse health effects have been FCC Notice established as being caused by mobile phone use". This device complies with part 15 of the FCC Rules. If you would like to know more detailed Operation is subject to the following two conditions: (1) This information, please refer to the WHO website. - Page 152 - Consult the dealer or an experienced radio/TV technician phone, including the antenna. All beltclips, holsters and for help and for additional suggestions. similar accessories used by this device must not contain any metallic components. Body-worn accessories that do Warning not meet these requirements may not comply with FCC RF The user is cautioned that changes or modifications not exposure limits and should be avoided.
-
Page 153: Export Administration Regulations
Export Administration Intellectual Property Right Regulations Trademarks This product and its accessories may be Company names and product names referred to subject to the Japan Export Administration in this manual are trademarks or registered Regulations ("Foreign Exchange and Foreign trademarks of the respective companies. Trade Law"... - Page 154 ENCODED BY A CONSUMER ENGAGED IN A Bluetooth ® and logo are registered trademarks PERSONAL AND NONCOMMERCIAL ACTIVITY owned by the Bluetooth SIG, Inc., and KYOCERA AND/OR WAS OBTAINED FROM A VIDEO Corporation is licensed to use those PROVIDER LICENSED BY MPEG LA TO trademarks.
- Page 155 HELLOPAGE is a registered trademark of NTT. ACCESS CO., LTD. in the United States, "すぐ文字" is registered trademark of KYOCERA Japan and/or other countries. Corporation. ⑵ This software is based in part on the work of USB Type-C™...
- Page 156 Corporation or the third parties, distribution, third party rights. reproduction, transformation and transmission Note that the existing license agreement takes over public lines without consent of KYOCERA priority for usage of GNU General Public Corporation are prohibited, unless you are License (GPL), GNU Library/Lesser General authorized or permitted by Copyright Law.
-
Page 157: License
License 【Original SSLeay License】 Copyright © 1995-1998 Eric Young (eay@cryptsoft.com) All 【OpenSSL License】 rights reserved. Copyright © 1998-2011 The OpenSSL Project. All rights This product includes cryptographic software written by Eric reserved. Young (eay@cryptsoft.com) This product includes software developed by the OpenSSL THIS SOFTWARE IS PROVIDED BY ERIC YOUNG ''AS Project for use in the OpenSSL Toolkit. - Page 158 For loss, theft or damage (toll free) Business hours 9:00 to 20:00 (7 days a week) April 2019, 1st Edition From xed-line phones/au cell phones, Sales: KDDI CORPORATION • OKINAWA CELLULAR TELEPHONE COMPANY 0120 - 925 - 919 Manufactured by: KYOCERA Corporation...
Need help?
Do you have a question about the au Gratina and is the answer not in the manual?
Questions and answers