Table of Contents
Advertisement
Quick Links
Advertisement
Table of Contents

Related Manuals for Dometic Spot Zero ZTC2000


Summary of Contents for Dometic Spot Zero ZTC2000
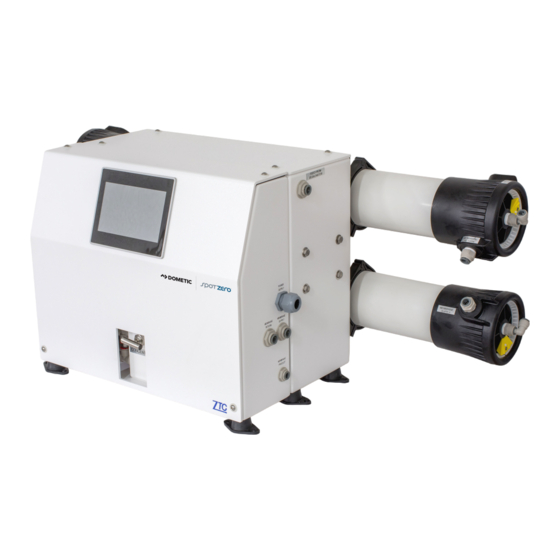
- Page 1 www.spotzerowater.com...
-
Page 2: Table Of Contents
TABLE OF CONTENTS 1. INTRODUCTION ......................4 Congratulations ............................. 5 System Requirements and Operation Guidelines ..................5 Acronyms and Definitions ..........................7 Principles of Reverse Osmosis ........................8 Unit Specifications ............................9 2. INSTALLATION AND COMISSIONING ................10 Feed Water..............................11 Electrical Connections ........................... - Page 3 5. SYSTEM SCHEMATICS ....................46 6. SYSTEM SPECS AND PARTS ..................51...
-
Page 4: Introduction
1. INTRODUCTION... -
Page 5: Congratulations
CONGRATULATIONS Your Spot Zero™ reverse osmosis system is a durable piece of equipment, which, with proper care, will last for many years. This User’s Manual outlines installation, operation, maintenance and troubleshooting details vital to the sustained performance of your system. Your system is designed to operate at a pressure of 80- 150 psi, unless otherwise stated. - Page 6 Pre-Filtration Spot Zero™ systems are supplied with a 1 micron sediment pre-filter (part # 252404005) that filters out most particles over 1 microns, a GAC/KDF (part # 252404004) Cartridge that removes chlorine, chloramine, VOCs and heavy metals. CAUTION: a traditional carbon block filter must not be used as it will not remove chlora- mines and will cause permanent membrane damage.
-
Page 7: Acronyms And Definitions
ACRONYMS AND DEFINITIONS ACRONYM/SYMBOLS DEFINITION FRESH WATER FLUSH REVERSE OSMOSIS POUNDS PER SQUARE INCH GALLONS PER MINUTE GALLONS PER DAY TOTAL DISSOLVED SOLIDS PARTS PER MILLION TEMPERATURE CORRECTION FACTOR LP SWITCH LOW PRESSURE SWITCH HP SWITCH HIGH PRESSURE SWITCH Φ PHASE SEA WATER FRESH WATER... -
Page 8: Principles Of Reverse Osmosis
PRINCIPLES OF REVERSE OSMOSIS REVERSE OSMOSIS How Fresh Water Is Produced Reverse Osmosis or “RO” is a process where freshwater water is produced by pumping saltwater through a semi-permeable membrane. Osmosis Osmosis is a naturally occurring process where a weak solution will cross a semi-permeable mem- brane to mix with a highly concentrated solution. -
Page 9: Unit Specifications
UNIT SPECIFICATIONS ZTC MODEL 2000 3000 FW Configuration 1 Vessel 2 Vessels (Spot Zero) Feed Water Source Fresh Water Fresh Water Rated Production Dock 2000(7571) 3000(11356) Water –gpd(ldp) Rejection and Flow Rates FW Nominal TDSRejec- tion % (Spot Zero) FW Minimum 1 (3.7) 1(3.7) Concen-trate Flow... -
Page 10: Installation And Comissioning
2. INSTALLATION AND COMMISSIONING... -
Page 11: Feed Water
INSTALLATION PROCEDURE FEED WATER 1. Plumb the feed water from the dock into the pre-filter inlet pressure regulator fitting. 1/2” FNPT or 1” MNPT custom connection from customer. Feed from dock 2. Tube cutting and installation procedure. Push the tube into the fitting, to the tube stop. Cut the tube square and remove burrs and sharp edg- es. - Page 12 3. From the pre- filter outlet fitting, run the white nylon 1/2” Spot Zero water tubing to the feed from pre-filtration fitting. 1/2” Tube From the “Overboard” discharge fitting, run the white nylon 1/2” Spot Zero water tubing to a dedicated overboard fitting.
- Page 13 5. From the product to tank fitting, run the white nylon 3/8” Spot Zero water tubing to the vessels fresh water tank. Ship’s fresh 3/8” Tube water tank FEED FROM WATERMAKER Connect the 3/8” product line from the water maker to the “WATER MAKER IN” fitting. Always install a three way valve in line with this, so the water can be diverted to the spot zero system, or to the vessels fresh water tank.
-
Page 14: Electrical Connections
Electrical Connections 1. Supply and connect specified power (115v or 230v) from the vessels panel to the ZTC panel. Connect line 1 and line 2 to the terminals, and connect the ground wire to the ground bus bar. Be sure to confirm sys- tems rated voltage before applying power. - Page 15 2. Connect the Pre-filter power leads as shown below.
-
Page 19: System Operation
3. SYSTEM OPERATION... -
Page 20: Home Screen
SPOT ZERO ZTC TOUCHSCREEN NAVIGATION Home Screen From any screen the Spot Zero icon can be pressed to return to this home screen. There is also a lot of infor- mation on this home screen that is important to the operation of this system. Some of the images can be pressed to bring up different information and setting choices. -
Page 21: Emergency Stop
Emergency Stop While the system is operating the emergency stop button will appear. Pressing the emergency stop button will shut down the system. To restart the system, press the reset button... -
Page 22: Operation From Dock Feed
OPERATION FROM DOCK FEED When operating from dock water, the system will show the water passing through the pre- filtration then into the double pass processing tank. The brine water will discharge overboard. The dock water must flow through the pre-filtration to remove chemicals and con- taminants that will harm the system and ruin the... -
Page 23: Water Maker Source
Water maker Source When operating from water maker product water, the flow will be shown going directly into double pass pro- cessing tank. The brine water from the water maker supply will be directed through the high efficiency valve then discharge overboard. High efficiency path The product water from the water maker has already gone through a desalination system and does not contain the chemi-... -
Page 24: Menu Options
MENU OPTIONS To access the menu, press the menu button in the upper left hand corner of the home screen. NOTE: The factory menu is password protected and for factory use only.**... -
Page 25: Summary
SUMMARY The summary screen shows the current values of the system SYSTEM INFORMATION The serial number of the system can be found here, also the system capacity, and the run time. -
Page 26: Alarms
ALARMS Any active alarms will be displayed here. When the system is in alarm a red alarm image will show at the top of the home screen. Pressing the alarm image will also open this screen. Press the reset button after the issue has been fixed in order to clear the system... -
Page 27: Alarm History
ALARM HISTORY The alarm history can be scrolled through using the back and forward buttons. The amount of time that has passed can also be changed in the drop down menu. Pressing the USB icon will allow the history to be trans- ferred to a USB. -
Page 28: Service Menu
SERVICE MENU The “SERVICE MENU” give you access to 3 system options as indicated on the screen below. UNITS OF MEASUREMENT Change the systems units of measurement. Choose between imperial units or metric system. Once you have selected what units you want to use, simply press the “SERVICE” button to go back or the main logo to return to the home screen. -
Page 29: Maintenance
MAINTENANCE When maintenance is required it will be listed here. If no maintenance is due, then it will say no mainte- nance needed. If maintenance is needed then after it has been completed press reset. REMOTE SUPPORT In this menu the pGD Touch IP address will be shown at the bottom of the screen if the system is wired to a router. -
Page 30: Enable Remote Support
Enable Remote Support Press the green button next to Enable Remote Support 2. In the service menu, press the enable remote support button. Another menu will pop up. Press the start VNC server button, then press ok... - Page 31 3. Download the Free VNC Viewer app from the app store. 4. Search for the VNC Viewer Icon on you device and open it.
- Page 32 5. Press the plus sign in the upper right hand corner to set up new connection. 6. Type in the IP Address found in the unit’s service menu, in the remote support menu at the bottom of the screen. Then give it a name.
- Page 33 EXAMPLE Next, press the “Connect” button...
- Page 34 8. The following screen will pop up. Simply press the “Connect” option. 9. Finally it will show you the connecting screen. When it is done connecting you will see the same image on your display and your device...
- Page 35 10. In order to browse and navigate the screen on you phone, a small dot will appear. This is a cursor that allows you to select icons and menus. Move the cursor with your finger to an icon you want tp press and tap the screen to select it.
-
Page 36: Remote Touch Screen Setup
REMOTE TOUCH SCREEN SETUP 1. Run a 4 conductor cable piggy backed on the power terminal and communication terminal on the display on the unit to the same terminals on the remote display . - Page 37 2. Press and hold the screen in a spot that does not bring you to another screen. A hidden menu will pop up. Press the Show System Settings selection. 3. Press the “Next” button until Set Device Address is highlighted. Then press “Set Device Address”.
- Page 38 4. Press the Port selection button to select “COM 1”. You will see it set for address 31. Press the box that has the 31 in it and change it to 30.
- Page 39 5. Press “ok”. You will then be instructed to cycle the power of the unit for the changes to take effect. Press “ok”, then “x” out of the screen and cycle the power to the machine. Now the display should be functioning correctly.
-
Page 40: System Maintenance
4. SYSTEM MAINTENANCE... - Page 41 Is my System Working Properly? TDS Rejection The Spot Zero ZTC reverse osmosis system is designed to reject 94% or more total dissolved solids (TDS). The rejection percentage is calculated by the following formula: % Rejection = ((Feed TDS - Product TDS) / Feed TDS) * 100 Example 1 :( (117ppm—4ppm) / 117ppm) * 100 = 96.58% Example 2 : ((900ppm-45ppm) / 900ppm) * 100 = 95% Both example s represent membranes in perfectly operating condition.
- Page 42 1. Procure part number 252404006 Spot Zero Chemical Cleaning Car- tridge. 2. Turn System off. 3. Disconnect product to tank and discard any product during cleaning process. 4. Temporarily Install SZ-10KDF2 in first housing in place of SZ-45- 1001. 5. Insert SZ-CCC in second housing in place of SZ-10KDF2. 6.
- Page 43 Restore System Settings For Spot Zero 2000 (SZ 2000) Set concentrate valve to produce specified flow rates of: 2 GPM of recycle,1 GPM of concentrate flow, 1.38 GPM of product @ 77 Degrees F (25 Degrees C) For Spot Zero 3000 (SZ 3000) Set concentrate valve to produce specified flow rates of: 2 GPM of recycle, 1 GPM of concentrate flow, 2.0 GPM of product @ 77Degrees F (25 Degrees C) Membrane Change...
- Page 44 5. Slowly remove the membrane element from the pressure vessel being careful not to grasp it by the permeate tube. Needle nose pliers may be necessary to pull the old membrane element out of the pressure vessel. 6. Remove new membrane element from container and inspect. Make sure that all parts are clean and free from dirt.
- Page 45 10. With a smooth and constant motion, push the membrane element into the housing so that the brine seal enters the housing without coming out of the brine seal groove. A slow twisting motion should be used to insert the membrane element, to ensure that the brine seal stays in place. 11.
- Page 46 5. SYSTEM SCHEMATICS...
- Page 51 6. ZTC SPECS AND PARTS...
Need help?
Do you have a question about the Spot Zero ZTC2000 and is the answer not in the manual?
Questions and answers