Table of Contents
Advertisement
Advertisement
Table of Contents
Troubleshooting

Subscribe to Our Youtube Channel
Related Manuals for Mahindra Jivo 365 DI


Summary of Contents for Mahindra Jivo 365 DI
- Page 1 Mahindra Jivo 365 DI SERVICE MANUAL...
-
Page 2: Table Of Contents
Index Sr. No Description Page No General Product Specifications 1 – 3 Safety Notes Maintenance Maintenance Chart Special Service Tools Greasing Points Locations Consumable Details Primary Check up Tyre Maintenance 13 - 15 Engine Engine Specifications 17-22 Torque Chart 23-25 Manifolds &... -
Page 3: Product Specifications
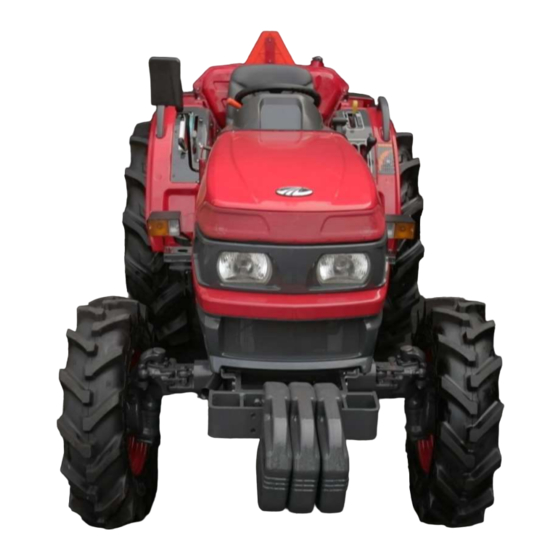
PRODUCT SPECIFICATION Mahindra Jivo 365 ENGINE Type Mahindra MDI No of Cylinders Engine Power 36 HP Bore 88.9 Stroke Displacement CC 2048 Rated Governor Speed 2600 Low Idle RPM 850 ± 50 High Idle RPM 2850 ± 50 Air Cleaner... - Page 4 PRODUCT SPECIFICATION TRACTOR DIMENSIONS (mm) - Vineyard Overall Height 1305 ± 20 Overall Length 3050 ± 20 Ground Clearance 196 ± 20 Overall Width "Front - 1200 ± 20, Rear - 1245 ± 20" Wheel Base 1650 Front Track Width 1040 ±...
- Page 5 PRODUCT SPECIFICATION TRACTOR DIMENSIONS (mm) - Paddy Overall Height 1405 ± 20 Overall Length 3050 ± 20 Ground Clearance 306 ± 20 Overall Width "Front - 1305 ± 20, Rear - 1410 ± 20" Wheel Base 1650 Front Track Width 1115 ±...
- Page 6 PRODUCT SPECIFICATION...
- Page 7 MAINTENANCE...
-
Page 8: Maintenance Chart
MAINTENANCE CHART Preventive Maintenance Schedule To be done by To be done by Dealer Details Activity Operator Technician 10 Hrs / Periodic Tractor Tractor Cleaning & washing Grease all Nipples Toe- In Check ... - Page 9 Activity Operator Technician 10 Hrs / Periodic Transmission Oil level Check Oil (Common Transmission & Hydraulic), Grade: Mahindra M- Change Star Oil (OIB)" Cooling System Thrash Guard Clean ...
- Page 10 MAINTENANCE CHART Preventive Maintenance Schedule To be done by To be done by Dealer Details Activity Operator Technician 10 Hrs / Periodic Tyre Air Pressure Check Front Axle Front Wheel Bearing free play* Check Front Axle (4WD) ...
- Page 11 SPECIAL SERVICE TOOLS Kit Part No 00000030071K Sr. No Tool No Tool Description Aggregate MST-9A01-FA-101 Front Axle King Pin Seal Dolly 4WDFront Axle MST-9A01-TN-102 Main Shaft Oil Seal Pressing Tool Transmission MST-9A01-4W-103 4WD Pinion Check Nut Loosening Tool 4WDFront Axle MST-9A01-FA-104 Power Cylinder Check Nut Loosening Tool Tractor...
-
Page 12: Greasing Points Locations
GREASING POINTS LOCATIONS... -
Page 13: Consumable Details
Quantity In litres Grade Change Frequency Engine Oil Mahindra M Star Premium Every Service Mahindra M Star Genuine OIB Transmission Oil Every 850 Hours Oil / Servo M Trac 30 3.7 – Vineyard at 100 & then at Front Axle ( 4WD) Servo M Trac 30 4.0 –... -
Page 14: Primary Check Up
PRIMARY CHECKUP Checking Engine Oil Level Check the engine oil before starting the engine or ‘5’ minutes or more after the engine has stopped. To check the oil level, draw out the dipstick, wipe it clean, insert it and draw it out again. Check to see that the oil level lies between the two marks. -
Page 15: Tyre Maintenance
TYRE MAINTENANCE Checking tyre pressure For normal load and operation of the tractor the following tyre pressure is recommended. Operation Puddling Vineyard Front Tyre Rear Tyre Front Tyre Rear Tyre 8 x 16 12.4 x 24 6 x 12 9.5 x 20 Field 1.60 kg/cm²... - Page 16 TYRE MAINTENANCE Front Axle - Front Wheel “Toe In Check” In the event of the tie rod setting being interfered with, then it is necessary to adjust the TOE-IN. Before measuring and adjusting the TOE-IN, ensure the front wheels are in the straight ahead position and the front axle is not tilted.
- Page 17 TYRE MAINTENANCE Front Axle - Front Wheel “Toe In Check” In the event of the tie rod setting being interfered with, then it is necessary to adjust the TOE-IN. Before measuring and adjusting the TOE-IN, ensure the front wheels are in the straight ahead position and the front axle is not tilted.
- Page 18 ENGINE...
-
Page 19: Engine Specifications
ENGINE SPECIFICATIONS Sr. No Description Specification Number of Cylinder Bore 88.9 Stroke Displacement 2048 Compression Ratio 19.8:1 Compression Pressure 35-38 Firing Order 1-3-2 Rated Power 36 HP @ 2600 RPM Maximum Torque 118 NM @1700 RPM Rated Speed 2600 RPM High Idle 2850 ±... - Page 20 ENGINE SPECIFICATIONS Sr. No Description Specification Valve Guide Length - inlet (mm) 59.94 Length - exhaust (mm) 59.94 Inside diameter (mm) 8.763 / 8.738 Valve Springs Initial length (mm) Initial load (N) 250.0 N ± 10% Final length (mm) 32.6 Final load 439.0 ±...
- Page 21 ENGINE SPECIFICATIONS Sr. No Description Specification Connecting Rod, Pistons & Cylinder Sleeves Material Steel Backed Overlay Plated Small end (bearings) Replaced Type Bush Material Cu-Lead Small end bush dia. (mm) 31.950 / 31.975 Piston Rings Number of rings per piston Type Cam Ground Oval KS Semi-Inlaid Half Keystone...
- Page 22 ENGINE SPECIFICATIONS Sr. No Description Specification Cavity Volume Cylinder dia Ø 88.9 Dia at skirt (Ø D1) mm Ø 88.81 ± 0.007 Dia at just below oil control ring (Ø D2) mm Ø 88.730 ± 0.009 Dia at top land (Ø D3) Ø mm Ø...
- Page 23 ENGINE SPECIFICATIONS Sr. No Description Specification Cylinder Sleeves Max. ovality (mm) 0.013 Sleeve I.D Discard limit (mm) 88.976 and above Lubrication System Pressure Regulating Valve Location On oil pump Spring free length (mm) 63.5 ± 0.010 Spring Initial length (mm) 44.5 Spring Initial load (N) 17 LBS ±...
- Page 24 ENGINE SPECIFICATIONS Sr. No Description Specification Camshaft Running clearance (mm) 0.089 / 0.038 Exhaust cam lift 6.325 Inlet cam lift 6.274 Timing Gears – Number Of Teeths Crankshaft gear Cam shaft gear Injection pump gear Idler gear Tandem Pump Gear Backlash between any pair of gear (mm) 0.1 to 0.3 Idler gear end clearance (mm)
-
Page 25: Torque Chart
ENGINE TORQUE CHART Sr. No Assembly Stage Part Torque In NM Plug1/4” For main Oil Gallery 20-24 Plug Pipe C 3.175 mm 10-12 Adaptor Oil Filter 235D1 27-33 Crankcase Sub Assy Adaptor Oil Gauge 24-30 Nut For Tube Oil Level Gauge M12 x 1 08-12 Water Pump Mounting Studs 16-20... - Page 26 ENGINE TORQUE CHART Sr. No Assembly Stage Part Torque In NM Front Cover & Water Nut C 7.938mm 22-28 Pump Fitment FIP Cover Gear Front Bolt Hex 67.9375 x 1.41 x 19.05 x BS5 07-10 ROSR Fitment Bolt Crankshaft Rear Oil Seal Retainer 22-28 Crank Pulley Fitment Crank Pulley Bolt- M14 x 1.5 x 32...
- Page 27 ENGINE TORQUE CHART Sr. No Assembly Stage Part Torque In NM High Pressure Assy Both Ends 25-30 HPP Assembly HPP Clamping Nut - M6 x 1.0 x 5 05-07 Exhaust Manifold Screw Hex FL M10 x 1.5 x 25.5 x 8.8 40-45 Assembly Valve Housing Cover...
- Page 28 Manifolds & Cylinder Head...
-
Page 29: Manifolds & Cylinder Head
Manifold & Cylinder Head Manifolds Intake & Exhaust Manifold Removal: 1. Remove Hose between Intake manifold and Air cleaner 2. Remove High Pressure, Low Pressure pipes, Fuel Filter and Bracket assy. 3. Remove 02 nos M8 bolts and remove Pull to Stop Mounting Bracket. 4. - Page 30 Manifold & Cylinder Head 5. Remove 04 nos, M10 bolts and pull Exhaust Manifold and gasket. Intake & Exhaust Manifold Installation: 1. Reverse the removal procedure. 2. It is always advisable to replace the Inlet & exhaust manifold gaskets with new ones. 3.
- Page 31 Manifold & Cylinder Head 2. Loosen 06 nos Nut Valve adjusting & 06 nos, grub screw. 3. Remove M12 bolt, Washer and lift Rocker Arm assembly & Valve Lever Shaft. 4. Lift out all six Push Rods.
- Page 32 Manifold & Cylinder Head Rocker Arm Shaft Assembly Dismantling: 1. Remove Circlip and washer. 2. Remove 1st rocker arm, Bracket & 2nd rocker arm. 3. Remove roll pin with punch and pull bracket.
- Page 33 Manifold & Cylinder Head 5. Remove 3rd rocker arm, Valve Lever spacer and Washer. 6. Remove 4th rocker arm, Spring Valve Lever, 5th rocker arm. 7. Remove Washer lever shaft, bracket, 6th rocker arm, Washer and circlip.
- Page 34 Manifold & Cylinder Head Inspection & Repairs 1. Thoroughly clean all components in Kerosene or Diesel and blow using compressed air. 2. Be sure all oil passages are free from sludge and sediment. 3. Check the valve lever shaft expansion plugs. 4.
- Page 35 Manifold & Cylinder Head Tappet Setting View From front, 1 Exhaust Valve-Intake Valve Then Intake valve-Exhaust valve Then Exhaust valve- Intake valve. 1. Rotate flywheel anti-clockwise. 2. Press 2 Cylinder exhaust valve. 3. Do tappet setting of 1 cylinder. 4. Insert filler gauge of 0.50 mm for Exhaust valve 5.
- Page 36 Manifold & Cylinder Head Tappet Setting 15. Tighten the nut by keeping filler gauge in insert position. 16. Insert filler gauge of 0.50 mm for Exhaust valve 17. Loose nut, tighten grub screw & insert filler gauge. Note: - Filler gauge movement should not be more tight or loose. 18.
- Page 37 Manifold & Cylinder Head Cylinder Head Removal 1. Remove the Manifolds, Rocker Arm Shaft Assembly as detailed earlier. 2. Remove Push rods and identify them so they can be installed in their original positions. 3. Remove thermostat housing by pass hose. 4.
- Page 38 Manifold & Cylinder Head Cylinder Head 3. Remove Valve. 4. Similarly remove remaining 05 valves from cylinder head. 5. Remove valve steam seals. Cleaning, Inspection & Repairs Cleaning 1. Wash all parts in a suitable solvent and blow dry with compressed air. 2.
- Page 39 Manifold & Cylinder Head Inspection 1. Inspect the casting for cracks and burnt metal around the valve ports. 2. Check the valve seats for cracks and pitting. 3. Position a lamp underneath the valve guides and examine the bore of the guide for burning, cracks or signs of excessive wear.
- Page 40 Manifold & Cylinder Head Before Rework Note: 1. Check whether the cylinder height permits reworking. 2. Check to see if nozzle tip protrusion will retain within specified limits after rework. 3. Nozzle protrusion of 2.3/1.8 mm/0.90”/0.70” is to be ensured. 4.
- Page 41 Manifold & Cylinder Head Assembly: - 3. Insert Valve Stem Seals. Now insert valve from bottom side. 4. Insert Washer, spring, Cup Valve Retainer. Press the spring by using special tool. 5. Insert Collet. Similarly complete assembly of remaining valves.
- Page 42 Manifold & Cylinder Head Assembly: - 6. Valves fitment should be as per sequence shown in picture. From front, 1 Exhaust Valve-Intake Valve Then Intake valve-Exhaust valve Then Exhaust valve- intake valve. Tips for service of Cylinder head 1. During cylinder head overhaul, Nozzle protrusion (protrusion of nozzle tip from head bottom face) should be checked thoroughly as it affects the fuel spray pattern of the nozzle.
- Page 43 Timing Gears Camshaft & Front Plate...
-
Page 44: Timing Gears, Camshaft & Front Plate
Timing Gears, Camshaft & Front Plate Timing Gears, Camshaft & Front Plate. Dismantling: 1. Remove FIP gear and 4 nos, M8 bolts and washers. 2. Remove FIP Adapter Plate and Gasket. 3. Remove G12.7 bolt and Idler Gear assembly. - Page 45 Timing Gears, Camshaft & Front Plate Timing Gears, Camshaft & Front Plate. Dismantling: 4. Use puller to remove Crank shaft gear. 5. Remove Hydraulic Gear and bearing. 6. Keep tappets in vertical position.
- Page 46 Timing Gears, Camshaft & Front Plate Timing Gears, Camshaft & Front Plate. Dismantling: 7. Remove 2 nos, M8 bolts of thrust plate and pull Camshaft assembly. 8. Remove Cam Gear, Camshaft Key & Thrust Plate. 9. Remove M6 screw & 2 no M8 Bolts G 7.93 and tap washer...
- Page 47 Timing Gears, Camshaft & Front Plate Timing Gears, Camshaft & Front Plate. Dismantling: 10. Take out Front Plate, washer and gasket. Assembly Cam shaft & gear Sub Assembly: - 1. Insert thrust plate and press woodruff key with mallet.
- Page 48 Timing Gears, Camshaft & Front Plate Sub Assembly: - 2. Place 2 nos, M8 bolts on thrust plate & Insert Cam shaft gear. Crankshaft & Gear Sub Assembly: - 1. Press woodruff key with mallet and insert gear.
- Page 49 Timing Gears, Camshaft & Front Plate Front Plate Assembly: - 1. Insert Gasket, 2 no’s screw and Front plate. 2. Tighten G7.93 M6 bolt with Tap Washer and apply 27 Nm torque. 3. Tighten G6.35 bolt with 13 Nm torque. Insert screw and tighten it with Screw driver.
- Page 50 Timing Gears, Camshaft & Front Plate Tappets & Camshaft Assembly: - 1. Insert tappets and Cam shaft assembly. 2. Tighten 2 no’s, G 9.5 bolts with 30 Nm torque.
- Page 51 Connecting Rods Pistons & Cylinder Liners...
- Page 52 Connecting Rods, Pistons & Cylinder Sleeves Connecting Rods Removal: - 1. Remove Cylinder head (Refer Cylinder Head section for detail). 2. Remove all the bolts securing the oil pan to the crankcase and pull out the oil pan (Refer Oil Sump section for detail).
-
Page 53: Connecting Rods, Pistons & Cylinder Liners
Connecting Rods, Pistons & Cylinder Liners 8. Remove Main Bearing Cap, & Bearing shell bottom. Take out Crank shaft. 9. Remove Bearing shell top & Valves Tappets. 10. Use Yuvo Special tool (MST-H1-EN-1) to remove Cylinder Sleeves. - Page 54 Connecting Rods, Pistons & Cylinder Liners 11. Remove Cylinder Sleeve “O” rings from Crankcase. 12. Remove Retainer, Piston Pin, Retainer, Piston & bush. 13. Remove Piston rings with Special plier.
- Page 55 Connecting Rods, Pistons & Cylinder Liners Connecting Rod Alignment 1. Insert two rods into the Connecting Rod big end and small end bore as shown. 2. The Big end and Small end bores must be square and parallel with each other in all the planes. 3.
- Page 56 Connecting Rods, Pistons & Cylinder Liners 2. Measure End gap with the help of Feeler Gauge. End Gap should be 0.2 mm to 0.4 mm. 3. Put 2 Ring by ensuring Top mark on should be on Top side. 4. Measure the End Gap. It should be 0.4 mm to 0.6 mm. 5.
- Page 57 Connecting Rods, Pistons & Cylinder Liners Land Clearance of Piston Rings 1. Check Piston Rings grooves for wear by using new rings and feeler gauge. 2. Land Clearance for 1 Ring should be 0.075 mm to 0.014 mm. 3. For 2 Ring Land Clearance should be 0.075 mm to 0.014 mm.
- Page 58 Connecting Rods, Pistons & Cylinder Liners Engine Liner Bore Ovality Check Caption on Top Left Side Crankshaft Direction – X Axis Direction Perpendicular – Y axis 1. Take Dial Bore Gauge and measure Sleeve bore diameter first in a direction along the Crankshaft axis i.e.
- Page 59 Connecting Rods, Pistons & Cylinder Liners Engine Liner Bore Ovality Check 4. And then measure Sleeve bore diameter perpendicular to the Crankshaft axis i.e. ‘Y’ axis, at the distance of 15 mm i.e. ‘A’ (Caption Y = Y) , 50 mm i.e. ‘B’ (Caption Y = Y1) and 75 mm i.e. ‘C’ (Caption Y = Y2) 5.
- Page 60 Connecting Rods, Pistons & Cylinder Liners Piston & Connecting Rod. Assembly: - 1. Insert Piston Rings with special plier. 2. Insert Connecting rod, Piston pin and retainers. 3. Please ensure during sub assembly, arrow mark on piston top should be on front side of engine &...
- Page 61 Connecting Rods, Pistons & Cylinder Liners Cylinder Liners. Assembly: - 1. Insert liner without “O” ring. Fix dial gauge base on plane surface & put needle under some tension & ensure zero. 2. Put needle on liner collar. Measure readings at two opposite position. Liner protrusion should be 0.051 above face to 0.025 below face.
- Page 62 Connecting Rods, Pistons & Cylinder Liners Assembly: - 5. Remove Liners and insert ‘O’ rings and insert Liner. 6. Press Liner with dolly. 7. Similarly insert ‘O’ rings for remaining Liners.
- Page 63 Connecting Rods, Pistons & Cylinder Liners Assembly: - 8. Remove Liners and insert ‘O’ rings and insert Liner. 9. Press Liner with dolly. 10. Similarly insert ‘O’ rings for remaining Liners.
-
Page 64: Engine Assembly
Engine Assembly Assembly: - 1. Insert upper main bearing shell. Apply oil for initial lubrication. Note: - Ensure bearing shell notch should be match with crankcase notch. Ensure thrust bearing should be fitted on flywheel side. 2. Insert crankshaft assembly. Ensure timing marks should match with reference to mark available on gears 3. - Page 65 Engine Assembly Assembly: - 4. Fit Main bearing caps serially. i.e. 1 to 4 sequentially from front to rear. Tighten the opposite ½”- 13 UNC bolts simultaneously and apply 122 to 128 Nm torque. 5. Similarly tighten remaining bolts from inside out. 6.
- Page 66 Engine Assembly Assembly: - 9. Similarly put dial gauge needle on Crankshaft and ensure zero. Move crank shaft axially. 10. Measure the reading. End float should be between 0.1mm to 0.4 mm. If readings are not ok then replace Crankshaft assembly. 9.
- Page 67 Engine Assembly Assembly: - 1. Insert protecting sleeve & rear oil seal retainer. Tighten 10 nos, M8 bolts with 22 to 28 Nm torque. 2. Take Piston assembly. Ensure arrow mark on piston should be on front side & big end notches are on FIP side.
- Page 68 Engine Assembly Assembly: - 4. Insert piston assembly in to tapered dolly. Put dolly on crankcase surface and push the piston into liner with pusher. 5. Locate connecting rod in to proper position. Put Cap & tighten 2 no’s, M10 bolts with 60 Nm torque.
- Page 69 Engine Assembly Crankshaft. Assembly: - 7. Insert piston assembly in to tapered dolly. Put dolly on crankcase surface and push the piston into liner with pusher. 8. Locate connecting rod in to proper position. Put Cap & tighten 2 no’s, M10 bolts with 60 Nm torque.
- Page 70 Engine Assembly Assembly: - 1. Insert oil pump assembly. Tighten Hex bolt G9.525 with 40 nm torque. 2. Insert 2 no’s, Flywheel dowels on Crankshaft. Assemble Flywheel correctly with respect to dowel pin. 3. Tighten 6 no, M12 bolts with 95 Nm torque.
- Page 71 Engine Assembly Assembly: - 4. Place Gasket and FIP Adapter on Crankcase and tighten 4 nos, M8 bolts with 27 Nm torque. 5. Insert Hex bolt G7.937 with Washer. Assemble FIP & tighten 4no, M10 bolts with 40 Nm torque. 6.
- Page 72 Engine Assembly Assembly: - 7. Insert idler gear along with shaft by properly locating roll pin in to the crankcase. Tighten Bolt G12.7 with 90 Nm torque. 8. Ensure timing marks provided should match with reference to marks available on all gears. 9.
- Page 73 Engine Assembly Assembly: - 1. Insert gasket & front cover. Tighten Screw on Front Cover with screw driver and Nut G 7.93 2. Tighten 05 no’s Hex Bolt G 7.93 and with 25 Nm torque. 3. Put “O” ring on Adapter Hydraulic Pump and place it on Front Plate.
- Page 74 Engine Assembly Assembly: - 4. Place Plate Hydraulic Pump with Gasket on Front Cover and tighten 2 no’s M10 bolts with 25 Nm torque. 5. Insert Phase Sensor on Front Cover and tighten M10 bolt with 10 Nm torque. 6. Place ‘L’ bracket and washer on Front Cover and tighten M10 bolt with 25 Nm torque.
- Page 75 Engine Assembly Assembly: - 7. Place 2 no’s Maxi-fuse bracket on Front Cover and tighten M8 bolts with 10 Nm torque. Insert 3nos Hex Bolt G7.93 with washer and tighten nut with 25 Nm torque. 8. Locate cylinder head gasket correctly with respect to dowel pin. Locate cylinder head correctly with respect to dowel pin.
- Page 76 Engine Assembly Assembly: - 10. Cylinder head mounting bolts torque sequence should be followed sequentially & in two stages. 11. Tighten all bolts sequentially as shown, with 35 Nm torque then apply 90 degree angular torque. 12. For angular torque, Mark the bolt with chalk at one position. Then apply torque till mark rotate by 90 degree.
- Page 77 Engine Assembly Assembly: - 14. Insert push rods & rocker arm assembly. 15. Tighten M11, Long bolt with 60 Nm torque and then apply 90 degree angular torque. 16. Insert gasket, & Valve housing cover. Tighten 2 nos, washer & M 10 Cap Nuts with 20 Nm torque.
- Page 78 Engine Assembly Assembly: - 17. Put gasket & Thermostat housing. Tighten 3no, M8 bolts with 30 nm torque. 18. Insert gasket & exhaust manifold. Tighten 4 no, M10 bolts with 40 Nm torque. 19. Insert gasket, intake manifold & pull to stop bracket. Tighten 6 no’s, M8 bolts with 30 nm torque.
- Page 79 Engine Assembly Assembly: - 20. Place Pull To Stop Bracket and tighten 2 no’s M8 bolts with 30 nm torque. 21. Tighten Temperature Sensor and washer with 27 Nm torque 22. Lock the fly wheel with tappet and insert woodruff key, main drive pulley.
- Page 80 Engine Assembly Assembly: - 23. Insert Crankshaft Pulley washer and tighten M14 bolt with 190 Nm torque. 24. Remove tappet. 25. Apply Loctite 5900 and insert 2 nos Pin Dowels.
- Page 81 Engine Assembly Assembly: - Place Ladder Frame on Crankcase and tighten 10 nos M10 bolts with 28 Nm torque. 27. Apply Loctite 5900 on Ladder Frame and place oil sump. 23. Tighten 16 nos, M10 bolts with tighten with 28 NM torque. Tighten M26 drain plug with washer apply 90 Nm torque.
- Page 82 Engine Assembly Assembly: - 24. Tighten Oil Pressure switch with apply 20 Nm torque. 25. Fit Oil Filter. 26. Fit Dip Stick Guide assembly.
- Page 83 Engine Assembly Assembly: - 27. Fit Oil Filler Cap with O Rings. 28. Insert starter motor and tighten 2 no, M10 bolts with 40 Nm torque. 29. Place Bracket Fuel Filter Mounting and tighten 2 no’s, M8 bolts with 10 Nm torque. 30.
- Page 84 Engine Assembly Assembly: - 31. Fit Fuel Filter on bracket and tighten 2 no’s M10 bolts with 10 Nm torque. 32. Fit Return Line on FIP and Injector 3 no’s Banjo and Washer. 33. Fit FIP Lubrication Pipe with M10 Banjo and washer.
- Page 85 Engine Assembly Assembly: - 34. Fit Pipe Feed Pump to Filter with M14 Banjo and washer. Fit Pipe Filter to FIP with M14 Banjo and washer. 35. Fit High pressure pipes & tighten with 30 Nm torque. 36. Place Water Pump on Cylinder Head assembly and tighten 4 no’s Hex Nut G9.525.
- Page 86 Engine Assembly Assembly: - 37. Insert blow-by pipe & tighten hose clip with screw driver. 38. Insert thermostat by-pass tube & tighten hose clip with screw driver. Insert Radiator Lower Hose & tighten hose clip with screw driver. 39. Fit Hydraulic Pump on and tighten 4 nos nut with 30 Nm torque.
- Page 87 Engine Assembly Assembly: - 40. Fit Alternator Brace, ‘L’ Clamp and tighten bolt with 27 nm torque Hold Alternator Bracket Rear on Front Cover Rear side. Hold Alternator in-between Bracket Rear and Brace and place Bracket Front on alternator. Now tighten 3 nos Hex Bolts with 20 Nm torque.
- Page 88 Engine Assembly Assembly: - 43. Fit Spacer and Fan on Water Pump and tighten 4 nos M8 bolts with 20 Nm torque. Assemble fan & tighten 4no, M8 bolts with 25 Nm torque.
-
Page 89: Trouble Shooting
Trouble Shooting... -
Page 90: Troubleshooting
Troubleshooting Sr. No Probable Causes Remedy Engine Fails To Turn Batteries too low to turn engine Charge battery or install new one. Starting switch inoperative Inspect for faulty cables and terminals. Replace starting switch if necessary. Engine oil too heavy Use correct grade of lubricating oil as specified in the operator’s manual. - Page 91 Troubleshooting Sr. No Probable Causes Remedy Poor Compression Piston rings worn, broken or cracked Install new rings Cylinder sleeve worn Install new sleeves. Valves damaged or worn Install new valves. Broken valve spring Install new springs. Worn cylinder head gasket Install new gasket.
- Page 92 Troubleshooting Sr. No Probable Causes Remedy Engine Misses on One or More Cylinders Remove and clean air cleaner and air cleaner Insufficient air to engine pipe. Defective injection nozzles Replace with serviceable unit. Vent air from system and check all fuel lines and Air lock in the injection pump or fuel filter connections for leaks.
- Page 93 Troubleshooting Sr. No Probable Causes Remedy Engine Does Not Idle Properly Injection Nozzle defective Test Nozzle and repair and reset as per specifications. Inspect fuel lines and valves; inspect for proper level in Restriction to fuel delivery or leaking fuel tank Poor compression See poor compression problems.
- Page 94 Troubleshooting Sr. No Probable Causes Remedy Abnormal Noise from engine Low oil level Maintain proper oil level. Lack of oil Maintain proper oil level. Engine runs too hot Keep engine at normal operating temperature. Loose bearings Install new bearings. Use of improper lubricating oil Use grade of oil specified in operator’s manual.
Need help?
Do you have a question about the Jivo 365 DI and is the answer not in the manual?
Questions and answers