
Related Manuals for Miele DA 6698 D


Summary of Contents for Miele DA 6698 D
- Page 1 Operating and installation instructions Cooker hood To prevent the risk of accidents or damage to the appliance, it is essential to read these instructions before it is installed and used for the first time. en-GB M.-Nr. 10 853 020...
-
Page 2: Table Of Contents
Modes of operation ..................... 16 Before using for the first time ................ 17 Select Extraction mode or Recirculation mode............. 17 Setting up Miele@home ..................17 Connecting via the app .................. 18 Connecting via WPS .................. 19 Sign out of WiFi (reset to factory settings) ............ 20 Setting up Con@ctivity .................. - Page 3 Contents Charcoal filter ......................39 Resetting the charcoal filter operating hours counter ........ 40 Disposing of charcoal filters ................ 40 Reactivatable charcoal filter ................ 40 Installation...................... 41 Before installation....................41 Assembly parts...................... 41 Appliance dimensions ................... 42 Safety distance between hob and cooker hood (S) ..........43 Installation recommendations ................
-
Page 4: Warning And Safety Instructions
They contain important notes on the safety, installation, use and maintenance of the appliance. Miele cannot be held liable for non- compliance with these instructions. Keep these instructions in a safe place and ensure that all users are familiar with the contents. - Page 5 Warning and Safety instructions The cooker hood can only be used by people with reduced physical, sensory or mental capabilities, or lack of experience and knowledge, if they are supervised whilst using it, or have been shown how to use it in a safe way and recognise and understand the consequences of incorrect operation.
- Page 6 Unauthorised installation, maintenance and repairs can cause considerable danger for the user. Installation, maintenance and repairs must only be carried out by a Miele authorised technician. A damaged appliance can be dangerous. Check it for visible signs of damage. Do not use a damaged appliance.
- Page 7 Under no circumstances should any other parts of the housing be opened. Miele can only guarantee the safety of the appliance when genuine original Miele replacement parts are used. Faulty components must only be replaced by Miele spare parts.
- Page 8 Warning and Safety instructions Using at the same time as another heating appliance that depends on the air from the room Danger of toxic fumes! Great care should be taken when using the cooker hood in the same room or the same area of the house at the same time as another heating appliance that depends on the air from the room.
- Page 9 Warning and Safety instructions In order to ensure safe operation and to prevent gases given off by the heating appliance from being drawn back into the room, when the cooker hood and the heater are both operated simultaneously, an underpressure in the room of 0.04 mbar (4 Pa) is the maximum permissible.
- Page 10 Warning and Safety instructions Correct use Never use a naked flame beneath the cooker hood. To avoid the danger of fire, do not flambé or grill over a naked flame. When switched on, the cooker hood could draw flames into the filter. Fat deposits could ignite, presenting a fire hazard.
- Page 11 Warning and Safety instructions Do not use the cooker hood without the filters in place. This way you will avoid the risk of grease and dirt getting into the appliance and hindering its smooth operation. The cooker hood can get very hot during cooking due to heat rising from the hob.
- Page 12 Wear gloves to protect your hands from being cut. Exhaust ducting must be of non-inflammable material. Suitable material is available from Miele specialist dealers or the Miele Spares Dept. The appliance must not be connected to a chimney or flue which is in use.
-
Page 13: Caring For The Environment
/ recycling centre for electrical and electronic appliances, or contact your dealer or Miele for advice. You are also responsible (by law, depending on country) for deleting any personal data that may be stored on the appliance being disposed of. -
Page 14: Guide To The Appliance
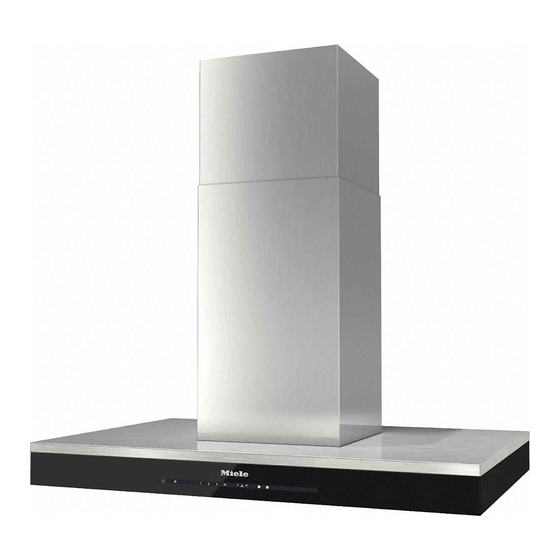
Guide to the appliance... - Page 15 Guide to the appliance a Telescopic extension piece b Tower c Canopy d Controls The symbols act as sensor controls. To select a function, touch the control. An audible tone sounds briefly to confirm selection. e Grease filters f Spacer frame The spacer frame creates a shadow gap between the tower and the ceiling.
-
Page 16: Modes Of Operation
If the on-site ventilation system does external motor have to be connected to not have a non-return flap, the non- a Miele external motor located in a return flap supplied must be fitted in the position of your choice outside the exhaust socket in the motor unit. -
Page 17: Before Using For The First Time
Miele@mobile app. To re-set it for extraction mode the operating hours counter for the If your Miele hob is connected to a charcoal filter(s) has to be deactivated. home WiFi network, you can control the cooker hood automatically via the ... -
Page 18: Connecting Via The App
Before using for the first time Miele@mobile App Connecting via the app The Miele@mobile App is available to The Miele@mobile app can be used to download free of charge from the Apple connect to your network. ® App Store or from the Google Play ... -
Page 19: Connecting Via Wps
Before using for the first time Switch the cooker hood off. Connecting via WPS Your WiFi router must support WPS (WiFi Protected Setup). Press and hold the B control. Switch the cooker hood off. Touch the lighting control at the same ... -
Page 20: Sign Out Of Wifi (Reset To Factory Settings)
WPS on your The cooker hood is ready for router quickly enough. Repeat the steps disconnection in the next two minutes. above. Tip: If your WiFi router does not support WPS, please connect via the Miele@mobile app. -
Page 21: Setting Up Con@Ctivity
Con@ctivity is the direct communication Touch the 1 control. system between an electric Miele hob and a Miele cooker hood. It enables the cooker hood to operate automatically depending on the operational state of a 2 will light up constantly, 3 will flash on Miele hob with onset controls. -
Page 22: Con@Ctivity Via The Home Wifi Network (Con@Ctivity 3.0)
Con@ctivity function via a WiFi connection (Con@ctivity 3.0) or Prerequisite: via a wireless connection (Con@ctivity – WiFi enabled Miele hob 2.0). If you do not have a home network, you Con@ctivity via the home WiFi can establish a direct connection network (Con@ctivity 3.0) -
Page 23: Con@Ctivity With Direct Wireless Connection (Con@Ctivity 2.0)
(Con@ctivity 2.0) instructions. Prerequisite: – Con@ctivity 2.0 enabled Miele hob When successfully connected the 2 and 3 will light up constantly. Quit connection mode on the cooker hood by touching the Run-on control . - Page 24 Before using for the first time Installing the Con@ctivity 2.0 stick Activating the cooker hood See the relevant installation The hob and cooker hood must be instructions provided with the switched off. Con@ctivity 2.0 stick. Activating the wireless connection ...
- Page 25 Before using for the first time Finish activation on the cooker hood Touch the B control to activate Con@ctivity 2.0. When successfully connected the B will go out, and the 2 and 3 will light up constantly. 2 will light up constantly, 3 will flash on and off.
- Page 26 Before using for the first time Activation failed If the wireless connection cannot be established despite activating the Touch the 1 control to deactivate cooker hood and the hob, both Con@ctivity 2.0. appliances must first be deactivated and then re-activated. Deactivating wireless connection 2 will light up constantly, 3 will flash on and off.
-
Page 27: Operation (Automatic Mode)
Operation (Automatic mode) When Con@ctivity 2.0 is active, the cooker hood always operates in Automatic mode (see "Setting up Con@ctivity 2.0"). If you wish to manually operate the cooker hood, see "Cooking without Con@ctivity. Examples for power levels 1 to B Cooking with Con@ctivity Reaction time (Automatic mode) - Page 28 Operation (Automatic mode) Cooking process Switching off If for example you switch on a Switch off all cooking zones. cooking zone at the highest power The cooker hood fan will reduce its level to heat a pan for frying and power level in stages over the next few reduce the power level after approx.
-
Page 29: Leaving Automatic Mode Temporarily
Operation (Automatic mode) You can also operate the cooker hood Leaving automatic mode manually for a complete cooking temporarily process. To leave automatic mode temporarily To do so switch the cooker hood fan during cooking: on before the hob. ... -
Page 30: Operation (Manual Mode)
Operation (Manual mode) Cooking without Con@ctivity Selecting the run-on time (Manual mode) It is advisable to run the fan for a few minutes after cooking has finished. This The cooker hood can be operated helps to remove any lingering vapours manually if: and odours from the air. -
Page 31: Dimming/Switching The Hob Lighting On/Off
Operation (Manual mode) Dimming/switching the hob Power management lighting on/off The cooker hood features a power management system to help save The hob lighting can be switched on energy. The fan power level is reduced and off and dimmed independently of and the lighting is switched off the fan. -
Page 32: Safety Switch-Off
Operation (Manual mode) Switching Power management on/off Safety switch-off Switch off the fan and the lighting. If Power management has been deactivated, the cooker hood will Touch the run-on option control switch itself off automatically after for approx. 10 seconds, until 1 lights 12 hours if it has been left on (fan and up in the power level display. -
Page 33: Operation (Automatic And Manual Modes)
Operation (Automatic and Manual modes) Switch off the fan and the lighting. Operating hours counter Touch the run-on option control The cooker hood registers the length of and the Grease filter control at the time it has been operated. same time. -
Page 34: Altering Or Deactivating The Charcoal Filter Operating Hours Counter
Operation (Automatic and Manual modes) Altering or deactivating the charcoal Reading the filter operating hours filter operating hours counter counter The charcoal filter is needed for You can check the percentage of time recirculation mode. set already used before the filter needs replacing. -
Page 35: Energy Saving Tips
Energy saving tips This cooker hood operates very – Use the Con@ctivity function. The efficiently and economically. The cooker hood will switch on and off following will help you to save even automatically at the optimum power more energy when using it: level for the cooking you are doing, which ensures low energy –... -
Page 36: Cleaning And Care
Housing To help prevent re-soiling, a proprietary conditioning agent for General information stainless steel (available from Miele) can also be used. Follow the The surfaces and controls are manufacturer’s instructions on the susceptible to scratches and packaging. -
Page 37: Grease Filters
Cleaning and care Removing a grease filter Grease filters When handling a grease filter, be Fire hazard! careful not to drop it. Oversaturated grease filters are a fire This can result in damage to the filter hazard. and the hob below. Clean the grease filters at regular Make sure you hold the filter securely intervals. - Page 38 Cleaning and care Unsuitable cleaning agents After cleaning After cleaning, leave the filters to dry Unsuitable cleaning agents can cause damage to the surface of the filters if on an absorbent surface before used regularly. replacing them. Do not use: ...
-
Page 39: Charcoal Filter
Cleaning and care Resetting the grease filter operating Charcoal filter hours counter With recirculation mode, a charcoal After cleaning, the operating hours filter must be fitted in addition to the counter needs to be re-set. grease filters. The charcoal filter is designed to absorb cooking odours. -
Page 40: Resetting The Charcoal Filter Operating Hours Counter
. Charcoal filters are available to order via the Miele Webshop, the Miele Spare Resetting the charcoal filter Parts Department (see end of this operating hours counter... -
Page 41: Installation
Installation Before installation Before installation, it is important to read the information given on the 4 extension piece holders following pages as well as the for aligning and securing the telescopic "Warning and Safety instructions" at extension piece the beginning of this booklet. Assembly parts 4 screws M4 x 8.5 mm for securing the extension piece... -
Page 42: Appliance Dimensions
Installation a Installation area: cut-out for feeding Appliance dimensions through the exhaust ducting, the mains cable and with ...EXT models, the connection cable to the external motor. In recirculation mode, only the mains cable is required. b Possible height range for appliance in extraction mode c Possible height range for appliance in recirculation mode... -
Page 43: Safety Distance Between Hob And Cooker Hood (S)
Installation Safety distance between hob and cooker hood (S) When planning the installation height of your cooker hood, the minimum safety distance between the top of a cooker or hob and the bottom of the cooker hood is as follows, unless a greater distance is specified by the manufacturer of your cooking appliance. -
Page 44: Installation Recommendations
Installation Installation recommendations Protective foil – When deciding on the safety distance The housing components have between the hob and cooker hood, protective foil around them to protect please note that a distance of them from transport damage. 650 mm above electric cookers/hobs ... - Page 45 Installation With extraction mode: – Place a section of the exhaust ducting in the ceiling and feed it down through the cross-sectional area as illustrated. Exhaust ducting of approx. 700 mm length is required between the ceiling and the cooker ...
- Page 46 Installation Use a knife to release the four spacers and the two covers from the spacer frame supplied. Drill four holes 10 mm, approx. 115 mm deep for the plugs supplied. Place the four plugs in the holes and ...
- Page 47 Installation The spacer frame can be installed between the tower and the ceiling. This creates a shadow which gives the illusion of a gap between the ceiling and the tower. This is useful if the ceiling is Mount the spacer frame onto the not level or is uneven.
- Page 48 Installation Hang the installation frame on the Align the installation frame with the four screws. The front of the frame is intersecting lines and secure it with marked with a "V". the screws. If using the spacer frame, place the The spacers, which were removed two covers into the fixing holes.
- Page 49 Installation Holding the installation frame securely, remove the two fixing screws and extend the installation frame to its maximum length. Replace the screws. The directional unit from conversion kit DUI 32 (optional accessory) is installed for recirculation mode (UL): ...
- Page 50 Installation Secure the exhaust socket to the exhaust ducting using a hose clip. Secure the exhaust ducting to the directional unit socket using a hose clip. Check that the exhaust ducting is held securely. Push the telescopic piece over the installation frame: –...
- Page 51 Installation Fit the four telescopic piece clamps. Bend back the two retaining tabs. When the screws are tightened, the Push the tower over the telescopic clamps spread out and push the piece and bend the retaining tabs telescopic piece upwards.
- Page 52 Installation A non-return flap is supplied with the cooker hood or is already fitted in the exhaust socket (depending on cooker hood version). With extraction mode / external motor (AL, EXT) fit the non-return flap in the exhaust socket if your ducting system is not equipped with one.
- Page 53 Installation For ...EXT models only: Connect the cooker hood and the external motor using the connection cable. Connect the mains cable. See "Electrical connection". Unscrew both screws from the installation frame again. The canopy can now be adjusted to the desired height, observing the permissible height ranges: ...
- Page 54 Installation Raise the canopy to the desired Hold the tower securely, bend back height and secure it with the screws. the retaining tabs and carefully lower the tower. The tower will locate in the cut-out in the canopy.
- Page 55 Installation With recirculation mode (UL) cooker hoods, insert the charcoal filter. Remove the grease filters from the cooker hood. Insert the safety screw on the inside. Carefully remove the protective foil from the grease filters. Replace the grease filters.
-
Page 56: Connection For Air Extraction
Connection for air extraction – Ensure that all connections are If the cooker hood is used at the strong and airtight. same time as a heating appliance that relies on oxygen from the same Remember that any constriction of room, there is a risk in certain the air flow will reduce extraction circumstances of toxic fumes... -
Page 57: Condensate Trap
Connection for air extraction Condensate trap Silencer To achieve even further reductions in noise levels, a special silencer (optional accessory) can be fitted in the ducting system. In addition to insulating the exhaust ducting, we recommend that a suitable Extraction mode condensate trap is also installed to collect and evaporate any condensate which may occur. - Page 58 Connection for air extraction Extraction mode with external motor To minimise noise from the motor in the kitchen, the silencer should be positioned in front of the external motor if possible, or, if the ducting is long, above the exhaust socket on the cooker hood .
-
Page 59: Electrical Connection
Electrical connection If the switch is not accessible after All electrical work should be installation (depending on country), an undertaken by a suitably qualified additional means of disconnection must and competent person in strict be provided for all poles. accordance with current national and For extra safety it is advisable to protect local safety regulations (BS 7671 in the appliance with a suitable residual... -
Page 60: After Sales / Warranty
Miele dealer or the Miele Service Department. Contact details for Miele are given at the end of this booklet. N.B. A call-out fee will be charged for service visits where the problem could have been resolved as described in these instructions. -
Page 61: Technical Data
Fuse rating Weight DA 6698 D 35 kg DA 6698 D EXT 32 kg * For EXT models, the connected load will depend on the type of external motor fitted. Length of connection cable to external motor: 1.9 m WiFi module Frequency band 2.412 - 2.462 GHz... -
Page 62: Conformity Declaration
Technical data Conformity declaration Miele hereby declares that this cooker hood complies with Directive 2014/53/EU. The complete text of the EU declaration of conformity is available from one of the following internet addresses: – Products, Download from www.miele.co.uk – For service, information, operating instructions etc. go to https:// www.miele.com.au/domestic/customer-information-385.htm and enter the... - Page 63 Data sheet for household cooker hoods In acc. with delegated regulation (EU) No. 65/2014 and regulation (EU) No. 66/2014 MIELE Model name / identifier DA 6698 D Annual Energy Consumption (AEC 32,1 kWh/year hood Energy efficiency class Energy efficiency index (EEI...
- Page 64 Data sheet for household cooker hoods In acc. with delegated regulation (EU) No. 65/2014 and regulation (EU) No. 66/2014 MIELE Model name / identifier DA 6698 D EXT Annual Energy Consumption (AEC 8,8 kWh/year hood Energy efficiency class Energy efficiency index (EEI...
- Page 67 Tel: +65 6735 1191 Fax. +971 4 3418 852 Fax: 011-46 900 001 Fax: +65 6735 1161 800-MIELE (64353) E-mail: customercare@miele.in E-Mail: info@miele.com.sg E-Mail: info@miele.ae Internet: www.miele.in Internet: www.miele.sg Website: www.miele.ae Manufacturer: Miele & Cie. KG, Carl-Miele-Straße 29, 33332 Gütersloh, Germany...
- Page 68 DA 6698 D DA 6698 D EXT en-GB M.-Nr. 10 853 020 / 00...
Need help?
Do you have a question about the DA 6698 D and is the answer not in the manual?
Questions and answers