Advertisement
Available languages
Available languages
Quick Links
Download this manual
See also:
User Manual
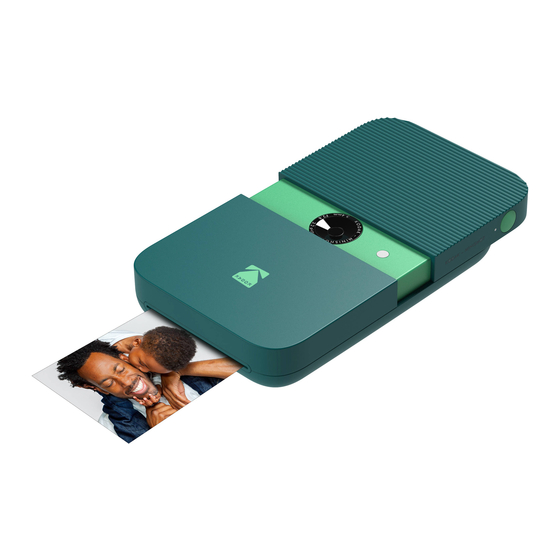
KODAK
SMILE
Appareil photo numérique à impression instantanée
Fotocamera digitale a stampa istantanea
Digitale Sofortdruckkamera
INSTANT PRINT DIGITAL CAMERA
Cámara digital con impresión instantánea
User Guide
Guide de l'utilisateur
Guida utente
Benutzerhandbuch
Guía del usuario
Advertisement

Related Manuals for Kodak Smile


Summary of Contents for Kodak Smile
-
Page 1: User Guide
KODAK SMILE Appareil photo numérique à impression instantanée Fotocamera digitale a stampa istantanea Digitale Sofortdruckkamera INSTANT PRINT DIGITAL CAMERA Cámara digital con impresión instantánea User Guide Guide de l'utilisateur Guida utente Benutzerhandbuch Guía del usuario... - Page 2 TABLE OF CONTENTS TABLE DES MATIÈRES | INDICE | INHALTSVERZEICHNIS | TABLA DE CONTENIDO English Deutsche Français Español Italiana 2 | EN EN | 3...
- Page 3 Coverage is subject to limits and with photosensitive epilepsy and/or • Prints Per Charge: ~40 Thank you for purchasing the KODAK SMILE exclusions. See warranty for details. other seizure disorders. User discretion is • Supported Photo Paper: KODAK ZINK 2″ x Instant Print Digital Camera.
- Page 4 create the risk of electric shock. can fall or be pulled into a tub or sink. PRODUCT OVERVIEW • Do not use products such as alcohol, • Do not place, drop, or submerge the Flash gasoline, diluent, or any other organic camera in water or any other liquid.
- Page 5 Power indicator Viewing screen Shutter button Paper Speaker Charging Navigation tray door indicator LED panel release Reset button Lanyard attachment MicroSD™ Micro USB card slot charging port 8 | EN EN | 9...
- Page 6 LED will change to ing it while on the main menu will return you to the live viewfinder. Charge the SMILE a solid green light. OK: Press this button to confirm a choice or take a picture. In...
- Page 7 Note: Only KODAK ZINK paper will work photos! glossy side to prevent getting fingerprints on the paper. in your KODAK SMILE camera. Other 1. Open the paper tray in the back by branded papers are not compatible. pressing down on the latch and pulling it 3.
- Page 8 Delete and you will be prompted one more After selecting Gallery from the main menu, There are six options on the KODAK SMILE a microSD™ card, but using one is strongly time to be certain you want to delete the...
- Page 9 The border will stay applied until mode status. a border to your photo. Press the OK button KODAK SMILE Camera. you manually re-enter the border menu to open the Borders menu. • Tap the shutter button once and you’ll see...
- Page 10 TIMER VOLUME LANGUAGE style shots as you want! Select the Timer icon from the settings Select the Volume icon from the settings Select the Language icon from the FLASH menu to set a timer for your next picture menu to open the volume menu. Use the settings menu to change the language Use the arrows to highlight the Flash icon (great for selfies and group shots!) Choose...
- Page 11 settings menu. displays four bars or less depending on ASAP. in the status bar, there is a timer applied its charge status. to your photos, meaning there will be a 2. Flash status: delay between when you press the THE LIVE VIEWFINDER AND a.
- Page 12 Print. If you press the OK button to edit, photobooth mode (two photos side-by- loaded with blue calibration sheet flash and general camera settings, and side). Guidelines in the viewfinder will ready to print the options for a border, or photobooth you’ll be taken to a screen to add a filter help you line up your photobooth shot.
- Page 13 OK button. If you have a microSD™ card installed in After Taking a Photo 3. Use the arrows to find the photo you want your KODAK SMILE camera, you can easily 1. Press the Print button. download and view higher-resolution copies 2.
- Page 14 (usually defaults NOTE: Please note that while the camera for your camera, the KODAK SMILE camera (usually defaults to E:\). to E:\). You will see a folder called DCIM, is plugged into the computer, you will not Instant Print Digital Camera.
- Page 15 WARRANTY INFORMATION OF ALL OTHER WARRANTIES, ORAL, WRITTEN, SUCH WARRANTIES TO THE DURATION OF THIS workmanship of the KODAK SMILE Instant Digital STATUTORY, EXPRESS OR IMPLIED. EXCEPT EXPRESS LIMITED WARRANTY. Camera (the “product”) for the Warranty Period as LIMITED WARRANTY ON KODAK SMILE INSTANT FOR THE EXPRESS WARRANTIES CONTAINED defined below.
- Page 16 Period”). The Warranty Period is not extended if Defective Merchandise Authorization (“DMA”) CUSTOMER SERVICE CONTACT The Kodak trademark, logo, and trade dress are used INFORMATION under license from Eastman Kodak Company. we repair or replace the product. We may change number.
- Page 17 Jaune, Bleu, Vert, Rouge Kit de démarrage de papier photo KODAK ZINK période. Cela peut entraîner une surchauffe pour référence. Ce produit est destiné à un...
- Page 18 problèmes. mager de façon permanente les parties APERÇU DU PRODUIT internes. Flash • Ne manipulez jamais l'appareil photo avec des mains humides ou mouillées. Cela pour- • N'utilisez pas cet appareil photo pendant le rait endommager l'appareil photo ou créer un bain ou sous la douche.
- Page 19 Voyant d'alimentation Bouton de l'obturateur Haut- Ouverture de parleur Voyant de Panneau de la réserve de charge navigation papier Bouton de réinitialisation Attache de la bandoulière Fente pour la Port de recharge Écran de visualisation carte MicroSD™ Micro USB 36 | FR FR | 37...
- Page 20 OK : Appuyez sur cette touche pour confirmer un choix ou prendre Charger le SMILE Charger le papier une photo. Dans certains scénarios, le bouton OK fonctionnera Avant d'utiliser l'appareil photo, branchez-le en Insérez le papier photo ZINK®...
- Page 21 Remarque : Seul le papier ZINK de KODAK Insérez une carte MicroSD™ appareil photo avec du papier adhésif ZINK® le côté brillant pour ne pas laisser d'empre- pour commencer à imprimer des photos ! intes digitales sur le papier. fonctionnera avec votre appareil photos SMILE.
- Page 22 OK avant l'impression APPUYEZ SUR LE BOUTON OK POUR OUVRIR Sélectionnez l'icône Galerie dans le menu Le SMILE est compatible avec les cartes LE MENU ÉDITION. TROIS OPTIONS SERONT de la photo. principal pour afficher vos photos. Dans la microSD™...
- Page 23 FILTRE Le menu Cadres vous offre deux options au menu Cadre et que vous le désactiviez ou • Appuyez une fois sur le bouton de prise choix : Off et On. que vous éteignez l'appareil photo. de vue pour voir apparaître les lignes vous Le menu Filtre offre une variété...
- Page 24 FLASH RETARDATEUR donc prendre autant de selfies et de photos de l'impression automatique est activée, vos groupe que vous le souhaitez ! photos seront imprimées immédiatement Utilisez les flèches pour mettre en évidence Sélectionnez l'icône Retardateur dans le après avoir été prises. L'option restera activée l'icône Flash et appuyez sur le bouton OK menu Paramètres pour définir un délai pour VOLUME...
- Page 25 dans le menu Paramètres pour afficher d'état au bas de l'écran affiche également c. Icône blanche avec deux barres b. Éclair seul : flash activé pour toutes les des informations sur votre appareil photo. diverses icônes, en fonction des options que affichées : la batterie est chargée photos...
- Page 26 clignote comme un compte à rebours chargé choisissez aucune de ces options et a. Icône d'impression auto : le mode après appui sur le bouton de prise de vue continuez simplement avec les paramètres d'impression automatique a été activé et par défaut.
- Page 27 6. Utilisez les flèches pour augmenter/ 1. Sélectionnez Galerie dans le menu bouton OK pour modifier, vous serez dirigé votre appareil photo KODAK SMILE, vous diminuer le nombre de copies à imprimer. principal et appuyez sur le bouton OK. vers un écran vous permettant d'ajouter un pouvez facilement télécharger et visualiser des...
- Page 28 2. Si une mise à jour du logiciel est externe. Ne débranchez pas votre appareil imprimer ou afficher ces versions haute disponible sur le site, téléchargez le photo pendant ce processus. résolution de vos photos KODAK SMILE sur 54 | FR FR | 55...
- Page 29 NUMÉRIQUE À IMPRESSION INSTANTANÉE souviendrez. pendant l'installation de la mise à jour. garantie est exclusive et vient en lieu et place KODAK SMILE de toute autre garantie écrite, orale, légale, 3. Connectez l'appareil photo à votre 7. Lorsque vous avez terminé, assurez- expresse ou implicite.
- Page 30 éventuelles de l' A ppareil photo numérique gratuitement ou (b) rembourser le prix d'achat AU REMBOURSEMENT COMME DÉCRIT à impression instantanée KODAK SMILE (le QUELLE EST LA PÉRIODE DE COUVERTURE? du produit si une unité de remplacement ne CI-DESSOUS DANS LA DÉCLARATION DE “produit”) pendant la période de garantie définie...
- Page 31 COMMENT BÉNÉFICIER DE LA GARANTIE? INFORMATIONS DE CONTACT DE La marque commerciale Kodak, le logo et l'habillage SERVICE À LA CLIENTÈLE Pour bénéficier du service de garantie, vous sont utilisés sous licence de Eastman Kodak Company. devez nous contacter au +1 844-516-1539 ou par Android est une marque commerciale de Google Inc.
- Page 32 • Pericolo di attacchi epilettici: Questo dispositivo • Capacità della batteria: 700mAh Questo prodotto è coperto da una garanzia digitale a stampa istantanea KODAK SMILE. Il utilizza ripetutamente luci LED lampeggianti, limitata di un anno. La copertura è soggetta • Tipo di batteria: Ai polimeri di litio...
- Page 33 lungo periodo di tempo. In caso contrario, la perché questo potrebbe causare INFORMAZIONI SUL PRODOTTO fotocamera potrebbe surriscaldarsi o soffrire di malfunzionamenti o danneggiare Flash altri problemi. permanentemente le parti interne. • Non utilizzare la fotocamera con le mani umide •...
- Page 34 LED indicatore dell'alimentazione Pulsante dell'otturatore Sgancio dello Pannello di sportello del Altoparlante navigazione Indicatore di cassetto della carica LED carta Pulsante reset Ancoraggio del cordino Schermata di visualizzazione Ingresso scheda Porta Micro USB MicroSD™ per ricarica 66 | IT IT | 67...
- Page 35 "Indietro". Premendolo, da una qualsiasi schermata, il processo, il LED di segnalazione diventerà si torna indietro alla schermata precedente. Premendolo mentre si è Caricare SMILE verde fisso. nel menu principale, si ritorna alla schermata di live view. Prima di utilizzare la fotocamera, collegarla al...
- Page 36 Attenzione: Nella fotocamera KODAK SMILE stampare le foto! impronte digitali sulla carta. funziona solo la carta KODAK ZINK. Carte di Inserire una scheda MicroSD™ 1. Aprire il cassetto della carta sul retro pre- 3. Quando stampi la prima foto dopo aver car- altri marchi non sono compatibili.
- Page 37 256GB. bordo , e elimina . Selezionare Filtro di recente. Consigliamo vivamente di utilizzare scattata in precedenza con la fotocamera SMILE scegliere tra le varie funzioni di filtro fotografico. una scheda microSD™ per sfruttare al meglio la o qualsiasi immagine già presente sulla scheda...
- Page 38 filtri disponibili. Lo schermo LCD fornisce live view. stampare due foto affiancate nella stessa lato sinistro dello schermo. un'anteprima in tempo reale di quel filtro; premere immagine. • On: una foto con il bordo. Selezionando • La fotocamera rimarrà in modalità cabina fo- nuovamente il pulsante OK per confermare e questa opzione, si viene portati nella modalità...
- Page 39 IMPOSTAZIONI STAMPA AUTOMATICA INFORMAZIONI SUL PRODOTTO volta al secondo, come conto alla rovescia. Il menu Impostazioni permette di accedere e Il timer resterà attivo fino a quando non rientri Selezionare l'icona Stampa automatica Selezionare l'icona Informazioni sul prodotto regolare molteplici impostazioni della fotocamera. manualmente nel menu del timer e lo disattivi, o dal menu delle impostazioni per attivare o dal menu delle impostazioni per visualizzare...
- Page 40 volta premuto il pulsante dell'otturatore. La la batteria è carica al 26-50% c. Lampo sbarrato : il flash è disattivato 5. Stato del bordo: barra di stato in basso mostrerà inoltre varie per tutte le foto d. Icona bianca che mostra una barra a.
- Page 41 modalità di stampa automatica è attiva e SCATTARE UNA FOTO impostazioni predefinite. l'opzione di stamparla o cancellarla. la fotocamera stamperà Se premi Stampa, potrai stampare 4. Mettere a fuoco lo scatto (o gli scatti) in 1. Accendere la fotocamera facendo scorrere immediatamente un'immagine dopo lo immediatamente la foto.
- Page 42 COMPUTER sia completata. 3. Utilizzare le frecce per trovare la foto che si intende stampare. Se nella fotocamera KODAK SMILE è Dopo aver scattato una foto 2. Aprire la fotocamera per attivarla. installata una scheda microSD™, è possibile 4. FACOLTATIVO: Per modificare 1.
- Page 43 6. Una volta terminato, assicurarsi di KODAK SMILE. Seguire queste istruzioni per 4. Andare nel punto in cui è stato salvato andando nel menu del computer, dove selezionare l'opzione "espelli il dispositivo scaricare e installare gli aggiornamenti.
- Page 44 ESCLUSIVA E SOSTITUTIVA DI TUTTE LE ALTRE GARANZIE, SIANO ESSE VERBALI, problemi alla fotocamera. GARANZIA LIMITATA PER LA KODAK ISTANT SCRITTE, OBBLIGATORIE, ESPRESSE O PRINT DIGITAL CAMERA IMPLICITE, FATTE SALVE LE GARANZIE QUESTA GARANZIA LIMITATA CONFERISCE ESPRESSE CONTEMPLATE IN QUESTA ALL’UTENTE DIRITTI LEGITTIMI E SPECIALI,...
- Page 45 QUAL È IL PERIODO DI COPERTURA? La il prodotto difettoso (o la parte difettosa) A PRODOTTI DIFETTOSI È LIMITATA ALLA e nei materiali della KODAK SMILE Instant validità di questa garanzia limitata decorre gratuitamente; (b) rimborsare il prezzo di RIPARAZIONE, SOSTITUIZIONE O AL Digital Camera (in prosieguo il “Prodotto”)
- Page 46 INFORMAZIONI DI CONTATTO DEL email all’indirizzo kodak@camarketing.com Il marchio, il logo e il vestito commerciale Kodak sono SERVIZIO CLIENTI durante il Periodo di garanzia, e richiedere il utilizzati su licenza di Eastman Kodak Company. numero di autorizzazione alla restituzione della Android è...
- Page 47 • Unterstützter Speicher: MicroSD™-Karten bis zu 256 GB vorgesehen. • Warnung vor Anfällen In diesem Gerät Vielen Dank, dass Sie sich für die KODAK werden immer wieder blinkende • Bilder: 10MP-Äquivalent Für dieses Produkt besteht eine beschränkte SMILE Instant Print Digital Camera entschieden LED-Leuchten eingesetzt.
- Page 48 oder anderweitig Probleme macht. • Verwenden Sie diese Kamera nicht beim PRODUKTÜBERSICHT Baden oder unter der Dusche. • Fassen Sie die Kamera niemals mit feuchten Blitz oder nassen Händen an. Dadurch kann • Stellen oder platzieren Sie die Kamera die Kamera beschädigt werden oder ein niemals so, dass sie herunterfallen oder in Stromschlag kann eintreten.
- Page 49 Betriebsanzeige- Sichtfenster Auslöser Lautsprecher Ladestatus-LED Papierschacht- Navigationsleiste Türentriegelung Reset- Taste Trageband MicroSD™ Micro USB- Kartenschlitz Ladeanschluss 96 | DE DE | 97...
- Page 50 ÜBERSICHT ÜBER DIE NAVIGATIONSLEISTE : Verwenden Sie diese Pfeiltasten, um indem Sie das Mikro-USB-Kabel in den dafür sowohl zwischen den Optionen in Menüs vorgesehenen Micro USB-Ladeanschluss als auch zwischen Fotos in der Galerie zu Tasten: auf der Unterseite stecken und vollständig wechseln.
- Page 51 Legen Sie das Papier ein Anmerkung: Nur KODAK ZINK-Papier vermeiden. wird in Ihrer KODAK SMILE Kamera Legen Sie Ihr ZINK®-Papier in die Kamera ein: 3. Wenn Sie Ihr erstes Foto nach dem funktionieren. Andere Markenpapiere sind Führen Sie die folgenden Schritte aus, um Einlegen des ZINK®-Papiers drucken, wird...
- Page 52 Um die Kamera auszuschalten, schieben Sie ohne microSD™-Karte verwendet werden. Ebenso alle vorhandenen Bilder, die sich Es gibt sechs Optionen im Menü der KODAK das Bedienfeld einfach wieder in Richtung Es wird jedoch dringend empfohlen, eine bereits auf Ihrer microSD™-Karte befinden.
- Page 53 RAHMEN den Pfeiltasten durch die aufgenommenen gefragt, ob Sie das Foto löschen möchten. Karte zu verwenden, um Ihre KODAK SMILE Fotos. Es gibt zwei Optionen für die Bilder, Klicken Sie auf OK, um das Foto von Ihrer Kamera optimal zu nutzen.
- Page 54 EINSTELLUNGEN herum geleitet. Im Sucher erscheint vorgegebenen Bereich passt. Außerdem bis Sie zum Rahmenmenü zurückkeh- unten rechts in der Statusleiste ein befindet sich unten rechts in der Statu- ren und es deaktivieren, oder bis Sie Mit dem Menü Einstellungen können Sie Symbol, das auch Ihren Rahmenstatus sleiste des Suchers ein Symbol, das den die Kamera ausschalten, damit Sie so...
- Page 55 SPRACHE wird das Kamera-Blitzlicht einmal pro Tastendrucke und den Auslöseton während zu verlassen und zum Einstellungsmenü Sekunde als Countdown blinken. der Aufnahme eines Bildes zu erhöhen oder zurückzukehren. Wählen Sie das Symbol iSprache zu verringern. Der Zeitgeber bleibt so lange aktiviert, bis aus dem Einstellungsmenü, um die SUCHER UND STATUSLEISTE Sie manuell wieder in das Zeitgebermenü...
- Page 56 linken unteren Ecke der Statusleiste und Akku so schnell wie möglich auf. a. Fotokabinensymbol : die Kamera in der Statusleiste erscheint, wird zeigt je nach Ladezustand maximal vier befindet sich im Fotokabinenmodus ein Timer auf Ihre Fotos angewendet. 2. Blitzstatus: Balken an.
- Page 57 : Papier, das gerade in der Kamera wird freigelegt. Aufnahmen) im Sucher an. können, und haben anschließend die eingelegt ist Möglichkeit, es zu drucken oder zu 2. Klicken Sie auf die Schaltfläche, um 5. Wenn Sie bereit sind, drücken Sie den löschen.
- Page 58 3. Wählen Sie mithilfe der Pfeile das Foto werden. Wenn Sie eine microSD™-Karte in Ihrer aus, das Sie drucken möchten. KODAK SMILE-Kamera installiert haben, Nach dem Fotografieren 4. OPTIONAL: Um das Foto weiter zu können Sie problemlos von jedem Laptop 1.
- Page 59 Kodak-Smile-Series und suchen Sie nach mit der Bezeichnung SMILE_CAM. Hier externes Speichermedium erkannt wird. können, um Fotos auf der Karte microSD™ Ihrer Kamera, der KODAK SMILE Instant finden Sie Kopien aller Ihrer Fotos. Trennen Sie während dieses Vorgangs aufzunehmen oder zu bearbeiten.
- Page 60 7. Wenn Sie fertig sind, achten Sie darauf, IST, IST DIESE GARANTIE EXKLUSIV UND ERSETZT ALLE ANDEREN GARANTIEN, die Option "Wechselmedien auswerfen" BESCHRÄNKTE GARANTIE AUF KODAK SMILE 4. Gehen Sie zu dem Ort, an dem SEIEN SIE MÜNDLICH, SCHRIFTLICH, INSTANT PRINT DIGITAL KAMERA zu wählen, um Probleme mit Ihrer Kamera...
- Page 61 Material- und Verarbeitungsfehler der KODAK FEHLERHAFTE WAREN BESCHRÄNKT Diese beschränkte Garantie beginnt mit kostenlos reparieren oder ersetzen oder (b) SMILE Instant Digitalkamera (das „Produkt“) für SICH AUF REPARATUR, ERSATZ ODER dem Datum Ihres Kaufs und dauert ein Jahr den Kaufpreis dieses Produkts erstatten, wenn die unten definierte Garantiezeit.
- Page 62 Austauscheinheit bereitgestellt werden KUNDENDIENST- Die Marke, das Logo und die Handelskleidung von Kodak kann. KONTAKTINFORMATIONEN werden unter Lizenz der Eastman Kodak Company verwendet. WIE ERHALTEN SIE DEN GARANTIE Sollten Sie Probleme mit Ihrem Produkt haben, Android ist eine Marke von Google Inc.
- Page 63 • Papel fotográfico compatible: Papel personas con epilepsia fotosensible y/u de que este producto funcione de manera fotográfico adhesivo KODAK ZINK de 2″ x otros trastornos convulsivos. Se aconseja segura y no represente un riesgo para el ESPECIFICACIONES 3″...
- Page 64 otros problemas. partes internas. DESCRIPCIÓN DEL PRODUCTO • Nunca manipule la cámara con las manos • No use esta cámara cuando esté en la Flash húmedas o mojadas. Esto podría dañar bañera o en la ducha. la cámara o hacerle correr el riesgo de •...
- Page 65 Luz LED indicadora Pantalla de visualización de energía Botón del obturador Altavoz Liberación de Luz LED indicadora Panel de de carga la bandeja para navegación el papel Botón de reinicio Accesorio para cordón Ranura de tarjeta Puerto de carga MicroSD™ Micro USB 128 | ES ES | 129...
- Page 66 Una vez que el proceso de carga botón para ir atrás. Presiónelo desde cualquier pantalla para ir a la Cargue la cámara SMILE se haya completado, la luz LED indicadora pantalla anterior. Si lo presiona al estar en el menú principal, regre- cambiará...
- Page 67 Nota: Solo funcionará el papel KODAK 4. Su foto se imprimirá después de que ZINK en tu cámara KODAK SMILE. termine la hoja de calibración. Los papeles de otras marcas no son 2. Coloque la hoja de calibración azul en la compatibles.
- Page 68 Después de seleccionar Galería en el menú foto, o manténgala sin borde. Seleccione funcionar sin una tarjeta microSD™, pero se cámara KODAK SMILE, a las que se accede principal, deberá elegir entre las fotos Eliminar y se le preguntará una vez más si...
- Page 69 KODAK SMILE. agregar un borde a su foto. Presione el drá aplicado hasta que vuelvas a acceder Presione OK para eliminar la foto de su botón OK para abrir el menú Bordes.
- Page 70 FLASH TEMPORIZADOR • Toca el botón del obturador una vez y temporizador y lo apagues, o hasta que verás las pautas para tomar tu primera apagues la cámara, ¡así que saca todas las Use las flechas para resaltar el icono de Seleccione el icono de Temporizador en foto en la pantalla.
- Page 71 INFORMACIÓN DEL PRODUCTO automática n el menú de configuración mostrará la imagen en vivo, tal y como se batería está 76-100 % cargada. para activar o desactivar la impresión capturará (incluidos los filtros o el borde) una Seleccione el icono de Información del b.
- Page 72 está activado en modo automático fotos, lo que significa que habrá un una al lado de la otra). Las pautas en el b. Icono con fondo azul : papel retraso entre el momento en el que visor le ayudarán a alinear la captura b.
- Page 73 IMPRIMIR UNA IMAGEN 3. Use las flechas para navegar a través de de navegación. filtro) o el borde (añadir un borde). las opciones del menú principal y elegir 6. Después de hacer la foto, la imagen que 5. Presione el botón imprimir.
- Page 74 4. Después de conectar la cámara y de TRANSFERIR LAS FOTOS A SU KODAK SMILE desde su ordenador! instalar los controladores, podrá acceder ORDENADOR a las fotos que ha realizado al dirigirse 6.
- Page 75 "expulsar el dispositivo el rendimiento del software en su cámara de almacenamiento extraíble" para evitar KODAK SMILE. Siga estas instrucciones para 4. Visite la ubicación en la que guardó cualquier problema con su cámara. descargar e instalar esas actualizaciones.
- Page 76 Cámara digital con impresión INCLUIDAS ENTRE OTRAS, LAS GARANTÍAS GARANTIZAMOS QUE, DURANTE EL PERÍODO EL REEMBOLSO SEGÚN SE DESCRIBE A instantánea KODAK SMILE (el "producto") DE COMERCIABILIDAD E IDONEIDAD PARA UN DE LA GARANTÍA, EL PRODUCTO NO CONTINUACIÓN EN ESTA DECLARACIÓN DE durante el período de garantía que se define...
- Page 77 ATENCIÓN AL CLIENTE se deba a: (a) transporte; (b) almacenamiento; ningún cambio se aplicará de modo retroactivo. kodak@camarketing.com durante el Período (c) uso inadecuado; (d) incumplimiento de de la garantía para obtener un número de ¿CUÁLES SON LOS RECURSOS DISPONIBLES...
- Page 78 Crusader Industrial Estate, London N4 1LZ, UK ©2019. Todos los derechos reservados. Fabricado La marca registrada Kodak, el logotipo y la en Vietnam. presentación del producto se usan bajo licencia de Eastman Kodak Company. Android es una marca registrada de Google Inc.
Need help?
Do you have a question about the Smile and is the answer not in the manual?
Questions and answers