LaCie 2big RAID User Manual
Hide thumbs
Also See for 2big RAID:
- Quick install manual (24 pages) ,
- Quick install manual (14 pages) ,
- Installation manual

Subscribe to Our Youtube Channel
Related Manuals for LaCie 2big RAID


Summary of Contents for LaCie 2big RAID
- Page 1 2big RAID User Manual Model: Click here to access an up-to-date online version of this document. You will also find the most recent content as well as expandable illustrations, easier navigation, and search capability.
-
Page 2: Table Of Contents
......................... . Set up LaCie 2big RAID . - Page 3 Windo ws 10 Safely Remove LaCie 2big RAID From Your Computer ...................
- Page 4 ........................Pro blem: The hard drive ico n do esn’t appear in Co mputer 12 Regulatory Compliance .
-
Page 5: Introduction
Introduction This manual provides details on configuring and managing your LaCie 2big RAID. For common questions and answers about your device, please see Frequently Asked Questions. You can get the latest tips regarding your product and updated technical information at LaCie customer support. -
Page 7: System Overview
Enclosure weight Capacity Weight (kg) 16TB Electrical Power supply 36W (12V-3A) Use only the power supply provided with your LaCie 2big RAID. Power supplies from third-party devices and other LaCie products can damage your 2big RAID. Environmental 2big RAID 3/22/19... -
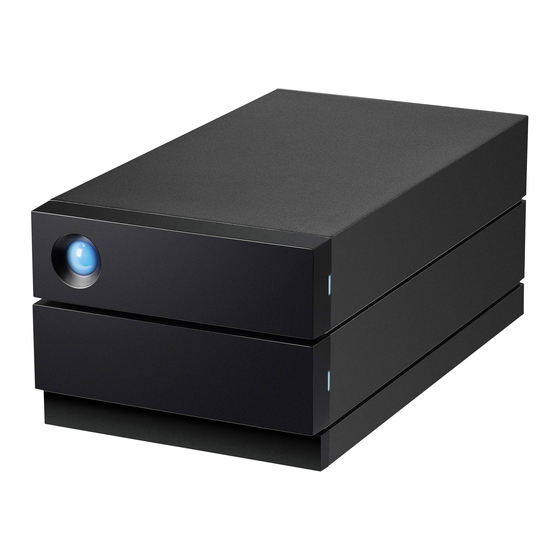
Page 8: Views
1. Status LED—The LED indicates that the device is powered on and provides status signals. See Status LEDs. 2. Swappable hard drive trays—Hard drive trays can be removed to replace failed hard drives. The LaCie 2big RAID hard drives are hot-swappable. See Hard Drive Maintenance. - Page 9 3. Kensington™ lock port—Use this port to physically lock the 2big RAID to a desk or rack. 4. USB 3.1 (Gen 2) port—Use the included USB cable to connect 2big RAID’s USB 3.1 port to your computer’s USB-C or Thunderbolt 3 port. Alternatively, you can use the included USB-C to USB-A (USB 3.0/USB 2.0) cable.
-
Page 10: Status Leds
Status LEDs The LEDs help you identify the status of 2big RAID’s system and drives. 1. System status 2. Drive status State Device powered off Solid blue Ready Blinking blue Accessing hard drive (normal operation) Slow blinking blue, 10 second... -
Page 12: Cables And Connectors
Your 2big RAID is shipped with two cables for compatibility with modern computers. USB-C to USB-C cable For optimal transfer rates, use the USB-C to USB-C cable to connect 2big RAID to a USB-C (USB 3.1 or Thunderbolt 3) port on your computer. -
Page 13: Usb-C To Usb Type A Cable
2big RAID Computer USB-C to USB Type A cable Use the USB-C to USB Type A cable to connect 2big RAID to a USB-A (USB 3.0 or USB 2.0) port on your computer. 2big RAID Computer Transfer rates with USB-A connections have the potential to reach the following speeds:... - Page 14 SuperSpeed USB 3.0 up to 5Gb/s Hi-Speed USB 2.0 up to 480Mb/s 2big RAID 3/22/19...
-
Page 15: Getting Connected
Connect the included power cable in the order listed below. 1. 2big RAID power input. 2. A live power outlet. Use only the power supply provided with your 2big RAID. Power supplies from third-party devices and other LaCie products can damage your 2big RAID. -
Page 16: Connect The Usb Cable
Confirm the type of USB port on your computer, and then choose the appropriate cable to connect 2big RAID. USB-C to USB-C For optimal transfer rates, use the USB-C to USB-C cable to connect 2big RAID to a USB-C port (USB 3.1 or Thunderbolt 3) on your computer. -
Page 17: Set Up Lacie 2Big Raid
Learn more about Toolkit Toolkit provides useful tools that let you easily: Set up your drives for performance or protection. Sync your computer data with 2big RAID. Archive edited and deleted files. For details on Toolkit features, see the Toolkit user manual. -
Page 18: Register Your Device
Using a file manager such as File Explorer or Finder, open LaCie 2big RAID and launch Start Here Mac Start Here Win. Register your device Enter your information and click Register. Download Toolkit Click the button. Download 2big RAID 3/22/19... -
Page 19: Install Toolkit
Your computer must be connected to the internet to install and run Toolkit. Storage format LaCie 2big RAID is configured RAID 0 for full storage capacity and formatted exFAT for compatibility with 2big RAID 3/22/19... -
Page 20: Disconnecting The Hard Drive
Toolkit user manual for details. If you use 2big RAID with only one type of computer, you can optimize file copy performance by formatting the drives in the native file system for your operating system. Choose one of the following methods to optimize your drive: Use Toolkit to optimize disk format. -
Page 21: Operation
Power on In most instances, LaCie 2big RAID powers on automatically when connected to a computer and an active power source. However, the power button can be used to power on the device if the following two conditions are met: The device was powered off using a long press. -
Page 22: Power-Saving Mode Managed By The Pc/Mac
Receiving power The LaCie 2big RAID powers on automatically when it is: Connected directly to a computer via 2big RAID’s USB-C port. The computer must be powered on. Connected to a live power source via the included power supply. Short push A short push is a manual depression on the power button that lasts no longer than one second. -
Page 23: Short Push And Raid Synchronization
A long push is a manual depression on the button that lasts more than four seconds. When the product is operating, a long push will cut the power to LaCie 2big RAID, forcing it to shut down immediately. A long push is not recommended for general use as it may result in data loss. - Page 24 2big RAID 3/22/19...
-
Page 25: Manage Raid
The number of disks that can fail before data is lost. Your LaCie 2big RAID can be configured as RAID 0 or RAID 1. Each RAID level has its own advantages: RAID 0—Data is not duplicated on both hard drives in RAID 0. This results in faster transfers and more storage, since the full capacity of both drives can be used to store unique data. -
Page 26: Comprehensive Raid Management
Toolkit will not launch the RAID setup wizard in the following circumstances: Toolkit was previously installed on your computer—for example, for use with another Seagate or LaCie device. The RAID level and/or format for your device were changed from their factory settings. -
Page 27: Hard Drive Maintenance
Observe all conventional ESD precautions when handling hard drives. Replacing a hard drive If a failed hard drive is under warranty, make certain to contact LaCie support to receive a replacement disk. It’s not necessary to power down the device to replace a single hard drive. - Page 28 3. If you are replacing a failed hard drive with a full disk tray, skip to Step 4. Continue here if you are replacing the hard drive using the same disk tray. Using a Phillips head screwdriver, carefully unfasten all four screws from their four slots. 2big RAID 3/22/19...
- Page 29 4. Using a Phillips head screwdriver, carefully fasten all four screws into their four slots. Do not force the screws into the slots. Forcing the screws too tight into the slots can make it difficult to remove them later and strip the screws’ teeth. 2big RAID 3/22/19...
- Page 30 5. Carefully insert the full disk tray into the empty disk slot. Gently push the disk tray handle until you feel it snap into place. When replacing hard drives that are members of an active RAID array, the hard drive LEDs blink red and blue 2big RAID 3/22/19...
-
Page 31: Lacie 2Big Raid Enclosure: Non-Serviceable Components
RAID is synchronizing data. You can continue to use the LaCie 2big RAID storage but performance is reduced until the synchronization is complete. LaCie 2big RAID enclosure: non-serviceable components The components inside the chassis are NOT hot-swappable and are NOT serviceable at any location outside of LaCie-approved service centers. -
Page 32: Optional Formatting And Partitioning
NTFS—The native file system for Windows. macOS can read NTFS volumes but cannot natively write to them. Mac OS Extended (HFS+)—The native hard drive file system for macOS. Windows cannot natively read or write to HFS+ (journaled) volumes. This is the best format if you intend to use LaCie 2big RAID with Time Machine. -
Page 33: Toolkit Optimize
Seagate storage device. macOS version 10.11 and later 1. Open the Finder and go to Applications > Utilities > Disk Utility. 2. In the sidebar to the left, select your LaCie 2big RAID. - Page 34 Management. 3. From the list of storage devices in the middle of the Disk Management window, locate your LaCie device. 4. The partition must be available to format. If it is currently formatted, right click on the partition and then choose Delete.
-
Page 35: Windows
Safely Remove LaCie 2big RAID From Your Computer Always eject a storage drive from your computer before physically disconnecting it. Your computer must perform filing and housekeeping operations on the drive before it is removed. Therefore, if you unplug the drive without using the operating system’s software, your files can become corrupt or damaged. - Page 36 3. In the list of devices, choose the device you want to eject. Windows displays a notification when it is safe to remove the device. 4. Disconnect the hard drive from the computer. 2big RAID 3/22/19...
-
Page 37: Frequently Asked Questions
Q: Is the hard drive connected to a Hi-Speed USB 2.0 port on your computer or hub? A: If your hard drive is connected to a Hi-Speed 2.0 port or hub, the inferior performance is normal. LaCie 2big RAID performance will improve when it is connected to a USB 3.1 port or a SuperSpeed USB 3.0 port. -
Page 38: Problem: I'm Receiving File Transfer Error Messages
Q: Did you get an error message telling you that the drive has been disconnected when coming out of sleep mode? A: Ignore this message since the drive remounts on the desktop despite the pop-up. LaCie drives conserve power by spinning down when you set your computer to sleep mode. When the computer awakes from sleep mode, the drive may not have enough time to spin up, causing the pop-up to appear. -
Page 39: Windows
(+) icon to view the full list of devices. If you’re uncertain that your drive is listed, safely unplug it and then reconnect it. The entry that changes is your LaCie hard drive. Q: Is your hard drive listed next to an unusual icon? A: Windows Device Manager usually provides information about failures with peripherals. - Page 40 Regulatory Compliance Product Name LaCie 2big RAID Regulatory Model Number LRDMU04 China RoHS China RoHS 2 refers to the Ministry of Industry and Information Technology Order No. 32, effective July 1, 2016, titled Management Methods for the Restriction of the Use of Hazardous Substances in Electrical and Electronic Products.
- Page 41 Beginning on January 1, 2018, Seagate products must comply with the “Marking of presence” requirements in Section 5 of CNS 15663. This product is Taiwan RoHS compliant. The following table meets the Section 5 “Marking of presence” requirements. 台灣RoHS是指台灣標準局計量檢驗局(BSMI)對標準CNS15663要求的減排電子電氣設備限用化學物質指引。從2018 年1月1日起,Seagate產品必須符合CNS15663第5節「含有標示」要求。本產品符合台灣RoHS。 下表符合第5節 「含有標示」要求。 2big RAID 3/22/19...
- Page 42 2big RAID 3/22/19...
Need help?
Do you have a question about the 2big RAID and is the answer not in the manual?
Questions and answers