Table of Contents
Advertisement
Franklin Electric Co., Inc.
P . O. Box 12010
Oklahoma City, OK 73157-2010
405.947.2511 • Fax: 405.947.8720
www.LittleGiantPump.com
CustomerService-WTS@fele.com
G INTRODUCTION
This instruction sheet provides you with the information required to safely own and
operate your Little Giant pump. Retain these instructions for future reference.
The patented Little Giant pump you have purchased is of the highest quality
workmanship and material, and has been engineered to give you long and reli-
able service. Little Giant pumps are carefully tested, inspected, and packaged
to ensure safe delivery and operation. Please examine your pump carefully to
ensure that no damage occurred during shipment. If damage has occurred,
please contact the place of purchase. They will assist you in replacement or
repair, if required.
READ THESE INSTRUCTIONS CAREFULLY BEFORE ATTEMPTING TO
INSTALL, OPERATE, OR SERVICE YOUR LITTLE GIANT PUMP. KNOW THE
PUMP'S APPLICATION, LIMITATIONS, AND POTENTIAL HAZARDS. PROTECT
YOURSELF AND OTHERS BY OBSERVING ALL SAFETY INFORMATION.
FAILURE TO COMPLY WITH THESE INSTRUCTIONS COULD RESULT IN
PERSONAL INJURY AND/OR PROPERTY DAMAGE!
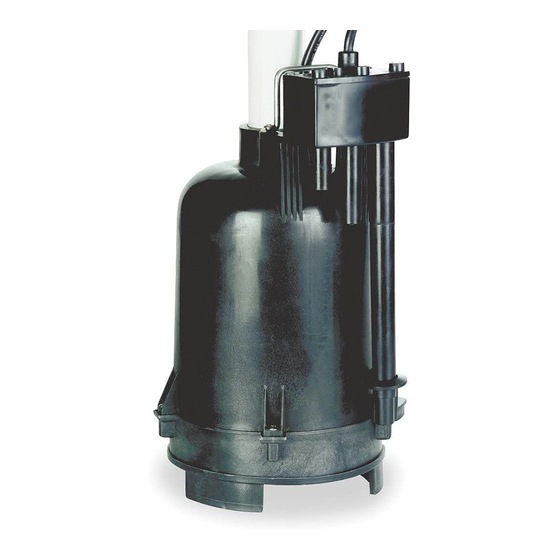
DESCRIPTION
This is a submersible effluent pump for use in sump basins. To order replace-
ment parts, refer to replacement parts table and order by kit number.
SAFETY GUIDELINES
1. Disconnect the unit from the power source before attempting to service or
remove any component.
2. Do not use to pump flammable or explosive fluids such as gasoline, fuel oil,
kerosene, etc. DO NOT use in explosive atmospheres or hazardous loca-
tions as classified by NEC, ANSI/NFPAT. Pump should be used with liquids
compatible with pump component materials.
3. Do not handle the pump with wet hands or when standing on a wet or
damp surface or in water.
4. Do not pull the pump out of the water by the power cord when the pump is
operating or connected to power source.
5. This pump is supplied with a grounding conductor and/or grounding type
attachment plug. To reduce the risk of electrical shock, ensure that it is
connected to a properly grounded grounding type receptacle.
6. In any installation where property damage and/or personal injury might
result from an inoperative or leaking pump due to power outages, dis-
charge line blockage, or any other reason, a backup system(s) and/or
alarm should be used.
7. The pump motor is equipped with an automatic resetting thermal protector
and may restart unexpectedly. Protector tripping is an indication of motor
overloading as a result of excessively high or low voltage, inadequate wir-
ing, incorrect motor connections, or a defective motor or pump.
ELECTRICAL CONNECTIONS
1. Check the pump label for proper voltage required. Do not connect to volt-
age other than that shown.
2. If pump is supplied with a 3-prong electrical plug, the third prong is needed
to ground the pump to prevent possible electrical shock hazard. DO NOT
REMOVE the third prong from the plug. A separate branch circuit is recom-
mended. Do not use an extension cord. Do not cut plug from the cord. If
the plug is cut or the cord is shortened, this will void the warranty.
3. Check local electrical and building codes before installation. The installa-
tion must be in accordance with their regulations as well as the most recent
National Electrical Code (NEC).
4. Pump should be connected to its own circuit with no other outlets or
equipment in the circuit line. Fuses and circuit breaker should be of ample
capacity in the electrical circuit.
CONSULT INSTRUCTION SHEET ILLUSTRATIONS FOR PROPER ASSEMBLY
AND DISASSEMBLY OF YOUR LITTLE GIANT PUMP.
TSW-SP
One or more of the following U.S. patents apply:
No. 5,145,323; No. 5,238,369; No. 7,264,449
GENERAL INFORMATION
1. Pump must be installed in a suitable basin which is at least 18" in diameter
and 22" deep.
2. Pump features a 1-1/2" female NPT discharge.
3. A check valve must be used in the discharge line to prevent back flow of
liquid into the basin. The check valve should be a free flow valve that will
easily pass solids. Install check valve in the vertical position.
4. In applications where clogging may occur, use the optional leg extension
kit to raise the pump 2.3 inches above the bottom of the basin. See instal-
lation section for details.
NOTE: Do not use the leg extension kit in installations where the TSW Clear
View cover kit is also used.
5. Do not attempt to restrict the intake side of this pump. This may cause dam-
age to the seal and may starve the pump. If you require reduced flow rates,
place a valve on the discharge side of the pump, or, if flexible vinyl tubing
is used, a clamp on the tubing to restrict the flow.
6. Do not let the unit run dry (without liquid). It is designed to be cooled by
pumping fluid. You may damage the seal and the motor may fail if the
pump is allowed to run dry.
7. If the unit is going to be idle for a period of time, follow the cleaning instruc-
tions outlined in the SERVICE INSTRUCTIONS. Do not let the unit freeze in the
wintertime. This may cause cracking or distortion that may destroy the unit.
INSTALLATION
(WITH TSW CLEAR VIEW KIT)
1. Install the sump pump basin and all basin inlet connections per local
plumbing codes.
2. Remove all components from the packaging to determine that all parts are
accounted for. Compare parts with your system number in Figure 3.
3. Attach the schedule 80 discharge pipe nipple (Item 4) to the basin cover
(Item 7) rib side down, using pipe cement that is compatible with both PVC
(Polyvinyl Chloride) and ABS (Poly Acrylonitrile Butadiene Styrene). The
schedule 80 discharge pipe (Item 4) should have 1-1/2" pipe threads on the
pump end while straight and smooth on the basin cover end. NOTICE: The
discharge pipe nipple (Item 4) has a vent relief hole indicated by a red dot.
This hole should face 180° away from the pump sensor probes (see Figure
1, Typical Installation drawing). Follow the instructions on the pipe cement
to allow proper drying time.
4. After the pipe cement has dried, thread cover and discharge pipe into
the pump. Run the power and switch cord up and along the side of the
discharge pipe and install supplied ty-rap around the discharge pipe and
cords. Run the two cords into the two holes in the cord grommet (Item 8)
and slide grommet into the basin cover slot.
5. Place the basin cover gasket (Item 6) on the rim of the basin (Item 1). Lower
the cover, discharge pipe and pump assembly onto the gasket while mak-
ing sure that the pump switch is located 180° from the basin inlet.
6. Your pump will be suspended by the discharge pipe nipple (Item 4) to keep
the pump from operating on the bottom of the basin. This will help keep
sediment from clogging your pump.
7. Complete discharge piping and check valve (Item 11) installation. It is rec-
ommended that there be at least a 36" piece of discharge pipe between the
cover and the check valve.
8. Run water into your basin assembly through the cord grommet slot and
allow the pump to cycle a few times to check your connections for leaks
and proper operation.
9. Fasten the washers (Item 10) and bolts (Item 9) through the basin cover
and into the basin.
INSTALLATION
(WITHOUT TSW CLEAR VIEW KIT)
1. If using optional leg extension kit, insert legs into pump base as shown in
Figure 4. No screws are necessary to secure legs.
2. Install discharge pipe into pump discharge.
3. Set pump (or pump/leg extension kit assembly) with discharge pipe onto
bottom of basin, positioning switch probes 180° from basin inlet.
4. Assemble check valve and discharge plumbing.
5. Plug pump's Intelli-Plug into outlet.
6. Test according to TESTING PUMP OPERATION section.
7. Install basin cover.
TESTING PUMP OPERATION
This pump is equipped with a water level sensor attached to the pump.
1. Plug power cord into a grounded receptacle with voltage consistent with
pump voltage as indicated on pump nameplate.
2. Run water into sump until pump starts.
3. Be sure gate valve in discharge line is open.
4. Allow pump to operate through several on/off cycles.
1
Advertisement
Table of Contents

Subscribe to Our Youtube Channel
Related Manuals for Little Giant TSW-SP


Summary of Contents for Little Giant TSW-SP
-
Page 1: General Information
If you require reduced flow rates, The patented Little Giant pump you have purchased is of the highest quality place a valve on the discharge side of the pump, or, if flexible vinyl tubing workmanship and material, and has been engineered to give you long and reli- is used, a clamp on the tubing to restrict the flow. -
Page 2: Typical Installation
Figure 1 Typical Installation 9.3” 9.3” 8.1” 8.1” 18.3” 16.0” 15.3” ALARM 13.0” 13.8 - 14.8” ALARM 12.8 - 13.8” 11.5 - 12.5” 10.5 - 11.5” 6.3 - 7.0” 4.0 - 4.75” WITHOUT LEG KIT WITH LEG KIT Figure 2 Overall Dimensions... -
Page 3: Connexions Électriques
Cette feuille d'instructions vous fournit les informations nécessaires pour entre- INFORMATION GÉNÉRALE tenir et faire fonctionner la pompe Little Giant. La pompe que vous avez ache- 1. Installer la pompe dans une cuve appropriée mesurant au moins 46 cm (18 tée est une pompe submersible pour eaux résiduaires, conçue pour être utili-... -
Page 4: Vérification Du Fonctionnement De La Pompe
Faire couler de l'eau dans la cuve à travers la fente de l'œillet du La unidad Little Giant que adquirió se fabrica utilizando mano de obra y mate- cordon et laisser la pompe effectuer quelques cycles afin de vérifier que les riales de la más alta calidad. -
Page 5: Conexiones Electricas
Los fusibles y el disyuntor deben ser de capacidad amplia en el circuito eléctrico. CONSULTE LAS ILUSTRACIONES DE LA HOJA DE INSTRUCCIONES, PARA MONTAR Y DESMONTAR CORRECTA MENTE SU BOMBA LITTLE GIANT. ¡ASEGURESE DE QUE LA UNIDAD ESTE DESCONECTADA DE LA FUENTA INFORMACIÓN GENERAL DE ALIMENTACION ELECTRICA ANTES DE INTENTAR PRESTAR SERVICIO A 1. -
Page 6: Performance Table
Model No. Volts Hertz H.P. Amps (ft.) 507700 TSW-SP 13.1 TROUBLESHOOTING INFORMATION • INFORMATION SUR LA RELÈVE DES DÉRANGEMENTS • INFORMACION DE INVESTIGACION DE AVERIAS PROBLEM • FONCTIONNEMENT PROBABLE CAUSES • CAUSES PROBABLES CORRECTIVE ACTION • SOLUTIONS DÉFECTEUX • PROBLEMA •... -
Page 7: Warranty Period
Veuillez contacter le our factory. During the time periods and subject to the conditions hereinafter centre de service autorisé Little Giant le plus près pour obtenir un service en set forth, Franklin Electric (the Company) will repair or replace to the original vertu de la garantie. -
Page 8: Duración De La Garantía
Se garantiza que las bombas Little Giant están en perfecto estado al salir de tenga la obligación de ofrecer dicho cambio o mejora para las unidades vendi- fábrica.
Need help?
Do you have a question about the TSW-SP and is the answer not in the manual?
Questions and answers