Advertisement
Quick Links
Advertisement

Related Manuals for GUSTARD DAC-X20PRO


Summary of Contents for GUSTARD DAC-X20PRO
- Page 1 Gustard DAC-X20 HD D/A converter with DSD User Manual...
- Page 2 Table of contents Front Panel..............2 Rear panel............... 2 The Screen and the Setting menu..........3 Remote controller............... 5 Product Specification............6 Warranty and service............7 Drivers installation.............. 8 OS Settings..............11 Archive DSD function with foobar2000........12 Q/A................16 - 1 -...
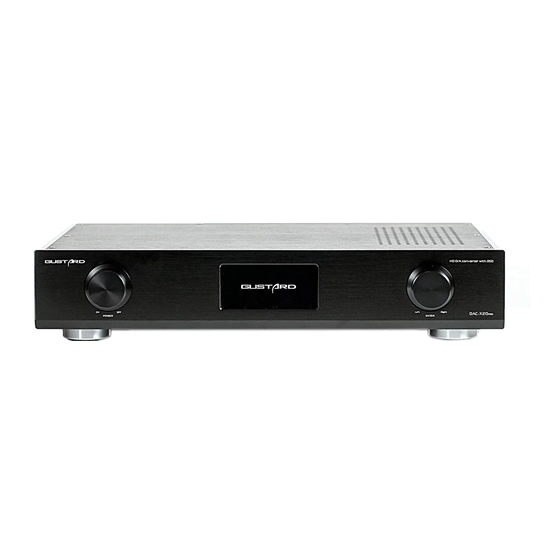
- Page 3 Front panel 1. Power switch——rotary switch.Clockwise to turn on.Counter clockwise to turn off. 2. The monitor display the input channel encoding format sampling rate volume and others. 3. Multi-function knob can archive all the functions by rotating(CW/CCW) or pressing. Rear panel - 2 -...
- Page 4 Display and the menu 1. Used large OLED monitor.Display the real-time status and functions The following figure shows an example 2. Input channel selection: X20Pro has 6 channels to input.In main menu press the knob to select in COAX——BNC——AES——USB——IIS——OPT circularly.(With out USB daughter-card will also display the USB channel.But no signal input)...
- Page 5 ES9028PRO asynchronous mode. *Under the “Auto” mode, the quality of the master clock of DAC-X20Pro will be more or less depended by the quality of the superior clock. This mode is recommended to be used only for the clock of the front-end audio equipment in good condition.
-
Page 6: Remote Controller
e.PHASE INVERT: The amplifier in the RCA output default is positive phase.XLR balanced output for the American standard polarity output.that is 1,2 hot 3 cold. There are two options for this function: DISABLE and ENABLE (optional). f.BRIGHTNESS : There are 8 levels of brightness to adjust(OLED Display) Remote Controller - 5 -... - Page 7 Input Button. Source will be switch to the next after pressing this button by the following cycle sequence: COAX - BNC - AES - USB – IIS. Menu Button. DAC-X20 main menu is shown by pressing this button. Four Directions Button. In DAC-X20 main menu,different item can be explored by UP and DOWN buttons, and different options in an item can be selected by LEFT and RIGHT buttons.
- Page 8 USB Driver Installation Under Windows * XMOS USB driver can be found in the CD-ROM accessory. Also one can visit the official website http://www.gustard.cn for downloading the driver as well. * Windows 10 users must disable digital signature before installing the driver, or it might be installed unsuccessful.
- Page 9 4. Following the prompts, then click next to install. 5. Checking system status. If showing red text prompts “Setup requires that the device is...”,please restart DAC-X20 or reconnect the USB cable. - 8 -...
- Page 10 6. If a security warning pops up, you can just ignore it by clicking "Install this driver software anyway", and then complete the driver installation. 7. Here shows the screen of a successful driver installation. Clicking “Finish” button to complete the installation。 - 9 -...
- Page 11 ◆ Setting DAC-X20 (XMOS XS1-U8 MFA) as the default system playback device 1. Finding the speaker icon at the lower right corner of the windows desktop, right-clicking, and then clicking the menu item "Playback Devices". 2. Selecting "XMOS XS1-U8 FMA (ST)", and clicking on the bottom "Set to the Default Value", and setting the maximum system volume。...
- Page 12 ◆ Setting DAC-X20 as Common Output Playback Device Configuration in foobar2000 ● 1. Clicking File->Preferences 2. Clicking Playback->Output, selecting“ASIO:XMOS USB Audio 2.0 ST 3033” on the - 11 -...
- Page 13 drop-down menu from “Device”. ◆ Archiving DSD hardware decoding by most common play-back application Setting in foobar2000 ● 1. Opening folder “ASIO Proxy for Foobar2000” ,double clicking “ASIOProxyInstall -0.7.1.2.exe” icon,and clicking “next” for finishing installation. 2. Pressing combination keys “Ctrl+P” under the main screen of foorbar2000. Showing “Preferences”...
- Page 14 3. Double clicking ““foo_dsd_asio”, showing “foo_dsd_asio v0.7.1.2” dialog box. From “ASIO Driver” drop-down menu, selecting “XMOS USB Audio 2.0 ST 3033”; From “DSD Playback Method” drop-down menu, selecting “DoP Marker 0x05/0xFA”. Leaving all the others unchanged. - 13 -...
- Page 15 “Device”drop-down 4. Clicking Playback->Output. From menu, selecting “ASIO:foo_dsd_asio”. 5. Clicking Tools->SACD. From “Output Mode” drop-down menu, selecting “DSD”. Clicking “OK” for finishing all settings. 6. Making sure the playback volume of XMOS is the maximum value, otherwise, nothing can be heard. - 14 -...
- Page 16 Problem and Solution for DSD playback For using foobar2000 application ● 1. Why there is no “ASIO” under the path “Playback->Output” in “Preferences” dialog box? Solution: The main reason is no ASIO component installation. Opening folder “foobar2000 Components” and dragging file “foo_out_asio.fb2k-component” to the right place in the “Preferences: Components”...
- Page 17 2. Why there is no “SACD” under the branch “Tools” in “Preferences” dialog box? Solution: The main reason is no “SACD” component installation. Opening folder “foobar2000 Components” and dragging file “foo_input_sacd.fb2k-component” to the right place in the “Preferences: Components” dialog box as showing in the following figure. Clicking “Apply”...
- Page 18 3. Why there is no sound when playing DSD64/DSD128 music file, but the LCD still displays “176.4K/352.8K” message? Solution: Because the system volume of XMOS USB AUDIO device is not set to 100%. The DSD identification code encoded in DoP carriers is destroyed by the system volume control function.
- Page 19 4. Why all the above settings are correct, but still getting the error as shown by the following figure when playing back DSD file? Because the version conflict between ASIOProxy and SACD decoder component. The correct version matching shows as following figure, the both IDs should start from “0.7.X” where “X”...
- Page 20 Some users are using an older version of foobar2000, its SACD decoding component ID is starts from 0.6.X. If you install ASIOProxyInstall-0.7.1.2.exe program, then foo_dsd_asio version is 0.7.1.2, and components conflict happens. Solutions: To solve the above problem, there are two solutions in totals. The first solution is to update the SACD component, as the methods described in Question 2.
-
Page 21: Product Specifications
Product Specifications Digital Input COAX input format supported: PCM 16-24bit/44.1-192kHz; DSD DOP64 BNC input format supported: PCM 16-24bit/44.1-192kHz; DSD DOP64 AES input format supported: PCM 16-24bit/44.1-192kHz; DSD DOP64 OPT input format supported: PCM 16-24bit/44.1-192kHz; DSD DOP64 USB input format supported: PCM 16-32bit/44.1-384kHz;... -
Page 22: Product Warranty
Services Thank you very much to buy GUSTARD hi-fi products. To protect your rights, please read the following warranties carefully, so you can access to the right services from GUSTARD in time. Product Warranty: You will enjoy the 2-year free warranty and lifetime maintenance after the date purchasing GUSTARD’s DAC-X20 product.
Need help?
Do you have a question about the DAC-X20PRO and is the answer not in the manual?
Questions and answers