
Related Manuals for NewAir AWB-400DB


Summary of Contents for NewAir AWB-400DB
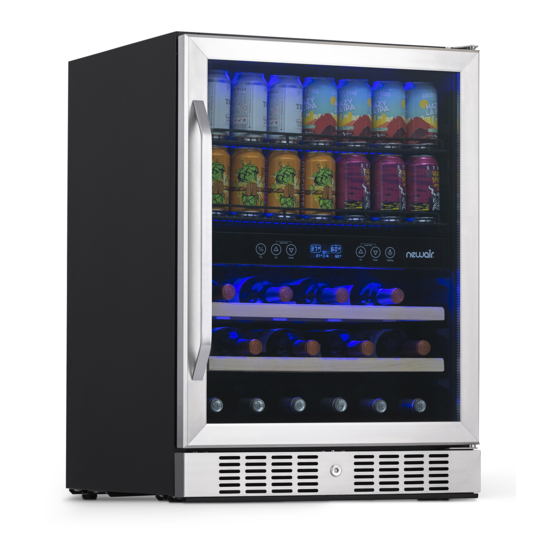
- Page 1 AWB-400DB Dual Zone Wine and Beverage Fridge OWNERS MANUAL Read and save these instructions. Manual v1.1...
- Page 2 Count on NewAir. As a proud NewAir owner, welcome to our family. There are no robots here, real people shipped your product and real people are here to help you.
-
Page 3: Table Of Contents
The Display Screen ..................10 Cleaning & Maintenance ..................11 Cleaning Your Fridge .................. 11 Moving Your Fridge ..................11 Wine Storage Guide ................... 11 Troubleshooting ....................12 Limited Manufacturer’s Warranty ..............14 SPECIFICATIONS AWB-400DB ODEL 120V OLTAGE 1.2A URRENT 60Hz REQUENCY... -
Page 4: Register Your Product Online
REGISTER YOUR PRODUCT ONLINE Register Your NewAir Product Online Today! Take advantage of all the benefits product registration has to offer: Service and Support Diagnose troubleshooting and service issues faster and more accurately Recall Notifications Stay up to date for safety, system updates and recall notifications... -
Page 5: Safety Information & Warnings
SAFETY INFORMATION & WARNINGS When using any electrical appliance, basic safety precautions must be followed in order to reduce the risk of fire, electrical shock and/or injury to persons or property. Be sure to read all instructions before using this appliance and observe the following safety tips: Attention: To avoid the risk of child entrapment, do not allow children to operate, play with, or crawl inside the unit. -
Page 6: Parts List
Check to make sure the following parts are included: • 2 beverage shelves, 2 sliding wine shelves • 1 additional half sized beverage shelf • 1 instruction manual • 1 moisture tray • Door handle and 2 screws PARTS DIAGRAM http://www.NewAir.com... -
Page 7: Assembly & Installation
ASSEMBLY & INSTALLATION HANDLE ASSEMBLY Tools Required for Assembly: Phillips screwdriver (not included) Estimated Assembly Time: 5 minutes Before installation, attach the handle to the front of the unit with the included screws. It may be necessary to push aside the rubber seal on the inside of the door to reveal the screw holes. -
Page 8: Reversing The Door Swing
To install, simply remove the first shelf from the top zone of the fridge and replace with the included half-sized shelf. http://www.NewAir.com... -
Page 9: Operating Instructions
OPERATING INSTRUCTIONS HOW TO USE THE BUTTONS ON THE DISPLAY PANEL Select Celsius or Raise the desired Fahrenheit temperature temperature. * scale. Turn the light on and off. Lower the desired temperature. * * To set the upper zone temperature, press the UP or DOWN button on the left side of the control panel. -
Page 10: The Display Screen
12. Shows set temperature of the 5. Actual temperature of the lower upper zone zone 13. Celsius or Fahrenheit degrees 6. Celsius or Fahrenheit degrees 14. Indicates status of the internal 7. Lower Zone light (on/off) Working Status Icons: Cooling Maintaining current Heating temperature http://www.NewAir.com... -
Page 11: Cleaning & Maintenance
CLEANING & MAINTENANCE CLEANING YOUR FRIDGE To clean your fridge: • Unplug the fridge and remove anything inside. • Wash the inside of the unit with a solution made of warm water and baking soda solution (2 tablespoons of baking soda to one quart of water). •... -
Page 12: Troubleshooting
See above. lot of noise. The fan may be Check the fan to make obstructed sure there is no debris or obstruction. If not, contact the manufacturer. The door will not The unit is not leveled. See above. close properly. http://www.NewAir.com... - Page 13 Problem Possible Causes Solution The door is not Check the door hinges properly installed. to make sure they are properly installed. The seal is weak. Replace the seal on the door. Replacements can be acquired from the manufacturer. The shelves are out of Make sure the shelves position.
-
Page 14: Limited Manufacturer's Warranty
Partially or completely dismantled appliances • Excess wear and tear by the user Replacement parts and/or units will be new, re-manufactured or refurbished and is subject to the manufacturer’s discretion. For technical support and warranty service, please email support@newairusa.com. http://www.NewAir.com...
Need help?
Do you have a question about the AWB-400DB and is the answer not in the manual?
Questions and answers