Advertisement
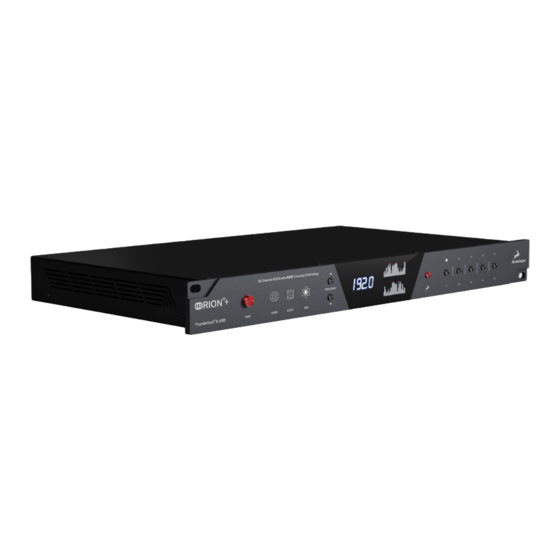
Orion32+ | Gen 3
Premium 64-channel Thunderbolt(TM)/USB AD/DA Converter
User Manual
1. Safety Notes
To reduce the risk of electrical shocks, fire, and related hazards:
Do not remove the screws, cover, or cabinet. There are no user-serviceable parts inside.
Refer servicing to qualified service personnel.
Do not expose this device to rain, moisture or spillover of liquid of any kind.
Should any form of liquid or a foreign object enter the device, do not use it. Switch off
the device and then unplug it from the power source. Do not operate the device again
until the foreign object is removed or the liquid has completely dried and its residues fully
cleaned up. If in doubt, please consult the manufacturer.
Do not handle the power cables with wet hands!
Make sure the device is switched off when plugging/unplugging it to/from the power
source.
Avoid placing things on the cabinet or using the device in a narrow and poorly
ventilated place, which could affect its operation or the operation of other closely located
components.
If anything goes wrong, turn off the device first and then unplug the power. Do not
attempt to repair the device yourself. Consult authorized service personnel or your dealer.
Do not install near any heat sources such as radiators, stoves, or other devices
(including amplifiers) that produce heat.
Do not use harsh chemicals to clean your unit. Clean only with specialized cleaners for
electronics equipment.
Connect all your devices before powering your unit.
Advertisement
Table of Contents

Related Manuals for Orion 32+

Summary of Contents for Orion 32+
-
Page 1: User Manual
Orion32+ | Gen 3 Premium 64-channel Thunderbolt(TM)/USB AD/DA Converter User Manual 1. Safety Notes To reduce the risk of electrical shocks, fire, and related hazards: Do not remove the screws, cover, or cabinet. There are no user-serviceable parts inside. Refer servicing to qualified service personnel. Do not expose this device to rain, moisture or spillover of liquid of any kind. - Page 2 Orion 32+ | Gen 3 expands the unit's proven flexibility and exemplary sound quality even further, with industry-leading conversion and a major facelift. Just like its predecessors, the Orion 32+ | Gen 3 stands ready to take over studios and live shows across the globe once again!
-
Page 3: Getting Started
7. Use the Antelope Audio Registration Wizard to register your device. Simply follow the on-screen instructions. 8. Proceed with connecting your equipment and setting up the Orion 32+ | Gen 3 for use in your preferred DAW. * For more information, please visit the official Antelope Audio... - Page 4 From left to right: 1. Power button Toggles standby/operation state Press and hold the Power button to enter the System Menu, which lets you access the following sub-menus: 1. Comm. Interface (choose between Thunderbolt(TM) and USB connectivity) 2. Device Info 3.
-
Page 5: Rear Panel Explained
Use these buttons to increase and decrease the device's sample rate. The following choices are available: 32kHz, 44.1kHz, 48kHz, 88.2kHz, 96kHz, 176.4kHz, and 192kHz. 6. Display Multi-function display * that shows the Sample Rate on the left and individual input/output volume levels on the top and bottom meters ( up to 64 channels at a time, adjustable from the software Control Panel). - Page 6 From left to right: 9. Mains Power Connection The IEC connector supports a range from ~95-245 V. The device automatically accommodates mains voltage in every country. 10. Word Clock Input BNC connector for Word Clock reference signal. 11. 10M Input This BNC Input Connector lets the Orion32+ | Gen 3 receive timing reference from an Antelope Audio Atomic Clock, such as the 10M and 10MX, thereby increasing oscillator accuracy, musical detail, and clock stability.
-
Page 7: Software Control Panel
* For more information, please visit the official Antelope Audio Windows Thunderbolt(TM) driver page. 17. USB port - Type B Orion32+ | Gen 3 uses an USB connector Type B and operates at up to 192kHz sample rate under Windows & macOS. 18. - Page 8 Routing Tab and Main View options The Universal Panel view sits constantly on the upper half of the Control Panel, allowing for quick access to the most important features. Main view: 1. Power/Standby button 2. Levels meter 3. Meter Source display (dropdown tab allows you to select different sources to preview) 4.
- Page 9 Clock Source Mode MADI Configuration Sample Rate Channels MADI 44.1 kHz 64 ch 48 kHz 64 ch MADI 2X 88.2 kHz 32 ch 96 kHz 32 ch MADI 4X 176.4 kHz 16 ch 192 kHz 16 ch Clock Source ADAT options: (Note that there is no S-Mux check-box for ADAT as it is automatically enabled when you select ADAT 2X or ADAT 4X): Clock Source Mode MADI Configuration...
- Page 10 Once you click save, you can save your session as a file on your computer. So when you load the file in the future, you can recall your session and have everything sounding exactly the same. Routing Tab 17. Undo/Redo Routing; Save/Load Set Up Files 18.
- Page 12 Mixer Tab 1. Fader Level indication 2. Fader (double-click to reset to zero) 3. Pan 4. Send 5. Mixer 1-4 Show/Hide 6. Mute 7. Solo 8. Stereo Link 9. Master Mix Fader 10. Mute Master Orion32+ | Gen 3 comes with four software low latency mixers which provide near zero latency mix and monitoring that can be distributed using the Control Panel.
- Page 13 Sample Rate MADI Thunderbolt( ADAT S/PDIF 32kHz 64 ch 64 ch 32 ch 16 ch total / 2 ch 8ch per line 44.1kHz 64 ch 64 ch 32 ch 16 ch total / 2 ch 8ch per line 48kHz 64 ch 64 ch 32 ch 16 ch total /...
- Page 14 Clicking the AFX Tab reveals the 16 AFX Channel Strips. Clicking each bar reveals or hides 2 of the total 16 DSP FX channel strips. Stack effects from the drop-down menu. Drag-and-drop the effects to re-order. User Manuals for all Antelope Audio real-time FPGA effects are available here. Options Tab Click on the ‘Settings’...
-
Page 15: Advanced User Tips
1. Monitor Trim 2. Line Out Trim 3. ADC Trim 4. Screen brightness slider 5. Oscillator 1 and Mute 6. Oscillator 2 and Mute 7. Line Out Volume 8. USB Channels Selector 9. S-MUX (MADI IN / OUT) 11. Windows, only: ASIO Control – Buffer Size & USB Streaming Mode 12. -
Page 16: Troubleshooting
Power cable • USB cable • 9. Troubleshooting Start up and Sound: Are you running the latest Control Panel and firmware? If not, please update your Control Panel and firmware. Are you correctly routing the audio signal via the routing panel? For ThunderboltTM or USB playback, route the ThunderboltTM or USB-play channels to the Line Out channels by dragging and dropping from the top section to the bottom. - Page 17 11. Thunderbolt/USB Real-Time Latency Measurements (Windows 10 & macOS 10.13.6) The tables below contain real-time latency measurements for the Orion 32+ | Gen 3 under Windows 10 and macOS 10.13.6 under Thunderbolt and USB. They were taken with the Oblique RTL Utility v0.4.11 for macOS and Windows using the following software versions:...
- Page 18 Line Out <-> Line In USB Sample Rate Buffer Size Latency (milliseconds) 192kHz 64 samples 3.887ms 96kHz 32 samples 4.201ms 48kHz 16 samples 4.365ms Mon Out <-> Line In USB Sample Rate Buffer Size Latency (milliseconds) 192kHz 64 samples 4.121ms 96kHz 32 samples 4.684ms...
- Page 19 Line Out <-> Line In USB Sample Rate Buffer Size Latency (milliseconds) 192kHz 64 samples 4.5ms 96kHz 32 samples 4.8ms 48kHz 16 samples 5.0ms Mon Out <-> Line In USB Sample Rate Buffer Size Latency (milliseconds) 192kHz 64 samples 4.7ms 96kHz 32 samples 5.3ms...
Need help?
Do you have a question about the 32+ and is the answer not in the manual?
Questions and answers