Table of Contents
Advertisement
Advertisement
Table of Contents
Troubleshooting

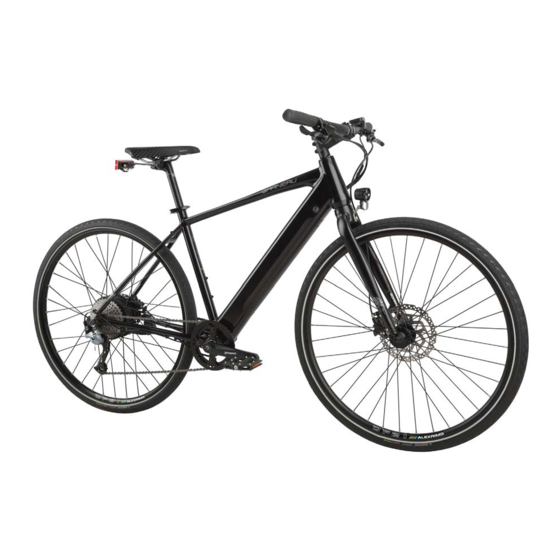
Summary of Contents for Garneau e-URBANIA
- Page 1 E-BIKE USER MANUAL...
- Page 2 DOCUMENT TO THE CUSTOMER UPON PURCHASE. PLEASE KEEP THIS MANUAL. CONTAINS USEFUL INFORMATION. LOUIS GARNEAU SPORTS INC. 30, DES GRANDS LACS STREET, ST-AUGUSTIN-DE-DESMAURES, QUÉBEC, CANADA, G3A 2E6 TEL.: (418) 878-4135 / 1-800-463-8356 FAX: (418) 878-4335 / 1-800-463-5131 LOUIS GARNEAU U.S.A. INC.
- Page 3 In order to offer quality products and provide good customer support, Louis Garneau Sports is offers an online registration system for your product. To stay informed by Louis Garneau Sports of any development regarding your product, follow the link below to register your bike online.
- Page 4 WARRANTY Louis Garneau Sports warrants, for the original owner only, the frame, rigid fork or original component parts of each new Louis Garneau bicycle to be free from defects in material and workmanship for the following specified periods for the Bafang electric systems.
-
Page 5: Table Of Contents
E-BIKE USER MANUAL FOR SAFETY, BE SURE TO READ THIS USER MANUAL THOROUGHLY BEFORE USE AND FOLLOW IT FOR CORRECT USE. TABLE OF CONTENTS 1. IMPORTANT NOTICE 2. SAFETY 2.1 Handling the battery 2.2 Safe riding 2.3 Using the product safely 2.4 Battery maintenance 3. - Page 6 5. BICYCLE MAINTENANCE (SUITE) 5.2 Lights 5.2.1 Front light 5.2.2 Rear light 5.3 Rear wheel 5.4 Bottom bracket 6. e-URBANIA 6.1 Functions 6.2 Display 6.3 Troubleshooting 7. e-ESPACE 7.1 Functions 7.1.1 ON/OFF 7.1.2 Assistance level 7.1.3 Turning the headlight on/off 7.1.4 Walk assistance mode (6 km/h)
-
Page 7: Important Notice
• If the battery does not reach full charge after 5 hours (e-Urbania) or 4 hours (e-Espace), immediately unplug the battery from the outlet to stop charging and contact the place of purchase. Failure to do so may cause the battery to overheat, explode or ignite. -
Page 8: Safe Riding
• Do not use the battery if it has any noticeable scratches or other external damage. Doing so may cause the battery to overheat or explode, as well as problems with operation. • The operating temperature ranges for the battery are specified below. Do not use the battery in temperatures outside these ranges. If the battery is used or stored in temperatures outside these ranges, fire, injury or problems with operation may occur. -
Page 9: Using The Product Safely
• Be sure to install caps to any connectors not being used. • For installation and adjustment of the product, consult a dealer. • The product is designed according to an IP54 rating (e-Urbania/e-Espace) to withstand wet weather riding conditions. However, the product must never be submersed in water. -
Page 10: Battery Maintenance
2.4 BATTERY MAINTENANCE • Only charge the battery with the included charger. • When not using the battery for an extended period, charge it to approximately 50%. Check the charge condition after six months. When only one LED of the charge-control indicator lights up, recharge the battery again to approximately 50%. •... -
Page 11: Components
3. COMPOMENTS Controller Rear light Front light Motor Battery... -
Page 12: Charging Instructions
4. CHARGING INSTRUCTIONS • Connect the charger directly to a power source. Never use extension 4.2 DISPOSAL cords. • This product must not be disposed with domestic waste. This • Avoid reverse charging. product must be disposed at an authorized place for recycling of •... -
Page 13: Bicycle Maintenance
5. BICYCLE MAINTENANCE 5.1 BATTERY 5.1.1 installation To install the battery on the bike, first make sure that the lock located On the battery, locate the electrical connector side (see image below) on the non-drive side of the bicycle is in the unlocked position. and align it at the bottom of the frame’s battery opening. - Page 14 Then, push the other side of the battery upward to clip it onto the frame. In the event that the keys are lost, locate the key lock mechanism on Once in place, push the other locking system into the lock position to the bike and note the three-digit code on the lock.
-
Page 15: Sleep Mode
5.1.2 Sleep mode The battery is designed to go in sleep mode by itself after 2h of inactivity Once the battery is out of its sleep mode, follow the steps below to turn to save power. To start the system again after an automatic shut down, the system on/off: press the button on of the battery (see image below) to exit the sleep Press... -
Page 16: Lights
5.2 LIGHTS 5.2.1 Front light To install the front light, use the long bolt with the help of a 5 mm Allen Once the light is installed on the fork, connect the white connector to key and a 10 mm hex wrench to tighten the light’s bracket to the front the light. -
Page 17: Rear Light
5.2.2 Rear light Connect the seatpost wire to the seat tube exposed wire. Once The rear light is already installed on the seatpost. To connect it to connected, push the excess wire down the seat tube and insert the the electrical system, make sure the seatpost is not installed on the bike and that the wire coming from the bike is out of the seat tube. -
Page 18: Rear Wheel
5.3 REAR WHEEL To remove the rear wheel, you must first disconnect the wire that Once the wire is free, pull the connector apart. The connector is located powers the motor. The wire must be unsecured from the frame by on the bicycle drive side, under the frame next to the rear wheel. - Page 19 Remove the plastic caps from the wheel axle’s hex nuts. Use two 18 mm To re-install the rear wheel on the bicycle, make sure the anti-rotation hex wrenches to loosen both nuts at the same time. The wheel can washer is aligned with the drop-out opening of the frame. then be removed from the frame.
-
Page 20: Bottom Bracket
5.4 BOTTOM BRACKET Left cap To remove the bottom bracket, use a spanner (Shimano TL-FC38) to Right cap unscrew ( counter clockwise) the right cap (b) from the bottom bracket. Center shaft assembly Left locking ring assembly Bottom bracket... - Page 21 Remove the rubber grommet from the bottom bracket. Pull out the center shaft assembly (c) from the bottom bracket (sprocket side) and make sure the cable is pulled at the same time. Be careful not to rotate the shaft assembly during this step to prevent the cable from breaking.
- Page 22 Use another spanner (Shimano TL-UN65) to unscrew (clockwise) the Use a spanner (Shimano TL-FC38) to unscrew (counter clockwise) the left locking ring (d) from the left cap (a). left cap (a) from the bottom bracket.
-
Page 23: E-Urbania
6. e-URBANIA 6.1 FUNCTIONS • Power on/off * The battery is designed to go in sleep mode by itself after 2h above) to exit the sleep mode. Once the battery button LED of inactivity to save power. To start the system again after an... - Page 24 Once the battery is out of its sleep mode, follow the steps below to turn • Lamp/LED display brightness the system on/off: Press for 2 seconds, the LED display will dim and both the front Press for 2 seconds, the display will turn ON; and rear lights will turn on.
- Page 25 • Bluetooth connection (Bafang Go app) verification code to the specified email address to authenticate To access the various functions of the system, download the that you entered a valid email address. Copy the verification code Bafang Go application on your mobile device. Follow the sign-up in the Verification Code box and create a password that you will procedure in the Bafang Go application.
- Page 26 Before connecting your phone to the system, make sure the Bluetooth Bluetooth devices list. Look for the DP E12.UART device and press it. function of your phone as well as the controller are turned on before Make sure the controller on the bicycle is powered on and that you are trying to pair your mobile device.
-
Page 27: Display
6.2 DISPLAY LED indication definition State of charge (from down to up) Light sensor Bluetooth > 75% 50% - 75% PA level 30% - 50% State of change 10% - 30% < 10% 1 flicker ≤ 5% • State of charge indication: 5-LED display of the state of charge; Power Assistance (PA) level indication: display current PA level 0 when the lowest LED flickers, it means it’s time to charge the to 4;... -
Page 28: Troubleshooting
6.3 TROUBLESHOOTING This system can indicate all errors occurring on the Pedelec. To indicate that an error has occurred, the LEDs will flicker as described in the table below. Error code Error definition Solution The second LED flickers 7 times in rapid succession High voltage protection Check the battery voltage using the app The second LED flickers 8 times in rapid succession Error with the motor effect sensor Have your dealer check the system... -
Page 29: E-Espace
7. e-ESPACE 7.1 FUNCTIONS ‘’+‘’ / Up ON/OFF/Mode ‘’-‘’ / Down Intelligent battery capacity indication Real-time speed indication Multiple function indication area Power assistance level indication * ‘’Press and hold” means press and hold for more than two seconds, ”Press briefly” means press for less than 0.5 second. -
Page 30: On/Off
7.1.1 ON/OFF * The battery is designed to go in sleep mode by itself after 2h of To start the system, press and hold power button to light up the display. inactivity to save power. To start the system again after an automatic Press and hold the power button again to turn it off. -
Page 31: Assistance Level
7.1.2 ASSISTANCE LEVEL 7.1.4 WALK ASSISTANCE MODE (6 KM/H) The assistance level can be selected by briefly pressing “+” or “-” until Press and hold the “-” button. The display will show the icon and the the desired assistance level is selected. e-bike will enter into walk assistance mode. -
Page 32: Display Settings
7.2 DISPLAY SETTINGS ‘’+‘’ / Up ON/OFF/Mode ‘’-‘’ / Down Intelligent battery capacity indication Real-time speed indication Multiple function indication area Power assistance level indication... - Page 33 • Real-time speed indication: Real-time speed indicated in km/h or MPH. • Assistance level indication: Indicates the current level from 1 to 5. If • Intelligent battery capacity indication: Shows the percentage of no number is displayed, the power assistance is off. remaining battery capacity which accounts for total battery capacity.
-
Page 34: Reset Single-Trip Distance
7.2.1 RESET SINGLE-TRIP DISTANCE 7.2.2 SELECTING METRIC OR IMPERIAL UNITS Enter DISPLAY SETTING menu and briefly press “+” or “-” to select Enter DISPLAY SETTING menu and briefly press “+” or “-” to select TRIP RESET and briefly press ON/OFF. Then, briefly press “+” or “-” to UNIT. -
Page 35: Backlight Brightness Setting
7.2.3 BACKLIGHT BRIGHTNESS SETTING 7.2.4 AUTO OFF TIME SETTING Enter DISPLAY SETTING interface and briefly press “+” or “-” to select Enter DISPLAY SETTING interface and briefly press “+” or “-” to select BRIGHTNESS and then briefly press ON/OFF to confirm selection. AUTO OFF, then briefly press ON/OFF to confirm selection. -
Page 36: Wheel Size
7.2.5 WHEEL SIZE 7.2.6 CHECK SPEED LIMIT Enter INFORMATION interface and briefly press “+” or “-” to select Enter INFORMATION interface and briefly press “+” or “-” to select WHEEL SIZE, then briefly press ON/OFF to check the wheel size. Briefly SPEED LIMIT, then briefly press ON/OFF to check the speed limit. -
Page 37: Troubleshooting
7.3 TROUBLESHOOTING If an error code occurs, the display will show the error code and will flicker at the same time. See the detailed definition shown in the table below. The error code interface can only disappear when the error code is solved. The rider should stop riding immediately if an error code occurs. Error code Error definition Solution...
Need help?
Do you have a question about the e-URBANIA and is the answer not in the manual?
Questions and answers