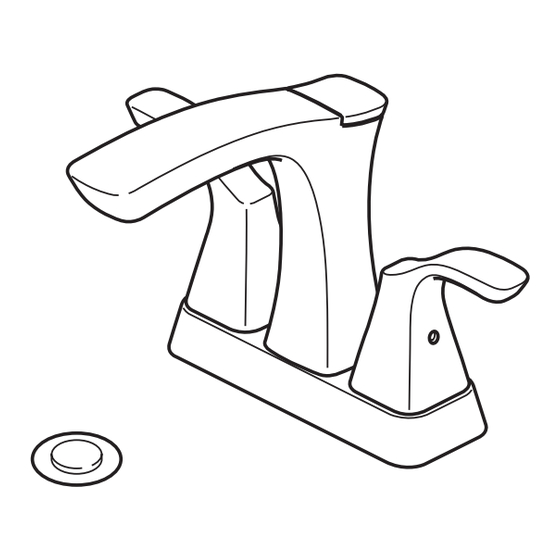
Delta 2538-DST Series Manual
Two handle lavatory centerset faucets
Hide thumbs
Also See for 2538-DST Series:
- Manual (12 pages) ,
- Installation instructions manual (12 pages) ,
- Manual (12 pages)
Advertisement
Quick Links
Models/Modelos/Modèles
2538-DST, 2551-DST, 2552-DST,
2555-DST, 2564-DST, 2592-DST
& 2594-DST
Series/Series/Seria
Write purchased model number here.
Escriba aquí el número del modelo comprado.
Inscrivez le numéro de modèle ici.
You may need/Usted puede necesitar/Articles dont vous pouvez avoir besoin:
For easy installation of your
Delta faucet you will need:
• To READ ALL the instructions completely
before beginning.
• To READ ALL warnings, care, and
maintenance information.
Para instalación fácil de su llave
Delta usted necesitará:
• LEER TODAS las instrucciones
completamente antes de empezar.
• LEER TODOS los avisos, cuidados,
e información de mantenimiento.
Pour installer votre robinet
Delta facilement, vous devez:
• LIRE TOUTES les instructions avant
de débuter;
• LIRE TOUS les avertissements ainsi que
toutes les instructions de nettoyage et
d'entretien;
www.deltafaucet.com
TWO HANDLE LAVATORY
72241
CENTERSET FAUCETS
LLAVES DE DOS MANIJAS DE MONTURA
DE CENTRO PARA LAVAMANOS
ROBINETS À ENTRAXE COURT À
DEUX POIGNÉES
1
T E FLO N
6/30/15
Rev. D
Advertisement

Summary of Contents for Delta 2538-DST Series
- Page 1 You may need/Usted puede necesitar/Articles dont vous pouvez avoir besoin: T E FLO N For easy installation of your Delta faucet you will need: • To READ ALL the instructions completely before beginning. • To READ ALL warnings, care, and maintenance information.
- Page 2 Si la reparación o su reemplazo no es práctico, Delta Faucet Company tiene DELTA FAUCET COMPANY NO SE HACE RESPONSABLE POR CUALQUIER DAÑO ESPECIAL, la opción de reembolsarle su dinero por la cantidad del precio de compra a cambio de la devolución...
- Page 3 Be sure glide ring (1) is properly seated in bottom Slide gasket (1) up over tubes and mounting of handle. Place handle over valve stem (2). Make shanks. Install under faucet body (2). Place sure handle is correctly positioned, then tighten Remove tube end from slot (1) and fully tubes through mounting holes and slide set screw (3).
- Page 4 Tubing is cut too short: buy a coupling union and a diameter is 8". Secure metal nut (3) that allows a leak-free joint to be created. Delta is not replacement supply line that mate together from a store. on faucet tube to supply valve...
- Page 5 Custom Fit Connections - Plastic Sleeve Installation Instructions Conexiones Especiales - Instructions d’installations de le manchon en plastique Spéciaux Branchement - Instrucciones para la Instalación del la Manga Plástica Correct method Incorrect Installation Método Correcto Instalación Incorrecta Installation Incorrecte Bonne méthode Do not install sleeve Ensure cut is straight.
- Page 6 Step 3b Step 3e Step 3c Metal Pop-up Apply silicone to underside of flange (1). Remove pivot nut (1). Install horizontal rod (2) and stopper (3) as removable (4) or non-removable (5). Insert body (2) into sink. Screw flange (1) Remove stopper (1) and flange (2).
- Page 7 Pop-Up with Metal Flange and Plastic Tail Piece With pivot (1) facing toward faucet, pull pop- Remove stopper (1), brass nut & washer (2), black Remove pivot nut (1). Install horizontal rod (2) up straight down into drain hole and secure gasket (3) and tail piece (4).
- Page 8 Plastic Pop-Up down firmly and hold in place. DO NOT TWIST. Attach horizontal rod (1) to strap (2) using Remove stopper (1) and flange (2). Screw nut Tighten nut (4), remove excess sealant. clip (3).Thread finial (4) (included with (3) all the way down. Push gasket (4) down. handles) onto lift rod (5), then, insert into Remove pivot nut (1).
- Page 9 Remove aerator (1) using supplied wrench (2) and turn faucet handles Check all connections at arrows for leaks. Re-tighten if necessary, but do (3) to the full on mixed position. Turn on hot and cold water supplies (4) not overtighten. and flush water lines for one minute.
-
Page 10: Maintenance
To Change the Position of Handle Stop (5). Para cambiar la posición de el tope (5). Pour changer la position de la butée (5). Cold Fría Caliente Froide Chaude La flecha va hacia el surtidor en lados Arrow faces calientes y fríos. spout on both hot &... -
Page 11: All Models
All Models 2555-DST 2538-DST RP41588▲ Lift Rod Barra de Alzar Tige de Manoeuvre RP60352 H216▲ Bonnet Nuts H238▲ Bonetes/Capuchones Chapeaux Filetés RP60400 Valve Assembly Ensamble de la Válvula Soupape RP60400 Valve Assembly Ensamble de la Válvula 2551-DST 2592-DST Soupape H292▲ H251▲... - Page 12 RP26533▲ RP34953 Metal Pop-Up Assembly Less Lift Rod Plastic Pop-Up Assembly Ensamble de Metal del Desagüe Automático Sin la Barra de Alzar Ensamble del Desagüe Automático Plástico Renvoi Mécanique en Métal Sans la Tige de Manoeuvre Renvoi Mécanique en Plastique RP5648▲...


Need help?
Do you have a question about the 2538-DST Series and is the answer not in the manual?
Questions and answers