
Related Manuals for SPR Therapeutics, Inc. SPRINT extensa

Summary of Contents for SPR Therapeutics, Inc. SPRINT extensa
- Page 1 Kommentar [TL1]: This is revision F, right? I am confirming because the revision level isn’t marked as a tracked change. Patient Instructions for Use © 2018 SPR Therapeutics, Inc. All Rights Reserved [L0092-MAN-000, Rev F]...
- Page 2 © 2018 SPR Therapeutics, Inc. All rights reserved. 2018-05-XX Kommentar [MW2]: Need to update prior to final release ® The SPRINT PNS System is manufactured by: SPR Therapeutics, Inc. 22901 Millcreek Blvd, Suite 110 Cleveland, OH, 44122 USA (844) 378-9108 www.sprtherapeutics.com Information on patents can be found at: www.sprtherapeutics.com/patents...
-
Page 3: Table Of Contents
Table of Contents Glossary ........................... 4 1 Introduction ........................... 5 1.1) About this Manual ......................5 1.2) Peripheral Nerve Stimulation (PNS) Therapy ..............5 ® 1.3) Your SPRINT PNS System .................... 6 2 Important Safeguards ......................8 2.1) Purpose of the device (Indications for Use) ..............8 2.2) When the device should not be used (Contraindications) .......... -
Page 4: Glossary
Chapter 1: Introduction Glossary Caution – Information on how to prevent damage to or failure of your device. ® Contraindication – When you should not use the SPRINT PNS System. Diathermy – A medical treatment applied to the outside of the body that delivers energy into the body. ®... -
Page 5: Introduction
Chapter 1: Introduction 1 Introduction 1.1) About this Manual ® This manual describes your SPRINT PNS System. It provides important use and safety information. Before you begin using your system, read this manual completely. Contact your provider if you have any questions or concerns. -
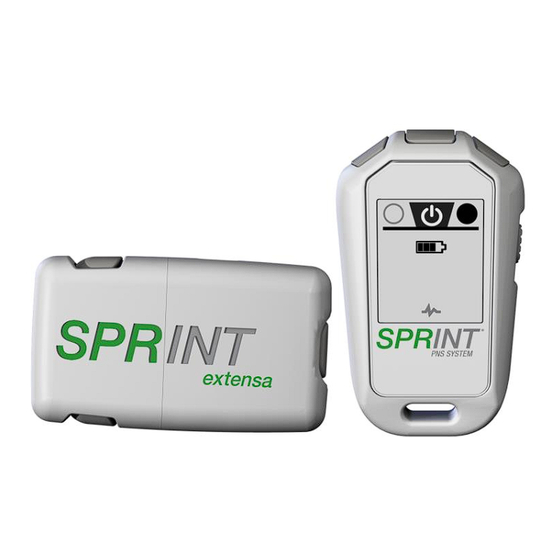
Page 6: Your Sprint Pns System
Chapter 1: Introduction ® 1.3) Your SPRINT PNS System 1. MicroLead (2): A thin, thread-like wire. One end is inserted through your skin near a nerve. The other end remains outside of your body and attaches to the Pulse Generator using the MicroLead Connector and Cables. - Page 7 Chapter 1: Introduction 6. Short & Long Extensions (2): Cables that provide extra length. 7. Pulse Generator: Delivers your peripheral nerve stimulation (PNS) therapy. 8. Mounting Pad: Connects the Pulse Generator to your skin. One side of the pad has a sticky gel to attach the pad to your skin.
-
Page 8: Important Safeguards
Chapter 2: Important Safeguards 2 Important Safeguards Carefully read the following information before using your SPRINT System. If you have any questions call your provider. 2.1) Purpose of the device (Indications for Use) ® The SPRINT Peripheral Nerve Stimulation (PNS) System is indicated for up to 60 days in the back and/or extremities for: Symptomatic relief of chronic, intractable pain, post-surgical and post-traumatic acute pain;... -
Page 9: Warnings, Precautions, & Risks
Chapter 2: Important Safeguards 2.3) Warnings, Precautions, & Risks Warning ( ) – Describes an action or situation that could harm you. This section lists potential hazards associated with the SPRINT System that you must be aware of to avoid serious outcomes that may cause injury. SPRINT Mounting Pad Placement ... - Page 10 Chapter 2: Important Safeguards The SPRINT System is MR unsafe — All MRI procedures anywhere on your body are not allowed while you are using the SPRINT System. Having an MRI procedure can cause tissue heating, injury, or unwanted stimulation. A medical professional should remove the MicroLead and all other System parts before an MRI is conducted.
- Page 11 Chapter 2: Important Safeguards Precaution - Information on how to prevent damage to or failure of your device. This section lists instructions you should follow to avoid situations that may cause discomfort or damage your System. Stimulation sensation while walking — Use caution while walking if receiving stimulation in your legs until you feel comfortable with how your therapy feels.
- Page 12 Chapter 2: Important Safeguards Pulse Generator and Remote. Too many Bluetooth devices in use at one time can disrupt one or more of the devices. • If moving away from another device solves the problem, it is likely that the System is interfering with the other device.
- Page 13 Chapter 2: Important Safeguards Risk – a possible side effect of the therapy. The following risks are associated with use of the SPRINT System. See Warnings and Precautions sections for additional risks. • Skin irritation, infection, or mild tissue inflammation may occur at the Lead exit site. •...
-
Page 14: Battery & Charging Your System
Chapter 3: Battery & Charging your System 3 Battery & Charging your System Your System has two Rechargeable Batteries, a Recharging Base, and Recharging Base Power Supply. How often you need to charge your battery depends on your stimulation intensity and how often you use the system. -
Page 15: Checking The Rechargeable Battery Level
Chapter 3: Battery & Charging your System 3.1) Checking the Rechargeable Battery Level To check your battery charge level, unlock your Remote by moving the Lock/Unlock Switch to the Up/Unlocked position. See Section 4.2: Operating your Hand-Held Remote. The home screen will display the battery charge level icon Full Charge Replace and Recharge... - Page 16 Chapter 3: Battery & Charging your System To insert a battery into the Pulse Generator: Slide the battery into the Pulse Generator until it clicks into place. Once inserted, you will hear a short beep and a light to show the charge level of the battery (as shown below).
-
Page 17: Using Your Sprint Pns System
Chapter 5: Connecting & Disconnecting the System 4 Using your SPRINT PNS System ® 4.1) Your Therapy Type Your provider will prescribe either 24hr Continuous Therapy or 6hr Session Therapy. 24hr Continuous Therapy If you have 24hr Therapy, you should have stimulation on all day and night. You should only stop and disconnect your system when you need to shower, change bandages or when a warning or precaution applies (for example, do not have therapy on while operating heavy machinery;... - Page 18 Chapter 5: Connecting & Disconnecting the System To turn stimulation on with your Remote, press the button (the button above the symbol). Turning stimulation on will turn both leads on. icon will appear and begin flashing, to show that stimulation is on. The Pulse Generator light will briefly flash green when stimulation is turned The clock on the screen (if shown) is the therapy session time left (see Section 4.4 below) .
- Page 19 Chapter 5: Connecting & Disconnecting the System 19 | SPRINT PNS System – Patient Instruction for Use [L0092-MAN-000, Rev F]...
-
Page 20: 6Hr Session Countdown Timer
Chapter 5: Connecting & Disconnecting the System 4.4) 6hr Session Countdown Timer If you have been prescribed 6hr Session Therapy, your Remote home screen will show a 6hr countdown timer once stimulation has been turned on. Countdown timer is only displayed for 6hr sessions. You will not see a timer if you have continuous therapy (24hr). -
Page 21: Adjusting Stimulation
Chapter 5: Connecting & Disconnecting the System 4.5) Adjusting Stimulation To adjust stimulation on the first MicroLead (which is connected to the light Connector) press the light button from the home screen. To adjust stimulation on the second MicroLead (which is connected to the ... -
Page 22: Selecting A Favorite
Chapter 5: Connecting & Disconnecting the System To turn stimulation on or off, or to adjust the second MicroLead, press the button to return to the home screen. 4.6) Selecting a ‘Favorite’ Some providers may choose to pre-set stimulation intensity settings (favorites). If set by the provider, the favorites allow you to move directly to these preset values and you will see small triangles on the left hand side of the screen. -
Page 23: Connecting And Disconnecting The System
Chapter 5: Connecting & Disconnecting the System 5 Connecting and Disconnecting the System 5.1) Connecting the System 1. Prepare the Mounting Pad Placement Site Clean the areas, clipping (not shaving) hair as needed Skin oils may be removed by wiping skin with rubbing alcohol WARNING: Never place the Mounting Pad or Pulse Generator across the chest from the MicroLead —... - Page 24 Chapter 5: Connecting & Disconnecting the System Be sure the Pad location does not put tension on your MicroLead Connectors. Make sure the entire Pad surface is stuck to your skin. ✎ NOTE: If the Pad does not stick well, add a drop of tap water to the sticky (gel) side prior to use.
-
Page 25: Disconnecting The System
Chapter 5: Connecting & Disconnecting the System 5.2) Disconnecting the System To disconnect your system before showering or when therapy is off: Turn stimulation OFF using the Remote or Pulse Generator. The home screen will display OFF showing that your Pulse Generator is no longer delivering stimulation. (see Section 4.3: Starting and Stopping Stimulation) Disconnect the MicroLead Connectors from the Magnetic Couplers. -
Page 26: Cleaning & Care
Chapter 6: Cleaning & Care 6 Cleaning & Care Your provider will show you how to care for your skin and lead exit sites (where the MicroLead goes through your skin). They will also discuss how and when to change the Waterproof Bandages and Mounting Cradles. -
Page 27: Changing The Waterproof Bandages And Connector Cradles
Chapter 6: Cleaning & Care 6.2) Changing the Waterproof Bandages and Mounting Cradles If the Waterproof Bandages or Mounting Cradles are soiled, damp, or starting to peel, they must be replaced. Follow these instructions to replace: 1. Wash your hands. 2. - Page 28 Chapter 6: Cleaning & Care 6. Place the center of the new Bandage over the MicroLead exit site. Make sure that no portion of the bandage adhesive touches the MicroLead exit site or Connector. 7. Press the sticky edges of the bandage firmly onto your skin so no water can enter the MicroLead exit site.
-
Page 29: System Cleaning
Chapter 6: Cleaning & Care 6.3) System Cleaning Clean your System as needed. Also clean it before and after entering a hospital, clinic, or medical office. • Use a soft cloth. Dampen the cloth with soapy water to wipe down the Pulse Generator or cables. -
Page 30: Appendix A Frequently Asked Questions
Appendix A: Frequently Asked Questions APPENDIX A Frequently Asked Questions If you have more questions, call your provider. Can I shower? How do I know stimulation is working? Disconnect the System as described in Section When stimulation is on, the icon will be 5.2 Disconnecting the System. -
Page 31: Appendix B Troubleshooting
Appendix B: Troubleshooting APPENDIX B Troubleshooting If you have more questions, call your provider. Problem Possible Causes Actions to be Taken Mounting Pad is not Skin is oily Clean skin with mild soap and water sticking to skin and allow skin to dry OR wipe skin with an alcohol pad and allow to dry Pad has lost its Apply a drop of tap water to the... - Page 32 Appendix B: Troubleshooting Problem Possible Causes Actions to be Taken Mounting Pad not well Ensure Mounting Pad is secured to skin OR see troubleshooting section adhered to skin “Mounting Pad is not sticking to skin” Issue with the MicroLead Call your provider Connector or MicroLead Stimulation will not turn Rechargeable battery is...
- Page 33 Appendix B: Troubleshooting Problem Possible Causes Actions to be Taken Bluetooth wireless Try removing and replacing the connection issue Rechargeable Battery; turn stimulation back on and resume use Stimulation is painful Pulse Generator issue Turn stimulation off. If stimulation will OR MicroLead has not turn off, remove the moved...
-
Page 34: Appendix C Specifications
Appendix C: Specifications APPENDIX C Specifications All the components of the SPRINT System are suitable for storage and transportation between at least 20°C (-4°F) and 55°C (131°F). This includes the products in their shipping carton as well as the product as stored by the clinician or patient between uses. - Page 35 Appendix C: Specifications Parameter Specification Duty cycle range: 50% - 100% Stimulus Waveform Asymmetric biphasic, no net DC 4 µC (For stimulus pulses with 50nC or less charge, the total per pulse Maximum Charge Per Pulse charge delivered accurate to +/- 15%) Maximum Charge Density at 0.4 µC/mm (when in use with the SPRINT MicroLead)
- Page 36 Appendix C: Specifications Parameter Specification Rechargeable Battery is charging (flashing Green), is fully charged (continuous Green), or is not charging (Yellow). Circuitry prevents recharging unless Rechargeable Battery cell is within Charging Protections specifications and the cell voltage is suitable for charging Charging Current 115mA.
- Page 37 Appendix C: Specifications Parameter Specification Light Gray (REF 9650) Colors Dark Gray (REF 9655) Proximal end: touchproof magnetic connector Connector Distal end: insulation displacement connector SPRINT Mounting Cradle (REF 9661) Parameter Specification Skin Contacting Material Adhesive Bandage SPRINT Dual Lead Adapter (REF 9670) Parameter Specification Proximal end: two touchproof keyhole connectors...
- Page 38 Appendix C: Specifications Parameter Specification Proximal end: touchproof magnetic connector Connector Distal end: touchproof keyhole connector 38 | SPRINT PNS System – Patient Instruction for Use [L0092-MAN-000, Rev F]...
- Page 39 Appendix D: Symbols & Messages APPENDIX D Symbols and Messages Table A: Hand-Held Remote Symbols and Messages Table A explains the symbols and messages that appear on the Hand-Held Remote and its screen. Symbol or Message Description Stimulation on/off button Stimulation is on Stimulation is off Increase...
-
Page 40: Appendix D Symbols And Messages
Appendix D: Symbols & Messages Symbol or Message Description Continue paused session (Systems with 6 hour sessions only) Start new session (Systems with 6 hour sessions only) Table B: Pulse Generator Lights and Tones Table B explains the lights and tones that are output by the Pulse Generator. Light or Tone Description Short beep... - Page 41 Appendix D: Symbols & Messages Symbol or Message Description Consult accompanying documents Caution: Consult accompanying documents Do not reuse Do not use if the product sterilization barrier or its packaging is compromised Sterilized using ethylene oxide Non-pyrogenic Lot number Serial Number Use by date (YYYY-MM-DD): This product should be used before the YYYY-MM-DD specified day.
- Page 42 Appendix D: Symbols & Messages Symbol or Message Description Manufacturer MR Unsafe MR Conditional Not made with natural rubber latex 42 | SPRINT PNS System – Patient Instruction for Use [L0092-MAN-000, Rev F]...
-
Page 43: Appendix E Contacting Customer Service
Appendix E: Contacting Customer Service APPENDIX E Contacting Customer Service You should first attempt to contact your provider for any questions related to your SPRINT System. If you are unable to reach your provider, please contact Customer Service: Via Mail: SPR Therapeutics, Inc. - Page 44 APPENDIX F: MRI Safety Information APPENDIX F MRI Safety Information The SPRINT System is MR Unsafe – All MRI procedures, no matter the anatomic site, are contraindicated for patients with the SPRINT System. Exposure can cause tissue heating and injury or unwanted stimulation. The MicroLead and all other System components should be removed from the patient before an MRI examination is performed.
-
Page 45: Appendix F Mri Safety Information
APPENDIX F: MRI Safety Information MRI Safety Card Cut along the dotted line and carry this MRI safety card with you. ® The SPRINT PNS System is MR Unsafe – exposure to MRI can cause tissue heating and injury or unwanted stimulation. - Page 46 22901 Millcreek Blvd, Suite 110 Cleveland, OH, 44122 USA Call 844-378-9108 | Fax 216-803-0777 www.sprtherapeutics.com support@sprtherapeutics.com © 2018 - SPR Therapeutics, Inc.
Need help?
Do you have a question about the SPRINT extensa and is the answer not in the manual?
Questions and answers