
Related Manuals for SLIDE SW200


Summary of Contents for SLIDE SW200
- Page 1 SMARTWATCH SW200 Quick Start Guide Please read this manual before use. Visit us at www.slideusa.com or contact us at support@slideusa.com...
-
Page 2: Fcc Statement
FCC Statement This equipment has been tested and found to comply with the limits for a Class B digital device, pursuant to Part 15 of the FCC Rules. These limits are designed to provide reasonable protection against harmful interference in a residential installation. - Page 3 Your wrist watch is a radio transmitter and receiver. It is designed and manufactured not to exceed the emission limits for exposure to radiofrequency (RF) energy set by the Federal Communications Commission of the U.S. Government. These limits are part of comprehensive guidelines and establish permitted levels of RF energy for the general population.
- Page 4 for this model phone when tested for use at the mouth is 0.131W/Kg and when worn on the body, as described in this user guide, is 0.518W/Kg. (Body-worn measurements differ among phone models, depending upon available accessories and FCC requirements). While there may be differences between the SAR levels of various phones and at various positions, they all meet the government...
-
Page 5: Safety Warning
SAFETY WARNING • Please charge the watch with the provided micro USB for at least two hours prior to its first use. • If prompted for a password, enter “1122.” This is the default password. You can change the password under Settings, in the Security Settings menu. -
Page 6: Home Screen
MENU • Slide the screen to the left, or press menu to view all additional applications. • Slide the screen to the right or left to navigate through these applications. -
Page 7: Using Your Smartwatch
• To return to the home screen press the power button. • The Settings menu available as one of these applications. Note: Several of these applications are unusable without a SIM card and memory card inserted. Note: SIM card and memory card not included. -
Page 8: Basic Functions
Pairing Via Bluetooth®: Turn on the Bluetooth functionality on your ® watch and select from the following options. 1. Power-Turns On/Off Bluetooth® 2. Visibility-Allows the user to choose if other Bluetooth® devices can see the watch. 3. My Name-Allows the user to select what name the watch will appear under when connecting via Bluetooth®... - Page 9 • Remote Notifications: Incoming notifications or SMS messages from the connected phone receive alerts on the watch. • Remote Camera: Control the phone camera with your watch. • Anti-Lost: Locate your phone using your watch, and vice versa. • Settings •...
- Page 10 Note: Not all phone companies support 2G networks. Please contact your mobile provider with any questions or problems involving wireless coverage. NOTES • The Bluetooth will disconnect ® when the phone is too far from the watch. • The watch is only compatible with 2G networks.
- Page 11 If The Usage Time is Short The battery may not be • adequately charged. If The Device Is Unable to Charge Check that the micro USB • cable is working. Check that the Micro USB • Cable is connected correctly. If The Callers Name Is Listed Incorrectly During A Phone Call Then the Phone Book may not...
-
Page 12: Replacing Battery
SETTINGS To set the date and time, swipe left on the home screen to access additional applications. Search for and select settings. Next click phone settings. You may now change, 1. The date and time 2. Language settings 3. Airplane mode On/Off REPLACING BATTERY To place or remove the battery pry the "Housing"(Battery Cover) away... - Page 13 WARRANTY CARD Customer Information Model Selling Company (signature) Customer Phone Number Name Sales Phone Purchase Date Number Product IMEI Code Customer Address Sale Address SUMMARY DATE SYMPTOMS SERVICING NOTES...
-
Page 14: Guía De Inicio Rápido
RELOJ INTELIGENTE SW200 Guía de Inicio Rápido Por favor lea este manual antes de su uso. Visitanos en www.slideusa.com o póngase en contacto con nosotros en support@slideusa.com... -
Page 15: Declaración De La Fcc
Declaración de la FCC Se han realizado pruebas en este equipo y se ha comprobado que cumple con los límites establecidos para los dispositivos digitales de Clase B, de acuerdo con la Parte 15 de la normativa de la FCC. Estos límites están diseñados para ofrecer una protección razonable contra interferencias dañinas en una instalación residencial. - Page 16 Su reloj pulsera es un transmisor y receptor de radio. Está diseñado y fabricado para no superar los límites de emisión para la exposición a la energía de radiofrecuencia (RF) estableci- da por la Comisión Federal de Comunicaciones del Gobierno de los EE. UU. Estos límites son parte de las directrices generales y establecen los niveles permitidos de energía de radiofrecuen- cia (RF) para la población en general.
- Page 17 sobre el cuerpo) según lo solicitado por la FCC para todos los modelos. El valor más elevado de SAR para este modelo de teléfono cuando se lo probó para usarse en la boca es de 0,131 W/Kg y cuando se lo colocó en el cuerpo, como se describe en el manual del usuario, es de 0,518 W/Kg.
- Page 18 ADVERTENCIA DE SEGURIDAD • Cargue el reloj con el cable micro USB suministrado durante al menos dos horas antes de su primer uso. • Si se le solicita una contraseña, ingrese “1122”. Esta es la contraseña predeterminada.Puede cambiar la contraseña en Configuración, en el menú...
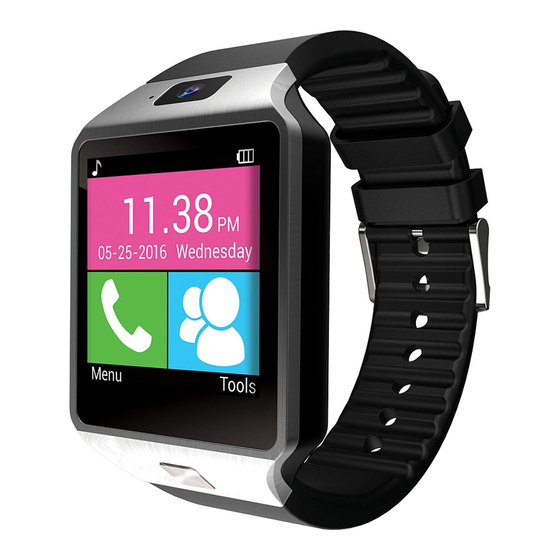
- Page 19 PANTALLA DE INICIO La pantalla de inicio se mostrará después de que se haya encendido el SW200. La pantalla de inicio contendrá la hora, la fecha y el día. Además, la pantalla de inicio soporta dos aplicaciones. La primera es la lista de contactos.
- Page 20 • Deslice la pantalla hacia la derecha o hacia la izquierda para navegar a través de estas aplicaciones. • Para volver a la pantalla de inicio, presione el botón de encendido. • El menú Configuración está disponible como una de estas aplicaciones.
-
Page 21: Funciones Básicas
Emparejamiento a través de Bluetooth®: active la funcionalidad Bluetooth® en su reloj y seleccione una de las siguientes opciones. 1. Enciende: Apaga el Bluetooth® 2. Visibilidad: permite al usuario elegir si otros dispositivos Bluetooth® pueden ver el reloj. 3. Mi nombre: permite al usuario seleccionar el nombre con el que aparecerá... - Page 22 • Registro de llamadas • Llamadas telefónicas • Lista de contactos Cámara remota: controla la • cámara del teléfono con tu reloj. Anti-Perdido: localice su • teléfono usando su reloj y viceversa. Configuraciones • Podómetro • Monitoreo del sueño: • muestra tu calidad de sueño.
-
Page 23: Solución De Problemas
la batería y la tapa de la batería. Nota: No todas las compañías telefónicas admiten redes 2G. Póngase en contacto con su proveedor de servicios móviles si tiene preguntas o problemas relacionados con la cobertura inalámbrica. NOTAS • El Bluetooth® se desconectará cuando el teléfono esté... - Page 24 • El reloj puede tener poca potencia. En este caso, cargue el reloj completamente antes de intentar encenderlo. Si El Tiempo De Uso Es Corto • La batería puede no estar cargada adecuadamente. Si El Dispositivo No Puede Cargar • Compruebe que el cable micro USB está...
- Page 25 mudarse a otro lugar con un mejor servicio telefónico. AJUSTES Para configurar la fecha y la hora, deslice el dedo hacia la izquierda en la pantalla de inicio para acceder a aplicaciones adicionales. Buscar y seleccionar configuraciones. A continuación, haga clic en la configuración del teléfono.
- Page 26 _____________________Housing...
Need help?
Do you have a question about the SW200 and is the answer not in the manual?
Questions and answers