
Related Manuals for SLIDE SW400


Summary of Contents for SLIDE SW400
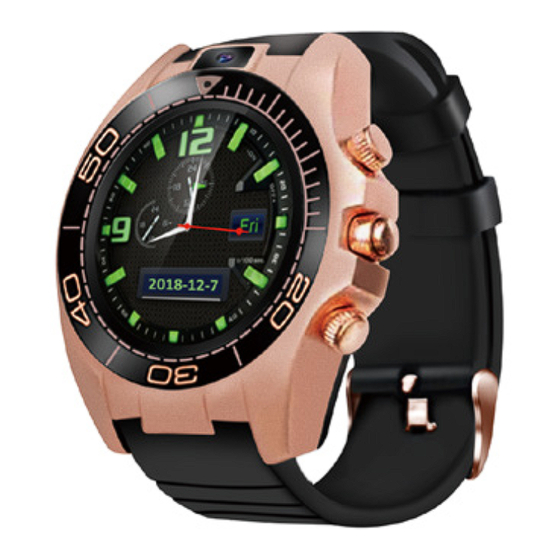
- Page 1 Smart Watch SW400 Quick Start Guide Please read this manual before use. Visit us at www.slideusa.com or contact us at support@slideusa.com...
- Page 2 FCC Statement...
- Page 3 Your wrist watch is a radio transmitter and receiver. It is designed and manufactured not to exceed the emission limits for exposure to radiofrequency (RF) energy set by the Federal Communications Commission of the U.S. Government. These limits are part of comprehensive guidelines and establish permitted levels of RF energy for the general population.
- Page 4 for this model phone when tested for use at the mouth is 0.160W/Kg and when worn on the body, as described in this user guide, is 3. 88W/Kg. (Body -worn measurements differ among phone models, depending upon available accessories and FCC requirements). While there may be differences between the SAR levels of various phones and at various positions, they all meet the government...
-
Page 5: Safety Warning
SAFETY WARNING • Please charge the watch for at least two hours prior to its first use. • If prompted for a password, enter “1122.” This is the default password. You can change the password under Settings, in the Security Settings menu. PRODUCT DETAILS Power button Zinc Alloy Shell... - Page 6 Micro USB Port: Charge or transfer data to/from the device. Touch Screen: Available functions will be shown on the touch screen, and can be controlled by simply touching them and following the instructions. Open the back cover: Find the cover crack out, put thumb nail in, then pull the back cover away, or use a tool to instead of thumb nail to open cover.
-
Page 7: Quick Controls
QUICK CONTROLS • Slide the screen to the left to change to the next page. • Slide the screen to the right to return to the previous page. • Swipe from the top of the screen to the bottom to bring up the Settings menu. -
Page 8: Basic Functions
FOR IOS PHONES: Turn on Bluetooth® on both the watch and the phone. Then, from the watch, go to the Bluetooth® option in the menu and touch “Search for New Device.” Locate your phone, and connect the two. Make sure to allow the Phone Book to be shared, as that will help with displaying incoming notifications. - Page 9 You will see a sliding metal fixture for the SIM Card. Slide it to open and insert the SIM Card. Next to the SIM Card slot is a place for the MicroSD Card.
-
Page 10: Troubleshooting
NOTES • It usually takes about 1-2 hours to achieve a full charge. • Use the included cable and charger to charge the watch. You can use your Android accessories with the watch. • Bluetooth® will disconnect when the phone is too far from the watch. - Page 11 Usage Time is Short • The battery may not be adequately charged. Charge the watch fully. • When using a SIM Card, the power may run out quickly if the signal is poor. Move to a location with better signal. Unable to Charge •...
- Page 12 WARRANTY CARD Customer Information Model Selling Company (signature) Customer Phone Number Name Purchase Date Sales Phone Number Product IMEI Code Customer Address Sale Address SUMMARY SYMPTOMS NOTES DATE SERVICING...
- Page 14 SMARTWATCH SW400 Guía de Inicio Rápido Lea este manual antes de usar. Visita nuestro sitio web www.slideusa.com o contáctenos aquí support@slideusa.com...
- Page 15 Declaración de la FCC Este equipo ha sido probado y se encontró que cumple con los límites para un dispositivo digital de Clase B, de conformidad con la Parte 15 de las Reglas de la FCC. Estos límites están diseñados para proporcionar una protección razonable contra interferencias dañinas en una instalación residencial.
- Page 16 Su reloj de pulsera es un transmisor y receptor de radio. Está diseñado y fabricado para no exceder los límites de emisión para la exposición a la energía de radiofrecuencia (RF) establecidos por la Comisión Federal de Comunicaciones del Gobierno de los EE. UU. Estos límites son parte de pautas integrales y establecen niveles permitidos de energía de RF para la población en general.
- Page 17 que no excede el límite establecido por el requisito adoptado por el gobierno para la exposición segura. Las pruebas se realizan en posiciones y ubicaciones (por ejemplo, en la oreja y en el cuerpo) según lo exige la FCC para cada modelo.
- Page 18 ADVERTENCIA DE SEGURIDAD • Cargue el reloj por lo menos dos horas antes de su primer uso. • Si se le solicita una contraseña, ingrese "1122." Esta es la contraseña predeterminada. Puede cambiar la contraseña en Configuración, en el menú Configuración de seguridad.
- Page 19 Puerto Micro USB: carga o transfiere datos hacia / desde el dispositivo. Pantalla táctil: las funciones disponibles se mostrarán en la pantalla táctil y se pueden controlar simplemente tocándolas y siguiendo las instrucciones. Abra la cubierta posterior: busque la grieta de la tapa, coloque la uña del pulgar, luego retire la cubierta posterior, o use una herramienta en lugar de la...
- Page 20 CONTROLES RÁPIDOS • Deslice la pantalla hacia la izquierda para pasar a la página siguiente. • Deslice la pantalla hacia la derecha para regresar a la página anterior. • Deslice el dedo desde la parte superior de la pantalla hacia abajo para que aparezca el menú...
- Page 21 USANDO SU SMARTWATCH PARA TELÉFONOS ANDROIDES: Escanee el código QR a la derecha para descargar la aplicación y sincronizar su teléfono. Siempre actualice el software Sync a medida que las actualizaciones estén disponibles.
- Page 22 PARA TELÉFONOS IOS: active Bluetooth® tanto en el reloj como en el teléfono. Luego, desde el reloj, vaya a la opción Bluetooth® en el menú y toque "Buscar nuevo dispositivo.” Localice su teléfono y conéctelos. Asegúrese de permitir que la guía telefónica se comparta, ya que eso ayudará...
- Page 23 Cámara remota: controle la cámara del teléfono con su reloj. Prevención de pérdida: ubique su teléfono usando su reloj, y viceversa. Configuraciones Podómetro Monitorización del sueño: muestre la calidad de su sueño, en función del tiempo de sueño. Recordatorio sedentario: establezca un recordatorio para levantarse y hacer ejercicio, evitando que permanezca inmóvil durante...
- Page 24 TARJETA SIM Y MEMORIA El reloj acepta tarjetas SIM para uso inalámbrico y tarjetas MicroSD como fuente de memoria interna. Para instalar ambas, retire la caja posterior del reloj y extraiga la batería. Verá un accesorio metálico deslizante para la tarjeta SIM. Deslice para abrir e inserte la tarjeta SIM.
- Page 25 NOTAS • Por lo general, demora alrededor de 1-2 horas para lograr una carga complete. • Use el cable y el cargador incluidos para cargar el reloj. Puedes usar tus accesorios de Android con el reloj. • Bluetooth® se desconectará cuando el teléfono esté...
- Page 26 El reloj puede tener poca • potencia. Cargue el reloj por completo, luego intente encender el reloj. Mirar Se Apaga Automáticamente • El reloj puede tener poca potencia. Cargue el reloj por completo. El Tiempo De Uso Es Corto • La batería puede no estar adecuadamente cargada.
- Page 27 • Es posible que la agenda no se haya sincronizado cuando el reloj se conectó inicialmente al teléfono. Desconecte, luego vuelva a conectar el teléfono y mire, y seleccione Sincronizar agenda telefónica cuando se le solicite. Mala Calidad de Voz en Llamadas Telefónicas •...
- Page 28 TARJENTA DE GARANTÍA Información al Cliente Compañía Modelo Vendedora (firma) Número de Cliente Teléfono Nombre Fecha de Compra Teléfono de Ventas Número Producto IMEI Código Cliente Dirección Dirección de Venta RESUMEN SINTOMAS NOTAS FECHA SERVICIO...
Need help?
Do you have a question about the SW400 and is the answer not in the manual?
Questions and answers