Table of Contents
Advertisement
Advertisement
Table of Contents

Related Manuals for Docomo F-04H


Summary of Contents for Docomo F-04H
- Page 1 F-04H ’16.7 INSTRUCTION MANUAL...
- Page 2 *You can download the latest information. "クイックスタートガイド (Quick start guide)" (included with Viewing this manual the terminal)(in Japanese only) ・ In this manual, "F-04H" mobile terminal is usually referred to This guide provides information of parts names and as "the terminal". functions. ・...
-
Page 3: Basic Package
Basic package Japanese only) ご利用にあたっての注意事項 (Notes and instructions for use) (in Japanese only) ■ F-04H (with warranty) ■ Desktop Stand (Sample) ・ For optional accessories compatible with the terminal (optional), refer to NTT DOCOMO website. https://www.nttdocomo.co.jp/product/option/ (in Japanese only) Contents/Precautions... -
Page 4: Table Of Contents
Early warning "Area Mail" ..........69 Before using the terminal ... 29 Browser ................70 Simplified Browser ............73 Part names and functions ..........29 docomo nano UIM card ...........30 Applications ........ 76 Charging ................32 Turning power on/off ............34 dmenu ................76 Basic operation ..............35... - Page 5 Language/Text/Input ............131 Appendix/Index ......160 Users ................132 Troubleshooting (FAQ) ..........160 Useful tools ..............133 Anshin Enkaku Support ..........165 docomo service/cloud ............135 Warranty and After-Sales Service ........ 165 Device management ............136 Software update ............. 167 Google ................141 Main specifications ............170 Specific Absorption Rate (SAR) of Mobile Terminals File management .......
-
Page 6: Before Using The Terminal
If you have a docomo mini UIM card, docomo UIM signals. Also, communication may be interrupted even card, or FOMA card, bring it to a docomo Shop to replace it when there are strong radio waves with 4 signal status icons with a docomo nano UIM card. - Page 7 ・ ・ Improving the terminals quality or upgrading operation For details on usage fee, refer to NTT DOCOMO website. system may be included in the software update. And some applications used in the previous version may not be available or some unintended bugs may occur after software update.
-
Page 8: Precautions (Always Follow These Directions)
Minor injury: This refers to injuries, burns (high- and low- Precautions (Always follow temperature), electric shock, etc. that do not require hospital admission for treatment or long-term hospital attendance as an these directions) outpatient. Physical damage: This refers to extended damage to buildings, ・... - Page 9 ■ Precautions contain the description below. Do not charge when the terminal is wet with Handling the terminal, adapter, and docomo nano UIM card water (drinking water, perspiration, seawater, (common).................7 urine of pet animals, etc.). Don’t Handling the terminal ..............9 May cause fire, burns, injuries, or electric shock.
- Page 10 Keep conductive materials (metal pieces, pencil CAUTION lead, etc.) from coming in contact with the Do not use the damaged terminal. charging jack or external connection jack, or dust Don’t May cause fire, burns, or injuries. into the terminal. May cause fire, burns, injuries, electric shock. Don’t Do not leave the terminal on unstable or sloping Do not cover or wrap the terminal with a blanket...
- Page 11 ◆ Handling the terminal When children use the terminal, do not let them use incorrectly without instruction by an adult for proper use. DANGER Don’t May cause injuries. Do not throw the terminal into fire or apply heat. Do not store the terminal within the reach of May cause fire, burns, or injury due to battery to ignite, small children.
- Page 12 Also, when playing games, video, or music with microSD card slot. an earphone microphone connected to the Insert the docomo nano UIM card or the microSD terminal, adjust the volume to the proper level. memory card in the correct place and in correct...
- Page 13 Also, may cause environmental destruction. Bring them to May cause battery pack to ignite, burst, heat, or leak, and a sales outlet such as docomo Shop. If your local may cause fire, burns, or injuries. municipality has a battery recycling program, dispose of them as provided for.
- Page 14 ◆ Handling the adapter If you develop skin problems, stop using the terminal immediately, and see a doctor. The use of the terminal may cause itching, rashes, WARNING eczema, or other symptoms depending on the Do not use the adapter cord if it gets damaged. user's physical condition.
- Page 15 When you disconnect the power plug from an Do not use a transformer for overseas travel (travel converter) as the AC adapter. outlet or accessory socket, do not pull the May cause fire, heat, electric shock. adapter cord with excessive force. Instead, hold Don’t the adapter to disconnect.
- Page 16 Be careful of the cut surface when handling a signals (turn off power, put it in Airplane mode, docomo nano UIM card as it may damage a part etc.) if within 15 cm of those around you, such as of your body such as fingers, etc.
- Page 17 Power key, Volume key PC+ABS resin/Acrylic UV curable coating Slot cap PC resin+Elastomer resin/ Acrylic UV curable coating Stereo earphone jack PA resin/None IMEI sheet (Sheet, Bar code) PET/Urethane acrylate resin (single side treatment) Tray for docomo nano UIM POM resin/None card Contents/Precautions...
-
Page 18: Handling Precautions
- The adapter and docomo nano UIM card do not have malfunction. waterproof/dustproof function. Do not use them in places ・... - Page 19 PC or cloud service, or keep a separate note. - For the position of the proximity sensor, refer to the - If the data is deleted, DOCOMO assumes no responsibility following. →P29 "Part names and functions" for the loss of any data.
- Page 20 Always keep UIM ICs clean. A recommended battery level to store the terminal is ・ Clean docomo nano UIM card with a soft, dry cloth (such as approximately 40% of remaining battery level as a guide. a cloth for eyeglasses).
- Page 21 Bluetooth. production lines of a factory that require a license, ・ DOCOMO assumes no responsibility for any information specified low power radio stations, or amateur radio which may be leaked during communication via Bluetooth. stations that do not require a license (hereafter "other ・...
- Page 22 To use in airplane, confirm with airline company in advance. - When multiple wireless LAN access points exist near the When docomo nano UIM card is not inserted or when you terminal and they use the same channel, search may not are out of service area, channels 12, 13 of 2.4 GHz band and...
- Page 23 Cautions on using 5 GHz devices Using wireless LAN built-into the terminal in 5.2/5.3 GHz Cautions on using 2.4 GHz devices outside is prohibited by the Radio Law. In the frequency band used by WLAN devices, in addition Channel numbers and frequency bands available in Japan to home electric appliances such as a microwave oven are as follows.
-
Page 24: Waterproofness/Dustproofness, Shock Resistance
For F-04H, IPX8 means that a communication terminal keeps invalid. functioning after F-04H is slowly submerged to depth of 1.5 m in Do not use the terminal with its certification of technical static tap water at room temperature, left there for 30 minutes and standard conformance invalid as it violates the Radio Law/ then taken out (Camera function cannot be used under water). - Page 25 Dustproofness Dust test for 6 hours consecutively Salt water durability Salt water durability test for 96 hours (dust concentration of 10±7 g/m , wind consecutively (2 cycles of 24 hours speed of 8.9 m/s) spraying of 5% salt water and 24 hours drying) Shock resistance Drop test from 1.22 meters height to...
- Page 26 - When your hands or the terminal are wet, avoid opening/ ・ When attaching or removing a docomo nano UIM card or closing the slot cap. microSD card, put your fingertip in the groove and pull open ・...
- Page 27 ・ Do not apply water flow stronger than allowed (→P22). Even if the F-04H is waterproof in IPX5 waterproof, water may enter inside from a damaged section and cause troubles such as electric shocks or corrosion of the battery.
- Page 28 If the terminal gets wet with water or other liquids with the slot cap open, the liquid may get inside the terminal and cause electric shocks or malfunction. Stop using the terminal, turn the power OFF and contact a DOCOMO- specified repair office. ・...
- Page 29 b Face down the display side of the terminal and shake c Swing the four corner of the terminal about 10 times each approximately 10 times, firmly holding its long side, until against a dry, clean cloth etc. to wipe off any water there is no more water splattering.
- Page 30 d Swing the terminal about 10 times against a dry, clean ◆ Charging cloth etc. to wipe off any water remaining in the stereo Check the following during and after charging. earphone jack, external connection jack, microphone, ・ Never try to charge the battery when the terminal is wet. speaker, key, TV antenna, etc.
-
Page 31: Before Using The Terminal
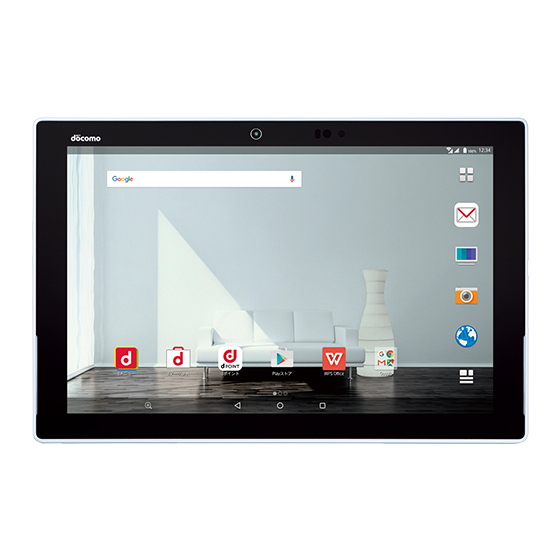
Before using the terminal The following illustration omits the slot cap. Part names and functions b cde f Left side Right side * The back cover cannot be removed. Trying to remove it with excessive force may cause damage or malfunction. a Display (Touch panel) b Iris registration camera Use for iris registration or iris authentication operation. -
Page 32: Docomo Nano Uim Card
Wi-Fi/Bluetooth antenna section card. If you have a docomo mini UIM card, docomo UIM m LTE antenna section card, or FOMA card, bring it to a docomo Shop to replace it mark with a docomo nano UIM card. o grip edge ・... - Page 33 UIM card ・ Install/remove after turning OFF the power. ・ Be sure to use the tray when inserting a docomo nano UIM card. Failure to do so may cause a malfunction. Tray ■ Installing a Face up the display side of the terminal and open the slot...
-
Page 34: Charging
・ It is normal for the terminal or AC adapter to become warm under the docomo nano UIM card slot. Do not pull out the while charging. When the terminal becomes warm, charging IMEI plate because it will be requested at a DOCOMO- may stop temporarily for the safety. - Page 35 For replacement of the internal battery, contact from the external connection terminal of this terminal "Technical Inquiries & Repairs" (in Japanese only) on the last page of this manual or DOCOMO specified repair office. ❖ Available charging adapter For details, refer to the operation manual of AC adapter or DC adapter.
-
Page 36: Turning Power On/Off
Turning power on/off External connection jack ◆ Turning power on Press and hold P (2 sec. or more) until the indicator LED lights in green The terminal vibrates and the lock screen appears following the startup screen. ・ For the first activation, make initial settings.→P43 Unlock the screen lock To 100 V AC outlet... -
Page 37: Basic Operation
❖ Tap/Double-tap Basic operation Tap : Touch the screen lightly and release the finger quickly. Double-tap : Tap twice quickly. ◆ Using touch panel Touch the touch panel directly to operate the terminal. ・ You can set the terminal to notify you by vibrating when the screen recognizes touch operation (Distinct touch→P103). - Page 38 ◆ Switching the portrait/landscape view The terminal supports a motion sensor that senses orientation or motion of the terminal. You can switch display view by tilting the terminal vertical or horizontal (Auto-rotate screen→ P106). ・ Even when you change the orientation of the terminal, the screen may not change depending on the screen displayed.
-
Page 39: Character Entry
◆ Application permissions Character entry The first time you launch an application or function that accesses other functions and information on the terminal, a Enter characters using software keyboard displayed on the confirmation screen that requests authorization for access screen. rights appears. - Page 40 ■ QWERTY keypad 設定 (Settings) : Setting for Super ATOK ULTIAS→P41 パスワードマネージャー (Password manager) : Quote Enter characters using Romaji input. Password manager 郵便番号 (Postal code) : Enter postal code→[変換 (Conversion)] to enter address corresponding to the postal code 記号 (Symbol)/顔文字 (Smiley)/絵文字 (Pict) : Display a list of number/symbol/smiley/pict/pict D ■...
- Page 41 ・ ・ Flick down on the key to restore a character deleted after On the Japanese syllabary keypad, tap it was fixed. switch the right and left syllable orders of the keypad. : Move the cursor to right : Display the handwritten input ・...
- Page 42 ❖ Numeric keypad input ■ Gesture input If you touch and hold the key assigned the character you want You can use the following 4 input methods in the numeric to enter, characters (gesture guide) will be displayed around keypad. that key.
- Page 43 ・ ◆ Switching input method Available items vary depending on input method. ❖ Setting Super ATOK ULTIAS You can also switch to another input method such as the Google keyboard to enter characters. Set entry actions or design for each keyboard. Also, you can ・...
- Page 44 ◆ Editing text Conversion setting : Set Input prediction, Showing prediction candidates before next input, Learning You can copy texts in the character entry field, web page, or function, Use half-width space, Auto space insert, received mail and cut and paste texts, register words in the Character delete key, Function key flick guide, Back key, character entry field.
-
Page 45: Initial Settings
・ To use a USB keyboard, connect it to the external connection shared with multiple users. jack on the terminal. Select Home screen : Select from "docomo LIVE UX" or ❖ "NX!Home(Simple)". Setting external keyboard Ease of use settings to suit you : Adjust screen using Customize navigation bar (→P50), Best view adjust (→... -
Page 46: Indicator Led
Set each item→[Next] Indicator LED d ACCOUNT : Set d ACCOUNT for using in docomo apps. docomo cloud : Set services for docomo cloud. docomo apps password : Set a password for using Indicator LED notifies the terminal states such as charging docomo applications. -
Page 47: Screen/Icon
■ Main notification icon Navigation bar : New Gmail : New NX! Mail Zoom at any time icon : New docomo mail Tap : Zoom the screen/Return to the original screen : New SMS Highlight & Copy icon : New Hangouts Tap : Copying texts→P49... - Page 48 : Authorization failure of d ACCOUNT settings : Glove touch is ON : Some notifications are not displayed : VPN connection : No docomo nano UIM card ■ Main status icon : Kana input mode : Signal strength : Alphabet input mode...
- Page 49 d Brightness ◆ Notification panel Slide the slider to adjust brightness. Tap to release/ Flick the status bar downward to open the Notification panel. set the automatic adjustment according to the ambient In Notification panel, you can check information of notification brightness.
- Page 50 You can set the Slide-in function by releasing your finger at the position of , which is called up at the ® same time as the Slide-in launcher. "ひつじのしつじくん (Butler Sheep)" NTT DOCOMO © Perform target operations Before using the terminal...
- Page 51 ❖ ❖ Capture & Draw Highlight & Copy Capture displayed screen to edit as an image or share with Text strings selected by tracing on the screen with your finger other application. can be copied or shared with another application. ・...
-
Page 52: Task Manager
From the Home screen, →[Settings]→ Change the screen (Home screen) displayed by tapping [Display & Wallpaper]→[Customize screen] (Home). "docomo LIVE UX", "NX!Home(Standard)", "NX!Home(Simple)", and "NX!Home(Kids)" are available in Set required items the terminal. →[Settings]→ From the Home screen, Task manager [Display &... -
Page 53: Touch Screen Lock
Touch screen lock Set the screen not to react by touch operation. Use this setting as child proof so that you can avoid misoperations. Press and hold P until the tablet options menu appears [Touch screen lock]→[OK] To cancel the settings, press P for 1 second or more. ・... -
Page 54: Docomo Live Ux
Indicator docomo LIVE UX Indicates the page number of home screens and which screen you are in. f Dock Displayed even if the home screen page is changed. Apps button : Display the application list screen. →P54 Home screen My Magazine button : Display My Magazine. - Page 55 Drag to [Back to apps list]/[Remove from Home] ・ Applications are moved to the application list screen (→ P54). Disabling applications or widgets : Touch and hold an application or widget and drag it to [Disable app]→ [DISABLE]→[DISABLE] docomo LIVE UX...
-
Page 56: Application List
To move an application or add a widget to the Home screens]. Or, pinch-in at any position on the Home screen to screen, touch and hold an application/widget, then display the home screens. drag it to the Home screen area. docomo LIVE UX... - Page 57 MyShelf : Browse comic, novels, practical books, download movies to watch anytime you want. etc. purchased from the docomo e-books store. Also, you can Twitter : An official client application of Twitter. Public read some of them for free before purchasing it.
- Page 58 →P92 managed in the cloud.→P60 Experience of iris authentication : An application to docomo backup : An application for backing up to/restoring from "Data Storage BOX" or "microSD card". →P100 experience iris authentication. Disaster kit : An application for using Disaster Message...
- Page 59 Photos : View or edit photos. Photos can be saved to For some pre-installed applications, installation may be Google cloud. required by accessing Play Store or DOCOMO's site for the フォトコレクション (Photo collection) : A service for first activation. ・...
-
Page 60: Backup And Restoration Of Home Screen
You can restore the Home screen layout such as applications ◆ Displaying all applications and widgets using docomo LIVE UX data backed up in docomo cloud. If you use it, docomo service page will be A function to search application locations. added to the home screens at the end. -
Page 61: My Magazine
You can also configure displayed in the article list screen. My Magazine so that it can be customized using notifications, location information, docomo service contract information, Tap the article you want to read etc. -
Page 62: Phonebook
・ To use cloud on the phonebook, docomo phonebook Phonebook list application is needed. For the first time activation of docomo a Name phonebook application (including after the application is Tap to display the profile screen. In the profile screen, initialized), "Use of Cloud"... - Page 63 In the phonebook list, [Register]→Set each In the phonebook list, [Group] item→[Save] [Add group]→Set each item→[OK] ・ Contacts data registered in docomo account can be Sorting groups : [Sort]→Tap a group and slide upward or synchronized with Cloud. downward→[OK] ・...
- Page 64 Restore from SIM card : Type of phone numbers and mail addresses are imported as "Others". Activate docomo backup app : Use docomo backup application to back up and restore phonebook data and other data to a microSD card etc. all at once.→P100 Send all data (common) : Activate application such as Bluetooth or mail attachment to send all phonebook data.
-
Page 65: Mail/Browser
You can send and receive text messages with a mobile phone number as the destination. docomo mail * For details on a number of characters that you can send/receive etc, refer to "Short Message Service (SMS)" on the NTT DOCOMO website. Send/receive mails using DOCOMO mail address (@docomo.ne.jp). - Page 66 ◆ When SMS is received ◆ Forwarding SMS When SMS is received, the notification icon (→P45) appears →[Messaging] From the Home screen, on the status bar. Open the Notification panel (→P47) to check new SMS. Select a message thread→Touch and hold SMS →[Forward] ✔INFORMATION ・...
-
Page 67: Nx! Mail
◆ Setting SMS NX! Mail →[Messaging]→ From the Home screen, [MENU]→[Settings] Set docomo mail address (@docomo.ne.jp) or an email account provided by general provider to use Email. Set each item ・ You can use SMS. SMS Enabled : Change default SMS application. - Page 68 ◆ Creating and sending an email ◆ Receiving/Displaying emails →[NX! Mail] →[NX! Mail] From the Home screen, From the Home screen, ・ The folder list screen appears. [MENU]→[Update] ・ If a folder is set for the startup screen (→P67), the mail list screen of the set folder appears.
- Page 69 ◆ Deleting emails Displaying the menu : [MENU] You can perform operations such as the mail update, account edit, email backup/restore, and email setting. →[NX! Mail] From the Home screen, ◆ Setting Email Select a folder from the folder list→Touch and hold an Email you want to delete on the list→...
- Page 70 ✔INFORMATION Character code when sending mail : Set the character codes for emails. ・ Tap [Information] to check the NX! Mail version, saved numbers of mails, and used license. ✔INFORMATION ・ The backup destination can be changed. ・ To delete an email account, touch and hold the account to If you are using a function that can be used by users or delete on the account list screen→Tap [Delete]→[OK].
-
Page 71: Gmail
Gmail Early warning "Area Mail" You can use email provided by Google or other general Area Mail is a service that you can receive Earthquake Early providers. Warning and Tsunami Warning provided by the ・ If Google account or email account is not set, follow the Meteorological Agency, and Disaster/Evacuation information onscreen instructions. -
Page 72: Browser
◆ Displaying received Area Mail Browser →[Disaster kit] From the Home screen, You can view web pages like on a PC using Browser. [Early Warning "Area Mail"]→Select an Area On the terminal, Browser can be used over a packet Mail communication or Wi-Fi connection. - Page 73 ◆ Opening a new browser window ◆ Displaying web page from history You can open 2 or more browser windows and switch web When a web page is displayed, tap [MENU] on pages quickly. the top of the screen →[Bookmarks]→ When a web page is displayed, tap [+] on the [HISTORY] top of the screen...
- Page 74 ◆ Saving and displaying a web page ◆ Web page link operations A displayed web page is saved and displayed offline. Tap a link displayed on web page to operate the following. ・ Touch and hold a link to display menu options; save the link ❖...
-
Page 75: Simplified Browser
◆ Setting Browser Simplified Browser When a web page is displayed, tap [MENU]→ [Settings] You can view web pages by simple and easy operation. Set each item ◆ Operation while viewing website with General : Set home page displayed when Browser is Simplified Browser activated or downloaded file saving location. - Page 76 ◆ Display a web page with Simplified ◆ Adding bookmark with Simplified Browser Browser to view website. ❖ From the Home screen, →[Simplified Registering a bookmark Browser] When a web page is displayed, tap [Favorite]→ [Search] [Register in bookmarks]→[OK] Enter a keyword/URL in the keyword search ❖...
- Page 77 ◆ Displaying web page from Simplified Protect/Cancel : [Menu]→[Protect/Cancel]→Place or remove a check mark on screen memo to protect/ Browser history cancel.→[Protect/Cancel]→[Execute]→[OK] Switch display method : [Menu]→[Switch display When a web page is displayed, tap [Favorite]→ method] [View browser history] ✔INFORMATION Select a history→[Connect] ・...
-
Page 78: Applications
In dmenu, you can easily access sites recommended by Top screen of dmarket appears. DOCOMO or convenient applications. ・ For details on dmarket, refer to NTT DOCOMO website. From the Home screen, [dメニュー (dmenu)] Browser activates and "dmenu" appears. Play Store ・... - Page 79 Google Play screen appears. data may be damaged. ・ NTT DOCOMO is not liable for malfunctions, if any, caused by Search an application→Select an application the application you installed. In such case, the repair is charged even during the warranty period.
-
Page 80: Toruca
・ For details of ToruCa, refer to NTT DOCOMO website. In Full Seg, you can watch a terrestrial digital TV broadcasting service with high-definition quality. ✔INFORMATION With 1Seg, you can watch a terrestrial digital TV broadcasting ・... - Page 81 ・ ■ TV antenna Information displayed in the area of data broadcasting is "data broadcasting" and "data broadcasting site" TV antenna receives broadcasting signals when you watch TV information. (Full Seg/1Seg). "Data broadcasting" information is carried in a broadcast, ・ Make sure to extend the TV antenna to the end when pulling together with images, voice and sound, and "data it out.
- Page 82 ❖ ◆ Activating TV TV watching screen From the Home screen, TV watching screen appears. ・ When you activate the software for the first time, create a channel list corresponding to the watching area.→P85 ・ By default, Full Seg/1Seg watching mode is set to [Auto].
- Page 83 a Operation area ・ To delete the station from the channel list, display the ・ Watching mode (Full-seg/One-seg), mode change switch channel list→Touch and hold the registered channel→ (Auto/Fullseg/Oneseg), screen rotation, and menu icon [Delete channel]→[YES]. e Navigation bar are displayed. In Full Seg, the following icons are f Control bar (for Full Seg only) displayed.
- Page 84 ❖ Registering TV link Set required items→[Save]→[YES] ・ When the confirmation screen related to the functions Select an item that can be registered as a TV available for users and guests, tap [OK]. If [Do not link in the data broadcast area display from now on] is unmarked, the setting screen will not be displayed from next time.
- Page 85 ・ →Tap (Start recording) On the reservation list, tap a reservation item→ [Edit] to edit contents. Recording starts. ・ On the reservation list, tap a reservation item→ → On the TV watching screen, tap TV watching [Delete]→Tap [YES] to delete 1 reservation item. ❖...
- Page 86 ・ While you use heavy load functions such as recording and ✔INFORMATION MTP transmission at the same time, the recording may not be ・ On the recorded program list, touch and hold an item→Tap performed normally. to select all the items or display the property. ・...
-
Page 87: Camera
[OK] Notes : Display the information of terms of use. Software License : Display software licenses. ❖ Switching channel list ❖ Setting subtitle / sound / video →[Change area] On the TV watching screen, →[Subtitle/ On the TV watching screen, →Select channel list Sound/Video setting] ・... - Page 88 ・ ◆ Viewing shooting screen The battery consumption is faster when using the camera. ・ If you do not operate for approximately 2 minutes during stand-by, appears on the status bar. ・ When you are approximately 10 cm or more away from an object, the camera automatically focuses on the object according to the set scene mode.
- Page 89 b Focus frame ◆ Shooting still images ・ When the face is not detected, the camera automatically focuses on the center of the screen to show the focus From the Home screen, [Camera] frame. When the face is detected, the camera A still image shooting screen appears.
- Page 90 ・ ◆ Panorama shooting Return to the previous shooting mode before setting to the panorama shooting screen. You can shoot a panoramic image by slowly swiveling the ◆ Automatic still image shooting camera to the left or right. ・ Panorama shooting is not available for in-camera. The terminal automatically adjusts settings and shoots From the Home screen, [Camera] pictures in the following functions.
- Page 91 ■ Automatic exposure ■ Location Automatically adjust exposure according to the ambient Set to add location information to shot images. When location lighting. When face detection frame of auto focus appears, information is set to be added, icon of for obtaining exposure is fixed based on the brightness of face.
- Page 92 ・ ◆ Automatic video recording You can also start shooting by pressing the volume up key. The terminal automatically adjusts settings and records video ・ When shooting starts, elapsed time appears on the in the following functions. shooting screen. ・ Recording voice is always turned on.
- Page 93 ■ Save Display a QR code on the shooting screen→ Select data saving location (Terminal/SD card). Scan ・ If the selected saving destination is low on memory, a A confirmation sound is played when scanning is message appears and switches saving destination complete and the scanned data appears.
-
Page 94: Gallery
■ Main icons and functions Gallery : Saving destination is the phone memory : Saving destination is microSD card : Activate camera You can view still images or videos shot with the camera or : Send or share an album/image downloaded to the terminal. -
Page 95: Media Player
◆ Playing music/video Media Player →[Media Player] From the Home screen, ・ If an explanation screen for Media Player appears, tap You can use the Media Player to play music/video and music/ video contents downloaded from dmarket. [使い方の説明を見る (Check user guide)] or [使ってみる ・... - Page 96 d Search ◆ Purchasing from dmarket Search music/video files of this terminal. e Display submenu →[Media Player] From the Home screen, Operate Settings, Display/Delete contents, Help, to →Purchase music or video files. beginners, Exit, etc. f dmarket ◆ Using Play list Search music/video files on dmarket.
-
Page 97: Location Data/Gps
Inside a basement or tunnel, and below the ground or water ・ Inside a bag or box ・ Note that DOCOMO is not liable for any damages that may ・ In buildings-clustered or residential area occur as a result of irregularities in the GPS system. - Page 98 ◆ Precautions for using electronic ◆ Setting location data/GPS compass Allow applications to use location data/GPS. ・ Items or displays may vary depending on the version of the An electronic compass is equipped with the terminal and it application. senses the faint fluctuation in the magnetic field of the earth to calculate directions.
-
Page 99: Schedule
To use Google Maps, a network connection via LTE/3G network or Wi-Fi is required. From the Home screen, [ドコモクラウド ・ To measure your current location, turn [Location data/GPS] (docomo cloud)]→[Schedule] ON in advance.→P96 The calendar screen appears. ・ Google Maps do not cover all countries and cities. -
Page 100: Clock
◆ Displaying schedule Clock Display information of registered schedule. On the calendar screen, tap schedule You can use the alarm, clock, timer, stopwatch and world clock. Check the schedule ◆ Displaying the clock Editing schedule : [Edit]→Edit schedule→[Save] Deleting schedule : [Delete]→[DELETE] From the Home screen, →[Clock]... -
Page 101: Calculator
◆ Using stopwatch Deleting an alarm : Tap the alarm you want to delete→ ・ Tap [UNDO] immediately after deleting to restore the deleted alarm. →[Clock] From the Home screen, ✔INFORMATION [STOPWATCH] ・ On the alarm screen, tap [MENU]→[Settings] to make The stopwatch screen is displayed. -
Page 102: Search
◆ Google Search With docomo backup, you can back up to or restore from "Data Storage BOX" or "microSD card". You can search in the website by entering keywords. You can check information for the current location (weather, traffic ◆... - Page 103 Enter a docomo apps password→[Done] ◆ Backing up to/Restoring to docomo ❖ Phonebook account copy cloud Copy phonebook data stored on a Google account to docomo Use データ保管BOX (Data Storage Box) to back up or restore account. the music data. From the Home screen, →[docomo backup]...
- Page 104 [Start restore]→[Restore]→Enter a docomo apps password→[Done] ✔INFORMATION ・ When restoring from docomo cloud, data is restored to the same saving location as when backed up. When the model is changed etc., however, data is restored to the different saving location.
-
Page 105: Settings
Distinct touch : Set whether to notify you of touch Users P132 recognition by vibration. Useful tools P133 Touch sounds : Set whether to sound when selecting docomo service/cloud P135 menu. Screen locking sounds : Set whether to sound when Device management P136, P151 setting and canceling screen lock. - Page 106 ◆ Volumes ◆ Manner mode You can adjust volume of media playing sound, alarm sound, Set/Cancel Manner mode. ・ notification sound. You can change the Manner mode type.→P105 ・ You cannot set while Manner mode is enabled. From the Home screen, →[Settings]→...
- Page 107 ❖ Changing Manner mode type ◆ Dolby Audio Set whether to use Dolby Audio for playing video or music. →[Settings]→ From the Home screen, From the Home screen, →[Settings]→ [Sound/Vibration/LED]→[Manner mode]→ [Sound/Vibration/LED]→[Dolby Audio] [Select manner mode] ・ If the Dolby Audio screen appears, read the description Selecting an item and tap [OK].
-
Page 108: Display & Wallpaper
・ Video correction may not be available depending on the Display & Wallpaper video. Picture correction : Set whether to correct image quality of still images (Gallery). Set screen brightness or auto-rotate screen. Daydream : Setting steps→P107 →[Settings]→ From the Home screen, ◆... - Page 109 ❖ ◆ Touch and go display Keep lit when held Double-tap the screen to set to cancel/set sleep mode. Set whether to keep the screen backlight on while the terminal is in motion, held in hand. From the Home screen, →[Settings]→...
-
Page 110: Battery
◆ Battery optimization Battery To suppress battery consumption for each application, the application is disabled when the terminal is not used or the Check the remaining amount of battery, etc. application is not used for several days. →[Settings]→ From the Home screen, →[Settings]→... -
Page 111: Wi-Fi
Check the signal strength and try again to make a connection. ◆ Connecting to network with Wi-Fi ON ・ If the docomo service is being used via Wi-Fi, "d ACCOUNT" needs to be set. To make settings, from the Home screen, tap →[Settings]→[Wi-Fi] From the Home screen, →[Settings]→[docomo service/cloud]→[dアカウント設定... - Page 112 ・ Enter additional security information as If more than one Wi-Fi network has been saved, you can switch from one network to another by selecting the required→[SAVE] destination network and then tapping [CONNECT]. The Wi-Fi network you are currently connected to is disconnected and ◆...
- Page 113 ・ ◆ Connecting other devices with Wi-Fi In case of push button method, press a dedicated button on an access point. In case of PIN entry method, enter Direct PIN code displayed on the terminal to an access point Connect between Wi-Fi Direct devices without routing an device and tap [OK].
- Page 114 Multi-connection may not be available depending on the (dmenu)→Items in "My docomo (お客様サポート)" (My application. docomo (customer support)) etc.). In that case, turn off Wi-Fi ・ Depending on the connected Wi-Fi network, high-speed before use. On the website that does not support multi- communication may not be available.
-
Page 115: Data Communication/Airplane Mode
・ Data communication usage displayed is an estimation. Actual usage when Wi-Fi is ON. data communication usage can be checked at "My docomo". MAC address : Display the MAC address. ・ If [Set mobile data limit] is set to ON, the notification screen IP address : Display the IP address. - Page 116 ・ If you have changed MCC/MNC settings and they do not For details on sp-mode, refer to NTT DOCOMO website. appear on the screen, reset to default or set the access point For using mopera U, Business mopera Internet, add the access manually.
- Page 117 ・ ✔INFORMATION When you are connected to the VPN, appears on the status bar. ・ You can delete access point one by one by tapping an access ❖ point from the APN list screen→Tap [MENU] on the access Disconnecting VPN point editing screen→and [Delete APN].
- Page 118 ❖ ❖ USB tethering Setting Wi-Fi tethering Connect the terminal to a PC using Micro USB Cable 01 Change the settings as needed. ・ (optional) to use the terminal as a modem to access the By default, [F-04H_AP] is set for Network name, [WPA2 PSK Internet.
-
Page 119: Lock & Security
❖ Bluetooth tethering Lock & Security You can connect your Bluetooth devices to the Internet. ・ Up to 4 Bluetooth devices can be connected simultaneously. Set up about lock. ・ You need to pair the Bluetooth devices with your terminal beforehand.→P146 →[Settings]→[Lock From the Home screen,... - Page 120 Displayed items vary depending on the security unlock preference or device lock setting. This may not appear depending on the settings of the Home application or security unlock preference. Not displayed if a docomo nano UIM card is not inserted. Settings...
- Page 121 PIN is a 4- to 8-digit number (code) that must be entered each subscription and the docomo nano UIM card to a time you insert the docomo nano UIM card into the terminal or docomo Shop, or contact "General Inquiries" on the last when the terminal is powered ON for user confirmation to page of this manual.
- Page 122 ・ ◆ Setting Security unlock preference When docomo nano UIM card is locked by PIN or PUK, remove the docomo nano UIM card. The Home screen will Set type of authentication operation to cancel the screen lock. appear and you can perform communication using Wi-Fi function.
- Page 123 ❖ Enable a security unlock preference ✔INFORMATION ・ When the Google account is set, you can set a lock function Enable the security unlock preference you set. by the password using a PC or tablet. If the terminal is lost, From the Home screen, →[Settings]→[Lock access to the following URL and log in with the Google...
- Page 124 Iris authentication technology does not guarantee complete ・ The following conditions may make iris authentication identity authentication or verification. Note that DOCOMO scanning difficult or reduce the authentication performance assumes no responsibility for any damage caused by use of and the function may not be available. Clean occasionally this terminal or unavailability of this terminal.
- Page 125 ❖ Precautions for using iris authentication [START REGISTRATION]→Follow the onscreen instructions to register iris Precautions for using iris authentication are as follows: ・ To register with one eye, register from [HERE FOR ONE- ・ Authentication performance depends on the condition of EYE REGISTRATION].
- Page 126 [REGISTER]→Set each item→[DONE] Tips for iris authentication : Display the tips at iris authentication. Editing : Tap a title→[EDIT]→Edit each item→[DONE] Site to master iris : Display the websites describing how Delete : Tap a title→[DELETE]→[OK] to use the iris authentication. Backing up/restoring : [MENU]→[Backup/Restore]→...
- Page 127 ❖ Installing authentication information or [SD card password settings]→Authenticate certificate Set required items You can install authentication information or certificates. ・ When precautions about unmount SD card appear, confirm the content and tap [OK]. →[Settings]→[Lock From the Home screen, Register password : Register microSD password (within &...
- Page 128 ・ ◆ Application lock Privacy mode can be set only for phonebook in FUJITSU account. If you change docomo account to FUJITSU Set applications that require authentication for activation. account, data added by i-concier, SNS account information ・ Set a security unlock preference which requires are not saved.
- Page 129 From the Home screen, →[Settings]→[Lock [Phonebook/Mail privacy]→Set each item & Security]→[Security]→[Privacy mode Action when mail received : Set action for receiving mail from specified phonebook entry/group in privacy mode. settings]→Authenticate ❖ Privacy mode operation settings (Others [Phonebook/Mail privacy]→Set each item privacy) Phonebook : Set whether to hide specified phonebook entry/group in privacy mode.
- Page 130 ◆ Displaying/Hiding recently used Receive indicator : Set whether to notify you of receiving mails from the phonebook/group specified to hide by applications changing battery icon type in privacy mode. Set whether to display recently used applications when you ❖ Activate/Deactivate options for privacy (History).
- Page 131 ❖ ◆ Setting PIN code Entering PIN code ❖ Turn power ON→Enter PIN code on the PIN Setting SIM card lock code entry screen→ Set PIN code to be entered when the terminal is turned ON. ❖ Unlocking PIN lock From the Home screen, →[Settings]→[Lock &...
- Page 132 ❖ (History)→ of the application to be fixed→ Encrypt SD card [GOT IT] Encrypt all data in the microSD card installed to the terminal. ・ To unlock the fixed application, touch and hold ・ Set [Security code] or [Password] for the security unlock (Back) and (History) at the same time.
-
Page 133: Language/Text/Input
Google Keyboard : Set up Google Keyboard settings. ◆ Font settings Super ATOK ULTIAS : Setting steps→P41 Change display font type. Moji-Henshu : Check details of ドコモ文字編集設定 (docomo Moji-Hensyu setting) app. →[Settings]→ From the Home screen, Google voice typing : Setting steps→P132 [Language/Text/Input]→[Font settings] NX!input Korean : Set up NX!input Korean settings. -
Page 134: Users
◆ Setting Voice Search Users Setting Google voice search. From the Home screen, →[Settings]→ By adding users, the terminal can be shared with multiple [Language/Text/Input]→[Google voice typing] users (a function available by users and guests). From the Home screen, →[Settings]→[Users] Set required items Languages : Set language for Google voice search. -
Page 135: Useful Tools
- When the first and last names are not registered at the Useful tools initial settings: If My Profile (→P62) is registered, the registered contents are displayed. ・ To change a user name, tap of the user while using it→ Set the NFC communication or Glove touch setting. - Page 136 ◆ Glove touch ◆ Slide-in function Set whether to improve the sensitivity of the touch panel so Configure settings so that you can slide your finger from the you can use touch gestures on the terminal with gloves on. edge of the screen to bring up the launcher, from which you can launch applications, or to capture a screen shot, or so that From the Home screen, →[Settings]→[Useful...
-
Page 137: Docomo Service/Cloud
If an application is disabled, it may not applications. Also, you can set dアカウント (d ACCOUNT) appear in the list of docomo service/cloud. If an application is authentication using biological information (iris newly downloaded from docomo, an item may be added to authentication) registered in the terminal. -
Page 138: Device Management
❖ Deleting applications Device management ・ For deleting the applications you obtained from Play Store, operating from the Google Play screen is recommended.→ ◆ Apps ・ You cannot uninstall some pre-installed applications by Manage or delete installed applications. default. And if pre-installed applications are unistalled, you ❖... - Page 139 ❖ ◆ Memory Erasing data in microSD card (Format) ・ You can check the memory usage conditions of applications Note that this operation erases all data in the microSD card. installed in the terminal. From the Home screen, →[Settings]→ ・ By tapping [Memory used by apps], you can check the [Device management]→[Storage &...
- Page 140 ❖ Resetting the terminal ◆ Accounts All installed applications and saved data to the terminal, for the Add or delete accounts. most part, are deleted when you reset the terminal. ❖ Adding accounts ・ For disabling encryption of microSD card, refer to "Encrypt SD card".→P130 From the Home screen, →[Settings]→...
- Page 141 ✔INFORMATION Automatic date & time : Set whether to adjust date and ・ time automatically by using network-provided docomo account and FUJITSU account cannot be removed. information. ❖ Starting synchronization manually Automatic time zone : Set whether to adjust time zone automatically by using network-provided information.
- Page 142 ◆ Accessibility ◆ About tablet Make the settings for supporting user operations. Display various information of the terminal. From the Home screen, →[Settings]→ From the Home screen, →[Settings]→ [Device management]→[Accessibility] [Device management]→[About tablet] Set required items Check items Software Update : Setting steps→P167 おすすめ使いかたヒント...
-
Page 143: Google
Google Information and settings for Google account and services can be checked/changed/deleted. ・ For details about Google settings, on the Google screen, tap → [Help & feedback] to refer. From the Home screen, →[Settings]→ [Google] The Google setting screen is displayed. Set required items Settings... -
Page 144: File Management
Folders in the internal storage (/storage/emulated/0/) and (as of July, 2016). data saved in each folder by default are as follows. ・ Note that DOCOMO does not guarantee actual operations of Alarms Alarm sound all microSD cards. For information on compatible microSD cards, contact manufacturers of microSD cards. - Page 145 ◆ Installing/Removing microSD card ■ Removing a Open the slot cap hooking the groove with your fingertip→ ・ Install/Remove after unmounting (→P137) or turning OFF the power. b Push the microSD card lightly and release it, then pull the microSD card straight out ■...
-
Page 146: File Operations
File operations You can manage data saved in the internal storage and microSD card (rename/delete/copy/move etc. folders and files). From the Home screen, →[KSfilemanager] Touch and hold a folder/file ・ Tap a file to display/play. ・ Tap [Home]/[SD Card] at the top of screen to switch displaying storage. -
Page 147: Data Communication
・ Data communication Place a Bluetooth device as far as possible from other electric appliances, audio visual devices and office appliances. A microwave oven strongly affects the connection when it is operated. Connection may not be established correctly when other devices are powered on, or ®... - Page 148 ・ ・ Open the Notification panel→Tap the [Bluetooth] panel When a Bluetooth device does not appear, tap switch to set ON/OFF for Bluetooth. [REFRESH]. ・ Turning the power OFF does not change Bluetooth ON/OFF Tap a detected Bluetooth device→Enter a setting.
- Page 149 Alert Notification Detail Setting : When Alert Notification From the Home screen, →[Settings]→ is ON, select items to notify (docomo mail, Email, Gmail, [Bluetooth] SMS, alarm, calendar). Find Me Ringtone : Set whether to emit ringtone when Turn [Bluetooth] ON→[Search for devices]→...
-
Page 150: Nfc Communication
❖ Transferring content displayed on the NFC communication screen You can transfer content shown on the screen such as NFC is an abbreviation for Near Field Communication and a websites, only by holding mark over each other's terminal. short range wireless communication method of international Activate each other's Android Beam function standard defined by ISO (International Organization for Standardization). - Page 151 ◆ Notes when holding over the other device Pay attention to the following when holding the terminal over a card reader, NFC module equipped device, etc. mark IC card reader ・ Bring mark close to the device slowly, do not hit it strongly.
-
Page 152: External Device Connection
Select a USB option External device connection Charging : Just charge the terminal. File transfers : Transfer music, movies, etc. using file management software compatible with MTP. Photo transfer (PTP) : Transfer photos or movies to PC etc. Connecting with a PC which are not compatible with MTP. -
Page 153: Connecting With A Printer
・ If Google account is not set, tap [ADD ACCOUNT] in the Connecting with a printer settings menu displayed after print search screen to set up a Google account. ・ If connection settings are not made for the daily used ◆... - Page 154 ◆ Print ✔INFORMATION ・ For Wi-Fi printers manufactured by Seiko Epson/Canon, refer On the image detail screen of Gallery/Browser to the following websites. screen, [Menu]/[MENU]→[Print] 〈Canon〉http://canon.jp/pixus (in Japanese only) 〈Seiko Epson〉 http://www.epson.jp/products/colorio/ (in Print setting screen for the connected printer appears. ・...
-
Page 155: Connecting With Dlna Device
・ Videos recorded with the terminal's camera may not be [はい (Yes)]. played with DLNA devices other than F-04H. Set required items DiXiM Server : Mark to enable the server function. サーバー名 (Server name) : Change the name displayed on the DLNA device. - Page 156 ◆ Distributing contents in the terminal ◆ Playing back DLNA device's contents on the terminal Distribute contents on the terminal to DLNA devices. Playback can be operated via the terminal. ・ Disclose contents on the DLNA device to allow access from ・...
-
Page 157: Connecting With Other Devices
✔INFORMATION Connecting with other devices ・ Touch and hold content in the content selection screen to display menu options for playing or deleting the content, or downloading or playing it on another device. However, ◆ Displaying on TV via MHL connection copyrighted contents may not be downloaded on some Connect the terminal and a TV with HDMI/MHL jack to display DLNA devices. - Page 158 Connect the HDMI conversion cable to the ◆ Displaying on Wi-Fi Miracast device via Wi-Fi connection external connection jack of the terminal ・ Connect it with the terminal turned ON. Show videos, images, etc on TV screen or displays by ・...
-
Page 159: International Roaming
* To use data communication during roaming, set Data roaming setting in the service area of the overseas network operator affiliated to on.→P158 with DOCOMO. You can use SMS without changing settings. ✔INFORMATION ・ The terminal can be used in a LTE network and 3G network ・... - Page 160 ■ Usage charge Overseas usage charges (call and packet communication) [Data roaming]→Check the contents on the differ from those in Japan. For details, refer to NTT DOCOMO Attention screen, [OK] website. ❖ ・ Since some applications automatically perform...
-
Page 161: After Returning To Japan
❖ About inquiries ・ For loss or theft of the terminal or docomo nano UIM card, immediately contact DOCOMO from the spot to take the necessary steps for suspending the use. For inquiries, see the last page of this manual. Note that you are still liable for the call and communication charge incurred after the loss or theft occurred. -
Page 162: Appendix/Index
Wait a while until the temperature is lowered on the last page of this manual or a repair counter specified and retry to charge. by DOCOMO. ■ Operations/Display ■ Power supply and charging ● No operations are performed even by tapping or ●... - Page 163 When the terminal is in high temperature state for a ● The docomo nano UIM card is not recognized long time, the display may become dim. Is the docomo nano UIM card installed in the right ● Display flickers direction?→P31 If [Automatic brightness] of Brightness level is marked, ●...
- Page 164 - With the power turned off, press and hold P for 2 ● Data is not displayed normally/Normal touch panel seconds or more. Immediately after the docomo logo operations are not possible disappears, press and hold the volume down key Turn the terminal OFF and ON.→P34...
- Page 165 Check if the available), and then perform registration of the devices. service area and network operator are available, referring to NTT DOCOMO website. ■ Maps/GPS function • Change network mode type to [LTE/3G (Auto)].→P158 ●...
- Page 166 Wait a while and then operate again. ● The PUK is locked If you enter a wrong PUK code of the docomo nano UIM card 10 times consecutively, this message is diplayed. Contact a sales outlet such as docomo Shop.→P120 ●...
-
Page 167: Anshin Enkaku Support
From the Home screen, * Data such as phonebook entries in the terminal can be saved in a (Enkaku support)] microSD card. * Data such as phonebook entries can be backed using docomo cloud. [遠隔サポートの接続画面に進む (Go to Remote support connection screen)]→[同意する (Agree)]... - Page 168 * Even in case that a repair is possible, since those conditions are required outside the range of the warranty, a repair is charged. Take the terminal to DOCOMO-specified repair office. Be sure ■ After expiration of the warranty to check the opening hours of the office before you go. The All repairs that are requested are charged.
-
Page 169: Software Update
(Software ・ Magnetic components are used in the speaker of the Update) on the status bar or in the NTT DOCOMO website. terminal. Do not allow cash cards or other devices that are ・ Software Update includes the following contents, etc. To... - Page 170 (model, serial number, etc.) is automatically sent to - When the terminal is low on available memory the server of DOCOMO. DOCOMO does not use the sent - When the basic software is altered information for purposes except software update.
- Page 171 b Select operation ■ When the icon is not displayed on the status bar Download and Install : After downloading is complete, Perform the update by the following operations. the installation starts automatically. If you do not tap →[Settings]→ From the Home screen, [OK], the installation starts 10 seconds later.
-
Page 172: Main Specifications
Operations may become unstable or function may not work properly without updating the application. Be sure to ■Phone upgrade to the latest version. Product name F-04H × ■ Updating from the notification icon Size Approx. 175 mm (H) 266 mm ×... - Page 173 Image Type Out-camera : Backside- Video recording size Out-camera : × illumination CMOS Full HD 1920 1080 pickup × device In-camera : Back-illuminated HD 1280 × CMOS Mobile email 640 In-camera: × Size Out-camera : 1/4.0 inch Full HD 1920 1080 ×...
- Page 174 ❖ File formats of still images and videos Continuous stand-by time indicates the estimated stand-by time when radio signal reception is normal. Stationary continuous stand- taken by the terminal by time indicates the estimated average operation time when radio signal reception is normal. Type File format Extension...
- Page 175 Edit microSD card (maximum recording time per one item) Type/Extension Create View (Save) × Approx 1,280 min. (Full Seg BML with data broadcasting Presentation file .dps ○ ○ recording : Approx. 1,024 min.) × (Presentation) .dpt ○ ○ * Maximum recording time per 1 GB is approximately 10 minutes ×...
-
Page 176: Specific Absorption Rate (Sar) Of Mobile Terminals
Mobile Terminals guidelines. The World Health Organization has stated that "a large number This model F-04H device complies with Japanese technical of studies have been performed over the last two decades to regulations and international guidelines regarding exposure assess whether mobile phones pose a potential health risk. To to radio waves. - Page 177 This is because the device is designed to operate at The product "F-04H" is declared to conform with the multiple power levels so as to use only the power essential requirements of European Union Directive 1999/ required to reach the network.
- Page 178 The exposure standard for wireless tablet device employs a For body worn operation, this device has been tested and unit of measurement known as the Specific Absorption Rate meets the FCC RF exposure guidelines. (SAR). The SAR limit set by the FCC is 1.6 W/kg. Tests for SAR Please use an accessory designated for this product or an are conducted using standard operating positions as accepted accessory which contains no metal and which positions the...
- Page 179 ◆ Important Safety Information Hearing Aids Some digital wireless tablet device may interfere with some AIRCRAFT hearing aids. In the event of such interference, you may want Switch off your wireless device when boarding an aircraft or to consult your hearing aid manufacturer to discuss whenever you are instructed to do so by airline staff.
-
Page 180: Export Administration Regulations
Regulations "WORLD WING", "sp-mode", "LIVE UX", logo of "ToruCa", logo of "dmenu", logo of "i-concier" are trademarks or registered trademarks of NTT DOCOMO, INC. This product and its accessories may be under coverage of the ・ Rovi, G-GUIDE, G-GUIDE MOBILE and G-Guide Export Administration Regulations of Japan ("Foreign... - Page 181 Adobe Mobile Print and Scan SDK is used for some part of owned by the Bluetooth SIG, INC. and any use of such marks the terminal. ©2013-2016 Adobe Systems Incorporated. All rights by NTT DOCOMO, INC. is under license. Other trademarks and names are those of their respective owners. reserved. ®...
- Page 182 ・ ◆ Others This product is licensed under the VC-1 Patent Portfolio License for the personal and noncommercial use of a ・ Part of this product includes module developed by consumer to (i) encode video in compliance with the VC-1 Independent JPEG Group.
-
Page 183: Sim Unlock
SIM unlock This terminal supports SIM unlock. If you release SIM lock, you can use SIM by a carrier other than NTT DOCOMO. ・ Available services and functions may be limited. DOCOMO is not liable to any failures or malfunctions. -
Page 184: Index
After-Sales Service ............索引 Index Airplane mode..............Android Beam ..............Anshin Enkaku Support ..........APN .................. App battery check............App running time............Application list ..............About phone Application info ............. Auth ................Disabling applications ..........Legal information ............Managing............... Status................Sorting ................ - Page 185 Scene mode ..............Bluetooth Low Energy............ Touch focus..............Alert Notification ............White balance ..............Alert Notification Detail Setting ......... Automatic video recording ..........Find Me Ringtone............Adjust flicker ..............Find Me Ringtone Settings......... Auto focus ..............Proximity..............White balance ..............Time ................
- Page 186 DiXiM Server setting........... Charging adapter............Playing back on the terminal........PC..................Playing digital recorded programs ......Precautions ..............Playing pack on DLNA device ........Clearing credentials ............dmarket................Clock................... dmenu ................Alarm ................Do not disturb ..............Stopwatch ..............docomo backup............... Appendix/Index...
- Page 187 Backing up to/Restoring from microSD card ... Email .................. Backup/restore to docomo cloud ......Account settings............Phonebook account copy........... Backup................docomo LIVE UX ............... Creating................docomo mail..............Deleting................docomo nano UIM card ............ Displaying ..............Installing................. Forwarding ..............Removing ...............
- Page 188 Flick ..................Wallpaper............... FOMA antenna section ............. Homescreen selector ............Font settings..............Font size................Full Seg ................Icon..................Back icon................ Capture & Draw icon............. Gallery ................Highlight & Copy icon........... Glove touch ..............History icon..............Gmail .................. Home icon..............Displaying ..............Navigation bar...............
- Page 189 Play list................Playing music/video............Keep lit when held ............Purchasing from dmarket..........Key misoperation support..........Memory................Keyboard................Messaging ................. External keyboard............MHL .................. Handwritten input............Microphone ............... Japanese syllabary keypad........... microSD card..............Numeric keypad............. Erasing data..............QWERTY keypad............File transfers ..............Format................
- Page 190 Flick input ............... Deleting application ............Gesture input ..............Installing application............. Numeric keypad input........... Playing video ..............2-touch input..............Pointer speed ..............NX! Mail ................Power button instantly locks......... Power key ................Pre-installed applications..........Print.................. Open source software ........... Privacy mode..............Out-camera ................
- Page 191 Shooting settings for still image........Camera Mode ..............Recommended applications..........Display grid..............Reset................Exposure/WB ..............RGB sensor ................ Location ................. Picture Size ..............Save................SelfTimer ............... SAR.................. Touch shutter ..............Schedule ................Shooting settings for video ..........Displaying ..............Registering ..............Camera Mode ..............
- Page 192 Creating ................Swipe ................. Deleting ................Switching input method ..........Displaying ..............Forwarding..............Receiving................ Tablet options menu ............Replying ................. Tap..................Sending ................Tap & pay................. Setting ................Task manager..............Software Update............Tethering ................. Sound at start charging..........Bluetooth tethering ............. Sound/Vibration/LED ............
- Page 193 Reserving recording ............VPN .................. Reserving watching............Adding................Setting ................Connecting..............Signal................Disconnecting.............. Sound output ..............Subtitle language ............Subtitle position ............Warranty ................Using TV................. Waterproofness/Dustproofness, shock resistance..Video switching ............. Wi-Fi ................. 30, 79 TV antenna ..............Adding................TV watching screen ............
- Page 194 There is a penalty for holding or using the terminal while and manufacturers. Bring them to your nearest driving. However, absolutely necessary cases such as docomo Shop. rescue of a sick person and maintaining public safety are * Items to be collected: mobile phones, PHS, battery exempted.
- Page 195 If you lose your terminal or have it stolen, immediately take the steps necessary for suspending the use of the terminal. ● If the terminal you purchased is damaged, bring your terminal to a repair counter specified by DOCOMO after returning to Japan.
- Page 196 ● Please confirm the phone number before you dial. ● For Applications or Repairs and After-Sales Service, please contact the above-mentioned information center or the docomo Shop etc. near you on the NTT DOCOMO website. NTT DOCOMO website https://www.nttdocomo.co.jp/english/ Don't forget your mobile phone ...
Need help?
Do you have a question about the F-04H and is the answer not in the manual?
Questions and answers