Table of Contents
Advertisement
Advertisement
Table of Contents

Related Manuals for iNetVu Fly-1801


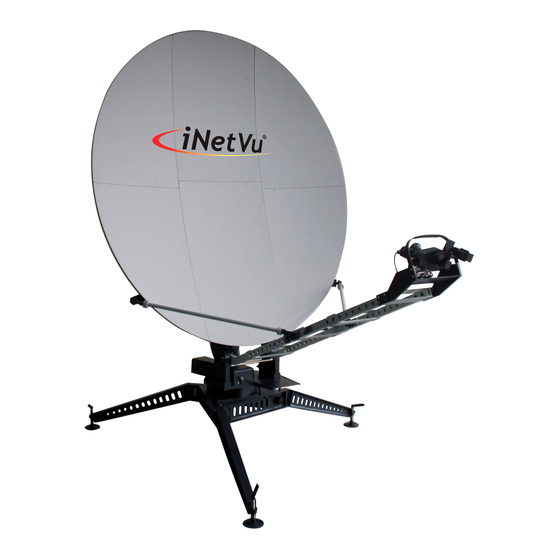
Summary of Contents for iNetVu Fly-1801
- Page 1 C-COM Satellite Systems Inc. Page 1 of 39 ® iNetVu Fly-1801 User Manual ® The iNetVu brand and logo are registered trademarks of C-COM Satellite Systems, Inc. © Copyright 2018 C-COM Satellite Systems, Inc. 1-877-iNetVu6 www.c-comsat.com Revision 1.0 October 25, 2018 ®...
- Page 2 C-COM Satellite Systems Inc. Page 2 of 39 This page is intentionally left blank. ® iNetVu Fly-1801 User Manual...
- Page 3 COM Satellite Systems, Inc., and is intended for internal and or C-COM Satellite Systems Inc. authorized partners use only. No part of this document may be copied or reproduced in any way, without prior written permission of C-COM Satellite Systems, Inc. ® iNetVu Fly-1801 User Manual...
-
Page 4: Table Of Contents
Typical Network Interface Connection - Ku ..............8 Typical USB Communication Interface - Ku ..............9 Assembly and Disassembly ....................10 Assembly Procedure ......................10 Disassembly Procedure ....................... 26 Appendix 1: Default Limits and Configuration Data Tables ........... 39 ® iNetVu Fly-1801 User Manual... -
Page 5: Introduction
Page 5 of 39 Introduction 1.1 About This Manual ® The iNetVu Fly-1801 Flyaway System Installation and Operation are described in this manual. ® An electronic version of this manual is included on the iNetVu flash drive that came with your system. -
Page 6: Power Consumption
7710 Controller ® Fig. 3: iNetVu 7720 Remote Drive Module ® The iNetVu Fly-1801 systems offer the following capabilities and features: • 2-Axis DC motor drive system on AZ & EL. • Motorized 3 axis (POL). • Satellite acquisition within 5 minutes (under normal operating conditions) •... -
Page 7: System Connections
Page 7 of 39 2. System Connections ® The iNetVu New Generation Fly-1801 Antenna have been designed to operate with ® the iNetVu 7710 Controller and a 7720 Remote Drive Module (Onboard). The typical connection configuration for each service will be the same regardless of the Satellite Modem / VSAT. -
Page 8: Typical Network Interface Connection - Ku
24 VDC Power input (If VAC not available) 100 - 240VAC RX IN Satellite Modem / VSAT TX OUT ® Fig. 5: iNetVu LAN interface Connection Configuration with Ku Antenna ® *Recommended for proper grounding of iNetVu systems. ® iNetVu Fly-1801 User Manual... -
Page 9: Typical Usb Communication Interface - Ku
24 VDC Power input (If VAC not available) Network Cable 100 - 240VAC RX IN Satellite Modem / VSAT TX OUT Fig. 6: USB Interface Connection with Ku Antenna ® *Recommended for proper grounding of iNetVu systems. ® iNetVu Fly-1801 User Manual... -
Page 10: Assembly And Disassembly
1) Remove AZ assembly (Rotary Platform) from case. 2) Remove tripod support legs from the case and install on the AZ assembly. Each support leg is labelled so install in the corresponding position on the AZ assembly. ® iNetVu Fly-1801 User Manual... - Page 11 Page 11 of 39 a. Remove pin on AZ assembly to install leg(s) b. Lift the AZ assembly and engage the support leg & support arm. c. Insert the pin to lock the support leg in place. ® iNetVu Fly-1801 User Manual...
- Page 12 Locking Hand Wheel 3) Continue with the same process as above for the remaining 2 support legs. 4) Install support rods between the corresponding support legs. Follow identification letters on Rods and Legs. ® iNetVu Fly-1801 User Manual...
- Page 13 C-COM Satellite Systems Inc. Page 13 of 39 5) Tension the adjustable support rod by turning the handle (on Leg B-C). 6) Remove EL Reflector Back Structure and install on AZ assembly. ® iNetVu Fly-1801 User Manual...
- Page 14 AZ Manual crank when installing the EL Reflector Back Structure. b. Rotate the EL Reflector Back Structure until the flats (on pins and slots) line up, this will allow the EL Reflector Back Structure to drop into place. ® iNetVu Fly-1801 User Manual...
- Page 15 C-COM Satellite Systems Inc. Page 15 of 39 7) Lift and rotate the EL Reflector Back Structure forward to prepare for EL Actuator installation. 8) Disengage the Lower EL Actuator Locking Pin. ® iNetVu Fly-1801 User Manual...
- Page 16 C-COM Satellite Systems Inc. Page 16 of 39 9) Remove EL Actuator from the case and install on AZ assembly, insert lower Locking Pin. Remove EL Actuator Align Actuator Pivot In place with slots Lower Locking Pin ® iNetVu Fly-1801 User Manual...
- Page 17 C-COM Satellite Systems Inc. Page 17 of 39 10) Remove Upper EL Actuator Locking Pin. Lower the EL Reflector Back Structure until the Actuator Piston and EL Reflector Back Structure slots align. ® iNetVu Fly-1801 User Manual...
- Page 18 C-COM Satellite Systems Inc. Page 18 of 39 11) Insert Upper EL Actuator Locking Pin, locking the actuator in place. 12) Connect EL Motor and EL Sensor cables to corresponding connectors. ® iNetVu Fly-1801 User Manual...
- Page 19 13) Slide locking end of Quick Connect back – Connect EL Tilt sensor and slide the locking end forward to lock connector. 14) Connect platform external Power/Canbus cable coming from 7710 Controller to Fly-Away Antenna. 15) Power ON Controller. ® iNetVu Fly-1801 User Manual...
- Page 20 EL LED is lit) until Reflector Back Structure levers are accessible. Note: The Antenna can be manually moved using the Hand Crank if no controller available 17) Install Upper Reflector Center piece. Push in, turn and lock levers to secure segment. ® iNetVu Fly-1801 User Manual...
- Page 21 Page 21 of 39 18) Install remaining Reflector segments, follow illustration on the back of the Reflector Back Structure segment. Push in, continue to turn lever all the way till the end, lock to secure segments. ® iNetVu Fly-1801 User Manual...
- Page 22 19) Install Feedboom Support Bars. The Support bar with the cables goes on the left side (Looking at face of reflector). Gently place Feedboom Support Bar on EL Arm and rotate until the flats line up, this will allow the Support Bar to drop into place. ® iNetVu Fly-1801 User Manual...
- Page 23 Rest the Feedboom Support Bar on the ground. Use the same method as above to install the second Support Bar. 20) Remove and install lower Feedboom segment. 21) Install upper Feedboom segment – Turn and lock levers. ® iNetVu Fly-1801 User Manual...
- Page 24 22) Lift and engage Feedboom Support Bars, install one Support Bar at a time, turn and lock levers. 23) Install Polarization assembly and lock using levers. Adjust elevation as required. 24) Connect POL, TX and RX cables at the top end of the Feedboom. ® iNetVu Fly-1801 User Manual...
- Page 25 27) System is now ready for operation. Indicates a situation or practice that might result in property or equipment damage. Ensure Sensor, Motor and RX/TX cables are connected prior to powering on 7710 Controller. ® iNetVu Fly-1801 User Manual...
-
Page 26: Disassembly Procedure
3) Detach segment 3 from segment 4 and store in the case. Place segment 3 in the third slot (pouch) in the case and orient the segment as shown, back of reflector segment to the case lid. ® iNetVu Fly-1801 User Manual... - Page 27 5) Remove Reflector segment 5 and 6 in one piece. 6) Detach 5 from 6, place segment 6 in the fifth slot and segment 5 in the sixth. 7) Remove Center segment 2 and place in the last slot. ® iNetVu Fly-1801 User Manual...
- Page 28 10) Move the EL down (press (-) button on front panel) until the Polarization can be easily accessed and removed. 11) Power off 7710 controller (this will also turn off the power on the 7720 Remote Drive Module). Ensure to power off the 7710 Controller prior to disconnecting cables. ® iNetVu Fly-1801 User Manual...
- Page 29 12) Disconnect POL, TX/RX cables and cap the POL connector. Loosen the two locking handles on the Polarization Assembly. Remove the Polarization assembly and place in the packing case. 13) Disconnect POL, TX/RX cables at the base and cap the POL connectors at both ends of the Feedboom. ® iNetVu Fly-1801 User Manual...
- Page 30 15) Loosen Feedboom levers at the center and remove upper segment. 16) Place segment in the first pouch in the Reflector case as shown. Orient the levers so they are in line with the segment. ® iNetVu Fly-1801 User Manual...
- Page 31 17) Lift and tip up the bottom segment of the Feedboom. Rotate until the flats line up, pull lightly in the upwards direction until segment disengages. Place segment in the case. 18) Lift and rotate the Feedboom support bar(s) until the flats align pulling up at the same time allowing the bar to detach. ® iNetVu Fly-1801 User Manual...
- Page 32 19) Place Feedboom support bar which has the cables attached to it in the case. Coil and tuck the cables inside the case. 20) Remove the other Feedboom support bar and place in the case. ® iNetVu Fly-1801 User Manual...
- Page 33 21) Power ON controller and select EL. Move Antenna up (press (+) button), until the UP limit comes on. The antenna should be in this position. 22) Power OFF the controller. 23) Disconnect EL Motor, EL Sensor and EL Tilt cables. Cap all connector cables. ® iNetVu Fly-1801 User Manual...
- Page 34 C-COM Satellite Systems Inc. Page 34 of 39 24) While supporting the Actuator in one hand remove the top Locking Pin. 25) Lift the EL Back Structure while supporting the Actuator to disengage the two parts. ® iNetVu Fly-1801 User Manual...
- Page 35 C-COM Satellite Systems Inc. Page 35 of 39 26) Disengage the Actuator by removing the bottom Locking Pin. 27) Place Actuator in the case as shown. ® iNetVu Fly-1801 User Manual...
- Page 36 C-COM Satellite Systems Inc. Page 36 of 39 28) Remove EL Back Structure – Slowly rotate back while lightly pulling upwards until the structure disengages from the AZ assembly. 29) Insert Locking Pin back in its place. ® iNetVu Fly-1801 User Manual...
- Page 37 Follow the same process until all 3 legs have been removed. 33) Ensure the feet on all 3 Legs are retracted before placing in the case, this will allow proper fit. ® iNetVu Fly-1801 User Manual...
- Page 38 Page 38 of 39 34) Place the pins back into place on the AZ assembly. 35) Place AZ assembly into the case, carefully tucking the cables to avoid damaging them. 36) Close and lock all cases. ® iNetVu Fly-1801 User Manual...
-
Page 39: Appendix 1: Default Limits And Configuration Data Tables
C-COM Satellite Systems Inc. Page 39 of 39 Appendix 1: Default Limits and Configuration Data Tables Elevation Offset Fly-1801 Flyaway (A1806E) EL OFFSET 30.0 Table 2: Default Elevation Offsets. All values are + 2 after Target Calibration. ® iNetVu Fly-1801 User Manual...
Need help?
Do you have a question about the Fly-1801 and is the answer not in the manual?
Questions and answers