Table of Contents
Advertisement
Quick Links
Advertisement
Table of Contents

Subscribe to Our Youtube Channel
Related Manuals for Zte A1


Summary of Contents for Zte A1
- Page 1 LTE/WCDMA/GSM Mobile Phone Quick Start Guide...
- Page 2 Images and screenshots used in this manual may differ from the actual product. Content in this manual may differ from the actual product or software. Trademarks ZTE and the ZTE logos are trademarks of the ZTE Corporation. Google and Android are trademarks of Google, Inc.
- Page 3 ® The Bluetooth trademark and logos are owned by the Bluetooth SIG, Inc. and any use of such trademarks by ZTE Corporation is under license. Manufactured under license from Dolby Laboratories. Dolby, Dolby Audio, and the double-D symbol are trademarks of Dolby Laboratories.
-
Page 4: Getting To Know Your Phone
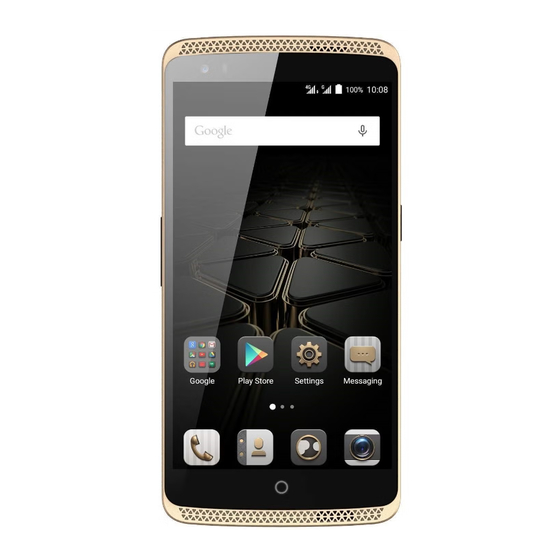
Getting to Know Your Phone Headset Jack Earpiece Auxiliary Microphone Proximity & Front Camera Light Sensor nano-SIM Card Tray Volume Key Touch Screen Home Key (with Indicator Light) Recent Apps Key Back Key Speaker Main Microphone... - Page 5 Back Camera Flash Power Key Camera Key Charging/ micro-USB Jack Power Key Press and hold to turn on or off airplane mode, restart, or power off. Press to turn off or on the screen display. Home Key...
-
Page 6: Installing The Nano-Sim Card
Touch to return to the home screen from any application or screen. Touch and hold to use Google search. Recent Apps Key Touch to see recently used apps. Back Key Touch to go to the previous screen. Volume Key Press or hold either end to turn the volume up or down. - Page 7 2. Pull out the nano-SIM card tray and place the nano-SIM card on the tray, as shown. Then carefully install the tray back. WARNING! To avoid damage to the phone, do not use any other kind of SIM card, or any non-standard nano-SIM card cut from a SIM card.
-
Page 8: Charging Battery
CAUTION: Do not change the built-in rechargeable battery in your phone by yourself. The battery can only be changed by ZTE or ZTE authorized service provider. 1. Connect the adapter to the charging jack. Ensure that the adapter is inserted with the correct orientation. -
Page 9: Touch Screen And Navigation
If the battery is extremely low, you may be unable to power on the phone even when it is being charged. In this case, try again after charging the phone for at least 20 minutes. Contact customer service if you still cannot power on the phone after prolonged charging. -
Page 10: Camera And Video Recording
Camera and Video Recording Take pictures and record videos right from your phone with the camera and camcorder and then share them with friends and family. -
Page 11: Take A Picture
Take a Picture From the home screen, touch Touch icons on the left side (shown on the picture) to adjust flash, HDR, countdown, and other settings. Zoom in and out by pressing the Volume Key or pinching/spreading two fingers on the screen. Touch to take a photo. -
Page 12: Record A Video
Record a Video From the home screen, touch Touch to start recording a video clip. Touch to stop recording. Share a Picture or Video From the home screen, touch Touch an album and then touch a photo or video. Touch and select an option for sharing. -
Page 13: Import Contacts From The Nano-Sim Card
just a few simple steps. Import Contacts From the nano-SIM Card From the home screen, touch Touch > Import/Export > Manage SIM card contacts. If you have added contact accounts other than the phone, select an account in which to save the contacts. Touch >... -
Page 14: Check Voicemail
a contact name. Touch the contact name or touch to place the call. Check Voicemail From the home screen, touch Touch Touch and hold the 1 Key. Follow voice prompts to listen to messages. Text and Multimedia Messaging Send text or multimedia messages to communicate privately and quickly. -
Page 15: Send A Text Message
Send a Text Message From the home screen, touch Touch to start a new text message. In the To field, enter a number or a contact name, or touch to select recipients from your contacts or call log. Touch the Type message field and enter your message. Touch to send the message. -
Page 16: Send A Multimedia Message
Send a Multimedia Message Follow steps 1-4 above. Touch Attach a file or a slideshow to message. Touch or SEND to send the message. WARNING! Please don’t text and drive. Email Access your Gmail™, corporate email, and personal email... -
Page 17: Email Setup
wherever you are! Email Setup From the home screen, touch > Email. Select an email server and then enter your email address and password and touch Next. Wait for the phone to connect and complete the setup automatically. Then set the email checking frequency and download options and touch Next. -
Page 18: Create And Send An Email
Create and Send an Email From your email inbox, touch Enter a contact name or email address in the ‘To’ field. You can also touch to select recipients from your contacts. Enter the email subject and compose the email text. To attach files to the email, touch >... -
Page 19: Network Indicators
Network Indicators Your 4G LTE mobile phone will indicate which type of networks you are connected to. A network indicator does not necessarily mean that you will experience any particular upload or download data speeds. 4G LTE: Connected to a 4G LTE network. 4G/3G: Connected to an HSPA+/3G network. -
Page 20: Connect To A Bluetooth Headset
Connect to a Bluetooth Headset From the home screen, touch > Settings > Bluetooth. Touch to turn Bluetooth on. Touch > Refresh. Touch the name of the device to pair and connect with it. -
Page 21: Connect To Wi-Fi Network
Connect to Wi-Fi Network From the home screen, touch > Settings > Wi-Fi. If Wi-Fi is off, touch to turn it on. Touch a network name. Enter a password if required and then touch CONNECT. Installing Apps From the Google Play™... - Page 22 NOTE: The content you can access in the Play Store depends on your region and your service provider. 1. Touch the Home Key > > Play Store. The first time you launch Play Store, accept the Google Play Terms of Service. 2.
-
Page 23: For Your Safety
For Your Safety FCC RF Exposure Information (SAR) This phone is designed and manufactured not to exceed the emission limits for exposure to radio frequency (RF) energy set by the Federal Communications Commission of the United States and Industry Canada of Canada. During SAR testing, this device was set to transmit at its highest certified power level in all tested frequency bands, and placed in positions that simulate RF exposure in usage against the... - Page 24 accordance with the measurement methods and procedures specified in IEEE1528, and Canada RSS 102. The FCC has granted an Equipment Authorization for this model phone with all reported SAR levels evaluated as in compliance with the FCC RF exposure guidelines. SAR information on this model phone is on file with the FCC and can be found under the Display Grant section of www.fcc.gov/oet/ea/fccid...
- Page 25 IC Notice This device complies with Industry Canada license-exempt RSS standard(s). Operation is subject to the following two conditions: (1) this device may not cause interference, and (2) this device must accept any interference, including interference that may cause undesired operation of the device. Le présent appareil est conforme aux CNR d'Industrie Canada applicables aux appareils radio exempts de licence.
-
Page 26: Ic Radiation Exposure Statement
IC Radiation Exposure Statement This EUT is compliance with SAR for general population/uncontrolled exposure limits in IC RSS-102 and had been tested in accordance with the measurement methods and procedures specified in IEEE 1528 and IEC 62209. This equipment should be installed and operated with minimum distance 1.0 cm between the radiator and your body. -
Page 27: Fcc Regulations
FCC Regulations This mobile phone complies with part 15 of the FCC Rules. Operation is subject to the following two conditions: (1) This device may not cause harmful interference, and (2) this device must accept any interference received, including interference that may cause undesired operation. -
Page 28: Hearing Aid Compatibility (Hac) Regulations For Mobile Phones
CAUTION: Changes or modifications not expressly approved by the party responsible for compliance could void the user’s authority to operate the equipment. Hearing Aid Compatibility (HAC) regulations for Mobile Phones In 2003, the FCC adopted rules to make digital wireless telephones compatible with hearing aids and cochlear implants. - Page 29 use a rated phone successfully. Trying out the phone with your hearing device is the best way to evaluate it for your personal needs. This phone has been tested and rated for use with hearing aids for some of the wireless technologies that it uses. However, there may be some newer wireless technologies used in this phone that have not been tested yet for use with hearing aids.
- Page 30 Compatibility, please go to http://www.fcc.gov/cgb/dro. This phone has been tested and rated for use with hearing aids for some of the wireless technologies that it uses. However, there may be some newer wireless technologies used in this phone that have not been tested yet for use with hearing aids. It is important to try the different features of this phone thoroughly and in different locations, using your hearing aid or cochlear implant, to determine if you hear any interfering noise.
Need help?
Do you have a question about the A1 and is the answer not in the manual?
Questions and answers