Table of Contents
Advertisement
Advertisement
Table of Contents

Related Manuals for Zte A110


Summary of Contents for Zte A110
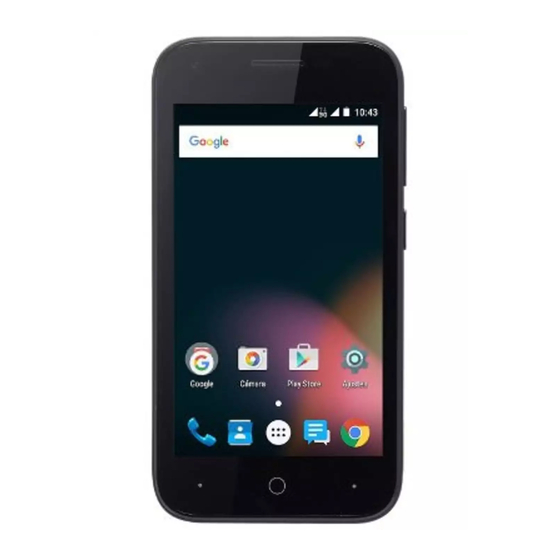
- Page 1 ZTE A110 User Guide...
- Page 2 ZTE Corporation. ZTE Corporation reserves the right to modify technical parameters and specifications in this guide, and promptly correct the contents in the guide that are inconsistent with the latest documents.
-
Page 3: System Recovery For Lost Passwords
Installation of a third-party ROM or non-official operating system (commonly called ‘rooting’ your device) might bring unwanted security risks and may make your device inoperable. ZTE Corporation will not be liable for the security threats brought by upgrade of the operating system. -
Page 4: Table Of Contents
Contents Getting started ..........................1 Inserting and Removing the SIM card ................4 Inserting and Removing Memory card (optional) ............5 Inserting the battery ..................... 6 Charging the Battery ..................... 7 Getting to know your phone ......................8 Screen control ....................... 8 Volume Controls ...................... - Page 5 Reject a call ......................... 17 End a call........................18 Adjust the volume....................... 18 Turn the speaker on or off ..................18 Add a multi party or Conference call ................18 Use touch tones during a call for automated call systems ........... 18 Contacts ............................
- Page 6 Message thread ......................24 Message Settings ......................25 Gmail ............................25 Set up an Gmail account for the first time ..............25 Connectivity ..........................26 Wi-Fi ........................... 27 Bluetooth® ........................28 Connect to a Computer to transfer files ..............29 Settings ............................
- Page 7 Music Player ....................... 36 Sound Recorder ......................37 FM radio ........................37 More Applications ........................39 Chrome ........................39 File manager ....................... 40 Clock ........................... 40 Calculator ........................42 Calendar ........................42 Downloads ........................44 Manage applications ........................45 Install new applications....................45 Uninstall applications ....................
-
Page 8: Getting Started
Getting started Receiver Front Camera Sensor Volume Keys Power Key Touch Screen Home Recent Apps Back... - Page 9 Headset Jack Charging/USB Jack Camera Flash Lamp Volume Key Headset jack Power Key Noise-reduction MIC Back Cover Loud Speaker...
- Page 10 Key functions Back Touch to open the previous screen you were working in. If the onscreen keyboard is open, touch it to close the keyboard. Home Touch to open the home screen. If you’re viewing the left or right extended home screen, Touch it to open the central home screen. Recent Apps Touch to open the Recent Apps list Power key...
-
Page 11: Inserting And Removing The Sim Card
Inserting and Removing the SIM card You must insert a valid SIM card into your phone before use. 1. Switch off your phone and disconnect any external power. 2. Remove the back cover using the thumb catch in the bottom left corner (viewed from the back) 3. -
Page 12: Inserting And Removing Memory Card (Optional)
Inserting and Removing Memory card (optional) Insert the microSD memory card into the card slot as shown below: TIPS A memory card is an optional accessory and is not included with your device. The phone accepts microSD cards up to 32GB with FAT32 format. The addition of a memory card is mainly used for personal storage such as Photos, Music and Videos. -
Page 13: Inserting The Battery
Inserting the battery 1. Open the battery cover on the back of your phone. 2. Align the battery's contact points with those of the phone and gently press the battery down into place. 3. Replace the battery cover clicking it back into position. -
Page 14: Charging The Battery
Charging the Battery Connect the charger to the phone using a USB cable, and plug the charger into a standard power socket. Only use the approved charger and USB lead provided. -
Page 15: Getting To Know Your Phone
Getting to know your phone Screen control There’s more to a touch screen than simple touching: - Touch: Touch items on screen to open apps, select options or use the keyboard. - Swipe or slide: Slide your finger across the screen to flick between ‘pages’ or scroll - Touch &... -
Page 16: Volume Controls
Volume Controls The volume keys work in different ways depending on which application or menu you are in. Lock screen or Home Screen Volume keys control the Ring Volume and the Priority Interuptions panel. Move the volume all the way down to enable Vibrate mode with handset interuptions controlled by All, Priority, or None. -
Page 17: Home Screen
Home screen Press the Home key to access your Home screen. Swipe right to view additional pages, touch apps to activate them, press and hold apps to move them and place them elsewhere, drag apps to ‘Remove’ to delete them. To add apps to your Home screen, go the Apps tray and press and hold on an icon to drop it onto your Home screen. - Page 18 Press & hold the icon you want to move, drag it to your desired position on the screen and release Press & hold the icon you want to move, and drag the icon to your desired screen. Delete icons on the home screen Touch &...
-
Page 19: Settings
- Place an app icon in the Favorites tray: Touch & hold an icon to move in or out of the favorites panel. Drag an icon onto another one to create a folder. Quick Settings Panel Pull down twice to open the quick settings panel to quickly check and control key features. Wi-Fi and Bluetooth options can be further configured by touching the drop down arrow underneath. -
Page 20: Settings
Settings Wi-Fi Switch Wi-Fi on and off. Scan and join Wi-Fi networks. Bluetooth Switch Bluetooth on and off. Connect to Bluetooth devices. Data usage Switch Data on or off. Check your data usage details. More – Airplane mode Switch off all radio functions for use on aircraft. Default SMS app Select which default SMS application to use. -
Page 21: Switch To Sleep Mode (Turn Off The Display)
Accounts Manage your Gmail and other accounts Language & input Control handset, keyboard, spelling language options Backup & reset Backup to Google and perform a Factory Reset Date & time Manually set date & time options and set date & time formats Schedule power on &... -
Page 22: Secure Your Device
1. Press the Power key to turn on the screen. 2. Drag the icon to unlock the screen. If you've set an unlock PIN, pattern or password, you need to draw the unlock pattern or input the password to enter the main interface. (For details, please see Settings > Security > Screen lock). Secure your device Go to Settings >... -
Page 23: Make And Answer Calls
Make and answer calls Make a call Make a call from the Dialler On the home screen, touch the button to open the Dialler. Touch a recently called number or press to open the Dial Pad and touch to make the call. Make a call from Contacts On the home screen, touch the Contacts icon, touch the desired contact and... -
Page 24: Answer A Call
Dial from Messaging 1. On the home screen, touch the Messaging icon 2. Touch a message or conversation to select it 3. Touch the icon at the top of the phone to dial. Answer a call Your phone will ring or vibrate (depending on your current settings) for an incoming call. -
Page 25: End A Call
End a call Touch the button to hang up the call. Adjust the volume In a call, you can raise or lower the volume by using the volume keys. Turn the speaker on or off In a call, touch the button to turn on the speaker, and touch it again to turn off speaker. -
Page 26: Contacts
Contacts You can place calls from the Phone app , the Contacts app , or other apps or widgets that display contact information. Wherever you see a phone number or call icon, you can usually touch it to dial. The contacts interface can be divided into the following tab pages: - All Contacts: View the list of contacts. -
Page 27: Delete Contacts
Delete contacts 1. In Contacts, touch the and then select Delete contact. 2. Touch the contacts you want to delete or touch , then touch the OK. Edit contact details 1. In Contacts, touch the contact whose details you want to edit. 2. -
Page 28: Add A Contact To Favorites
Add a contact to Favorites You can tap the contact you want to add to favorites in the contact interface, and then touch in the upper right corner to add it to Favorites directly. Import/Export contacts 1. In Contacts, touch the to select Import/export. -
Page 29: Using Google Contacts
Using Google Contacts When you are signed into your Google account (ie Gmail) all your existing Contacts are downloaded and synced to your device. Also if you add a Contact to your device, for example by importing from your SIM card or entering a new Contact manually, it is automatically synced to your Google account and stored securely on line. -
Page 30: Messaging
Messaging In Messaging, you can send or receive text messages and multimedia messages. On the home screen or in the All Apps screen, touch the Messaging icon to open. Send messages 1. In Messaging, touch the icon. 2. Input your desired telephone number . You can also touch the button to select a contact from the People and then touch OK icon to add a contact. -
Page 31: Receive Messages
Receive messages 1. In idle mode, you will be reminded about the new messages in the notification area. Slide down to open the notification panel to view. 2. Touch the message. 3. Enter text to reply to the message. Touch the icon to send the message. -
Page 32: Message Settings
Message Settings In Messaging, touch Options and then touch Settings to perform relevant settings. Gmail You can use Gmail to read and write email from any mobile device or browser. All your email is always up to date and available no matter where you check it from. On the home screen or in the All Apps screen, touch the Gmail icon to open Gmail. -
Page 33: Connectivity
Connectivity Your phone can connect to the Internet via your mobile phone operator or over a Wi-Fi network. When A Wi-Fi network is configured and available the device will automatically choose the Wi-Fi connection to reduce your mobile data usage. GSM/WCDMA data connection Different locations may have different mobile networks available. -
Page 34: Wi-Fi
Wi-Fi Turn on/off Wi-Fi 1. In the All apps screen, touch Settings > WIFI. 2. Touch the switch to turn it ON or OFF 3. You can also pull down the Quick Settings Panel and touch the Wi-Fi icon to switch Wi-Fi on or off. -
Page 35: Bluetooth
Bluetooth® ® Via the Bluetooth function, you can exchange data with other Bluetooth devices that are within a short distance. ® Turn on/off Bluetooth 1. On the home screen, touch and then touch Settings. ® 2. Touch Bluetooth , and slide the ON/OFF button to turn it on or off. Pairing ®... -
Page 36: Connect To A Computer To Transfer Files
® Change your phone’s Bluetooth name 1. On the home screen, touch and then touch Settings > Wireless & networks. ® 2. If the Bluetooth function is not turned on, turn it on. ® 3. Touch Bluetooth , then touch >... -
Page 37: Settings
Subsequently, select Media Device (MTP) from the notifications window, which will open the handset in Windows Explorer. On your MAC, download and install Android File Transfer. Connect your handset using the USB data lead supplied. Select Media Device (MTP) from the notifications window, which will open the handset on your MAC. -
Page 38: Device
Tip: On the home screen, you can press and hold the Power key, then select Airplane mode. Device Audio profiles Touch and then touch Settings > Sound& notification > Phone ringtone: Select the ringtone to sound when you receive a call. Default notification sound: Select your default notification ringtone. - Page 39 Wallpaper: Choose a wallpaper. Sleep: Choose the delay before the screen automatically turns off. Using micro SD Storage To copy files between a PC and your phone’s SD card, you should set the SD card as USB mass storage. 1. Connect your phone to your PC with the USB cable. 2.
-
Page 40: Accounts And Sync
Accounts and sync Adding your accounts 1. Touch Settings > Accounts > Add account. 2. Touch the account type you want to add. 3. Follow the onscreen instructions to enter your account information. Most accounts require a username and password, but the details depend on the kind of account and the configuration of the service you're connecting to. -
Page 41: Date & Time
Date & time You can set the format of date and time. On the home screen touch and then touch Settings > Date & time. About phone You can check the phone’s status, battery use, software version, etc. On the home screen touch and then touch Settings >... -
Page 42: Camcorder
2. Aim the camera lens at the subject and make any necessary adjustments. Touch the icon to make the following settings: - Touch the icon to change White balance. Touch the icon to set Scene mode. - Touch the icon to set Color effect. 3. -
Page 43: Gallery
- Touch the icon to change White balance. - Touch the icon to set the Color effect. 2. Focus your lens on the object, touch the icon to start recording and touch the icon to end. After a video is recorded, you can slide to the left to view it. Gallery The Gallery categorizes your pictures and videos by storage location and stores these files in folders. -
Page 44: Sound Recorder
Listen to music Touch the Song you want to play to start playing it. Sound Recorder You can record audio files through sound recorder. Open the sound recorder Before opening the sound recorder, please insert a memory card. In the All Apps screen, touch the Sound Recorder icon to open it. Record audio files 1. - Page 45 The wired headset that comes with your phone works as an antenna, so always connect the headset when using the radio. When you receive an incoming call while listening to the radio, the radio will be turned off. To tune in, plug your headset into your phone. In the All Apps screen, press the FM Radio icon to open it.
-
Page 46: More Applications
More Applications Chrome Use the Chrome browser to view web pages and to search for information on the web. Open Chrome On the home screen or in the All Apps screen, touch the icon. 2. First time you need to Accept and Continue, and can add an account if you want to sync and share your browsing Bookmarks and History between different devices. -
Page 47: File Manager
Browse options When you’re browsing web pages, touch the to select: You can perform more operations such as Bookmarks, Save to bookmarks, Share page, Find on page, Request desktop site, etc. Settings You can choose settings that will affect how page content is displayed and privacy and security preferences to suit your browse style. - Page 48 screen or a phone button to wake the phone up again. To return to the home screen, touch the Home key. Adding an Alarm 1. Touch 2. Touch the icon at the top of the screen. 3. Touch Add alarm. Turning on/off an Alarm To turn it on, touch OFF and slide it to the right.
-
Page 49: Calculator
Select the Timer function. Touch Play to start the timer. Press Stop to stop the alert. Press +1 to add 1 minute, press + to add a new timer event. Stopwatch Select the Stopwatch function. Touch Play to start the Stopwatch. You can Record the time, Pause the time or Share the results. - Page 50 1. On the calendar screen, touch and then touch New event. 2. Enter the event name and location. 3. To set the duration for the event, touch From and To. 4. Enter the event time zone and description. 5. If you have more than one calendar, select the calendar where you want to save the event. 6.
-
Page 51: Downloads
1. On the calendar screen, touch and then touch Calendars to display. 2. Touch which calendars you would like to be displayed. 3. If you have more calendars you would like to synchronize and display, touch Calendars to sync, then touch the checkbox next to the calendar(s) you would like to synchronize, touch OK, and then you are returned to the Calendars to display screen where what you chose is now displayed and where you can choose which to display in the calendar. -
Page 52: Manage Applications
Manage applications You can view and manage applications installed in your phone. Install new applications You can install applications from the Play Store or from elsewhere. When installing applications that are not from the Play Store, make sure the software is suitable for your phone. Installing applications from the Play Store 1. -
Page 53: Uninstall Applications
Uninstall applications Uninstall applications in the Play Store 1. On the Play Store screen. 2. Touch the application to uninstall. 3. Touch Uninstall and complete the uninstall process according to the wizard. Uninstall applications not in the Play Store 1. On the home screen, touch and then select Settings >... -
Page 54: Technical Specifications
Technical Specifications Size and Weight 125 × 64.6 × 10.8 mm. 127g with battery Networks 4G LTE Band 3, 7, 28 (1800/2600/700) LTE Data Rates: 150M Down / 50M Up 3G UMTS 850, 2100 MHz. HSPA+ 42Mbps data 2G 900, 1800, 1900 MHz. Display 4”... - Page 55 Capacity 1600mAh Li-ion user replaceable Charge 3-4 hrs with AC Charger Time Battery Standby Up to 380 hours (subject to network) time Voice Up to 11 hours (subject to network) talk time Connectivity Bluetooth 3 , Wi-fi 802.11b/g/n, 3.5mm jack NAHJ, micro USB SIM Card Micro SIM, 3FF format.
-
Page 56: Troubleshooting
Troubleshooting Symptom Solution How do I check the Settings > About phone > Build number software version? How do I reset to factory Settings > Backup & reset > Factory data reset defaults? How do I check the SMS Messages > Options > Settings service centre number? How do I configure the Messages >... - Page 57 Symptom Solution How do I manually select Settings > More > Mobile Networks > Network operators > a carrier? Search networks How do I enable USB Settings > More > Tethering and Portable hotspot > USB tethering? tethering. (Connect as CDROM to install drivers) Settings >...
- Page 58 Search for ZTE Australia on Facebook or email support@zte.com.au How do I get more technical support? Symptom Solution How do I change the Settings > Sound & notifications > Phone ringtone Ringtone? Possible network coverage issue. Check the signal level. With only...
- Page 59 Confirm the charger is properly inserted. Remove the battery, clean the contacts and check it is inserted I cannot charge the correctly. The battery may be worn out. phone You can charge your handset from any standard USB port. Try another lead if you have access to one. Turn Bluetooth on.
-
Page 60: Declaration Of Rohs Compliance
We’re determined to reduce the impact we have on the environment and take responsibility for the earth we live on. So this document allows us to formally declare that theA110, manufactured by ZTE CORPORATION, fully complies with the European Parliament’s RoHS (Restriction of Hazardous Substances) Directive 2002/95/EC, with respect to all the following substances:... -
Page 61: Disposal Of Your Old Phone
EU 2002/95/EC, or are exempt due to their application. The A110 manufactured by ZTE CORPORATION, meets all the requirements of EU 2002/95/EC. Disposal of your old phone 1. When the wheelie bin symbol is attached to a product, it means the product is covered by the European Directive 2002/96/CE.
Need help?
Do you have a question about the A110 and is the answer not in the manual?
Questions and answers