
Subscribe to Our Youtube Channel
Related Manuals for Atlas Copco FX 1


Summary of Contents for Atlas Copco FX 1
- Page 1 Atlas Copco Refrigerant compressed air dryers FX 1, FX 2, FX 3, FX 4, FX 5, FX 6, FX 7, FX 8, FX 9, FX 10, FX 11, FX 12 Instruction book...
- Page 3 Atlas Copco Refrigerant compressed air dryers FX 1, FX 2, FX 3, FX 4, FX 5, FX 6, FX 7, FX 8, FX 9, FX 10, FX 11, FX 12 From following serial No. onwards: CAI814019 Instruction book Original instructions Copyright notice Any unauthorized use or copying of the contents or any part thereof is prohibited.
-
Page 4: Table Of Contents
Instruction book Table of contents Safety precautions......................4 ........................... 4 AFETY ICONS ......................4 AFETY PRECAUTIONS GENERAL ................... 5 AFETY PRECAUTIONS DURING INSTALLATION ....................6 AFETY PRECAUTIONS DURING OPERATION ................7 AFETY PRECAUTIONS DURING MAINTENANCE OR REPAIR General description......................9 ...........................9 NTRODUCTION ............................ - Page 5 Instruction book Maintenance instructions.................... 26 Device settings......................27 Problem solving......................28 Technical data.......................31 .................... 31 EFERENCE CONDITIONS AND LIMITATIONS ..........................31 IR DRYER DATA Pressure equipment directives................... 34 Declaration of conformity.................... 35 2920 7112 40...
-
Page 6: Safety Precautions
Instruction book Safety precautions Safety icons Explanation Danger to life Warning Important note Safety precautions, general General precautions All responsibility for any damage or injury resulting from neglecting these precautions, or non-observance of the normal caution and care required for installation, operation, maintenance and repair, even if not expressly stated, will be disclaimed by the manufacturer. -
Page 7: Safety Precautions During Installation
Instruction book Safety precautions during installation Precautions during installation 1. The dryer must only be lifted using suitable equipment and in accordance with the applicable safety regulations. Loose or pivoting parts must be securely fastened before lifting. It is strictly forbidden to dwell or stay in the risk zone under a lifted load. -
Page 8: Safety Precautions During Operation
Instruction book Also consult following safety precautions: Safety precautions during operation Safety precautions during maintenance or repair. These precautions apply to machinery processing or consuming air or inert gas. Processing of any other gas requires additional safety precautions typical to the application which are not included herein. -
Page 9: Safety Precautions During Maintenance Or Repair
Instruction book Also consult following safety precautions: Safety precautions during installation Safety precautions during maintenance or repair. These precautions apply to machinery processing or consuming air or inert gas. Processing of any other gas requires additional safety precautions typical to the application which are not included herein. - Page 10 Instruction book flush abundantly with fresh water over the clothing until all refrigerant is flushed away; then seek medical first aid. 21. The following safety precautions are stressed when handling desiccant: • Take precautions not to inhale desiccant dust. • Check that the working area is adequately ventilated; if required, use breathing protection. •...
-
Page 11: General Description
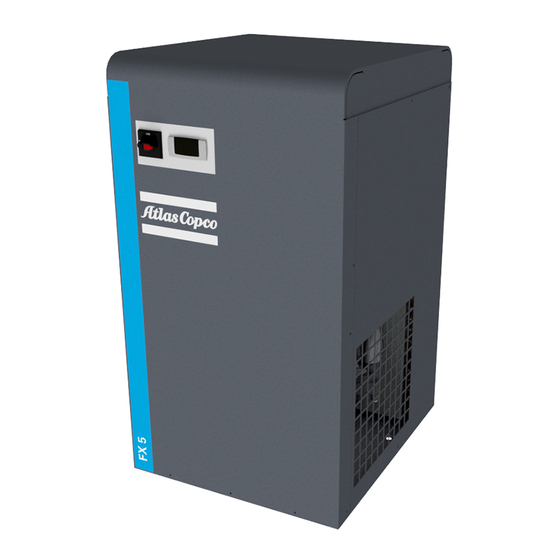
Instruction book General description Introduction General views FX 1 up to FX 5 2920 7112 40... - Page 12 Instruction book FX 6 up to FX 12 Introduction The FX air dryers remove moisture from compressed air by cooling the air to near freezing point. This causes water to condense. The condensate is automatically drained. The air is warmed up before leaving the dryer.
-
Page 13: Air System
Instruction book Air system Air flow diagram Reference Name Evaporator Condensate separator Impurity trap Heat exchanger Digital dewpoint indicator Condensate drain Description Compressed air enters heat exchanger (10) and is cooled by the outgoing, cold, dried air. Water in the incoming air starts to condense. -
Page 14: Refrigeration System
Instruction book Refrigeration system Refrigerant flow diagram Reference Name Refrigerant compressor Condenser Evaporator Expansion capillary tube Refrigerant filter Description Compressor (1) delivers hot, high-pressure refrigerant gas which flows through condenser (2) where most of the refrigerant condenses. The liquid flows through the refrigerant dryer/filter (8) to capillary tube (7). The refrigerant leaves the capillary tube at evaporating pressure. -
Page 15: Electrical System
Instruction book Reference Name Cooling fan Hot gas bypass valve Description The condenser pressure must be kept as constant as possible to obtain stable operation. Fan control switch therefore stops and starts the cooling fan (3). If, under partial or no load, the evaporator pressure drops below a certain level, the hot gas bypass valve opens and hot, high-pressure gas is fed to the evaporator circuit to prevent the evaporator pressure from dropping any further. -
Page 16: Installation
The dimension drawings can be found on the CD-ROM, delivered with the dryer. Dimension drawing Model 2202 7549 00 FX 1 up to FX 5 2202 7463 00 FX 6 and FX 7 2202 7464 00 FX 8 up to FX 10... - Page 17 Instruction book Example of compressor/dryer room Installation proposal for FX 1 up to FX 5 Installation proposal for FX 6 up to FX 12 Reference Description Install the refrigerant air dryer on a level floor, suitable for its weight. The recommended minimum distance between the top of the unit and the ceiling is 1.5 m (58.5 in).
-
Page 18: Pictographs
Instruction book Reference Description The power cable must be connected by a qualified electrician. Connect the dryer to the correct voltage; if necessary, check the unit data plate. Check that the electrical installation corresponds to local codes. The dryer must be earthed and protected against short circuits using an automatic cut-out device with a differential device. -
Page 19: Operating Instructions
The operator must apply all relevant safety precautions, including those mentioned in this manual. Altitude operation Consult your supplier if operating above 3000 m (9843 ft). Control panel Description FX 1 up to FX 12 Reference Name Digital controller, used for: 1. pressure dewpoint indication (main function) 2. -
Page 20: Digital Controller
Instruction book Digital controller Identification Front panel of the controller Reference Name Alarm icon Refrigerant compressor icon Fan icon PDP (dewpoint) temperature Unit (°C or °F) Alarm LED Button to snooze or to reset the alarm (only for remote alarm function). SET button UP button DOWN button... - Page 21 Availability of the remote alarm function Model Fault message availability FX 1 to FX 3 FX 4 and FX 5 FX 6 to FX 12 Location of the free contact (1) 2920 7112 40...
- Page 22 Instruction book Fault messages Flashing fault message Description Remedy Fan control probe failure Replace the probe. Dewpoint temperature probe failure Replace the probe. Refrigerant compressor discharge Replace the probe. temperature probe failure (only available on FX 6 to FX 12 with remote alarm function) Pressure dewpoint too high Refer to the fault and remedies...
- Page 23 Instruction book Resetting the maintenance warning Front panel of the controller To reset the maintenance warning, follow steps 1 to 12: 1. The display is flashing between standard view (dewpoint) and Maintenance required (SE) alarm. 2. Push and hold buttons SET (8) and DOWN (10) to enter the menu. 3.
- Page 24 Instruction book 12. Then “rL” is fixed and “°C” blinks on display for about 10 seconds. The service alarm is now reset. Setting the service interval To set the service interval, follow steps 1 to 9: 1. PDP is showing standard view. 2.
-
Page 25: Starting
Wait at least 5 minutes to start the dryer again after stopping to allow pressure equalization. To keep the compressed air net free of condensate, start the dryer before starting the compressor and stop the compressor before stopping the dryer. Procedure FX 1 up to FX 12 2920 7112 40... -
Page 26: During Operation
Approx. 10 minutes later, the nominal dewpoint will be reached. During operation Procedure FX 1 up to FX 12 Regularly check: • The pressure dewpoint on the digital controller (1). The pressure dewpoint will deviate from nominal if the air inlet conditions or volume flow differ from nominal. - Page 27 Instruction book Procedure FX 1 up to FX 12 Step Action Close the dryer inlet and outlet valve (customer’s installation). Press dryer on/off switch (2), the dryer stops. If provided, open the dryer by-pass valve. 2920 7112 40...
-
Page 28: Maintenance Instructions
Instruction book Maintenance instructions Safety precautions Before starting any maintenance or repair work, close the air inlet and outlet valve and switch off the voltage. When removing the side panels of the dryer, be aware that internal elements such as the pipes can be hot. Therefore, wait until the dryer has cooled down before removing the side panels. -
Page 29: Device Settings
Instruction book Device settings Regulating and safety devices The regulating and safety devices are factory-adjusted to obtain optimum performance of the dryer. Do not alter the setting of any of the devices. 2920 7112 40... -
Page 30: Problem Solving
Instruction book Problem solving Condensate drain and air inlet and outlet valves FX 1 up to FX 5 FX 6 up to FX 12 Reference Name Inlet and outlet valves Condensate drain Dryer on/ off switch Isolating switch 2920 7112 40... - Page 31 Instruction book Attention Use only authorised parts. Any damage or malfunction caused by the use of unauthorised parts is not covered by Warranty or Product Liability. Apply all relevant safety precautions. Before carrying out any maintenance or repair work on the dryer: Close air inlet and outlet valves (1) of the dryer.
- Page 32 Instruction book Condition Fault Remedy The condensate drain Drain system clogged Have system inspected remains inoperative Evaporator pressure is too Hot gas by-pass valve Have hot gas by-pass valve adjusted high or too low at unload incorrectly set or out of order Condenser pressure too high See 2 or too low...
-
Page 33: Technical Data
Maximum ambient temperature °F Maximum compressed air inlet temperature °C Maximum compressed air inlet temperature °F Air dryer data FX 1 up to FX 5 - 230 V 50 Hz Air dryer type Unit FX 1 FX 2 FX 3 FX 4... - Page 34 0.290 0.350 0.480 Total charge (approx.) 0.33 0.37 0.64 0.77 1.06 FX 1 up to FX 5 - 230 V 60 Hz Air dryer type Unit FX 1 FX 2 FX 3 FX 4 FX 5 Nominal power Nominal power 0.23...
- Page 35 Instruction book Air dryer type Unit FX 6 FX 7 FX 8 FX 9 FX 10 FX 11 FX 12 Electric power input, 720.5 776.5 1035 1210 1455 compressor Electric power input, 0.767 0.966 1.041 1.287 1.388 1.623 1.951 compressor Electric power input, fan motor W Electric power input, fan motor hp 0.076...
-
Page 36: Pressure Equipment Directives
Instruction book Pressure equipment directives Components subject to Pressure Equipment Directive All pressure bearing components are designed category I or less according to European Directive 97/23/EC (until 19/07/2016) or Directive 2014/68/EU (from 20/07/2016 onwards). 2920 7112 40... -
Page 37: Declaration Of Conformity
Instruction book Declaration of conformity Typical example of a Declaration of Conformity document (1): Contact address: Atlas Copco Airpower n.v. P.O. Box 100 B-2610 Wilrijk (Antwerp) Belgium (2): Applicable directives (3): Standards used 2920 7112 40... - Page 38 Instruction book On the Declaration of Conformity / Declaration by the Manufacturer, the harmonized and/or other standards that have been used for the design are shown and/or referred to. The Declaration of Conformity / Declaration by the Manufacturer is part of the documentation that is supplied with this device.
- Page 40 Atlas Copco delivers the products and services that help to increase your business’ efficiency and profitability. Atlas Copco's pursuit of innovation never ceases, driven by our need for reliability and efficiency. Always working with you, we are committed to providing you the customized quality air solution that is the driving force behind your business.
Need help?
Do you have a question about the FX 1 and is the answer not in the manual?
Questions and answers
How to set up my air dryer
To set up the Atlas Copco FX 1 air dryer:
1. Site Preparation:
- Install on a level floor that can support its weight.
- Ensure the ambient air is clean and within temperature limits.
- Maintain at least 1.5 m (58.5 in) clearance above and behind the unit.
- Keep ventilation gratings clear.
2. Drain Hose:
- Route the condensate drain hose to a drain collector via a funnel.
- Ensure the hose slopes downward.
- Insulate the hose if exposed to freezing temperatures.
3. Electrical Connection:
- A qualified electrician must connect the power cable.
- Verify the voltage matches the unit data plate.
- Ensure compliance with local electrical codes.
4. Startup Procedure:
- Close the dryer by-pass valve (if installed).
- Press the on/off switch to start the dryer.
- Open the air inlet valve after starting.
- After ~5 minutes, open the air outlet valve.
- Nominal dew point is reached in ~10 minutes.
5. Operating Tips:
- Start the dryer before the compressor.
- Stop the compressor before stopping the dryer.
- Do not restart the dryer within 5 minutes of stopping.
This answer is automatically generated
I hav P2 warning flashes on my fx9n
A P2 warning flash indicates a "Too high discharge temperature of the refrigerant compressor" on an Atlas Copco FX 1.
This answer is automatically generated