Table of Contents
Advertisement
Quick Links
DR200/HE & DR300 Hook-Up Guide for Holter
5-Electrode Placement
Electrodes
--
RED
RED
WHITE BLACK
GREEN (Ground)
Electrodes
--
WHITE
WHITE BROWN
BLACK BROWN
+
Ch. 1
CM5
BROWN
Ch. 2
aVF
BLACK
Ch. 3
lead II
• Select area over bone, avoiding muscle areas and breast tissue.
+
• Clean electrode sites aggressively with alcohol and use a razor to remove hair.
• Abrade electrode sites with a scrub pad or gauze. Allow sites to dry before applying electrodes.
Ch. 1
lead I
• Firmly snap electrodes to the lead wires.
BLACK
• Apply electrodes to appropriate sites. Press adhesive border firmly for consistent adhesion.
Ch. 2
mod.
• To help alleviate tension, loop and tape lead wires down.
V5
Ch. 3
mod. III
7-Electrode Placement
Patient Preparation
Tape
Tape
MediMark Eruope, SARL
11 rue Emile Zola
BP 2332
F-38033 Grenoble CEDEX 2
0143
France
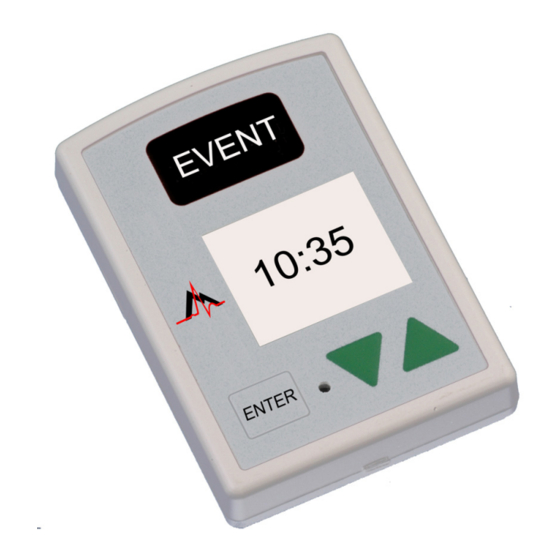
• Remove and reinsert battery.
• If 15- second countdown begins,
interrupt by pressing ENTER,
▼, ▲,
and EVENT buttons, in that order.
Electrodes
--
+
Ch. 1
WHITE
RED
mod.V5
Ch. 2
BLACK BROWN
mod.V1
Ch. 3
BLUE ORANGE
lead III
GREEN (Ground)
Electrode
Electrode
IP22
NEMM020 - Rev-I - English
Advertisement
Table of Contents

Related Manuals for NorthEast Monitoring DR200/HE


Summary of Contents for NorthEast Monitoring DR200/HE
- Page 1 DR200/HE & DR300 Hook-Up Guide for Holter TO GET TO MAIN MENU: • Remove and reinsert battery. 5-Electrode Placement • If 15- second countdown begins, interrupt by pressing ENTER, ▼, ▲, and EVENT buttons, in that order. Electrodes 7-Electrode Placement Ch.
- Page 2 TO START RECORDER FOR HOLTER Step 1 - Insert formatted SD Card and battery into recorder. Screen will display recorder model and then “NorthEast Monitoring” information. Erase memory if prompted to do so. Press ENTER to continue to main menu.
- Page 3 DR200/HE & DR300 Hook-Up Guide for Event 2-Electrode Placement Channel 1 RED - 5th rib, left anterior axillary line WHITE - Right mid-clavicular TO START RECORDER FOR EVENT Step 1 - Remove old battery and insert new alkaline or NIMH battery. Replace battery cover.
- Page 4 DR200/HE & DR300 Quick-Start Guide for Event TO GET TO MAIN MENU: DR300 WIRELESS OPTION: • Remove and reinsert battery. See the DR300 Recorder and Socket manuals for more • If 15- second countdown begins, interrupt by pressing ENTER, information on setting up and using the wireless feature.
Need help?
Do you have a question about the DR200/HE and is the answer not in the manual?
Questions and answers