Table of Contents
Advertisement
Quick Links
Advertisement
Table of Contents

Related Manuals for Verizon CDM8950


Summary of Contents for Verizon CDM8950
- Page 1 User Guide CDM8950...
-
Page 2: Table Of Contents
CHAPTER 1. BEFORE USING CDM8950 MAKING AN INTERNATIONAL CALL ..........21 CHAPTER 4. MENU FUNCTION CALL SETTINGS ................68 3-WAY CALLING ................. 21 MEMORY ................... 70 BEFORE USING ................6 CONTACTS ..................38 CALL WAITING FUNCTION ............21 PHONE INFO ................72 INSIDE THE PACKAGE .............. -
Page 3: Before Using
CHAPTER 7. SAFETY AND WARRANTY GAMES ..................100 CHAPTER 1 SAFETY ..................118 MOBILE WEB ................101 BEFORE USING CDM8950 SAFETY INFORMATION FOR WIRELESS HANDHELD PHONES ..118 BROWSE & DOWNLOAD .............102 SAFETY INFORMATION FOR FCC RF EXPOSURE ......121 EXTRAS ..................103 SAR INFORMATION ..............121 MEDIA CENTER INFO ..............103... -
Page 4: Handset Descriptions
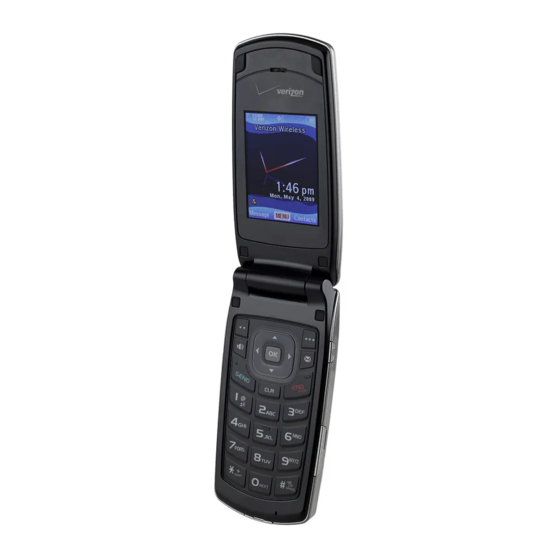
3. Directional Key 7. Voicemail Key 25. External Speaker Battery Cover QRG (Quick Reference Guide) Wall Charger 4. Left Soft Key 8. International Dial Key 26. Charging / Data Jack Chapter 1 − Before Using CDM8950 Before Using CDM8950 − Chapter 1... -
Page 5: Keys Descriptions
Press and hold to automatically dial your function listed above the key. Music player. voicemail system. 24. microSD Card Slot: You can insert a microSD memory card here to increase memory capacity. Chapter 1 − Before Using CDM8950 Before Using CDM8950 − Chapter 1... -
Page 6: Display Indicators
Indicates Voice Privacy mode is active. Missed Calls: Indicates you have missed calls. Bluetooth Active: Indicates Bluetooth Active mode. Data Call: Data Session in progress. Message: Indicates you have new message. Chapter 1 − Before Using CDM8950 Before Using CDM8950 − Chapter 1... -
Page 7: Install Battery
Picture Message Draft Read WAP Push the “click”. Multiple Message Priority Delivered Chapter 1 − Before Using CDM8950 Before Using CDM8950 − Chapter 1... -
Page 8: Charging Your Battery
Side of the phone, and connect the charger adapter. Plug the other BASIC OPERATION • Only use the battery and charger approved for use with the CDM8950. end into a standard outlet. Only use the battery for its original purpose. -
Page 9: Menu Summary
MENU SUMMARY TURNING THE PHONE ON/OFF ACCESSING THE MENU Main Menu DEPTH DEPTH Your phone can be customized via the menu. Each function can be accessed Main Menu DEPTH DEPTH TURNING THE PHONE ON MESSAGING 1. New Message 1. TXT Message by scrolling with the Directional Key or by pressing the number that 2. -
Page 10: Making A Call
6. Menu Settings 2. SW/HW Version 7. Dial Fonts 3. Icon Glossary may also answer incoming calls by opening the phone or by pressing SETTINGS & 1. My Verizon 8. Menu Font Size 4. Software Update any key.) TOOLS 2. Tools 1. -
Page 11: Missed Call Notification
MISSED CALL NOTIFICATION WAIT/PAUSE FEATURE ANSWERING A CALL 3WAY CALLING When an incoming call is not answered, the Missed Call logo appears on the Pauses are used for automated systems (i.e., voice mail or calling cards). 1. If your phone is set to With 3-Way Calling, you can talk to two people at the same time. -
Page 12: Calling A Number From Contacts
1. To answer another call while on the phone, press the SEND ADJUSTING VOLUME CALLER ID FUNCTION MUSIC PLAYER . This places the first call on hold. To switch back to the first To adjust the master volume: Caller ID displays the number of the person calling when your phone Music Player is for playing MP3 files saved on the microSD card. -
Page 13: Making An Emergency Call
RECENT CALLS MAKING AN EMERGENCY CALL In this case, making a call can automatically end the Emergency Callback Mode. To view your Recent Calls list during a call: The 911 feature automatically places the phone in the Emergency Call Mode The 911 call does not appear in the recent call list. -
Page 14: Memory Function
CHAPTER 3 MEMORY FUNCTION This chapter addresses memory functions including: Storing a phone number Entering letters, numbers & symbols One, Two, Three-touch dialing Chapter 2 − Basic Operation... - Page 15 4. To change the data as necessary, then press the OK Key 2. Press the Left Soft Key STORING A PHONE NUMBER [SAVE] Press the Right Soft Key [Options] to access the following options: [Edit]. to save. 3. Press the Directional Key •...
- Page 16 6. If a phone number is already assigned to the item you selected, 5. Press the Directional Key ADDING OR CHANGING AN EMAIL ADDRESS The Default Number cannot be deleted. The entire Contact entry can be deleted or up or down to select a Speed Dial another number can be assigned as the Default Number allowing you to delete the press the Directional Key up or down to select ”Yes”...
- Page 17 EDITING STORED PHONE NUMBERS DELETING DELETING A SPEED DIAL ENTERING LETTERS, NUMBERS & SYMBOLS 1. From standby mode, press the Right Soft Key 1. From standby mode, press the OK Key [Contacts]. Your [MENU]. The input mode (Alpha editor) will automatically be activated when DELETING A PHONE NUMBER FROM A CONTACT Contacts display alphabetically.
- Page 18 97, 98, and 99 : Speed Dial entries 97(#BAL), 98(#MIN), and 99(#PMT) the entered characters. A word can be entered more quickly by pressing a key once Press SYMBOL MODE already assigned to Verizon Wireless Account Information. per character. Press Allows you to enter symbols. • #BAL is a VZW Customer Service VRU number (Free call) that provides customers information 1.
-
Page 19: Chapter 4. Menu Function
Bluetooth menu Calendar In case of emergency Sounds settings Alarm clock My name card Display settings Stop watch Recent calls Phone settings World clock Missed Call settings Notepad Received Memory My Verizon Dialed Phone info Chapter 3 − Memory Function... -
Page 20: Groups
3. Select “Add”. 4. To call the selected number, press the Right Soft Key Entries can be retrieved by name or group. CONTACT LIST [Options] and then select ”9. Call” or press the SEND Key 4. Your contact entries will be displayed in alphabetical order. Select the You can review all the entries stored in your Contact List or quickly find an NEW CONTACT entry by entering a name or its character string. - Page 21 6. Under “Subject:”, input a subject and then press the Directional Key 2. Press the Directional Key 9. Press the Right Soft Key TO SEND A PICTURE MESSAGE TO A GROUP up or down to select the existing group [Options] to select “Preview”, “Save As down.
-
Page 22: Speed Dials
7. Under “Subject:”, input a subject and then press the Directional Key 6. Press the OK Key [OK]. A confirmation message appears. 1. From standby mode, press the OK Key 411 (Directory Assistance) are already assigned to Verizon Wireless Account [MENU], and press down. Information. -
Page 23: My Name Card
4. The Contact name will be displayed in place of 3. Select 5. The information you enter now appears in place of 4. Press the OK Key “Contact 1”, “2. Unassign”. “Note 1”, [OK] to select “Yes”. A confirmation window “Contact 2”, or “Contact... -
Page 24: Recent Calls
4. Select “1. TXT Message”, “2. Picture Message”, “3. Video Message” or RECENT CALLS MISSED “4. Voice Message”. The Recent Calls menu is a list of the last phone numbers or Contact entries Displays information about the 90 most recently missed calls. Place a call to a 5. -
Page 25: Received
RECEIVED DIALED BLOCKED Displays information about the 90 most recently received calls. Place a call to a Displays information about the 90 most recently dialed numbers. Place a call Displays information about the most recently received, dialed and missed calls. This menu appears only when “Incoming Call Restriction”... -
Page 26: View Timers
• Press the Left Soft Key [Reset] to reset highlighted timer. technology in some locations. Check with your local authorities or Verizon • Press the Right Soft Key [Reset All] to reset all timers. 2. From standby mode, press the OK Key [MENU], the Directional Wireless. -
Page 27: Settings
4. The handset will prompt you with the following message on the LCD 8. Once connected, you will see the device listed in the Bluetooth Menu 1. From standby mode, press the OK Key • Remove Device: Removes a device from the pairing list. [MENU], the Directional •... -
Page 28: Sounds Settings
8. Select the PIC/VIDEO/VOICE MESSAGE ringtone with using the AUTO PAIR HANDSFREE CALL RINGTONE To skip select the CALL SOUNDS ringer type, press the Left Soft Key [Skip]. Directional Key up or down, then press the OK Key [SET]. To set Auto Pair Handsfree On/Off: 1. -
Page 29: Display Settings
The ERI Banner text changes to tell 3. Press the Directional Key up or down to select “On/Off”, then a customer if they are using the: “Verizon Wireless Network”, “Extended Network” To skip select the keypad backlight time, press the Left Soft Key [Skip]. - Page 30 5. Select the Main Screen Wallpaper image with using the Directional 10. Select the format of the Main Screen Clock with using the ERI BANNER WALLPAPER up, down, left or right, then press the OK Key [SET]. Directional Key up or down, then press the OK Key [SET].
-
Page 31: Phone Settings
FRONT SCREEN MENU SETTINGS DIAL FONTS CLOCK FORMAT To choose the kind of Front LCD background to be displayed on the phone: To change Main Menu layout and type: To set the font size: To choose the kind of clock to be displayed on the Main LCD or Front LCD screen: 1. - Page 32 Display Settings “Shortcut 2”, “Shortcut 3”, or “Shortcut 4”, and then press the Right • My Verizon • My Videos • New Contact • New TXT Message Your phone offers you the option of assigning a shortcut key (Directional Key left, •...
- Page 33 2. Press the Directional Key 2. Press the Directional Key up or down to select “UP Directional • Tones Only Mode: Will only prompt the user with a tone (in place of the Readout EDIT CODES up or down to select one of the prompt).
- Page 34 4. After reading the warning message that appears, press the RESTRICTIONS PHONE LOCK SETTING LOCK PHONE NOW Directional Key up or down to select “Yes”, and then press the Use the following procedure to configure Location Setting, Calls and Messages This setting specifies whether the phone should be locked whenever it is turned on.
-
Page 35: Call Settings
3. Select NAM SELECTION “NAM 1 - VERIZON” or “NAM 2 - VERIZON” , then press the AUTO RETRY ONE TOUCH DIAL OK Key [OK]. Enables Auto NAM (Number Assignment Modules) or manually selects a NAM. To set the length of time the phone waits before automatically redialing a number... -
Page 36: Memory
3. Press the Directional Key 2. Press the Directional Key 3. Press the Directional Key DTMF TONES up or down to select one of the up or down to select one of the up or down to select “Yes”, and then following settings, and then press the OK Key [OK]. -
Page 37: Phone Info
DELETING AND MOVING FILES MOVING ALL FILES TO PHONE MEMORY SW/HW VERSION SOFTWARE UPDATE To delete files stored in Card Memory, and to move files from Card Memory to Phone To move all files from Card Memory to Phone Memory: 1. -
Page 38: Set Up Wizard
• Contact <Name> • Play <Playlist> • My Verizon • Help 6. Select the format of the Main Screen Clock with using the Directional This feature allows you to make calls or use the phone’ s functions by simply 1. From standby mode, press the OK Key 4. -
Page 39: Voice Commands
• Battery • Volume Examples: - Send Picture to Dee Harper’ s Mobile, 2. Press the Right Soft Key MY VERIZON [Settings], “1. Digit Dial Readout”. - Send Video to Tom Jones Mobile, CONTACTS <NAME> 3. Select “On/Off” by pressing the Directional Key 1. -
Page 40: Tools
3. Select “Automatic”, 5. Repeat steps 1-4. When you are finished with a full session, you “Always Confirm” or “Never Confirm” by ADAPTATION CALL ALERT pressing the Directional Key up or down, then press the OK will reach a screen that reads “Adaptation Complete”. Voice Command is speaker independent, which means that no training or adaptation Provides audible readout of the phone number and/or name (if in your contact list) of is required. -
Page 41: Calculator
CALCULATOR CALENDAR END TIME ALERT Use the keypad to set a end time and press the Left Soft Key Press the Left Soft Key [Set] to select a new ringtone. Press the The Calculator allows you to perform simple mathematical calculations. The Calendar tool provides easy and convenient access to your schedule. -
Page 42: Alarm Clock
3. Select 2. Press the Directional Key 3. Press the Right Soft Key TIME “Turn On/Turn Off” then press the OK Key [OK]. up, down, left or right to choose the [Options], “6. Erase Passed”, then press event then press the OK Key [VIEW]. -
Page 43: Stop Watch
4. To measure up to eight time periods, repeat the above steps. STOP WATCH DST DAYLIGHT SAVING TIME SETTING NOTEPAD 5. To stop the stop watch, press the OK Key 1. Press the Right Soft Key Simultaneously times up to eight different events. To operate the stop watch: Your phone includes an internal notepad that can be used to compose and [STOP]. -
Page 44: My Verizon
ERASE SAVED MEMO MY VERIZON To erase a saved memo: To access your Verizon account information: 1. From standby mode, press the OK Key 1. From standby mode, press the OK Key [MENU], the Directional [MENU], the Directional right twice for SETTINGS &... -
Page 45: Chapter 5. Media Center
CHAPTER 5 MEDIA CENTER Your phone provides a unique feature -Media Center- that enables you to download ringtones, wallpapers, games and more from your network to your phone. Please contact your service provider for the availability of these services. Using the microSD card Music &... -
Page 46: Music & Tones
4. The USING THE microSD CARD It will pop-out to allow you to remove the card. • Music acquired from another online store as part of a subscription service or CONFIRM PURCHASE screen will display the price and items you purchased in another format other than WMA/MP3 will not be recognized by V CAST selected to purchase. - Page 47 2. If you have not downloaded any ringtones or ringtone applications TO ERASE DOWNLOADED TUNES OR TONES: TO ASSIGN DOWNLOADED TUNES OR TONES: MY MUSIC previously, press “1. Get New Applications”. The Media Center browser To select a desired ringtone, or download a new ringtone: 1.
- Page 48 5. Press 5. Press the Directional Key Move: To move the selected sound to the other save location. “3. Rename”. SYNC MUSIC left to start the song over again. Press This option only appears if a memory card is inserted. the Directional Key right to skip to the next song if there are 6.
-
Page 49: Picture & Video
5. Under the 1. From standby mode, press the OK Key 2. Press the Directional Key “Music & Tones” menu, open “My Music” to view and GET NEW PICTURES [MENU], the Directional up or down to select the V CAST play your music. - Page 50 3. Select one of the following options: 3. Press the OK Key TO ERASE THE CURRENT PICTURE: [OK] to select “Yes”. A confirmation message To view captured images, press the Left Soft Key [My Pics]. appears. 1. From standby mode, press the OK Key [MENU], the Directional •...
-
Page 51: Games
4. Sub Display: To recording a video of yourself by checking the view on the front LCD. GAMES MOBILE WEB GO TO URL To view recorded videos, press the Left Soft Key [Videos]. Takes user to the VZW Search > Go to Site page. Now you can access news, sports, weather, and Email from your phone. -
Page 52: Browse & Download
• Key Press Time Out: When the “Key Press Timeout” item is selected from the Settings BROWSE & DOWNLOAD EXTRAS menu, the browser allows the user to set the key press timeout as fast, medium or slow. Medium is 1.5 seconds, slow 2 seconds and DOWNLOADING NEW APPLICATIONS DOWNLOADING NEW APPLICATIONS fast is 1 second. -
Page 53: Chapter 6. Messaging Menu
CHAPTER 6 MESSAGING MENU This chapter addresses Voicemail, TXT, Picture, Video, Voice Messaging functions including: When a new message arrives New message Inbox Sent Drafts Voicemail Mobile IM Email Chat Erase all Settings Chapter 5 − Media Center... -
Page 54: Messaging
4. Under “Text:”, input a new TXT message. When completed, press the 7. Under “Subject:”, input a subject and then press the Directional Key WHEN A NEW MESSAGE ARRIVES PICTURE MESSAGE OK Key [SEND]. down. 1. From standby mode, press the Left Soft Key 1. - Page 55 7. Under 3. To record a new Voice Memo, press the OK Key 8. Under VIDEO MESSAGE “Name Card:”, you can insert your name card. Press the Left [OK] to start “Name Card”, you can insert your name card. Press the Left Soft Soft Key [Add] select “1.
-
Page 56: Inbox
3. With the message open, press the Right Soft Key INBOX • Save Sound (MMS Sound): Select to save a sound to the “My Sounds” folder MESSAGE ICON REFERENCE [Options] to • Save Objects (EMS Save Objects): Select to save a graphic, sound, name card. access the following: The Inbox manages received TXT, Picture, Video. -
Page 57: Mobile Im
3. Choose from “AIM”, TO ACCESS YOUR VOICE MAILBOX “WL Messenger” and “Yahoo!®”. • Mobile Email: To connect Brew Smartlink. ERASE ALL • Mobile Web Mail: To connect WAP Browser. Highlight the messenger service and press the OK 1. To dial voice mail directly, press * Key To erase all messages stored in your Inbox, Drafts or Sent folders: , 8 Key , 6 Key... -
Page 58: Settings
SETTINGS AUTO ERASE PICVIDEO AUTO RECEIVE VOICEMAIL# Automatically erases inbox messages when new messages arrive. 1. Select “On” or “Off” by pressing the Directional Key 1. Input a new voicemail number or edit voicemail number then press To configure received message settings: up or down 1. -
Page 59: Chapter 7. Safety And Warranty
CHAPTER 7 SAFETY AND WARRANTY This chapter addresses the safety guidelines and precautions to follow when operating your phone. Before operating your phone, please be aware of all the safety details. This chapter contains the terms and conditions of services and the warranty for your phone. - Page 60 SAFETY INFORMATION FOR WIRELESS HANDHELD 1* : American National Standards Institute. If you must use the phone while driving, please use one-touch, speed dialing, and • ALWAYS keep the phone more than six inches from your pacemaker when the 2* : National Council on Radiation protection and measurements. auto answer modes.
-
Page 61: Safety Information For Fcc Rf Exposure
your vehicle. You should also consult the manufacturer of any equipment that has obey all signs and instructions. Sparks in such areas could cause an explosion or fire return unit to an authorized UTStarcom cellular service center. If unit is disas- avoided. -
Page 62: Fcc Hearing-Aid Compatibility (Hac) Regulations For
network. In general, the closer you are to a wireless base station antenna, the lower * In the United States and Canada, the SAR limit for mobile phones used by the ence, you may not be able to use a rated phone successfully. Trying out the phone For information about hearing aids and digital wireless phone the power output. -
Page 63: Fda Consumer Update
FDA CONSUMER UPDATE the user. In such a case, FDA could require the manufacturers of wireless phones to Federal Communications Commission (FCC). All phones that are sold in the United suffered from flaws in their research methods. Animal experiments investigating notify users of the health hazard and to repair, replace or recall the phones so that States must comply with FCC safety guidelines that limit RF exposure. - Page 64 using wireless phones would provide some of the data that are needed. Lifetime (CRADA) to do research on wireless phone safety. FDA provides the scientific 8. What has FDA done to measure the radiofrequency energy coming from • If you must conduct extended conversations by wireless phone every day, you animal exposure studies could be completed in a few years.
-
Page 65: Avoid Potential Hearing Loss
11. What about wireless phone interference with medical equipment? • Federal Communications Commission (FCC) RF Safety Program • Set the volume in a quiet environment and select the lowest volume at which you YOU CAN OBTAIN ADDITIONAL INFORMATION ON THIS SUBJECT FROM (http://www.fcc.gov/oet/rfsafety) can hear adequately. -
Page 66: Fcc Compliance Information
Connect the equipment into an outlet of a circuit different from that to which the Communications for repair or service. (d) Damage resulting from connection to, or use of any accessory or other product ©2008 Verizon Wireless. All Rights Reserved. receiver is connected. Chapter 7 − Safety and Warranty... - Page 67 To obtain repairs or replacement within the terms of this Warranty, the product No person or representative is authorized to assume for the Company any liability 3-WAY CALLING CONTACT LIST GROUPS KEYS DESCRIPTIONS should be delivered with proof of Warranty coverage (e.g. dated bill of sale), other than expressed herein in connection with the sale of this product.
- Page 68 MOBILE IM GO TO <SHORTCUT> PHONE INFO CALL SOUNDS 55 NEW MESSAGE 106 HELP DEVICE CONNECT PICTURE MESSAGE ICON GLOSSARY MY VERIZON MY NUMBER 72 EASY SET UP TXT MESSAGE PLAY <PLAYLIST> KEYPAD VOLUME VIDEO MESSAGE SOFTWARE UPDATE SEND <MSG TYPE>...
Need help?
Do you have a question about the CDM8950 and is the answer not in the manual?
Questions and answers