
Related Manuals for Iluv Morning Call 5 Qi


Summary of Contents for Iluv Morning Call 5 Qi
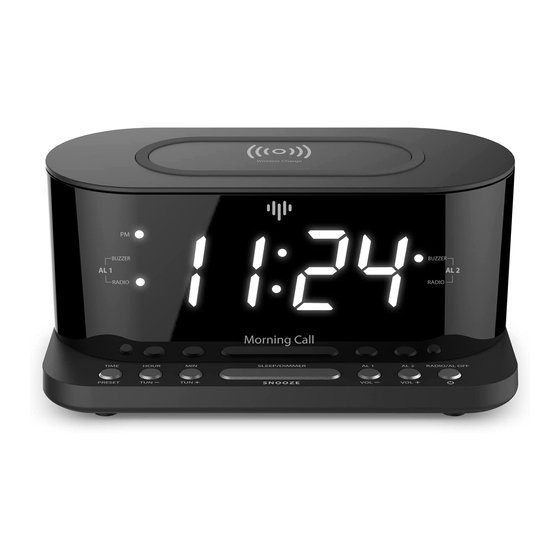
- Page 1 Jumbo White LED Display Dual Alarm Clock with Qi Certi ed Wireless Charging Station, FM Radio, and USB Charging Port Morning Call® 5 Qi User Manual...
-
Page 2: Do Not Open
WARNING AND SAFETY INSTURCTIONS CAUTION RISK OF ELECTRIC SHOCK DO NOT OPEN The lightning ash with arrowhead CAUTION TO REDUCE THE RISK OF The exclamation point within an symbol, within an equilateral triangle, is ELECTRIC SHOCK, DO NOT equilateral triangle is intended to intended to alert the user to the REMOVE COVER (OR BACK). -
Page 3: Important Safety Instructions
8. Unplug Morning Call 5 Qi during lightning storms or when unused for long periods of time. 9. When main plug is connected, Morning Call 5 Qi is readily operatable. In order to disconnect Morning Call 5 Qi completely, the main plug should be disconnected from the main socket outlet. -
Page 4: Overview Of The Product
OVERVIEW OF THE PRODUCT iLuv Alarm Repeat Index One day Everyday Every Weekday Every Weekend Monday Tuesday BUZZER BUZZER Wednesday Thursday AL 1 AL 2 Friday Saturday RADIO RADIO Sunday Morning Call TIME HOUR SLEEP/DIMMER AL 1 AL 2 RADIO/AL OFF... - Page 5 MORCAL5Q FCC ID : KHKQI1110 DC 5V/2.1A USB CHARGING S rial No.:1FE0000 17 18 SPEAKER BATTERY COMPARTMENT ANTENNA DC POWER INPUT JACK USB CHARGING PORT...
-
Page 6: Connecting To Power
POWER ON CONNECTING TO POWER Connect the plug of the power adapter to a wall outlet. Morning Call 5 Qi display will be on, DC 5V/2.1A USB CHARGING indicating that it is powered on and in standby mode. AC Adaper... -
Page 7: Backup System
BACKUP SYSTEM MORCAL5Q FCC ID : KHKQI1110 Morning Call 5 Qi is equipped with a backup system. It requires 2 AAA batteries. Insert the batteries into the battery compartment and make sure the positive and negative (+ or -) sides of the batteries are in contact with the corresponding erial No.:1FE000001... - Page 8 3 To open the battery compartment, press the battery cover from the side and pull it. 4 When replacing the battery, do not disconnect the power adapter. Other- wise, all clock and alarm settings will be lost.
-
Page 9: Setting Time
SETTING TIME 1 In standby mode, press and hold the [TIME/PRESET] button to enter the clock setting mode. Alarm Repeat Index One day Everyday Every Weekday 2 Press the [TIME/PRESET] button Every Weekend Monday Tuesday Wednesday repeatedly to cycle through the Thursday Friday Wireless Charge... - Page 10 Thursday Friday Wireless Charge Wireless Charge Saturday Sunday 4 Setting month/date: Press the [HOUR/TUN-] button to set the month and [MIN/TUN+] button to set the date. Press and hold the [HOUR/TUN-] or [MIN/TUN+] button to move fast. Press [TIME/PRESET] button to con rm. i.e.
-
Page 11: Setting The Alarm
SETTING THE ALARM Wireless Charge SETTING ALARMS The Morning Call 5 Qi lets you have 2 alarm settings. 1 In standby mode, press and HOLD the [AL 1/Vol-] button to TIME HOUR SLEEP/DIMMER AL 1 AL 2 enter the alarm time setting mode. - Page 12 Setting alarm time: Press [HOUR/TUN-] to set the hour and [MIN/TUN+] button to set the minute. Press [AL 1/Vol-] button to con rm. SLEEP/DIMMER SLEEP/DIMMER TIME HOUR TIME HOUR AL 1 TIME AL 2 HOUR RADIO/AL OFF AL 1 AL 2 SNOOZE SNOOZE PRESET...
- Page 13 Press the [Al 1/VOL-]. Display will display volume level. Press [HOUR/TUN-] or [MIN/TUN+] to set wake up Radio volume (From V5 to V15). If you selected Buzzer, the wake up volume change is not supported. 6 Setting alarm frequency: Press the iLuv iLuv [HOUR/TUN-] or [MIN/TUN+] button BUZZER...
- Page 14 7 *One day only set up: Press the [AL 1/Vol-] button when this SLEEP/DIMMER TIME HOUR AL 1 AL 2 RADIO/AL OFF TIME HOUR Wireless Charge Wireless Charge option is selected. Then press the [HOUR/TUN-] or [MIN/TUN+] to select a speci c day for the alarm activation.
-
Page 15: Turning The Alarms On Or Off
8 Once the alarm setting is done, the alarm will be on with the corresponding alarm indicator iLuv (buzzer or radio) on. BUZZER BUZZER AL 1 AL 2 9 To set Alarm 2 follow step 1-7, replacing RADIO RADIO [AL1/Vol-] with [AL2/Vol+]. - Page 16 SNOOZE iLuv 1 When the alarm goes o , the corresponding BUZZER BUZZER AL 1 AL 2 Alarm 1 or Alarm 2 indicator (buzzer or RADIO RADIO radio) will ash on the display. Morning Call 2 Press the [SNOOZE/SLEEP/DIMMER] Alarm Repeat Index...
- Page 17 6-7 = Every Weekend Monday Tuesday Wednesday Thursday iLuv Friday Saturday 3 The corresponding Alarm 1 or Alarm 2 Sunday BUZZER BUZZER indicator (buzzer or radio) will ash on AL 1 AL 2 RADIO RADIO the display during the snooze period.
- Page 18 PRESET RADIO/AL OFF TO DISABLE THE ALARM iLuv 1 Press [AL1/Vol-] button once to disable Alarm 1 while the alarm is not going o . Press [AL2/Vol+] button once to disable Alarm 2 while the alarm is not going o .
-
Page 19: Sleep Timer Function
RADIO/AL OFF select the number of minutes you want your music PRESET SNO O Z E to play: 10, 20, 30, 40, 50, 60, 70, 80, 90, or 00. iLuv BUZZER BUZZER AL 1 AL 2 3 The display will change back to the current time if... - Page 20 AL 2 RADIO/AL OFF 5 Press the [SNOOZE/SLEEP/DIMMER] button to PRESET SNOOZE check the remaining time before the radio turns iLuv 6 To stop sleep mode before the time is out, BUZZER BUZZER AL 1 AL 2 press the [SNOOZE/SLEEP/DIMMER] button to...
-
Page 21: Play Fm Radio
7 = Sunday FM RADIO PLAY FM RADIO 1 Unroll and extend the antenna to improve FM signal reception. SLEEP/DIMMER TIME HOUR AL 1 AL 2 RADIO/AL OFF 2 Press the [POWER/RADIO/AL OFF] button to turn the radio on. 3 Press the [HOUR/TUN-] or [MIN/TUN+] button to adjust SNOOZE PRESET frequency. - Page 22 TIME HOUR 1 Tune to a station. PRESET 2 Press and hold [TIME/PRESET] button until “P01” (or the next available preset) shows on the display. iLuv 3 Press the [HOUR/TUN-] or [MIN/TUN+] button to BUZZER BUZZER AL 1 AL 2...
- Page 23 4 Press the [TIME/PRESET] button to con rm. The preset station has been set. TIME HOUR 5 Press the [TIME/PRESET] button repeatedly while listening to the radio to select a preset station. Alternatively, press the [TIME/PRESET] button once and then press the PRESET [HOUR/TUN-] or [MIN/TUN+] button to select a preset station.
-
Page 24: Display Information
DISPLAY INFORMATION 1 In standby mode, press [TIME/PRESET] button repeatedly to see the information of day*, year, date and time TIME HOUR d1 = Monday d5 = Friday d2 = Tuesday d6 = Saturday PRESET d3 = Wednesday d7 = Sunday d4 = Thursday 2 In radio mode, press the [HOUR/TUN-] or [MIN/TUN+] button once to brie y change the display from the clock time to the current radio frequency. -
Page 25: Display Dimmer
DISPLAY DIMMER 1 In standby mode, press the Alarm Repeat Index One day Everyday Every Weekday Every Weekend [SNOOZE/SLEEP/DIMMER] button to change Monday Tuesday Wednesday Thursday Friday Wireless Charge Saturday the brightness level of the display: low, high Sunday or o . TIME HOUR SLEEP/DIMMER... - Page 26 USB charging port on the back of the DC 5V/2.1A USB CHARGING main unit 2 The Morning Call 5 Qi cannot access the contents in the connected device. 3 Compatibility (USB port): Most devices that charge via USB like smartphones, tablets, portable speakers, wireless head-...
- Page 27 CHAGING EXTERNAL DEVICE QI WIRELESS CHARING PAD 1 Place your Qi enabled smartphone on the center of the wireless charging pad Alarm Repeat Index One day Everyday Every Weekday Every Weekend Monday Tuesday Wednesday Thursday Friday Wireless Charge Saturday Sunday 2 Charges through most cases of Polycarbon- ate (PC) or Thermoplastic Polyurethane TIME...
- Page 28 INDICATOR IN THE RIGHT BOTTOM CORNER iLuv OF DISPLAY • Off: Standby BUZZER BUZZER AL 1 AL 2 • Solid Blue: Charging RADIO RADIO • Off: Fully charged • Blinking Red: Abnormal Morning Call - Check if your device supports Qi wireless charging - Place mobile device in center - Remove the case with magnet, metal, or thicker material than 0.12”...
-
Page 29: Specifications
AC power adaptor Output :DC 5V/2.1A. CUSTOMER SUPPORT Alarm Repeat Index One day If you have any question or need support, please contact us by visiting Everyday Every Weekday http://support.iLuv.com or call customer service department at 1-866-807-5946. Every Weekend Monday Tuesday Wednesday... - Page 30 COMPLIANCE WITH FCC REGULATION This device complies with Part 15 of the FCC Rules. Operation is subject to the following two conditions: AL 2 RADIO/AL OFF (1) this device may not cause harmful interference, and (2) this device must accept any interference received, including interference that may cause undesired operation. NOTE: This equipment has been tested and found to comply with the limits for a Class B digital device, pursuant to Part 15 of the FCC Rules.
- Page 31 AL 2 RADIO/AL OFF Alarm Repeat Index One day Everyday Every Weekday Every Weekend...
- Page 32 AL 2 RADIO/AL OFF...
Need help?
Do you have a question about the Morning Call 5 Qi and is the answer not in the manual?
Questions and answers