Honeywell CS10XE Series User Manual
Portable evaporative air cooler
Hide thumbs
Also See for CS10XE Series:
- Owner's manual (65 pages) ,
- User manual (11 pages) ,
- Owner's manual (24 pages)
Table of Contents
Advertisement
Available languages
Available languages
Quick Links
Portable Evaporative Air Cooler
EN
User Manual
Read and save these instructions before use
Refroidisseur d'air par évaporation portatif
FR
Mode d'emploi
Lire ces instructions avant l'utilisation et les conserver
Enfriador de Aire Evaporativo Portátil
ES
Manual de Instrucciones
Lea y guarde estas instrucciones antes de usar la unidad
Customer Support:
Assistance Au Client:
Servicio de atencion a clientes:
USA/ EE.UU: 1-800-474-2147
CANADA/ CANADÁ^ : 1-888-209-0999
^ Canada Customer Support service available for models sold in Canada only.
^ Le Service Client Canadien est disponible uniquement pour les modèles vendus sur le territoire Canadien.
^ Servicio de Atención A Clientes en Canadá disponible solo para modelos vendidos en Canadá.
www.jmatek.com
Email: usinfo@jmatek.com
Model / Modèle / Modelo:
CS10XE Series / Série / Serie
Advertisement
Table of Contents

Related Manuals for Honeywell CS10XE Series


Summary of Contents for Honeywell CS10XE Series
- Page 1 Enfriador de Aire Evaporativo Portátil Manual de Instrucciones Lea y guarde estas instrucciones antes de usar la unidad Model / Modèle / Modelo: CS10XE Series / Série / Serie Customer Support: Assistance Au Client: Servicio de atencion a clientes: USA/ EE.UU: 1-800-474-2147 CANADA/ CANADÁ^ : 1-888-209-0999...
-
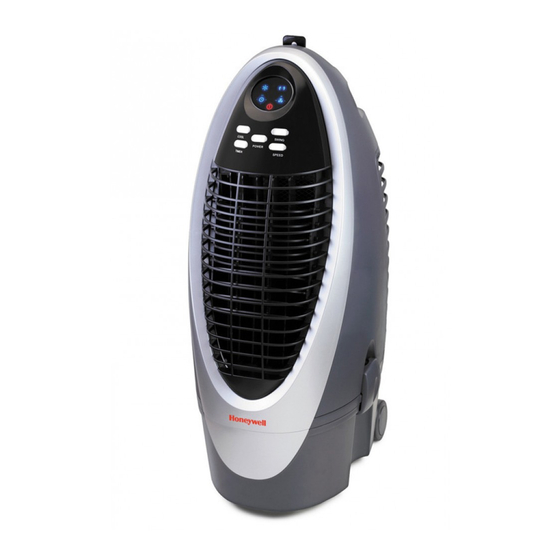
Page 2: Parts Description
PARTS DESCRIPTION Display Screen Rear Grill Control Panel Water Fill Tray Water Level Indicator Water Tank Detachable Water Tank Latch Castors Louvers Remote Control Front Grill Carbon Dust Filter Handle Power Cord & Plug Honeycomb Cooling Media Drain Plug WARNING -- READ AND SAVE THE AIR COOLER SAFETY & MAINTENANCE GUIDE AND USER MANUAL BEFORE USING THIS PRODUCT. -
Page 3: Use And Operation
USE & OPERATION CONTROL PANEL COOL SWING POWER TIMER SPEED Icons on Display Screen Power ON/OFF Fan speed: L - Low Cool M - Medium Swing H - High Timer Setting S - Sleep* *Applicable for models with Sleep feature only. -
Page 4: Function Buttons
USE & OPERATION (CONTINUED) FUNCTION BUTTONS POWER Press the POWER button to turn the unit on. The cooler will start automatically at medium speed. After a few seconds the speed will switch to low. To turn the unit off, press the button again. SPEED Press the SPEED button repeatedly to change the speed between H - M - L - S*. -
Page 5: Remote Control
USE & OPERATION (CONTINUED) REMOTE CONTROL POWER : ON / OFF SPEED Low / Medium / High / Sleep* COOL Evaporative Cooling ON / OFF SWING Controls the motion of the louvers TIMER Controls the Timer function for automatic off *Applicable for models with Sleep feature only. - Page 6 USE & OPERATION (CONTINUED) COOLER LOCATION Make sure to position the air cooler correctly before you set up and start using the product. Please refer to the COOLER LOCATION section of the separate Safety & Maintenance Guide. FILLING WITH WATER CAUTION: Unplug the unit from the electrical power outlet before emptying or refilling the water tank.
- Page 7 USE & OPERATION (CONTINUED) CLEANING & DRAINING THE WATER TANK Below are instructions on how to clean and maintain your air cooler. If the cooler will not be used for a long period of time, please refer to the STORAGE & MAINTENANCE GUIDELINES located in the separate Safety &...
- Page 8 USE & OPERATION (CONTINUED) CLEANING THE CARBON DUST FILTER* AND HONEYCOMB COOLING MEDIA • The appliance is supplied with a Carbon Dust Filter* and Honeycomb Cooling Media. • The Carbon Dust Filter* and Honeycomb Cooling Media are located inside the Rear Grill. See Figure 1 for instructions on how to remove them from the unit for cleaning and maintenance.
-
Page 9: Description Des Pièces
DESCRIPTION DES PIÈCES Écran d’affichage Grille arrière Panneau de commande Bac d’alimentation en eau Indicateur de niveau d’eau Réservoir d’eau Verrou du réservoir d’eau Roulettes démontable Grille d’aération Télécommande Poignée Filtre dépoussiéreur à charbon Poignée Cordon électrique et prise Système de refroidissement Bouchon de vidange en nid d’abeilles AVERTISSEMENT -- LIRE ET CONSERVER LE GUIDE DE SÉCURITÉ... -
Page 10: Utilisation Et Fonctionnement
UTILISATION ET FONCTIONNEMENT PANNEAU DE COMMANDE COOL SWING POWER TIMER SPEED Icônes sur l’écran d’affichage Interrupteur Vitesse du ventilateur: L - Faible Refroidissement M - Moyenne Oscillation H - Élevée Réglage de la S - Sommeil* minuterie *Applicable uniquement pour les modèles avec la fonction Sommeil. - Page 11 UTILISATION & FONCTIONNEMENT (SUITE) TOUCHES DE FONCTION POWER (INTERRUPTEUR) Appuyer sur l’POWER pour mettre l’appareil en marche. Le refroidisseur fonctionnera automatiquement à la vitesse moyenne. Après quelques secondes, la vitesse basculera à faible. Pour éteindre l’appareil, appuyer sur l’interrupteur de nouveau. SPEED (VITESSE) Appuyer sur le bouton de la SPEED à...
- Page 12 UTILISATION & FONCTIONNEMENT (SUITE) TELECOMMANDE EN MARCHE / ÉTEINDRE Interrupteur Vitesse Faible / Moyenne / Élevée / Sommeil* Refroidissement par évaporation Refroidissement En marche/ Éteindre Commande le mouvement des grilles Oscillation d’aération Commande la fonction de minuterie pour Minuterie un arrêt automatique *Applicable uniquement pour les modèles avec la fonction Sommeil.
- Page 13 UTILISATION & FONCTIONNEMENT (SUITE) POSITION DU REFROIDISSEUR D’AIR Veiller à placer le refroidisseur d’air comme il se doit avant de l’installer et de l’utiliser. Il convient de se reporter à la section POSITION DU REFROIDISSEUR D’AIR (IMPORTANT à LIRE) du Guide de sécurité et d’entretien.
- Page 14 UTILISATION & FONCTIONNEMENT (SUITE) NETTOYER ET VIDANGER LE RÉSERVOIR D’EAU Voici ci-dessous les consignes pour nettoyer et entretenir votre refroidisseur d’air. Si le refroidisseur n’est pas utilisé pendant une longue période, il convient de se reporter aux DIRECTIVES D’ENTREPOSAGE ET D’ENTRETIEN du Guide de sécurité et d’entretien. AVERTISSEMENT: Avant de nettoyer l’appareil, l’éteindre et le débrancher de la prise électrique.
- Page 15 UTILISATION & FONCTIONNEMENT (SUITE) NETTOYAGE DU FILTRE DÉPOUSSIÉREUR À CHARBON* ET DU SYSTÈME DE REFROIDISSEMENT EN NID D’ABEILLES • L’appareil est vendu avec un filtre dépoussiéreur à charbon* et un système de refroidissement en nid d’abeilles. • Le filtre dépoussiéreur à charbon* et le système de refroidissement en nid d’abeilles se trouvent derrière la grille arrière.
-
Page 16: Descripción De Partes
DESCRIPCIÓN DE PARTES Display Screen Rejilla Trasera Control Panel Bandeja de Agua Indicador de Nivel de Agua Tanque de Agua Cerrojo de Tanque de Agua Ruedas Desmontable Deflectores Control Remoto Rejilla Frontal Filtro de Carbón para Polvo Cable de Alimentación y Manija Enchufe Filtro de Enfriamiento... -
Page 17: Uso Y Funcionamiento
USO Y FUNCIONAMIENTO PANEL DE CONTROL COOL SWING POWER TIMER SPEED Iconos en la Pantalla Display Encendido Velocidad del Ventilador: (ENC / APAG) L - Baja Enfría M - Media Oscilación H - Alta Configuración S - Nocturno* del Temporizador *Aplica únicamente para los modelos con función Nocturno. - Page 18 USO Y FUNCIONAMIENTO (CONTINUACIÓN) BOTONES DE FUNCIONES POWER (ENC/APAG) Presione el botón POWER para encender la unidad. El enfriador comenzará automáticamente a funcionar a velocidad media. Después de unos segundos la velocidad cambiará a baja. Para apagar la unidad, presione el botón nuevamente. SPEED (VELOCIDAD) Presione el botón de SPEED.
-
Page 19: Control Remoto
USO Y FUNCIONAMIENTO (CONTINUACIÓN) CONTROL REMOTO Encendido Encendido / Apagado Velocidad Baja / Media / Alta / Nocturna* Enfría Enfriamiento Evaporativo Encendido / Apagado Oscilación Controla el movimiento de los deflectores Tiempo Control de función de apagado automático *Aplicable a modelos con Nocturna disponible solamente. NOTA: •... - Page 20 USO Y FUNCIONAMIENTO (CONTINUACIÓN) UBICACIÓN DEL ENFRIADOR Asegúrese de colocar el enfriador de aire correctamente antes de configurar y empezar a usar el producto. Por favor, consulte la sección de la Guía de seguridad y de mantenimiento separada. LLENADO CON AGUA PRECAUCIÓN: Desenchufe la unidad de la toma de corriente eléctrica antes de vaciar o llenar el depósito de agua.
- Page 21 USO Y FUNCIONAMIENTO (CONTINUACIÓN) LIMPIEZA Y VACIADO DEL TANQUE DE AGUA A continuación se presentan las instrucciones para limpiar y mantener el Enfriador de aire. Si el Enfriador no se usa por un largo período de tiempo, por favor, consulte las instrucciones de almacenamiento y mantenimiento situadas en la Guía de seguridad y de mantenimiento separada.
- Page 22 USO Y FUNCIONAMIENTO (CONTINUACIÓN) LIMPIEZA DEL FILTRO DE CARBÓN* Y FILTRO DE ENFRIAMIENTO HONEYCOMB • El aparato se suministra con un filtro de polvo de carbón* y un filtro de enfriamiento Honeycomb. • El filtro de carbón* y filtro de enfriamiento Honeycomb se encuentran dentro de la rejilla posterior.
- Page 23 Hecho en China © 2018 JMATEK Limited. Todos los derechos reservados. La marca Honeywell es usada bajo licencia de Honeywell International Inc. Honeywell International Inc. no representa ni garantiza este producto. Este producto es fabricado por Airtek Int'l Corp. Ltd.
Need help?
Do you have a question about the CS10XE Series and is the answer not in the manual?
Questions and answers