
Related Manuals for beautyrest Black Luxury Base


Summary of Contents for beautyrest Black Luxury Base
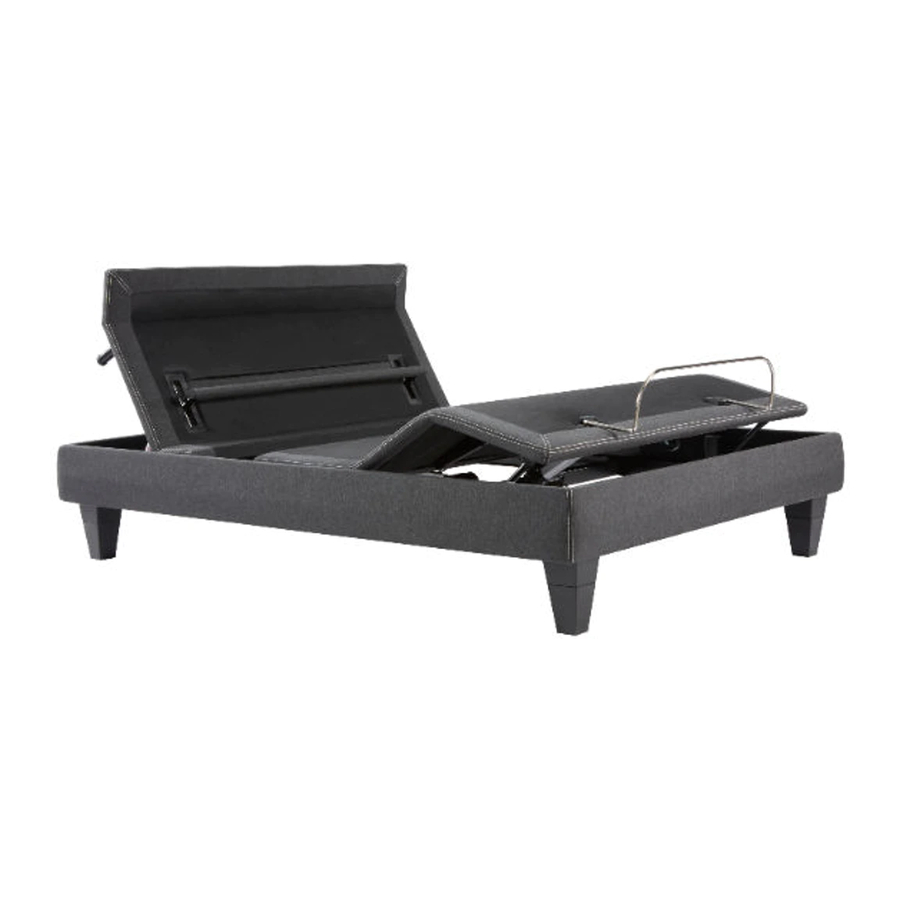
- Page 1 OWNER’S MANUAL Luxury Base Actual product appearance and functionality may vary from photographs, illustrations and descriptions included in this manual.
-
Page 2: Table Of Contents
table of contents Safety Precautions and Usage Statements ..............1-4 Parts List . -
Page 3: Safety Precautions And Usage Statements
safety precautions and usage statements Attention: Important Safety Disclaimers Read all instructions before using your adjustable base. Save these instructions. WARNING outlet. Unauthorized modification or failure to use a wall outlet or surge protector could void the electrical portion of your warranty. WARNING Always unplug the base from the electrical outlet before servicing any part of the base. - Page 4 safety precautions and usage statements position. In normal base operation, the wheels which allow the bed to maintain WARNING its distance from the wall, will make contact with the steel platform supports of the base creating a contact noise. When entering, exiting or shifting weight on For optimal safety and operation, plug bed base into a surge protector the base, this contact noise may be audible as the wheels make contact.
- Page 5 safety precautions and usage statements designed and manufactured to perform and function within designated quality grandkids. The extra movement will help the adjustable base respond to weight control parameters. Bases are subject to meticulous and rigorous inspections and temperature changes. Some of the materials in our adjustable bases such during the quality control process to ensure bases will operate within these as the woods, metals and plastics used in the platform, frame and components Adjustable...
- Page 6 safety precautions and usage statements restarting. • Tinker with or modify base. This will void the warranty. WEIGHT LIMITS: • Press down on the head or foot while actuated can damage frame and This product is not rated to support weights exceeding 850 pounds. This product motors.
-
Page 7: Parts List
parts list Before discarding the packing materials, ensure all the parts are accounted for. All electronics and components that need to be installed are located in boxes under the base or attached to the frame. (Remote varies based on model.) Wireless Remote Control and (3) AAA Batteries Legs Mattress Retainer Bar *... -
Page 8: Base Overview / Quick Reference Guide
base overview WiFi Underbed Head Motor USB Ports Lights Lumbar Motor Foot Massage Motors Head Massage Motors Control Box Foot Motor USB Ports Underbed Lights... - Page 9 quick reference guide Not to scale. For illustration purposes only. Read all instructions before beginning installation. Control Box HEAD MASSAGE FOOT MASSAGE Connection ports to all LUMBAR motors (installed under base) TILT FOOT HEAD Power Supply Input Cord Power Cord Underbed Lighting Y Cable USB Charger...
-
Page 10: Installation Guide
installation guide Always use two people when setting up the base. If installing a Divided King base, please refer to the Divided King Quick Setup Guide. STEP 1 STEP 4 Place the bed base box in a desired location with the top of the To sync two bases see detailed installation box facing up. -
Page 11: Installation Guide
installation guide STEP 7 STEP 10 Carefully flip the base over. Important: Two people are required to Install mattress retainer bars by inserting both ends of mattress move the bed base. Do not drag across the floor. Do not rest frame retainers bar into holes on the platform and laying the bars on its side, excessive pressure may damage the legs. -
Page 12: Remote Control
remote control Remote Control arrives paired to the adjustable base. Three (3) AAA batteries are required to operate the remote. MASSAGE FEATURE The HEAD button will turn on the head massage. Cycle through 6 massage intensities. The FOOT button will turn on the foot massage. - Page 13 remote control ADJUST ONE TOUCH BUTTONS Preset Position #1 Lumbar Support UP - Increases the level of lumbar support Preset Position #2 Lumbar Support DOWN - Decreases the level of lumbar support Anti-Snore Preset Position The HEADarrows lift and One touch ZERO-G preset lower the head section of the position.
-
Page 14: Remote Control - Preset Programming
remote control - preset programming The programmable feature allows you to save custom positions. Please read all the instructions below before setting your custom presets on the remote. STEP 1 Articulate the head and foot to your desired position. STEP 2 Press and hold one of the preset buttons [I and II] for 7 seconds. -
Page 15: Remote Control Pairing
remote control pairing Remote Pairing The original remote that comes in the box is already paired to the adjustable base. No further action is required. In the event that the remote is not paired with the base, follow the steps below. STEP 1 STEP 3 Unplug the Power Cord from your power outlet. -
Page 16: Syncing Two Bases
syncing two bases (optional) A Sync Cord is included with the base. Not available on Queen, Full or Full-Long size bases. The Sync Cord connects two control boxes to a single remote for the synchronization of two bases. This process is most commonly used for syncing two connected TXL bases. STEP 1 The system is now linked. -
Page 17: Power Down Box
Emergency Battery Backup For emergency use only, in case of a power outage. Batteries are not to be used for normal operation of the bed. STEP 1 STEP 3 Disconnect the Power Supply from the input power cord. Connect the end of the Battery Backup Strap to the input power cord that is attached to the control box. -
Page 18: Connecting Straps
connecting strap (optional) Connecting straps are secured to the base frame upon delivery. Legs are required for the installation of the connecting straps. STEP 1 STEP 2 With the bases in their desired location, slightly loosen both legs Slide side (a) of the connecting strap onto leg bolt. Swing the to allow the strap to fit on the leg bolt, between the leg washer strap and connect side (b) to the leg bolt. -
Page 19: Headboard Brackets
headboard bracket installation guide (optional) Headboard Brackets are optional accessories and are not included. A 9/16” (14 mm) & 1/2” (13 mm) socket or wrench and legs are necessary to complete installation. STEP 1 STEP 2 Attach the plastic spacer and T-Bracket. a.) Align the hole in the bracket to the brass sleeve into which the leg threads. -
Page 20: Troubleshooting
troubleshooting • Check under the bed base to verify that the wired connections are secure and that there are no cords or bedding obstructing the movement of the base. • Check to ensure the green LED light is illuminated on the control box. If there is no light, verify that the input and power cords are properly connected. -
Page 21: Español
español Pg. 1 -4 - Sobre las precauciones y el uso: Atención: Restricciones importantes sobre de asfixia para los niños pequeños y las mascotas. Para evitar lesiones, no se aconseja que la seguridad Lea todas las instrucciones antes de usar su base ajustable. Guarde estas los niños y los animales domésticos pequeños jueguen encima o debajo de la cama. - Page 22 español normal. cumplido con los estándares de control de calidad del fabricante. MATERIALES EL OLOR DEL" NUEVO PRODUCTO ": Las bases ajustables Ergomotion están hechas de diversos materiales como maderas, Algunas personas notan un ligero olor de su nueva base ajustable, puede provenir del metales, plásticos y telas.
- Page 23 español descanse 30 minutos después de que el masaje se haya apagado automáticamente antes Cumplimiento con la FCC: Este dispositivo cumple con la Parte 15 de las Regulaciones de de reiniciar. la Comisión Federal de Comunicaciones (FCC, en inglés). Su funcionamiento está sujeto a las dos condiciones siguientes: 1) Este dispositivo no puede causar ninguna interferencia LÍMITES DE PESO: perjudicial y 2) Este dispositivo deberá...
- Page 24 español Head Massage = Motor de masaje de la cabecera PASO 6: Desenrolle el cable de alimentación y conéctelo a la fuente de alimentación. Foot Massage = Motor de masaje de los pies Coloque la fuente de alimentación en el suelo y extiéndala desde la base. Asegúrese de que USB Ports = Puertos USB la fuente de alimentación y todos los cables conectados estén dirigidos hacia el protector de sobretensión deseado.
- Page 25 español una posición PLANO. Queen, Full, Full-Largo, o King Dividido. El cable de sincronización conecta las dos cajas de Posición preestablecida # 1 control a un solo control remoto para la sincronización de dos bases. Posición preestablecida # 2 PASO 1: Desconecte las bases de los tomacorrientes. PASO 2: Desconecte el cable de la bacteria de Reserva de cada Caja de Control o cable splitter.
-
Page 26: Español
español llamando al (888) 550-3746. • Revise debajo del somier para verificar que las conexiones de cable son seguras y que no haya cables o ropa de cama obstruyendo el movimiento de la base. PASO 1: Con las bases en la ubicación deseada, afloje con cuidado ambas patas para que la correa quepa en la tuerca de la pata, entre la arandela de la pata y el marco. - Page 27 français Pg. 1-6 - Précaution de sécurité à prendre et consignes d’utilisation implantables et tout autre appareil sensible aux champs magnétiques. Il est FORTEMENT recommandé que les propriétaires de tels appareils médicaux SÉCURITÉ consultent leur médecin avant d’utiliser les produits qui contiennent les aimants Neodymium.
- Page 28 français compris du bois, des métaux, des plastiques et des tissus. La tension, la pression ce qui se traduit en une tolérance de jusqu’à 1 ½”. ou le mouvement appliqués au cadre, au support ou à la couverture lors de son Toute fondation ajustable jugée compatible avec ces tolérances allouées est utilisation générale peuvent créer un son audible.
- Page 29 français le nettoyage, consultez un professionnel. • Ne penchez pas le sommier sur le côté. Ceci pourrait endommager les pieds ou les boulons. CLASSIFICATION DU PRODUIT • Ne vous mettez jamais debout et ne sautez jamais sur le sommier ajustable; Les moteurs de levage ne sont pas conçus pour opérer de manière continue ceci peut endommager le cadre et les moteurs.
- Page 30 français Serta Simmons Bedding, LLC («SSB») pourraient annuler la conformité EMC et Barre de retenue de matelas* vous interdire l'utilisation de cet appareil. Pattes (4) Cet appareil a été testé pour la conformité FCC dans des conditions qui incluent Cordon d’alimentation l'utilisation de dispositifs périphériques SSB et câbles SSB et connecteurs entre les composants du système.
- Page 31 français — Position à plat Étape 2: Enlever la base de lit de la boîte, puis faire en sorte que la partie inférieure de la base soit vers le haut. Position prédéfinie 1 Position prédéfinie 2 Étape 3: Pour installer les pattes, vissez la rondelle au-dessus de la vis sur la patte. Zero G Position prédéfinie de gravité...
- Page 32 français L’installation Élémentaire Est Complète. base ne bougera pas lors de cette évolution). Le témoin s’allume. Pour contacter l’assistance clientèle, visitez ergomotion.com ou appelez le : 1-888- Étape 3: Appuyez sur le bouton à l’arrière de la télécommande et le maintenir 550-3746 enfoncé.
- Page 33 français Ne mélangez pas les piles de marque. Connectez l'extrémité de la sangle de sauvegarde de la batterie au cordon d'alimentation Pg. 15 - Bluetooth® d'entrée connecté au boîtier de commande. Remarque: Détachez la sangle de secours de la batterie une fois l'urgence terminée, car le 1.
- Page 34 français Vérifiez que le voyant DEL vert est allumé sur le bloc d’alimentation. (Si aucun voyant ne s’allume), vérifiez que l’entrée et que les cordons d’alimentation sont correctement connectés. Débranchez la base pendant 1 heure pour réinitialiser les composants électroniques. Branchez la base du lit sur une prise électrique différente, ou vérifiez le courant de la prise avec un autre appareil qui fonctionne (protecteur de surtension électrique mise à...
-
Page 35: Notes
notes... - Page 36 US Customer Service 2017 Ergomotion Inc V001 _R03 10/2018 35007100 Phone US 1-888-550-3746 US 1-805-979-9399 Email info@ergomotion.com www.ergomotion.com Serial Number:...
Need help?
Do you have a question about the Black Luxury Base and is the answer not in the manual?
Questions and answers
How to set motion light
To set the motion light (underbed lighting) on a Beautyrest Luxury Base, use the remote control to turn the Underbed Lighting ON or OFF. There is a specific button on the remote for this function.
This answer is automatically generated
Warranty information for BeautyRest Luxury Split base
The Beautyrest Black Luxury Adjustable Base comes with a warranty, and extended warranties are available for purchase. Extended warranties are usually inexpensive and can save money in the future.
This answer is automatically generated
Is there a way to adjust the length of time the bed vibrates
No, the vibration duration on the Beautyrest Luxury Base cannot be adjusted. The massage system automatically shuts off after operating, and it must rest for 30 minutes before restarting.
This answer is automatically generated