Table of Contents
Advertisement
Available languages
Available languages
Quick Links
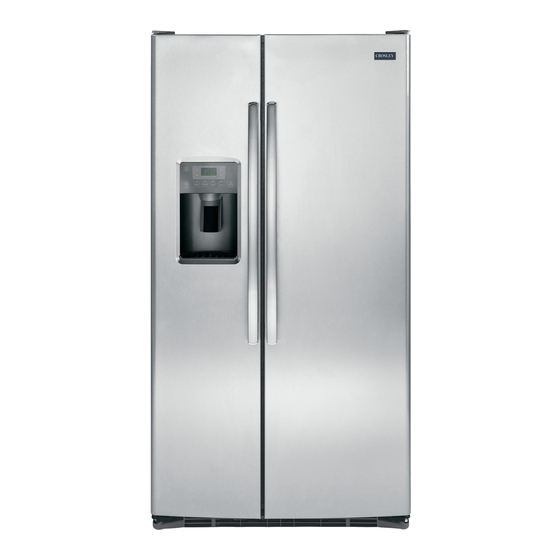
Side by Side Refrigerators
Models: XSS23G, XSS25G
Contents
Safety Information . . . . . . . . . . . . . . . . .3
Using the Refrigerator
Controls . . . . . . . . . . . . . . . . . . . . . . . .5
Water Filter - MWF . . . . . . . . . . . . . . . .6
Water Filter - XWF . . . . . . . . . . . . . . . .7
Shelves and Bins . . . . . . . . . . . . . . . . .8
Crispers and Pans . . . . . . . . . . . . . . . .9
Doors . . . . . . . . . . . . . . . . . . . . . . . . .10
Automatic Icemaker . . . . . . . . . . . . . .11
Ice and Water Dispenser . . . . . . . . . .13
Care And Cleaning
The Outside . . . . . . . . . . . . . . . . . . . .14
The Inside . . . . . . . . . . . . . . . . . . . . .14
Behind the Refrigerator . . . . . . . . . . .14
Preparing for Vacation . . . . . . . . . . . .15
Preparing to Move . . . . . . . . . . . . . . .15
Replacing the Light Bulbs . . . . . . . . .15
Write the model and serial numbers here:
Model # _______________________________
Serial # _______________________________
Find these numbers on a label inside the
refrigerator compartment at the top on the right side
behind the controls .
49-1000105 Rev . 0 08-18 GEA
Installation Instructions
Preparing to Install the Refrigerator . .17
Moving the Refrigerator . . . . . . . . . . .18
Installing the Refrigerator . . . . . . . . . .22
Installing the Water Line . . . . . . . . . .26
Troubleshooting Tips . . . . . . . . . . . . .30
Limited Warranty . . . . . . . . . . . . . . . . .32
Consumer Support
Water Filter Limited Warranty . . . . . .33
Performance Data Sheet . . . . . . . . . .34
Consumer Support . . . . . . . . . . . . . . .36
Owner's Manual
and Installation
Instructions
Español
Para consultar una version
en español de este manual
de instrucciones,visite sitio
de internet crosley.com .
Advertisement
Table of Contents

Subscribe to Our Youtube Channel
Related Manuals for Crosley XSS23G


Summary of Contents for Crosley XSS23G
- Page 1 Installation Instructions Models: XSS23G, XSS25G Contents Safety Information . . . . . . . . . . . . . . . . .3 Installation Instructions Preparing to Install the Refrigerator .
- Page 2 America's iconic brand, backed by America's best appliance warranty! 10 Year Limited Warranty FREE on all Crosley Appliances! MANUFACTURER'S CROSLEY'S EXTENDED APPLIANCE COMPONENT LIMITED WARRANTY LIMITED WARRANTY Refrigerator or Compressor 1 Year Freezer Gearcase/ Top-Load Washer 1 Year Transmission Front-Load...
- Page 3 IMPORTANT SAFETY INFORMATION READ ALL INSTRUCTIONS BEFORE USING THE APPLIANCE To reduce the risk of fire, explosion, electric shock, or injury when using your refrigerator, follow WARNING these basic safety precautions: ■ T his refrigerator must be properly installed ■ T o avoid serious injury or death, children should not and located in accordance with the Installation stand on, or play in or with the appliance .
- Page 4 IMPORTANT SAFETY INFORMATION READ ALL INSTRUCTIONS BEFORE USING THE APPLIANCE CONNECTING ELECTRICITY WARNING ELECTRICAL SHOCK HAZARD Plug into a grounded 3-prong outlet Do not remove the ground prong Do not use an adapter Do not use an extension cord . Failure to follow these instructions can result in death, fire, or electrical shock .
- Page 5 Controls Not all features are on all models . Your controls may be similar to the following: The temperature controls are preset in the factory at 37°F (2 .8°C) for the refrigerator compartment and 0°F (-17 .8°C) for the freezer compartment . Allow 24 hours for the temperature to stabilize to the preset recommended settings .
- Page 6 . Crosley has not qualified non-GE Appliances this type of water With adapter Without adapter branded filters for use in Crosley refrigerators and there filter . (appearance may vary) is no assurance that non-GE Appliances branded filters meet Crosley standards for quality, performance and 2.
- Page 7 Appliances filters meet rigorous industry standards for safety and quality that are important for products that are filtering your water . Crosley has not qualified non-GE Appliances-branded filters for use in Crosley refrigerators and there is no assurance that non-GE Appliances-branded filters meet Crosley standards for quality, performance and reliability .
- Page 8 Shelves and Bins Not all features are on all models . Refrigerator Door Bins and Freezer Door Tilt-Out Bins Large Bins The larger refrigerator door bins and freezer tilt-out door Snugger bins are adjustable . To remove: Lift the front of the bin straight up, then lift up and out .
- Page 9 Shelves and Bins Not all features are on all models . QuickSpace™ Shelf Fixed Freezer Shelves (on some models) To remove, lift the shelf up at the left side and then This shelf splits in half and slides under itself for storage bring the shelf out .
- Page 10 Doors Refrigerator Doors (on some models) The refrigerator doors may feel different than the ones you are used to . The special door opening/closing feature makes sure the doors close all the way and are securely sealed . When opening and closing the door you will notice a stop position .
- Page 11 Automatic Icemaker Not all features are on all models . Automatic Icemaker The icemaker will produce seven cubes per cycle— Icemaker Icemaker approximately 100–130 cubes in a 24-hour period, depending on freezer compartment temperature, room temperature, number of door openings and other use conditions .
- Page 12 Automatic Icemaker Accessing Ice and Reaching the Power Switch on Dispenser Models There are two types of ice storage bins on dispenser Models with a shelf above the ice bin models. One has a shelf above the bin, the other does To access ice, pull the bin forward .
- Page 13 Ice and Water Dispenser (on some models .) Using the Dispenser Locking the Dispenser Select CUBED ICE CRUSHED ICE Press the LOCK pad for 3 seconds to lock the dispenser and control panel . To or WATER unlock, press and hold the pad again for Press the glass gently against 3 seconds .
- Page 14 Care and Cleaning Cleaning the Outside The dispenser drip area, (on The stainless steel doors and door handles (on some some models) beneath the models) can be cleaned with a commercially available grille, should be wiped dry . stainless steel cleaner . Cleaners with oxalic acid such Water left in this area may as Bar Keepers Friend Soft Cleanser™ will remove rust, leave deposits .
- Page 15 Care and Cleaning Preparing for Vacation For long vacations or absences, remove food and If the temperature can drop below freezing, have a unplug the refrigerator . Clean the interior with a baking qualified servicer drain the water supply system (on soda solution of one tablespoon (15 ml) of baking soda some models) to prevent serious property damage due to one quart (1 liter) of water .
- Page 16 Care and Cleaning Freezer Compartment 1 . Unplug the refrigerator . 2 . Remove the shelf just above the light shield . (The shelf will be easier to remove if it is emptied first .) Remove the screw at the top of the light shield . 3 .
- Page 17 Installation Instructions Refrigerator Models XSS23G, XSS25G BEFORE YOU BEGIN PREPARATION WATER SUPPLY TO THE ICEMAKER Read these instructions completely and carefully. (on some models) IMPORTANT If the refrigerator has an icemaker, it will have to be • — Save these instructions connected to a cold water line .
- Page 18 Installation Instructions MOVING THE REFRIGERATOR LOADING THE REFRIGERATOR If the refrigerator must go through any ONTO A HAND TRUCK entrance that is less than 38” wide, the doors must be removed . Proceed to Leave all tape and door pads on doors until Step 3 . the refrigerator is in its final location . DO NOT remove the handles.
- Page 19 Installation Instructions MOVING THE REFRIGERATOR (Cont .) DISCONNECT THE ELECTRICAL CAUTION Lifting Hazard. CONNECTORS (on some models) Single person lift can cause injury . Use assistance when handling, moving or lifting the refrigerator If the refrigerator has a refreshment center, doors .
- Page 20 Installation Instructions MOVING THE REFRIGERATOR (Cont .) REMOVE THE REFRIGERATOR REMOVE THE FREEZER DOOR DOOR WARNING Follow all steps for removing WARNING and reinstalling the door . Failure to follow these Follow all steps for removing instructions, leaving off parts, or overtightening and reinstalling the door .
- Page 21 Installation Instructions MOVING THE REFRIGERATOR (Cont .) REMOVE THE REFRIGERATOR REPLACING THE DOORS DOOR (Cont .) WARNING Follow all steps for removing Lift the refrigerator door up and off the bottom and reinstalling the door . Failure to follow these hinge .
- Page 22 Installation Instructions INSTALLING THE REFRIGERATOR REFRIGERATOR LOCATION • Do not install the refrigerator where the • Do not install the refrigerator in a location exposed to temperature will go below 60°F (16°C) because water (rain, etc .) or direct sunlight . it will not run often enough to maintain proper •...
- Page 23 Installation Instructions INSTALLING THE REFRIGERATOR (Cont .) CONNECTING THE Fasten the tubing into the clamp provided to REFRIGERATOR TO THE HOUSE hold it in position . You may need to pry open the clamp . WATER LINE Tubing Clamp 1/4” Tubing (icemaker and dispenser models) 1/4”...
- Page 24 Installation Instructions INSTALLING THE REFRIGERATOR (Cont .) PUT THE REFRIGERATOR IN LEVEL THE DOORS PLACE Adjust the refrigerator door to make the doors even at the top . Move the refrigerator to its final location . To align: Using a 7/16” wrench, turn the door adjusting LEVEL THE REFRIGERATOR screw to the right to raise the door, to the left to lower it .
- Page 25 Installation Instructions INSTALLING THE REFRIGERATOR (Cont .) REPLACE THE BASE GRILLE START THE ICEMAKER Replace the grille by installing the two Phillips Set the icemaker power switch to the I (on) head screws . position . The icemaker will not begin to operate until it reaches its operating temperature of 15°F (–9°C) or below .
- Page 26 Installation Instructions INSTALLING THE WATER LINE (icemaker & dispenser models) BEFORE YOU BEGIN WHAT YOU WILL NEED If the water supply to the refrigerator is from a Reverse Osmosis Water Filtration System AND the refrigerator also has a water filter, use the refrigerator’s filter bypass plug .
- Page 27 Installation Instructions INSTALLING THE WATER LINE (Cont .) Install the shutoff valve on the nearest frequently used WHAT YOU WILL NEED (Cont .) drinking water line . NOTE: The only GE Appliances approved SHUT OFF THE MAIN WATER plastic tubing is that supplied in SmartConnect™ Refrigerator Tubing kits .
- Page 28 Installation Instructions INSTALLING THE WATER LINE (Cont .) FASTEN THE SHUTOFF VALVE CONNECT THE TUBING TO THE VALVE Fasten the shutoff valve to the cold water pipe with the pipe clamp . Place the compression nut and ferrule (sleeve) Pipe Clamp for copper tubing onto the end of the tubing and connect it to the shutoff valve .
- Page 29 Normal Operating Conditions Newer refrigerators sound different from older refrigerators . Modern refrigerators have more features and use newer technology . Do you hear what I hear? These conditions are normal. HUMMM... WHOOSH... ■ T he new high efficiency compressor may run faster and longer than your old refrigerator and you may ■...
- Page 30 Troubleshooting Tips... Before you call for service Save time and money! Review the charts on the following pages first and you may not need to call for service . Problem Possible Causes What To Do Refrigerator does not operate Refrigerator in defrost cycle. Wait about 30 minutes for defrost cycle to end .
- Page 31 Troubleshooting Tips... Before you call for service Problem Possible Causes What To Do Normal when refrigerator is first Water in first glass is warm (on Wait 24 hours for the refrigerator to completely cool some models) installed down . Water dispenser has not been used for Dispense water until all water in system is replenished .
- Page 32 Your appliance is covered by a limited warranty, as listed below, by GE Appliances . All warranty service is provided by our GE Appliances Factory Service Centers, or an authorized service technician . To schedule service, call Crosley at 800 .544 .4780 . Please have your serial number and your model number available when calling for service .
- Page 33 Water Filter Cartridge Limited Warranty Contact us at geapplianceparts.com, or call 800 .GE .CARES . For the period of GE Appliances will replace Thirty Days Any part of the water filter cartridge which fails due to a defect in materials or workmanship during this limited thirty-day warranty.* From the date of the original...
- Page 34 Performance Data Sheet SmartWater Filtration System—GE Appliances MWF Cartridge ™ The concentration of the indicated substances in water entering the system was reduced to a concentration less than or equal to the permissible limit for water leaving the system as specified in NSF/ANSI Standard 42 and Standard 53 . System tested and certified by NSF International against NSF/ANSI Standard 42 and Standard 53 for the reduction of substances listed below .
- Page 35 Performance Data Sheet Model: GE Appliances XWF ■ S ystem certified by IAPMO R&T against NSF/ANSI Standards 42, 53, 401 for the reduction of claims specified on the performance data sheet and at iapmort .org . ■ Actual performance may vary with local water conditions. Influent challenge Maximum permissible Avg % Substance Tested for Reduction concentration product water Application Guidelines/Water Supply Parameters Reduction (mg/L) concentration (mg/L) Service Flow 0 .5 gpm (1 .89 lpm) Chlorine Taste and Odor 2 .0 mg/L +/- 10%...
- Page 36 . Schedule Service Crosley repair service is only one step away from your door . Call 800 .544 .4780 during normal business hours to schedule service . CROSLEYCARE 10 Year Limited Warranty ®...
-
Page 37: Table Of Contents
Manual del Propietario e Instrucciones de Instalación Modelos: XSS23G, XSS25G Contenido Información de Seguridad . . . . . . . . . .3 Instrucciones para la Instalación Preparación para instalar Uso del Refrigerador el refrigerador . - Page 38 ¡La icónica marca estadounidense apoyada por la mejor garantía de electrodomésticos estadounidense! ¡Garantía Limitada por 10 Años GRATUITA en todos los Electrodomésticos Crosley! ELECTRODO- GARANTÍA LIMITADA GARANTÍA LIMITADA COMPONENTE MÉSTICO DEL FABRICANTE EXTENDIDA DE CROSLEY Refrigerador o Compresor 1 Año...
- Page 39 INFORMACIÓN IMPORTANTE DE SEGURIDAD LEA TODAS LAS INSTRUCCIONES ANTES DE USAR A fin de reducir el riesgo de incendio, explosión, descargas eléctricas o lesiones al usar ADVERTENCIA refrigerador, siga estas precauciones básicas de seguridad: ■ E ste refrigerador se deberá instalar y ubicar y sufran asfixia, retire las puertas de alimentos frescos adecuadamente de acuerdo con las Instrucciones de y del congelador de cualquier refrigerador antes de Instalación antes de ser usado .
- Page 40 INFORMACIÓN IMPORTANTE DE SEGURIDAD LEA TODAS LAS INSTRUCCIONES ANTES DE USAR CONEXIÓN DE LA ELECTRICIDAD ADVERTENCIA RIESGO DE DESCARGA ELÉCTRICA Enchufe en un tomacorriente con conexión a tierra de 3 cables . No elimine el cable de conexión a tierra . No use un adaptador .
-
Page 41: Controles
Controles Los controles de temperatura fueron configurados previamente en la fábrica en 37°F (2.8°C) para el compartimiento del refrigerador y en 0°F (-17.8°C) para el compartimiento del congelador . Espere 24 horas hasta que la temperatura se estabilice en los ajustes de preconfiguración recomendados . Es posible que los controles de temperatura muestren la temperatura en SET (Ajustada) y la temperatura real en el refrigerador y en el congelador . La temperatura real puede variar levemente en relación a la temperatura en SET (Ajustada) en base al uso y al ambiente donde se usa. -
Page 42: El Filtro De Agua - Mwf
NSF de la industria sobre seguridad y calidad, que son importantes para los productos que están filtrando su agua . Crosley no posee filtros de la marca GE Appliances que no estén calificados para su uso en... -
Page 43: El Filtro De Agua - Xwf
. Los filtros de GE Appliances cumplen con rigurosos estándares NSF de la industria sobre seguridad y calidad, que son importantes para los productos que están filtrando su agua . Crosley no posee filtros de la marca GE Appliances que no estén calificados para su uso en refrigeradores Crosley y no existe seguridad de que los filtros que no son de la marca GE Appliances cumplan con los estándares de Crosley en relación a calidad, funcionamiento y confiabilidad . -
Page 44: Entrepaños Y Recipientes
Entrepaños y recipientes No todos los modelos tienen todas las características . Estantes de la Puerta del Refrigerador y Estantes Inclinables de la Puerta del Congelador Recipientes grandes Tapa deslizante Los recipientes de la puerta del refrigerador y los recipientes inclinables de la puerta del congelador más grandes son ajustables . -
Page 45: Cajones Y Recipientes
Entrepaños y recipientes No todos los modelos tienen todas las características . Entrepaño QuickSpace™ Entrepaños fijos del congelador (en algunos modelos) Para remover, deslice el entrepaño hacia arriba en el lado Este entrepaño se divide en dos y la mitad se desliza debajo izquierdo y entonces extráigalo del alojamiento . -
Page 46: Puertas
Puertas Puertas del refrigerador (en algunos modelos) Es posible que Ud . note una diferencia entre el manejo de las puertas de su antiguo y nuevo refrigerador . La característica especial de abertura y cierre de las puertas asegura que estas cierren por completo y permanezcan selladas firmemente . Al abrir y cerrar la puerta, usted observará... -
Page 47: Máquina De Hielo Automática
Máquina de hielo automática No todos los modelos tienen todas las características . Máquina para hacer hielo automática Máquina Máquina La máquina de hielo producirá siete cubos por ciclo- de hielos de hielos aproximadamente entre 100 y 130 cubos en un período de 24 horas, dependiendo de la temperatura del compartimento del congelador, la temperatura ambiente, el número de aperturas de puertas y otras condiciones de uso . - Page 48 Máquina de hielo automática Acceso al Hielo y Acceso al Interruptor en los Modelos con Dispensador Hay dos tipos de estanterías de almacenamiento de hielo Los modelos con un estante encima del cubo de hielo en los modelos con dispensador. Uno tiene un estante Para tener acceso al hielo, tire del cubo de hielo hacia encima de el depósito, el otro no .
-
Page 49: El Dispensador De Agua Y De Hielo
El dispensador de agua y de hielo (en algunos modelos) Para usar el dispensador Dispenser Light (Luz del dispensador) Seleccione CUBED ICE (cubos de hielo), Esta tecla enciende y apaga la luz del CRUSHED ICE dispensador . La luz también se enciende al (hielo triturado) presionar el brazo del dispensador . Si esta luz se funde debería reemplazarse con una or WATER (agua). -
Page 50: Cuidado Y Limpieza
Cuidado y limpieza Limpiar el exterior El area de la cavidad del Soft Cleanser™ eliminarán el óxido, deslustres y pequeñas dispensador, por debajo de la manchas . Use sólo un limpiador líquido libre de material parrilla, se debe mantener limpio abrasivo y frote en la dirección de las líneas del cepillo con una y seco . -
Page 51: Preparación Para Vacaciones
Cuidado y limpieza Preparación para vacaciones En el caso de vacaciones o ausencias prolongadas, retire Si la temperatura pudiera llegar por debajo del punto de los alimentos y desenchufe el refrigerador . Limpie el interior congelación, haga que una persona calificada drene el sistema con solución de bicarbonato de una cucharada (15 ml) de del suministro de agua (en algunos modelos) para evitar daños bicarbonato por un cuarto (1 litro) de agua. Deje abiertas las... - Page 52 Cuidado y limpieza Compartimento del congelador 1. D esenchufe el refrigerador. 5 . Vuelva a instalar el entrepaño y enchufe el refrigerador de nuevo . 2 . Retire el entrepaño justo por encima de la cubierta de luz . (El entrepaño será más fácil de quitar si se vacía primero.) Remueva los tornillos de la parte superior del protector superior .
-
Page 53: Instrucciones Para La Instalación
Modelos de Refrigerador Instrucciones para la Instalación XSS23G, XSS25G ANTES DE COMENZAR PREPARACIÓN SUMINISTRO DE AGUA PARA LA Lea estas instrucciones completamente y MÁQUINA DE HACER HIELO cuidadosamente. IMPORTANTE algunos modelos) • — Conserve estas Si el refrigerador cuenta con una máquina de hacer hielo, instrucciones para uso del inspector local . -
Page 54: Cómo Mover El Refrigerador
Instrucciones para la instalación CÓMO MOVER EL REFRIGERADOR CÓMO CARGAR EL Si el refrigerador debe pasar por alguna REFRIGERADOR EN UNA entrada menor de 38” de ancho, entonces las puertas pueden ser removidas . Proceda al CARRETILLA DE MANO paso 3 . Deje toda la cinta adhesiva y las almohadillas hasta NO REMUEVA las manijas. - Page 55 Instrucciones para la instalación CÓMO MOVER EL REFRIGERADOR (Cont.) DESCONECTE LOS PRECAUCIÓN Riesgo al levantar la CONECTADORES ELÉCTRICOS puerta. Si es levantada por una sola persona, podrían (en algunos modelos) ocasionarse lesiones . Solicite ayuda al sostener, mover o levantar las puertas del refrigerador . Si el refrigerador tiene un centro para refrescar, NOTA: Al retirar la puerta, a fin de evitar daños sobre la entonces hay conectadores eléctricos (arnéses), que...
- Page 56 Instrucciones para la instalación CÓMO MOVER EL REFRIGERADOR (Cont.) REMUEVA LA PUERTA DEL REMUEVA LA PUERTA DEL REFRIGERADOR CONGELADOR ADVERTENCIA ADVERTENCIA Siga todos los pasos para Siga todos los pasos retirar y volver a instalar la puerta . Si no se siguen para retirar y volver a instalar la puerta .
- Page 57 Instrucciones para la instalación CÓMO MOVER EL REFRIGERADOR (Cont.) REMUEVA LA PUERTA DEL CÓMO REEMPLAZAR LAS REFRIGERADOR (Cont.) PUERTAS ADVERTENCIA Levante la puerta del refrigerador y libérela de la Siga todos los pasos para bisagra inferior . retirar y volver a instalar la puerta . Si no se siguen SI el refrigerador cuenta con un centro espacioso, estas instrucciones, dejando piezas sin uso o ajustando una persona deberá...
-
Page 58: Cómo Instalar El Refrigerador
Instrucciones para la instalación CÓMO INSTALAR EL REFRIGERADOR LOCALIZACIÓN DEL REFRIGERADOR • No coloque el refrigerador donde la temperatura • No instale el refrigerador en una ubicación expuesta al esté por debajo de 60° F (16° C) porque no operará agua (lluvia, etc.) o en contacto directo con la luz solar. con la suficiente frecuencia como para mantener las • Instálelo en un piso suficientemente resistente como temperaturas apropiadas . - Page 59 Instrucciones para la instalación CÓMO INSTALAR EL REFRIGERADOR (Cont.) CÓMO CONECTAR EL Apriete la tubería en la abrazadera proporcionada para sostenerla en su posición . Es posible que usted REFRIGERADOR necesite levantar la abrazadera haciendo palanca . A LA LÍNEA DE AGUA DE LA Abrazadera Tubería de 1/4”...
- Page 60 Instrucciones para la instalación CÓMO INSTALAR EL REFRIGERADOR (Cont.) COLOQUE EL REFRIGERADOR NIVELES LAS PUERTAS EN SU LUGAR Ajuste la puerta del refrigerador para que las puertas estén niveladas en la parte superior . Mueva el refrigerador a su destino final . Para linear: Usando una llave de 7/16”, gire el tornillo ajustable de la puerta hacia la derecha para levantar la puerta,...
- Page 61 Instrucciones para la instalación CÓMO INSTALAR EL REFRIGERADOR (Cont.) REEMPLACE LA PARRILLA INICIE LA MÁQUINA DE HIELOS DE LA BASE Fije el interruptor de la máquina de hielos en la posición ON (encendido). La máquina de hielos Reemplace la parrilla de la base instalando los dos no empezará...
-
Page 62: Cómo Instalar La Línea De Agua
Instrucciones para la instalación CÓMO INSTALAR LA LÍNEA DE AGUA (en modelos con máquina de hielos y dispensador) ANTES DE COMENZAR LO QUE USTED NECESITARÁ Si el suministro de agua del refrigerador es de un Sistema de Filtración de Osmosis inversa y el refrigerador también tiene un filtro de agua, use el tapón de derivación del filtro . Usar el cartucho de filtración de agua del refrigerador además del filtro RO podría resultar en la formación de cubos de hielo huecos y en un flujo de agua más lento a... - Page 63 Instrucciones para la instalación CÓMO INSTALAR LA LÍNEA DE AGUA (Cont.) Instale la válvula de cierre en la línea de agua de tomar más LO QUE USTED NECESITARÁ cercana . (Cont.) CIERRE EL SUMINISTRO DE NOTA: La única tubería plástica aprobada por GE Appliances es la que proporcionamos con el Kit AGUA PRINCIPAL SmartConnect™...
- Page 64 Instrucciones para la instalación CÓMO INSTALAR LA LÍNEA DE AGUA (Cont.) APRIETE LA VÁLVULA DE CÓMO CONECTAR LA TUBERÍA CIERRE A LA VÁLVULA Apriete la válvula de cierre a la tubería de agua fría Coloque la tuerca de compresión y el casquillo con una abrazadera de tubo .
- Page 65 Sonidos normales de operación Los refrigeradores más nuevos producen sonidos diferentes a los modelos más antiguos . Los refrigeradores modernos tienen más funciones y usan tecnología más reciente . ¿Usted escucha lo que yo escucho? Estos sonidos son ¡WHIR! HUMMM... WHOOSH...
-
Page 66: Solución De Problemas
Consejos para la Solución de Problemas... Antes de solicitar el servicio técnico ¡Ahorre tiempo y dinero! Primero revise los cuadros que aparecen en las siguientes páginas y es posible que no necesite solicitar reparaciones . Problema Causas Posibles Qué hacer El motor opera durante Es normal cuando el refrigerador es recién instalado Espere 24 horas para que el refrigerador se... - Page 67 Consejos para la Solución de Problemas... Antes de solicitar el servicio técnico Problema Causas Posibles Qué hacer El agua en el primer vaso está Eso es normal con un refrigerador recién Espere 24 horas para que se enfríe el refrigerador . tibia (en algunos modelos) instalado.
-
Page 68: Garantía Limitada
Centros de Servicio de Fabricación de Electrodomésticos GE Appliances, o por un técnico autorizado del servicio técnico . Para programar el servicio técnico, comuníquese con Crosley al 800 .544 .4780 . Cuando llame para solicitar el servicio técnico, tenga los números de serie y modelo disponibles . -
Page 69: Soporte Al Consumidor Garantía Limitada Filtro De Agua
Garantía Limitada del Cartucho del Filtro de Agua Comuníquese con nosotros en geapplianceparts.com, o llame al 800 .GE .CARES . Por el Período de: Reemplazaremos, Sin Costo: Treinta Días Desde Cualquier parte del cartucho del filtro de agua que falle debido a un defecto en los materiales la fecha de compra o la fabricación durante esta garantía limitada de treinta días .* original . -
Page 70: Hoja De Datos De Funcionamiento
Ficha Técnica de Funcionamiento Sistema de Filtración SmartWater™—Cartucho GE Appliances MWF La concentración de las sustancias indicadas en el agua que ingresa al sistema fue reducida a la concentración menor que o igual al límite permisible para el agua que deja el sistema, como se especifica en NSF/ANSI Estándar 42 y Estándar 53 . Sistema evaluado y certificado por NSF International contra NSF/ANSI Estándar 42 y Estándar 53 para la reducción de las sustancias que figuran a continuación . - Page 71 Ficha Técnica de Funcionamiento del Modelo: GE Appliances XWF ■ S istema certificado por IAPMO R&T contra los Estándares 42, 53, 401 de NSF/ANSI para la reducción de demandas especificadas en la ficha técnica de rendimiento y en iapmort .org . ■ El rendimiento real podrá variar en relación a las condiciones locales del agua. Concentración de Concentración del Sustancia Evaluada aguas máximas Promedio peligro de intrusión Pautas de Aplicación/ Parámetros de Suministro de Agua para la Reducción permitidas sobre el (mg/L) producto (mg/L)
-
Page 72: Soporte Al Consumidor
. Servicio Programado El servicio de reparación de Crosley está a sólo un paso de su puerta . Para programar el servicio técnico, comuníquese al 800 .544 .4780 durante el horario de atención comercial . Garantía Limitada de 10 Años de CROSLEYCARE ®...
Need help?
Do you have a question about the XSS23G and is the answer not in the manual?
Questions and answers