Table of Contents
Advertisement
Quick Links
Advertisement
Table of Contents

Related Manuals for FAVI RioHD-LED-K1


Summary of Contents for FAVI RioHD-LED-K1
- Page 1 User Guide RioHD-LED-K1...
-
Page 2: Table Of Contents
TABLE OF CONTENTS Product Registration Important Safety Notes Projector Overview Left Back Remote Operating Powering Focusing Channels Menu Settings Multimedia Player... -
Page 3: Product Registration
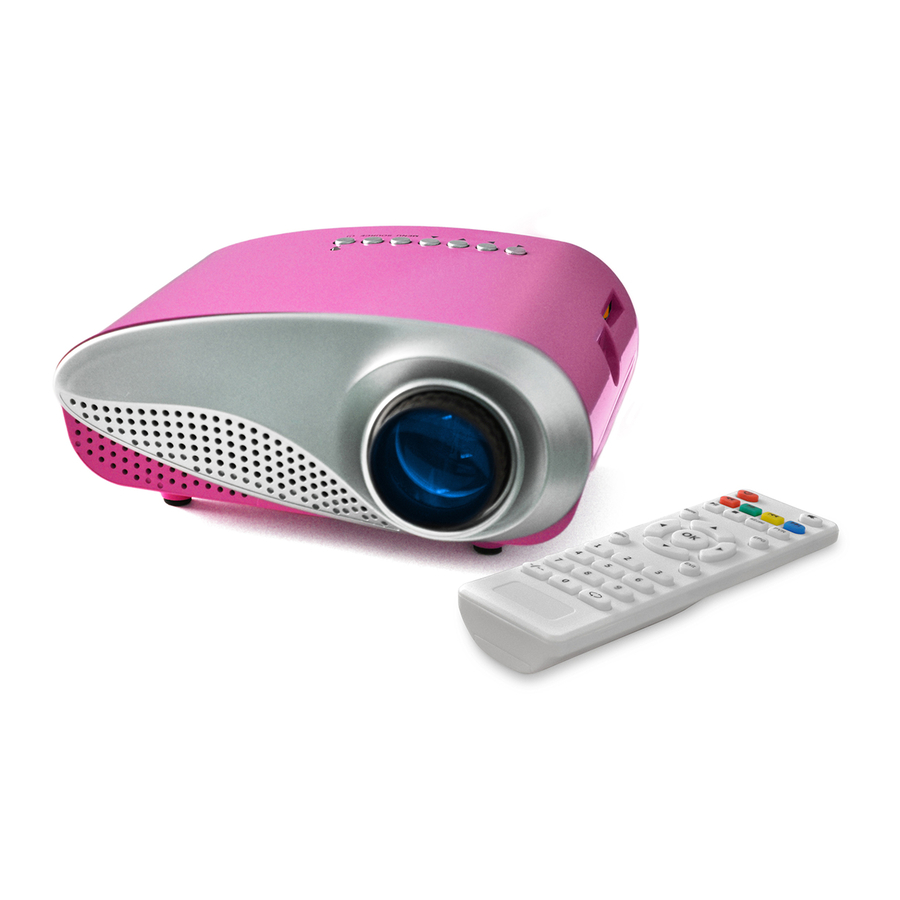
To better serve you in the future, please take a moment to register your product at: www.favientertainment.com/register The RioHD-LED-K1 is available in Black (-BL), Blue (-BLUE), Green (-GR), Pink (-P), White (-WH), and Yellow (-Y). Please specify your projector color when registering your projector. - Page 4 WARRANTIES Your FAVI projector is warrantied to be free of defects in material and workmanship for a period of 1-year from the date of receipt. Should your projector develop an issue requiring it to be repaired within this time frame, we will repair or exchange any defective unit at no cost to you.
-
Page 5: Important Safety Notes
IMPORTANT SAFETY NOTES Before you use this projector, please read this manual carefully. WARNING: Projector contains small parts that may cause choking hazard to small children. It is recommended that an adult be present when projector is in use. SAFETY •... -
Page 6: Projector Overview
PROJECTOR OVERVIEW LEFT SD Card Reader Focus Ring BACK USB HDMI DC - N... -
Page 7: Top
PROJECTOR OVERVIEW AUD.LANG Source Menu Exit 3 4 5 6 7 8 1. Power Button - /- - 2. Indicator Light 3. Move Left / Volume Down 4. Move Right / Volume Up 5. Move Up REMOTE 6. Move Down 1. -
Page 8: Operating
OPERATING Power: Step 1: Connect one end of the AC adapter to the projector DC 12V port and plug the other end into an electrical outlet. Step 2: Press the POWER button on the projector or remote. Focusing: Manually adjust image focus by rotating the focus ring around the projector’s lens. -
Page 9: Menu Settings
MENU SETTINGS Press the MENU button to open MAIN MENU. Press LEFT/RIGHT buttons to navigate through Menu. Press UP/DOWN buttons to navigate through Menu Setting Options. Press OK to select and confirm Menu Setting Options. Menu Menu Setting Options Picture Mode, Color Temperature, Aspect Ratio, Picture Noise Reduction, PC Settings Sound Mode, Balance, Auto Volume, Surround... -
Page 10: Multimedia Player
MULTIMEDIA PLAYER Step 1: Insert a USB or SD Card. Step 2: From the SOURCE MENU, select Multimedia to open the menu above. Step 3: Select the correct Media option to open your media file. File Format Format Format .WMA Audio .MP3 .M4A...
Need help?
Do you have a question about the RioHD-LED-K1 and is the answer not in the manual?
Questions and answers