Table of Contents
Advertisement
Quick Links
Advertisement
Table of Contents

Related Manuals for Walkera VOYAGER 4


Summary of Contents for Walkera VOYAGER 4
- Page 1 DEVO F18 Remote Controller V1.1 QUICK START GUIDE Oct. 18th 2018 www.walkera.com...
-
Page 2: Table Of Contents
6.0 Charge the Batteries 7.0 Download and install the software APP 8.0 APP Main Screen Instructions 9.0 Prepare the Remote Controller 10.0 Prepare the VOYAGER 4 9-10 11.0 Ready to fly 11.1 Starting the aircraft / Get binding 11.2 Connect to APP Software 11.3 GPS indicator light... -
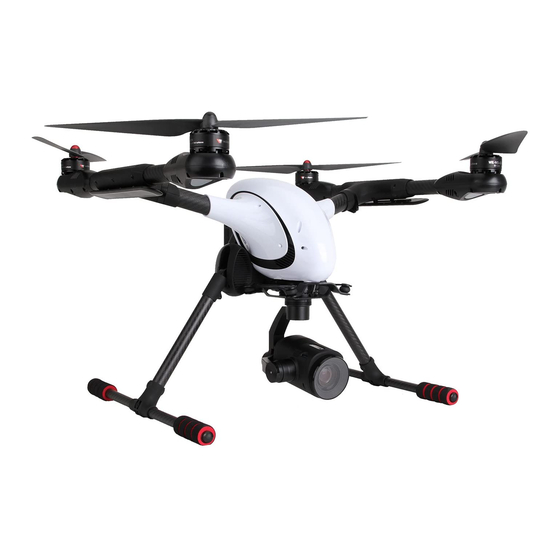
Page 3: Get To Know Your Aircraft
* 1) 4G communication cards for aircraft and mobile devices are purchased and installed by buyers. 2) The Maximum flight time of 20 minutes was obtained under test environment. 3) To avoid property loss and personal injury caused by wrong operation, please read the manual carefully and watch the tutorial videos at www.walkera.com before flight. -
Page 4: Get To Know Your Remote Controller
DEVO-F18 with the built-in Bluetooth Module. Equipped with function like manual mode / GPS hold mode / Return To Home, camera & Gimbal controlling, the VOYAGER 4 is easier to control. (You can select the suitable flight mode according to your flying skill.) 1. -
Page 5: Specifications
3250g(Battery included) Remote Controller: DEVO F18 Main Controller: FCS-V4 Receiver: DEVO-RX715 Brushless Motor: WK-WS-42-002A Brushless ESC: Voyager 4 (R/B) Battery: 22.2V 4500mAh 10C(6S) LiPo Flight Time: About 20mins Working Temperature: -10℃~ +40℃ Gimbal Control accuracy: Static: ±0.008°; Motion: ±0.08°; Shake-proof: ±0.008°... -
Page 6: Attention Before Flight
6.0 Charge the Batteries 1) Connect the charger to the AC power (100 ~ 240v 50/60hz). 2) Only use the walkera charger for your Intelligent Flight Battery and remote controller. Please turn off the intelligent flight battery and remote controller before charging. -
Page 7: Download And Install The Software App
APP software supports Android 5.1 and above systems iOS 9.0 and above, Android system please download at Walkera official website (www.walkera.com) or go to Google play to search for Walker Drone or scan the QR code to download and install;... -
Page 8: Prepare The Remote Controller
Quick Start Guide 12. Setting [ ]: Click the icon to open the Setting menu, Normal setting, aircraft, remote controller, gimbal and battery can be charged. 13. Camera Settings [ Touch icons it has preview settings, recording settings and so on. Under identical Video Size, the larger the stream Rate, the better the picture quality, anyway, the video transmission distance is shortened accordingly. -
Page 9: Prepare The Voyager
Quick Start Guide 10.0 Prepare the VOYAGER 4 The factory default of the aircraft is Travel Mode. Before flying, connect to power, transform the aircraft to Landing Mode, please don't use the outside force. Insert the battery. Power on the remote controller and the aircraft. -
Page 10: Ready To Fly
1. Click the icon 2. Click “Select Model”, 3. Select remote controller(RC) , 4. Remote control serial on mobile device select “Voyager 4-4G-4K”, click “Connect”. number will pop up and then click “Go to Connect”. automatically, click "serial number and connect”. -
Page 11: Gps Indicator Light
Quick Start Guide 11.3 GPS indicator light When the blue LED light (GPS) begin to flash, Blue LED light you can work GPS function. 11.4 Motor Unlock / Lock Motor Unlock Push the switch to GPS mode or Manual mode or Motion mode, and push the left stick and right stick down and move outward and hold for more than 2 seconds. -
Page 12: Operation Instruction
Quick Start Guide 12.0 Operation Instruction 1) Make sure that the received GPS signal (Blue LED light blinks) 2) When the status indication on the top of the APP is shown as “Connected”, the you can use the App to control the aircraft. AUTO Takeoff (remote controller or APP operation) Please unlock the motor before take off. - Page 13 Quick Start Guide Motion mode (Remote controller operation) Beginner Beginner Common Common AUX2 AUX2 AUX3 AUX3 Switch to “Common” Short press the Enter key to position enter the Motion mode Ground Attention: 1) In the Motion mode, there are Altitude hold, fixed point, brake function, the flight speed is faster (≤8m/s). 2) If the GPS signal is poor or no signal, can only be Altitude hold, but not fixed point.
- Page 14 Quick Start Guide RETURN TO HOME (Remote controller or APP operation) Long press this key(3-5 seconds) Click this key in the APP on the remote controller and the interface and the aircraft aircraft will return automatically will return automatically Aircraft with Home point horizontal distance > 30m Height over HP>25m a.
- Page 15 Quick Start Guide Hyper IOC Mode IOC or Intelligent Orientation Control mode means that the aircraft’s flight direction is only relative to the orignal take-off point (where you armed the motors). REGARDLESS of the actual aircraft headding, in this mode you can fly past something and pan the aircraft to frame your shot, without having to worry what direction the aircraft is facing.
- Page 16 Quick Start Guide Control the gimbal (remote controller or APP operation) Three-axis stabilization gimbal makes the camera steady so that it can shoot stable photos even fly with hight altitude. And you can control pitch and horizontal angle of the gimbal by Gimbal stick on Remote Controller or APP Software.
-
Page 17: End Flight
Quick Start Guide Video and photo (remote controller or APP operation) Remote Controller Operation Slide upward: Take photo by adjust the panorama of zoom camera short pressing Photo the button of Remote Controller Video Slide downward: adjust the telescope of zoom camera Left Gimbal Dial Video by short pressing the button of Remote Controller... -
Page 18: Additional Remarks
Upgrading www.walkera.com Please upgrade online via USB Cable Walkera official website 14.2 Compass Calibration Attention: If there is circles or drift in flying, please calibrate the compass. (the motor must be locked and rear red LED light turn off ) Please calibration outdoors and far away from strong electromagnetic interference. -
Page 19: Remote Controller Stick Mode Switch And Stick Calibration
Quick Start Guide 14.3 Remote Controller stick mode switch and stick calibration Tip: DEVO F18 stick mode and stick calibration has been set up before out of factory, if you need to switch and calibration, please refer to the following methods. It must be operated under power off or motors are locked well. -
Page 20: Introduction For Devo-Rx715 Receiver
Quick Start Guide 14.4 Introduction for DEVO-RX715 receiver Flexible flat cable connection The metal surface of flexible flat The metal surface of flexible flat cable cable plug should be inserted plug should be inserted downward to upward to receiver port properly. power board port properly. -
Page 21: Intelligent Flight Battery Safety Guidelines
2) Never use non-walkera batteries. Go to www. walkera.com to purchase new batteries. Walkera takes no responsibility for any damage caused by non-walkera batteries. - Page 22 Manufacturer: Guangzhou Walkera Technology Co.,Ltd. Add: No.48 Wantai Rd, Taishi Industrial Park, Dongchong Town, Nansha Dist, Guangzhou, China.511453 Hotline:+86 20-84915115 This manual is subject to update without prior written notice. Please refer to Walkera official website for latest version.
Need help?
Do you have a question about the VOYAGER 4 and is the answer not in the manual?
Questions and answers