Table of Contents
Advertisement
FUSE
OPTIONAL-
TECHNICAL SHEET OF THE MACHINE WITH RIGHT SIDE SCRUBBING BRUSH
DATE OF LAST UPDATE 20-02-2015
LIST OF CONTENTS
TOPIC
PAGE
3
3
4
4
6
6
7
8
11
13
18
18
19
19
21
22
22
23
23
24
25
25
25
27
27
28
29
30
30
31
33
33
34
35
37
37
38
38
39
41
43
43
44
45
46
47
48
49
50
51
52
53
57
58
59
60
2
Advertisement
Table of Contents

Related Manuals for Eureka E110


Summary of Contents for Eureka E110
-
Page 1: Table Of Contents
LIST OF CONTENTS TOPIC PAGE INTRODUCTION MACHINE IDENTIFICATION WARNINGS! GENERAL WARNINGS AND RECOMMENDATIONS DISPOSAL TRANSPORT AND MOVEMENT UNPACKING BATTERIES INSTALLATION MACHINE DESCRIPTION PRIMARY FUNCTIONS AND CONTROLS MACHINE SETTING BRUSHES REPLACEMENT/ ROTATION MOUNTING THE SQUEEGEE ADJUSTING THE SQUEEGEE FILLING THE DETERGENT SOLUTION TANK DETERGENT DOSING DEVICE DETERGENT DOSING DEVICE WASHING DETERGENT DOSING DEVICE CONTROLS... -
Page 2: Introduction
INTRODUCTION Our company, a leading industrial cleaning machine manufacturer, is delighted to welcome you to the ranks of our scrubber owners and it trusts that you will get the greatest satisfaction from the use of the machine. We are certain that while using the machine you will have the opportunity to see the quality, solidity and possibilities for use by yourselves. -
Page 3: Warnings
ATTENTION! BEFORE USING THE MACHINE OR CARRYING OUT ANY OPERATION ON IT, ALL THE PROCEDURES AND WARNINGS DESCRIBED IN THIS MANUAL MUST BE READ AND UNDERSTOOD. RIGOROUS COMPLIANCE WITH THE REGULATIONS AND INSTRUCTIONS CONTAINED IN IT, TOGETHER WITH THE OPERATOR’S ATTENTION AND PRUDENCE WILL BE THE BEST GUARANTEE AGAINST ACCIDENTS THAT COULD OCCUR AT WORK. - Page 4 CLEANING AND MAINTENANCE The machine must be cleaned by persons who have received proper instruction for the purpose, who know how to cut off the sources of energy and who know the characteristics of the machine so as not to find themselves in a hazardous situation.
-
Page 5: Disposal
RESPONSIBILITIES OF THE OPERATOR - The operator is responsible for the day-to-day servicing of the machine - The operator must care for the machine and keep it in good operating condition - The operator must inform his or her superior or the technical department when scheduled maintenance is requested in the case of damage or breakage. -
Page 6: Unpacking
UNPACKING Make sure that all the parts indicated in the following list are present before unpacking the machine: Squeegee; battery cable fitted with connector, terminals and terminal covers; on board battery charger; NOTICE: brushes, discs and disc pad holders must be purchased separately. Follow the instructions below to unpack the machine: - connect the inclined ramp to the front part of the pallet, as shown in the figure;... -
Page 7: Batteries Installation
INSTALLING BATTERIES CAUTION: USE PROTECTIVE GLOVES AND GOGGLES WHEN HANDLING BATTERIES, AVOIDING ANY CONTACT WITH THE ACID INSIDE THE BATTERIES. CAUTION: THE MACHINE'S CONTROL BOARD AND BATTERY CHARGER COME OFF THE ASSEMBLY LINE CONFIGURED FOR USE WITH LEAD ACID BATTERIES. IF GEL BATTERIES OR AGM BATTERIES ARE USED, THE MACHINE’S CONTROL BOARD AND THE BATTERY CHARGER MUST BE SET. - Page 8 Remove the 3 metal plate caps (pos. 1); Remove the 2 bolts (pos.2); Pull the safety lever (pos.4) in the direction indicated by the arrow and remove the connector (pos. 5) from the switch; Remove the seat rest plate (pos.3). To install the battery (position 3), lift it with an overhead travelling crane, a carriage or a crane and use a lifting beam (position 1), chains or belts to fasten it.
- Page 9 BATTERY CONNECTION FIG. A After positioning the battery on board the machine, connect the cables. The machine features 3 connectors shown in figure A: 1) Battery connector for supplying power to the machine; 2) Battery-charger connector; Connect the cables of connectors 1 and 2 to the negative pole 3 and positive pole 4 in accordance with the polarities. Connect connectors1 -2 to the respective connectors on the machine.
-
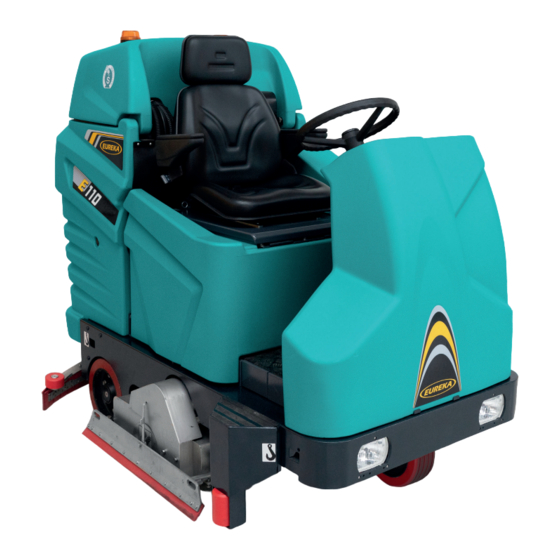
Page 10: Machine Description
19 20 21 22 1. Fuses inspection door 20. Splashguard 2. Handwheel 21. Brush tray 3. Seat 22. Brush motor 4. Hood and seat opening device 23. Battery seat 5. Lid and vacuum motor seat 24. Bumper roller 6. Vacuum filter 25. - Page 11 23 24 1. Transformer no. 2 36V-24V (LIGHTS) 18. ECO-SYSTEM solenoid valve 2. Transformer no.1 36V-24V (SERVICES) 19. CLEAN WATER solenoid valve 3. Flashing light intermittence 20. Solution pump 4. Reverse light relay 21. Clean water filter 5. Handbrake engaged buzzer 22.
-
Page 12: Primary Functions And Controls
PRIMARY FUNCTIONS AND CONTROLS CONTROL PANEL ON/OFF 1.5% CHEMICAL WATER ADJUSTMENT BUTTONS Use the buttons + or – to set the maximum quantity of water to use for the operation. Press the + button to increase the quantity of water; the 5 green led lights on the panel come on progressively one at a time. - Page 13 SUCTION FAN BUTTON If the suction fan is switched off, this button can be used to turn it on, the squeegee lowers and a green light indicator will come on. If the suction fan is switched on, the light will start flashing, when this button is pressed, but the suction function will remain active for a fixed period of time and once lapsed the squeegee will lift and the suction function will come off.
- Page 14 GREEN WARNING LIGHT: DRIVE ALARM It shows any anomalies present on the motor’s drive board. The green light will come on under normal operation. The light will start flashing if there is a problem with the drive system. The number of blinks indicates the type of fault ( see troubleshooting table) 1.5% DETERGENT PERCENTAGE ADJUSTMENT POTENTIOMETER By turning the potentiometer, the percentage of detergent in the solution being...
- Page 15 DETERGENT DOSING SYSTEM GREEN INDICATOR LIGHT When the indicator light is on, this indicates the detergent dosing system is on. CHEMICAL LEVER SWITCH By pushing the lever towards the ON or OFF position, the detergent dosing system is turned on or off. BRUSH BUTTON Press this button to enable the brush function;...
- Page 16 BRAKE PEDAL SERVICE BRAKE The machine is fitted with a service brake that operates on both the rear wheels. By pushing the pedal pos. 1, the brake gets inserted. PARKING BRAKE The machine is fitted with a parking and emergency brake that operates on both the rear wheels. To lock the machine push the brake pedal (pos.1) down, turn the lever pos.2 anticlockwise to its maximum stroke and then release it.
-
Page 17: Machine Setting
BRUSHES REPLACEMENT/ ROTATION Follow the instructions below to replace or rotate the brushes: Switch the machine off on a flat surface with the lifted brush plate and remove the key; Insert the brake Unloose the handwheel (pos. 1), remove the spring (pos. 2) from the pin (pos. 3). Remove the splashguard joint (pos 4) from the pin (pos 3) and rotate the splashguard backward. -
Page 18: Mounting The Squeegee
MOUNTING THE SQUEEGEE Follow the instructions below to mount the squeegee to the machine: disable the suction function to keep the squeegee support in up position and facilitate assembling procedures; park the machine on a flat surface, insert the brake, switch it off and remove the key; Fit in the squeegee (pos.6) into the squeegee support (pos.7) centring the knobs (position 5) into the corresponding slits on the support (position 7). - Page 19 POS. 1: NORMAL SITUATION POS. 1 POS. 2: ENABLE YOU TO WORK NEXT TO THE WALLS AND TO TURN LEFT OF 90° NEAR THE CORNER POS. 2...
-
Page 20: Filling The Detergent Solution Tank
FILLING THE DETERGENT SOLUTION TANK The solution tank can only be filled with clean water when the detergent dosing system is used, or with a mix of water and detergent suited to the type of floor and to the conditions of dirt to be washed and a product suitable for reducing foam. -
Page 21: Detergent Dosing Device
DETERGENT DOSING DEVICE FIG.2 FIG. 1 To use the detergent dosing device, the detergent can must be fitted in the compartment provided on board the machine. To do this, proceed as follows: Open the compartment (pos. 1); Take out the pipe (pos. 4) so it does not hinder can fitting: Fit the can (pos. -
Page 22: Detergent Dosing Device Controls
DETERGENT DOSING SYSTEM CONTROLS ON/OFF 1.5% 1.5% CHEMICAL CHEMICAL The detergent dosing device is switched on by moving the lever switch (pos. 1) to ON. At the same time as the pump, the green indicator light (pos. 2) also comes on to indicate the system is ON. The detergent pump operates when the water pump is on. -
Page 23: Slash Guard Lifting For Pre-Washing
LIFTING THE SPLASHGUARD FOR THE PRE-WASHING A pre-washing operation is highly advisable when using the machine for particularly dirty surfaces, as to allow the chemical product present in the detergent solution to remove the dirt more efficiently. Once pre-washing is over, clean the surface by activating the brush function. Do not use the squeegee to gather the solution. -
Page 24: Using The Machines
USING THE MACHINE Our scrubber-dryers must be operated by properly trained authorised staff. Scrubber-dryers that do not operate properly must be taken out of service immediately. CHECK BEFORE USE Make sure to check the following before using the machine: Make sure the brushes are in good condition and Make sure the battery connector is plugged-in;... - Page 25 Set the desired maximum solution quantity using + and – keys. The led lights may start flashing if there is a leakage of the solution while operating or while attempting to enable the brush function without solution in the tank. When this occurs, make sure to fill the tank.
-
Page 26: Periodic Servicing
PERIODIC SERVICE INTRODUCTION REGULAR AND PERIODIC SERVICING OF YOUR SCRUBBER GUARANTEES OUTSTANDING PERFORMANCE OF THE MACHINE AND ITS LONG LIFE. THE PAGES THAT FOLLOW CONTAIN THE INFORMATION THAT WILL HELP TO PLAN THE CARE AND THE SERVICING THAT THE SCRUBBER NEEDS. WARNING! DO NOT CARRY OUT ANY MAINTENANCE OPERATION NEITHER ON THE MACHINE NOR ON ITS COMPONENTS WITHOUT HAVING FIRST STOPPED THE MACHINE, ENGAGED THE PARKING BRAKE, BLOCKED OFF THE WHEELS... -
Page 27: Eco-System Plant Washing Instructions
Wash the ECO-SYSTEM filter (pos.11) using water throughout the filter, paying attention not to damage it. After each working day, carefully remove the filter and wash it inside in order to remove possible encrustations. Before doing it, wash the area surrounding the filter. Unscrew the filter anti-clockwise. Do not remove the safety filter pos.10 placed on the connection in which the filter is screwed in. -
Page 28: Draining And Cleaning The Solution Tank
DRAINING AND CLEANING THE SOLUTION TANK The recovery tank must be drained after each washing operation. In order to drain and wash the tank proceed as follow: Turn off the washing function using the ON/OFF button and go to the tank drainage area;... -
Page 29: Checking Brushes
CHECHING BRUSHES Check the condition of the brushes and replaced them if they are worn out; Check the wear of the brushes: the minimum diameter shall not be less than 115 millimeters; Check that there are not any wires, plastic threads or any other material which are tangled with the brush Every 40 –... -
Page 30: Cleaning, Replacing And Checking The Installation Of The Squeegee Blades
CLEANING THE SQUEEGEE After completing the washing operation, clean the squeegee and make sure the blades are in good condition, then proceed as follows: Deactivate the suction function, in case it is active and lift the squeegee Bring the machine into a stop position in a flat surface area;... - Page 31 REPLACING SQUEEGEE BLADES The squeegee is fitted with two drying blades, a rear and a front blade, as specified in the previous paragraph. Each blade has 4 edges that can be used and rotated 4 times before being replaced, unless one of the edges is torn. For better drying performance, make sure the edge of the rear blade is not worn out.
-
Page 32: Splash Guard Blades Rotation/Replacement
ROTATING OR REPLACING THE SPLASHGUARD BLADES Follow the instructions below to rotate or replace the splashguard blades : Turn off the brushes function and lift the brush plate; Turn off the machine, remove the key and the battery connector and put on the brake. -
Page 33: Cleaning The Solution Doser Connection And The Detergent Doser Connection
CLEANING THE SOLUTION PIPE FITTING ON/OFF 1.5% CHEMICAL The machine is fitted with a metering pump for clean water and a metering pump for detergent. If the solution does not flow out of the tank properly, make sure the output pipe fitting is not obstructed or clogged (pos.1and 2). -
Page 34: Checking And Replacing Fuses
CHECKING OR REPLACING FUSES 10 11 To check or replace the fuses on the switchboard proceed as follows: Bring the machine into a stop position in a flat surface area, turn the key in pos. 0 and put on the brake;... - Page 35 Unscrew the 2 nuts pos.25 that fix the fuse of 80 Ah pos. 24 Clean the fuse holder and oil it with vaseline Reassemble the nuts. IMPORTANT: use exclusively the spare fuse by Eureka Fuse pos.27: 125 A fuse PROTECTION OF THE DRIVE SYSTEM TO REPLACE IT PROCEED AS FOLLOWS: Remove the 2 nuts pos.26;...
-
Page 36: Greasing Points
GREASING POINTS Every 100 hours, grease points A and B shown at POINTS 1 and 2. POINT 1 - Squeegee rotation pin: fill lubricators (pos. A) using a lubrication pump. POINT 2 - RIGHT and LEFT wheel brake pin: Remove the 2 screws (pos. 3); Remove the protection guard (pos. -
Page 37: Cleaning The Suction Filter
CLEANING THE SUCTION FILTER The machine is fitted with a stainless steel washable cartridge filter or – as optional – with a PU filter on the suction duct, which provides two functions: To filter the air vacuumed by the squeegee, trapping dust before releasing it into the environment, without putting it back into the air;... -
Page 38: Recharging Batteries
RECHARGING BATTERIES Pb 1PB ST 36V/45A ---V ---A Ah=-- Tc:-- -- CHARGE 2 3 4 WARNING! THE CHARGER IS PRESET FOR LEAD BATTERIES. TO MOUNT GEL OR AGM BATTERIES, BOTH THE STATUS LED AND THE CHARGER HAVE TO BE SET ACCORDING TO THE TYPE OF BATTERY WHICH IS TO BE USED. - Page 39 RECHARGING BATTERIES WARNING Pb 1PB ST 36V/45A ---V ---A Ah=-- Tc:-- -- XXXX XXXXX IMPORTANT! BEFORE DISCONNECTING THE PLUG FROM THE POWER MAINS MAKE SURE: - THE LEDS POS. 2 (GREEN), POS. 3 (YELLOW), POS. 4 (GREEN) ARE LIT UP ON THE BATTERY CHARGER SCREEN.
- Page 40 RECOMMENDED SPARE PARTS USED FOR SERVICING. SERVICING OPERATIONS CAN BE CARRIED OUT BY THE USER HIMSELF ON CONDITON IT HAS PREVIOUSLY BEEN INSTRUCTED BY EITHER THE MACHINE OWNER OR HIS EMPLOYER 340104 120795 130366 360447 360448 360449 210518 210474 360426 360427 210474 360431...
-
Page 41: Recommended Spare Parts
RECOMMENDED SPARE PARTS USED FOR SERVICING. SERVICING OPERATIONS CAN BE CARRIED OUT BY THE USER HIMSELF ON CONDITON IT HAS PREVIOUSLY BEEN INSTRUCTED BY EITHER THE MACHINE OWNER OR HIS EMPLOYER COD. 120795 : MOTOR SAFETY FILTER STAINLESS STEEL COD. 130366 : ECO-SYSTEM FILTER COD. -
Page 42: Dimensional Technical Drawings
DIMENSIONAL DRAWINGS 1940 SCRUBBER-DRYER TECHNICAL SPECIFICATIONS TECHNICAL CHART MODEL E 110 – M 110 SCRUBBING WIDTH mm 1025 BRUSH PRESSURE Kg 45 Lt 195 - Lt 195 with 175mm SOLUTION / RECOVERY TANK CAPACITY of free tank PRODUCTIVITY /h 8200 MACHINE WEIGHT (WITHOUT CHARGER &... -
Page 43: Optional- Description Of The Machine With The Right Side Sweeper Brush
OPTIONAL RIGHT SIDE SWEEPING BRUSH SIDE BRUSH CONTROL PANEL RESET FUSE – When the brush motor exceeds the established current draw for a few minutes, the fuse trips and stops the motor. Wait 1-2 minutes, press the fuse button and the brush will start working again. -
Page 44: Optional- Replacing And Adjusting The Right Side Sweeping Brush
OPTIONAL RIGHT SIDE SWEEPING BRUSH REPLACING AND ADJUSTING THE RIGHT SIDE SWEEPING BRUSH To replace the brush, proceed as follows: Position the brush in idle condition by means of the control pos. 1; Stop the machine on a flat section of floor, engage the parking brake, switch off the machine and interrupt the power supply. -
Page 45: Optional- Description Of The Machine With Right Side Scrubbing Brush
OPTIONAL RIGHT SIDE SCRUBBING BRUSH SIDE BRUSH CONTROL PANEL RESET FUSE – When the brush motor exceeds the established current draw for a few minutes, the fuse trips and stops the motor. Wait 1-2 minutes, press the fuse button and the brush will start working again. -
Page 46: Optional- Fastening And Releasing The Right Side Scrubbing Brush
OPTIONAL RIGHT SIDE SCRUBBING BRUSH FASTENING AND RELEASING THE BRUSH OR THE ABRASIVE DISC ON/OFF 1.5% CHEMICAL To automatically fasten the side brush or the disc pad holder with abrasive disc, proceed as follows: Make sure there is water in the solution tank; Stop the machine on a flat piece of floor and engage the parking brake;... -
Page 47: Optional- Cleaning The Solution Doser Connector With Side Brush
OPTIONAL RIGHT SIDE SCRUBBING BRUSH CLEANING THE SOLUTION DOSER CONNECTOR The machine features a pump that regulates the flow of clean water and a metering pump that regulates the flow of detergent. In case of any flow blockage, make sure the nozzles indicated in pos. 1 and 2 are not blocked. POS.1: detergent flow nozzle;... -
Page 48: Optional- Replacing The Right Side Scrubbing Brush Splashguard Blade
OPTIONAL RIGHT SIDE SCRUBBING BRUSH REPLACING THE SPLASHGUARD BLADES Position the machine on a flat section of floor with the side brush plate lowered and engage the parking brake; remove the battery connector Remove the screws and the relevant washers (pos. -
Page 49: Optional- Control And Replacement Of The Right Scrubbing/Sweeping Side Brush Panel
OPTIONAL RIGHT SIDE SWEEPING - SCRUBBING BRUSH CONTROL AND RELACEMENT OF THE FUSE ON THE PANEL The side brush control panel features a 3 A glass fuse to protect the actuator which operates the brush. To check and replace the fuse proceed as follows: Disconnect the battery connector. - Page 50 OPTIONAL RIGHT SIDE SWEEPING - SCRUBBING BRUSH TECHNICAL CHART WITH SIDE SWEEPING BRUSH TECHNICAL CHART MODEL E 110 – M 1100 BRUSH SIZE – RPM N° mm Ø 420 rpm 100 BRUSH MOTOR REDUCER V/Watt 36/200 CLEANING PATH mm 1400 CLEANING CAPACITY /h 11200 MACHINE WEIGHT (WITHOUR CHARGER &...
-
Page 51: Optional- Recommended Right Side Scrubbing/Sweeping Brush Spare Parts
OPTIONAL RIGHT SIDE SWEEPING/SCRUBBING BRUSHES RECOMMENDED SPARE PARTS USED FOR SERVICING. SERVICING OPERATIONS CAN BE CARRIED OUT BY THE USER HIMSELF ON CONDITON IT HAS PREVIOUSLY BEEN INSTRUCTED BY EITHER THE MACHINE OWNER OR HIS EMPLOYER 360553 210586 360491 360551 360555 360458 360459... -
Page 52: Trouble-Shooting Chart
TROUBLE-SHOOTING CHART IMPORTANT! ALL MAINTENANCE JOBS OR TESTS, WITH THE EXCEPTION OF THOSE DESCRIBED IN THE MANUAL, MUST ONLY BE PERFORMED BY AN AUTHORISED AFTER-SALES CENTRE (AAC) PROBLEM CAUSE SOLUTION The battery gets discharged Either exhaust or broken elements Replace it The display of the control card does not Flat or worn out battery Recharge it... - Page 53 PROBLEM CAUSE SOLUTION Not enough water flow on the brush 43. Tap is closed Open the tap 44. Faulty solenoid valve of the detergent solution. Replace it 45. Clogged detergent solution filter Clean the filter 46. The solution pipe from the tank to the brush is Make sure there is no incrustations clogged 47.
- Page 54 PROBLEM CAUSE SOLUTION Not enough suction on the squeegee 81. Recovery tank is full Empty the tank 82. Lid on the exhaust pipe is open Tight the lid 83. Vacuum pipe disconnected Verify that it is mounted properly 84. Vacuum pipe is clogged Clean the vacuum pipe 85.
- Page 55 OPTIONAL RIGHT SIDE SWEEPING/SCRUBBING BRUSH TROUBLESHOOTING TABLE IMPORTANT! ANY TYPE OF MAINTENANCE SERVICE OR TEST, EXCEPT FOR THOSE DESCRIBED IN THE MANUAL, MUST ONLY BE PERFORMED BY AN AUTHORIZED AFTER-SALES CENTRE (AAC) PROBLEM CAUSE SOLUTION Brush plate does not come out 128.
-
Page 56: Alarms
CHECKING THE ALARMS ON THE DISPLAY OF THE CONTROL BOARD ALARM CAUSE SOLUTION Stop the machine and start it again. Activate the cut- out switch again. Check out the cause of over- absorption (threads or any other material which might Amperometric protection by the cut-out switch for get tangled with the brush.) If the alarm persists, check over-absorption of the brush motor. -
Page 57: Product Warranty
PRODUCT WARRANTY Eureka S.p.a. warrants that its machine will be free from defects in material and workmanship for a period of 12 months from date of installation. Written notice of any claimed defect must be given to Eureka S.p.a. or its Authorized Sales/Service Representative within the warranty period and within thirty (30) days after such defect is discovered. -
Page 58: Installation Form For Warranty Approval
Warranty claims will be evaluated only if the following Installation Form will be sent by fax or by mail, filled in all its parts, to Eureka’s headquarter within thirty (30) days after the machine’s installation. PLEASE RETAIN THE ORIGINAL COPY WITHIN THE MANUAL. -
Page 59: Declaration Of Conformity
Noi:EUREKA S.p.a. Viale dell’Artigianato 30/32 35013 CITTADELLA (PD) dichiariamo sotto la nostra esclusiva responsabilità che il prodotto LAVASCIUGA PAVIMENTI: MODELLO: E110 – M110 _____________ N°. TELAIO: al quale questa dichiarazione si riferisce è conforme alle seguenti norme: Sicurezza del macchinario, Concetti fondamentali, principi generali di progettazione Specifiche e principi tecnici - UNI EN 12100-1, UNI EN 12100-2 ...
Need help?
Do you have a question about the E110 and is the answer not in the manual?
Questions and answers