Table of Contents
Advertisement
Available languages
Available languages
Owner's Manual
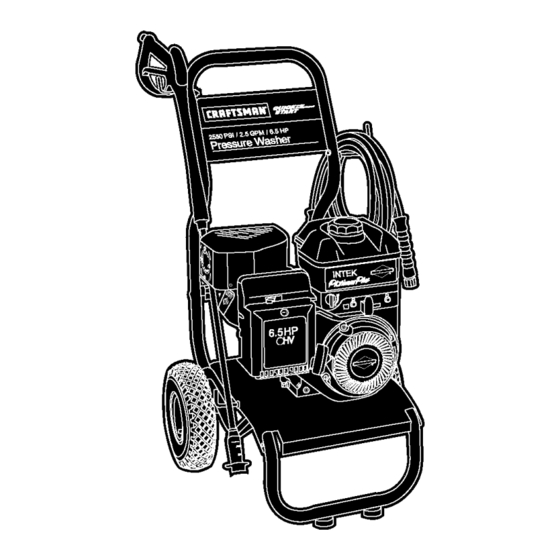
HIGH PRESSURE WASHER
6.5 HORSEPOWER
2550 PSI
2.5 GPM
Model No. 580.752550
PRESSURE WASHER
CUSTOMER HELPLINE
1 - 8 0 0 - 2 2 2 - 3 1 3 6
HOURS: Mon. - Fri. 8 a.m. to 5 p.m. (CT)
CAUTION:
Before using this product,
read this manual and follow all Safety
Rules and Operating Instructions.
SEARS, ROEBUCK and CO., Hoffman Estates, IL 60179 U.S.A.
Visit our Craftsman website: www.sears.com/craftsman
Part No. 192059 Draft 3 (05/27/2003)
• Safety
• Assembly
• Operation
• Maintenance
• Parts
• Español
Advertisement
Chapters
Table of Contents

Related Manuals for Craftsman 580.752550


Summary of Contents for Craftsman 580.752550
- Page 1 CAUTION: Before using this product, • Parts read this manual and follow all Safety • Español Rules and Operating Instructions. SEARS, ROEBUCK and CO., Hoffman Estates, IL 60179 U.S.A. Visit our Craftsman website: www.sears.com/craftsman Part No. 192059 Draft 3 (05/27/2003)
-
Page 2: Table Of Contents
LIMITED WARRANTY ON CRAFTSMAN PRESSURE WASHER For one year from the date of purchase, when this Craftsman pressure washer is maintained and operated according to the instructions in the owner's manual, Sears will repair, free of charge, any defect in material and workmanship. - Page 3 In the State of California a spark arrester is required WARNING by law (Section 4442 of the California Public Fuel and its vapors are extremely Resources Code). Other states may have similar laws. flammable and explosive. Federal laws apply on federal lands. If you equip the Fire or explosion can cause severe burns or muffler with a spark arrester, it must be maintained in death.
- Page 4 WARNING CAUTION A pressure washer produces a high pressure spray Starter and other rotating parts can entangle which increases risk of injury and damage to unit. hands, hair, clothing, or accessories. • DO NOT secure spray gun in open position. •...
-
Page 5: Know Your Pressure Washer
KNOW YOUR PRESSURE WASHER Read the owner’s manual and safety rules before operating your pressure washer. Compare the illustrations with your pressure washer to familiarize yourself with the locations of various controls and adjustments. Save this manual for future reference. Fuel Cap Spray Gun Throttle Control Lever... -
Page 6: Assembly
7/16” wrench. 1-800-222-3136. ASSEMBLING YOUR PRESSURE WASHER Your Craftsman high pressure washer was mostly assembled at the factory. However, you will need to perform these tasks before you can operate your pressure washer: 1. Attach handle. - Page 7 Add Engine Oil Add Fuel IMPORTANT: Any attempt to crank or start the engine WARNING! NEVER fill fuel tank indoors. before it has been properly serviced with the NEVER fill fuel tank when engine is running or recommended oil may result in an engine failure. hot.
- Page 8 Connect Hose and Water Supply to Pump CAUTION IMPORTANT: To avoid pump damage, you must There MUST be at least ten feet of unrestricted garden assemble the nozzle extension to the spray gun and hose between the pressure washer inlet and any flow attach all hoses before you start the engine.
-
Page 9: Operation
OPERATION HOW TO USE YOUR PRESSURE 9. Rotate fuel shut-off valve to “On” position (fully counter-clockwise). WASHER If you have any problems operating your pressure washer, please call the pressure washer helpline at Fuel Valve shown in 1-800-222-3136. “On” position To Start Your Pressure Washer To start your engine-powered pressure washer for the 10. - Page 10 How To Use the Adjustable Nozzle 3. Twisting nozzle adjusts spray pattern from a narrow pattern to a fan pattern. You now should know how to START your pressure washer and how to STOP it. The information in this section will tell you how to adjust the spray pattern and apply detergent or other cleaning chemicals.
- Page 11 6. Apply detergent to a dry surface, starting from 3. Apply a high pressure spray to a small area, then bottom and working up. check surface for damage. If no damage is found, it is okay to continue cleaning. 7. Allow detergent to “soak in” for 3-5 minutes before rinsing.
-
Page 12: Maintenance
MAINTENANCE OWNER’S RESPONSIBILITIES Follow the hourly or calendar intervals, whichever occurs first. More frequent service is required when operating in adverse conditions noted below. MAINTENANCE SCHEDULE HOURLY OPERATING FILL IN DATES AS YOU COMPLETE SERVICE DATES REGULAR SERVICE INTERVAL Every 50 Every 100 Before MAINTENANCE TASK... -
Page 13: Pressure Washer
PRESSURE WASHER Purge Pump of Air and Contaminants MAINTENANCE To remove air from the pump, follow these steps: 1. Set up pressure washer as described in Check and Clean Inlet Screen “Assembling Your Pressure Washer” section and Examine garden hose inlet screen. Clean if it is connect water supply. -
Page 14: Change Pump Oil
5. Using a garden hose, remove additional debris by 3. Tilt pressure washer to drain oil into an approved back flushing water through nozzle extension. container until it drips slowly from pump. Back flush between 30 to 60 seconds. Turn 4. -
Page 15: Service Air Cleaner
Service Air Cleaner 2. Remove and inspect spark plug. 3. Replace spark plug if electrodes are worn, or if Your engine will not run properly and may be damaged if you run it with a dirty air cleaner. insulator is cracked or chipped. Service the air cleaner once every 100 hours of 4. -
Page 16: Storage
STORAGE AFTER EACH USE WINTER STORAGE Water should not remain in the unit for long periods of CAUTION time. Sediments or minerals can deposit on pump parts and “freeze” pump action. Follow these You must protect your unit from freezing temperatures. procedures after every use: •... - Page 17 LONG TERM STORAGE Oil Cylinder Bore • Remove spark plug. Squirt about 1 tablespoon of If you do not plan to use the pressure washer for more clean engine oil into the cylinder. Cover spark plug than 30 days, you must prepare the engine and pump hole with rag.
-
Page 18: Notes
NOTES... -
Page 19: Troubleshooting
TROUBLESHOOTING Problem Cause Correction 1. Nozzle in low pressure mode. 1. Pull nozzle backward for high pressure mode. 2. Water inlet is blocked. 2. Clear inlet. 3. Inadequate water supply. 3. Provide adequate water flow. 4. Inlet hose is kinked or leaking. 4. -
Page 20: Replacement Parts
PARTS CRAFTSMAN 2550 PSI Pressure Washer 580.752550 Main Unit — Exploded View and Parts List Item Part # Description Item Part # Description 192394GS BASE 10 192309GS KIT, Hook E191886GS HANDLE 11 192128GS KIT, Hook 191909GS BILLBOARD 12 191265GS KIT, E-Ring... - Page 21 CRAFTSMAN 2550 PSI Pressure Washer 580.752550 Pump — Exploded View and Parts List Item Part # Description Item Part # Description 190568GS SEAL 76 21783GS THERMAL RELIEF 190569GS RETAINER RING 77 190585GS OIL BOTTLE 190671GS ENGINE ADAPTER & BEARING 190672GS...
- Page 22 ENGINE, 6.5 HP, Briggs and Stratton, 120412 – Exploded View...
- Page 23 ENGINE, 6.5 HP, Briggs and Stratton, 120412 – Exploded View...
- Page 24 ENGINE, 6.5 HP, Briggs and Stratton, 120412 – Exploded View...
- Page 25 ENGINE, 6.5 HP, Briggs and Stratton, 120412 – Parts List Item Part # Description Item Part # Description 693811 Cylinder Assembly 693593 Muffler-Exhaust 299819 §Oil Seal (Magneto Side) 693621 Housing-Blower 693643 Cylinder Head 690960 Screw (Blower Housing) 695166 §+Cylinder Head Gasket 693610 Shield-Cylinder 692600...
-
Page 26: Emission Control Warranty
EMISSION CONTROL WARRANTY STATEMENT Sears, Roebuck and Co., U.S.A. (Sears), the California Air Resources Board (CARB) and the United States Environmental Protection Agency (U.S.EPA) Emission Control System Warranty Statement (Owner's Defect Warranty Rights and Obligations) EMISSION CONTROL WARRANTY COVERAGE IS a. - Page 27 NOTES...
-
Page 28: Español
Durante un año a partir de la fecha de compra, Sears reparará, sin cargo alguno, cualquier defecto en material y mano de obra, siempre y cuando esta máquina lavadora de presión Craftsman haya sido mantenida y puesta en funcionamiento de acuerdo a las instrucciones suministradas en el manual del propietario. - Page 29 En el estado de California es obligatorio, según la ley, el uso ADVERTENCIA de apagachispas (Sección 4442 del Código de Recursos Públicos de California). Otros estados pueden tener leyes La gasolina y sus vapores son extremadamente similares. Las leyes federales se aplican en tierras inflamables y explosivos.
- Page 30 ADVERTENCIA PRECAUCIÓN El lavadora de presión produce un rocío alto de la El arrancador y otras piezas que rotan pueden presión cuál riesgo de aumentos de la herida y dañe a la enredar las manos, el pelo, la ropa, o los unidad.
-
Page 31: Conozca Su Maquina Lavadora De Presion
CONOZCA SU MAQUINA LAVADORA DE PRESION Lea el manual del propietario y las reglas de seguridad antes de poner en marcha su máquina lavadora a presión. Compare las ilustraciones con su máquina lavadora a presión para familiarizarse con las ubicaciones de los diferentes controles y ajustes. -
Page 32: Montaje
La gran mayoría de su máquina lavadora a presión IMPORTANTE: Cualquier intento de hacer girar o arrancar Craftsman ha sido ensamblada en la fábrica. Sin embargo, el motor antes de que se haya depositado el aceite usted deberá llevar a cabo los siguientes procedimientos recomendado puede resultar en falla del motor. - Page 33 Seleccione una viscosidad de acuerdo a la tabla • Use combustible limpio y almacénelo en recipientes siguiente. cubiertos, limpios y aprobados. Utilice embudos limpios. NUNCA utilice gasolina "vieja" dejada de la estación anterior o gasolina almacenada por períodos de tiempo prolongados.
- Page 34 Conecte el otro extremo de la manguera de alta presión ABRA el suministo del agua y abra la válvula de a la salida de alta presión de la bomba. Apriete con la suministro para purgar la sistema de bomba de aire y mano.
-
Page 35: Operacion
OPERACION CÓMO USAR SU MÁQUINA Gire la válvula de control de combustible a la posición de "Encendido" ("On") (completamente en dirección LAVADORA A PRESIÓN contraria a las manecillas del reloj). Si tiene problemas operando su máquina lavadora a presión, por favor llame a la línea de ayuda para máquinas Combustible Válvula lavadoras a presión al 1-800-222-3136. - Page 36 Cómo Detener su Máquina Lavadora a El patrón de rociado se ajusta de un patrón angosto a un patrón en abanico girando la boquilla. Presión • Mueva la palanca de la válvula de regulación a la posición “Stop” (“Parado”). • Apriete el gatillo de la pistola de rociado para eliminar la presión de la manguera.
- Page 37 Aplique el detergente sobre la superficie seca, Aplique un rociado de alta presión en un área pequeña, comenzando en la parte inferior y dirigiéndose hacia después revise si la superficie presenta daños. Si no arriba. encuentra daños, puede continuar con el trabajo de limpieza.
-
Page 38: Mantenimiento
MANTENIMIENTO RESPONSABILIDADES DEL PROPIETARIO Siga el programa de mantenimiento según el número de horas o según el calendario, lo que suceda primero. Se requiere de servicio con mayor frecuencia cuando opere la unidad en las condiciones adversas descritas a continuación. CALENDARIO DE MANTENIMIENTO INTERVALO DE ANOTE LAS FECHAS CONFORME... - Page 39 ANTES DE CADA USO Coloque el colador del filtro en línea en el extremo con rosca de la extensión para boquillas. Su dirección NO Revise el nivel de aceite del motor. importa. Coloque el colador ejerciendo presión con el borrador de un lápiz hasta que se asiente por completo Revise si existen daños en el colador de la entrada de en el fondo de la abertura.
- Page 40 Quite el en el filtro de la línea del otro fin de la extensión de boquilla. Use un pequeño sujeta papeles para liberar cualquier material extraño que esté tapando la boquilla. Tapón de Aceite Introduzca el alambre dentro de la boquilla y gírelo hacia los lados, hacia adelante y atrás hasta despejar la obstrucción.
- Page 41 Reinstale en su lugar la tapa del drenaje. Remueva la Remplace la Bujía tapa del llenado de aceite. Remplace la bujía anualmente o cada 100 horas de operación. Llene al punto de sobrellenado al nivel de la tapa del ADVERTENCIA llenado de aceite.
-
Page 42: Almacenamiento
ALMACENAMIENTO DESPUES DE CADA USO ALMACENAMIENTO PARA INVIERNO No deberá haber agua en la unidad por largos períodos de tiempo. Los sedimentos de minerales se pueden depositar en partes de la bomba y “congelar” su funcionamiento. PRECAUCIÓN Lleve a cabo estos procedimientos después de cada uso: Usted deberá... - Page 43 ALMACENAMIENTO PROLONGADO Aceite el Diámetro Interior del Cilindro • Retire la bujía. Rocíe aproximadamente 1 onza de aceite Si usted no planea usar la máquina lavadora a presión por limpio para motor dentro del cilindro. Cubra el orificio de más de 30 días, deberá preparar el motor para un la bujía con un trapo.
-
Page 44: Notas
NOTAS... -
Page 45: Reparacion De Daños Repuestos
REPARACION DE DAÑOS Problema Causa Solución La boquilla está en el modo de baja Mueva la boquilla hacia atrás para el presión. modo de alta presión. La entrada de agua está bloqueada. Limpie la entrada. Suministro de agua inadecuado. Proporcione flujo de agua adecuado. -
Page 46: Garantia Del Control De Emisiones
GARANTÍA DEL SISTEMA DE CONTROL DE EMISIONES Sears, Roebuck and Co., U.S.A. (Sears), California Air Resources Board (Consejo de Recursos sobre el Aire de California, CARB, por sus siglas en inglés) y United States Environmental Protection Agency (Agencia de Protección Ambiental de EE.UU. - Page 47 NOTAS...
Need help?
Do you have a question about the 580.752550 and is the answer not in the manual?
Questions and answers